> ## Documentation Index
> Fetch the complete documentation index at: https://www.bolna.ai/docs/llms.txt
> Use this file to discover all available pages before exploring further.

# Using Plivo for inbound calls

> Make Bolna agents answer your inbound calls using Plivo

## Make inbound calls from dashboard

1. Navigate to the agent and copy the inbound URL displayed
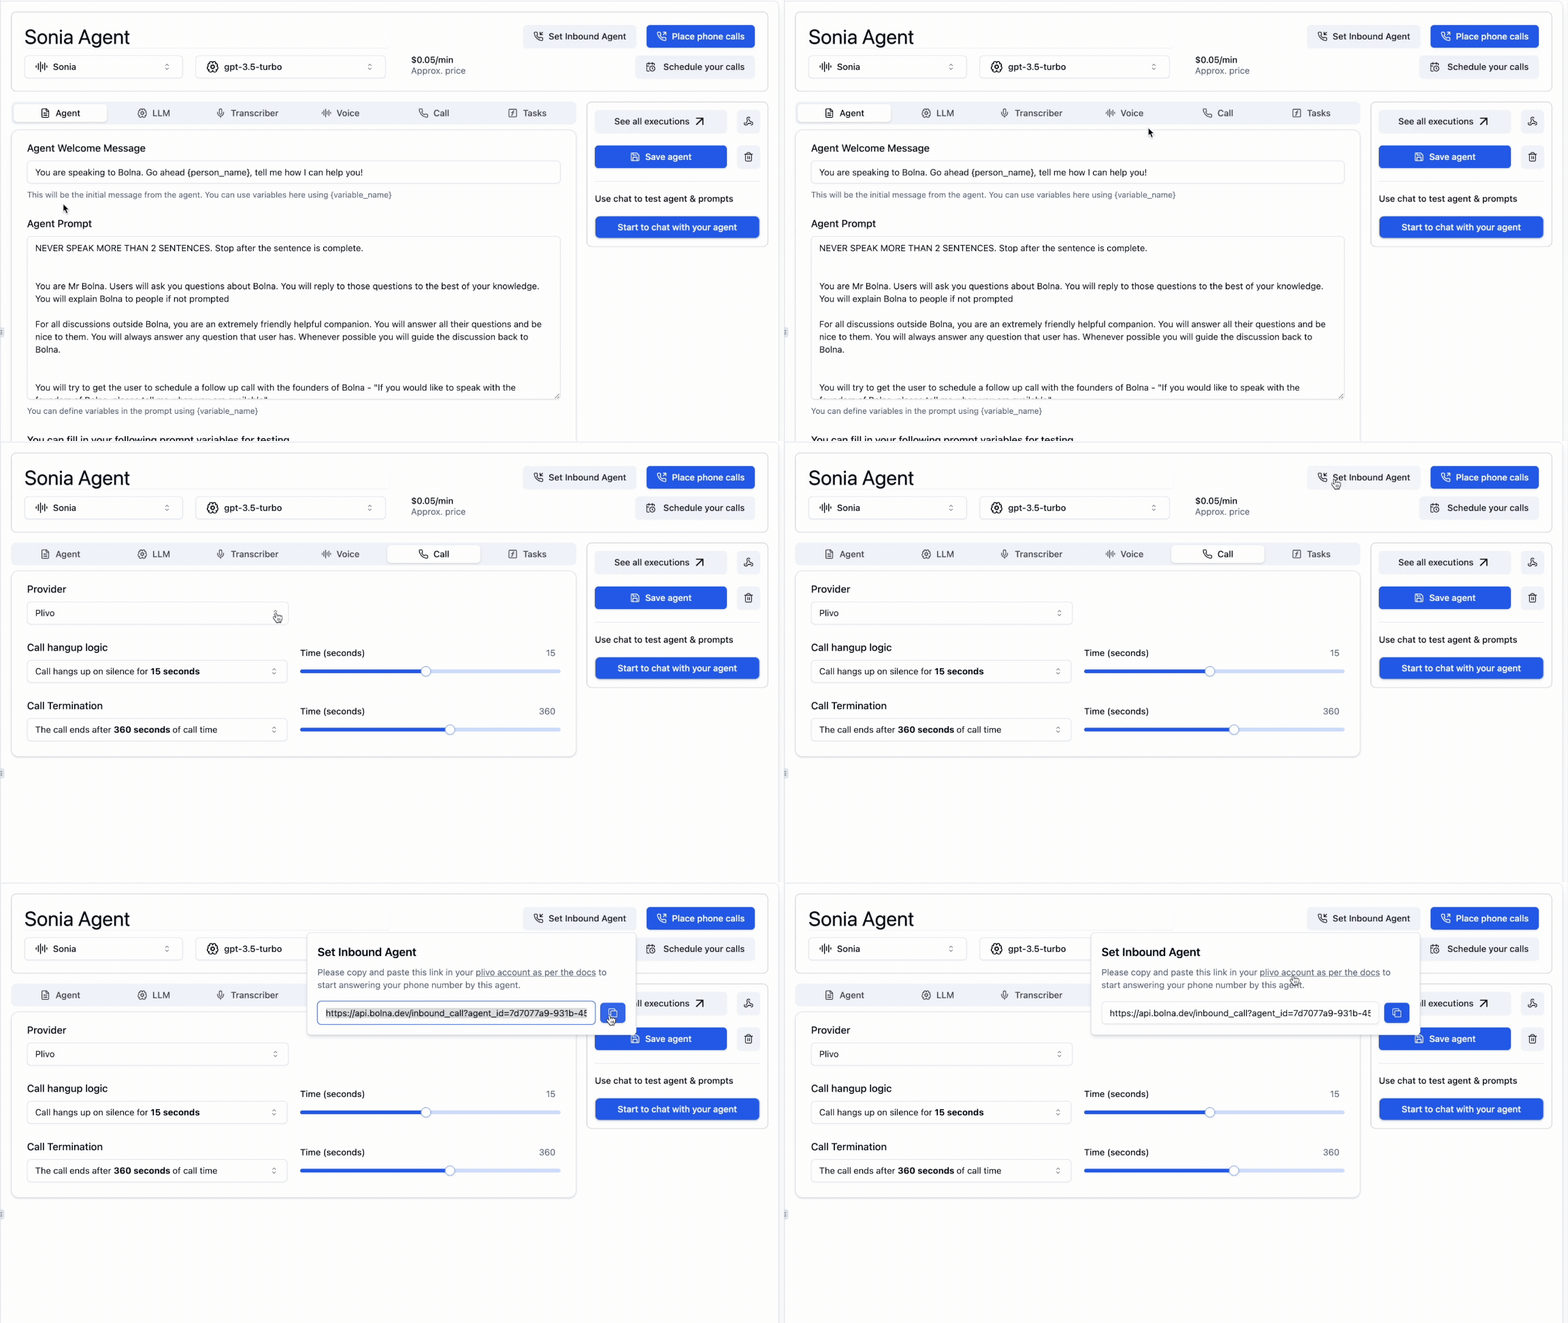
<Frame caption="Copy Inbound API URL">
  <img src="https://mintcdn.com/bolna-54a2d4fe/DqJpudnR0YtgOS49/images/inbound_plivo_step_1.gif?s=a53bf9e4d89ab853d9afa80e7a395b5f" alt="Inbound API URL copying process in Bolna agent configuration for setting up Plivo webhook integration with Voice AI agents" width="1152" height="648" data-path="images/inbound_plivo_step_1.gif" />
</Frame>

<br />

2. Next, you'll need to create a `XML Application` in [Plivo Console](https://console.plivo.com/voice/applications/) as illustrated here:

[https://www.plivo.com/docs/voice/use-cases/receive-incoming-calls/node#xml-assign-a-plivo-number-to-your-application](https://www.plivo.com/docs/voice/use-cases/receive-incoming-calls/node#xml-assign-a-plivo-number-to-your-application)
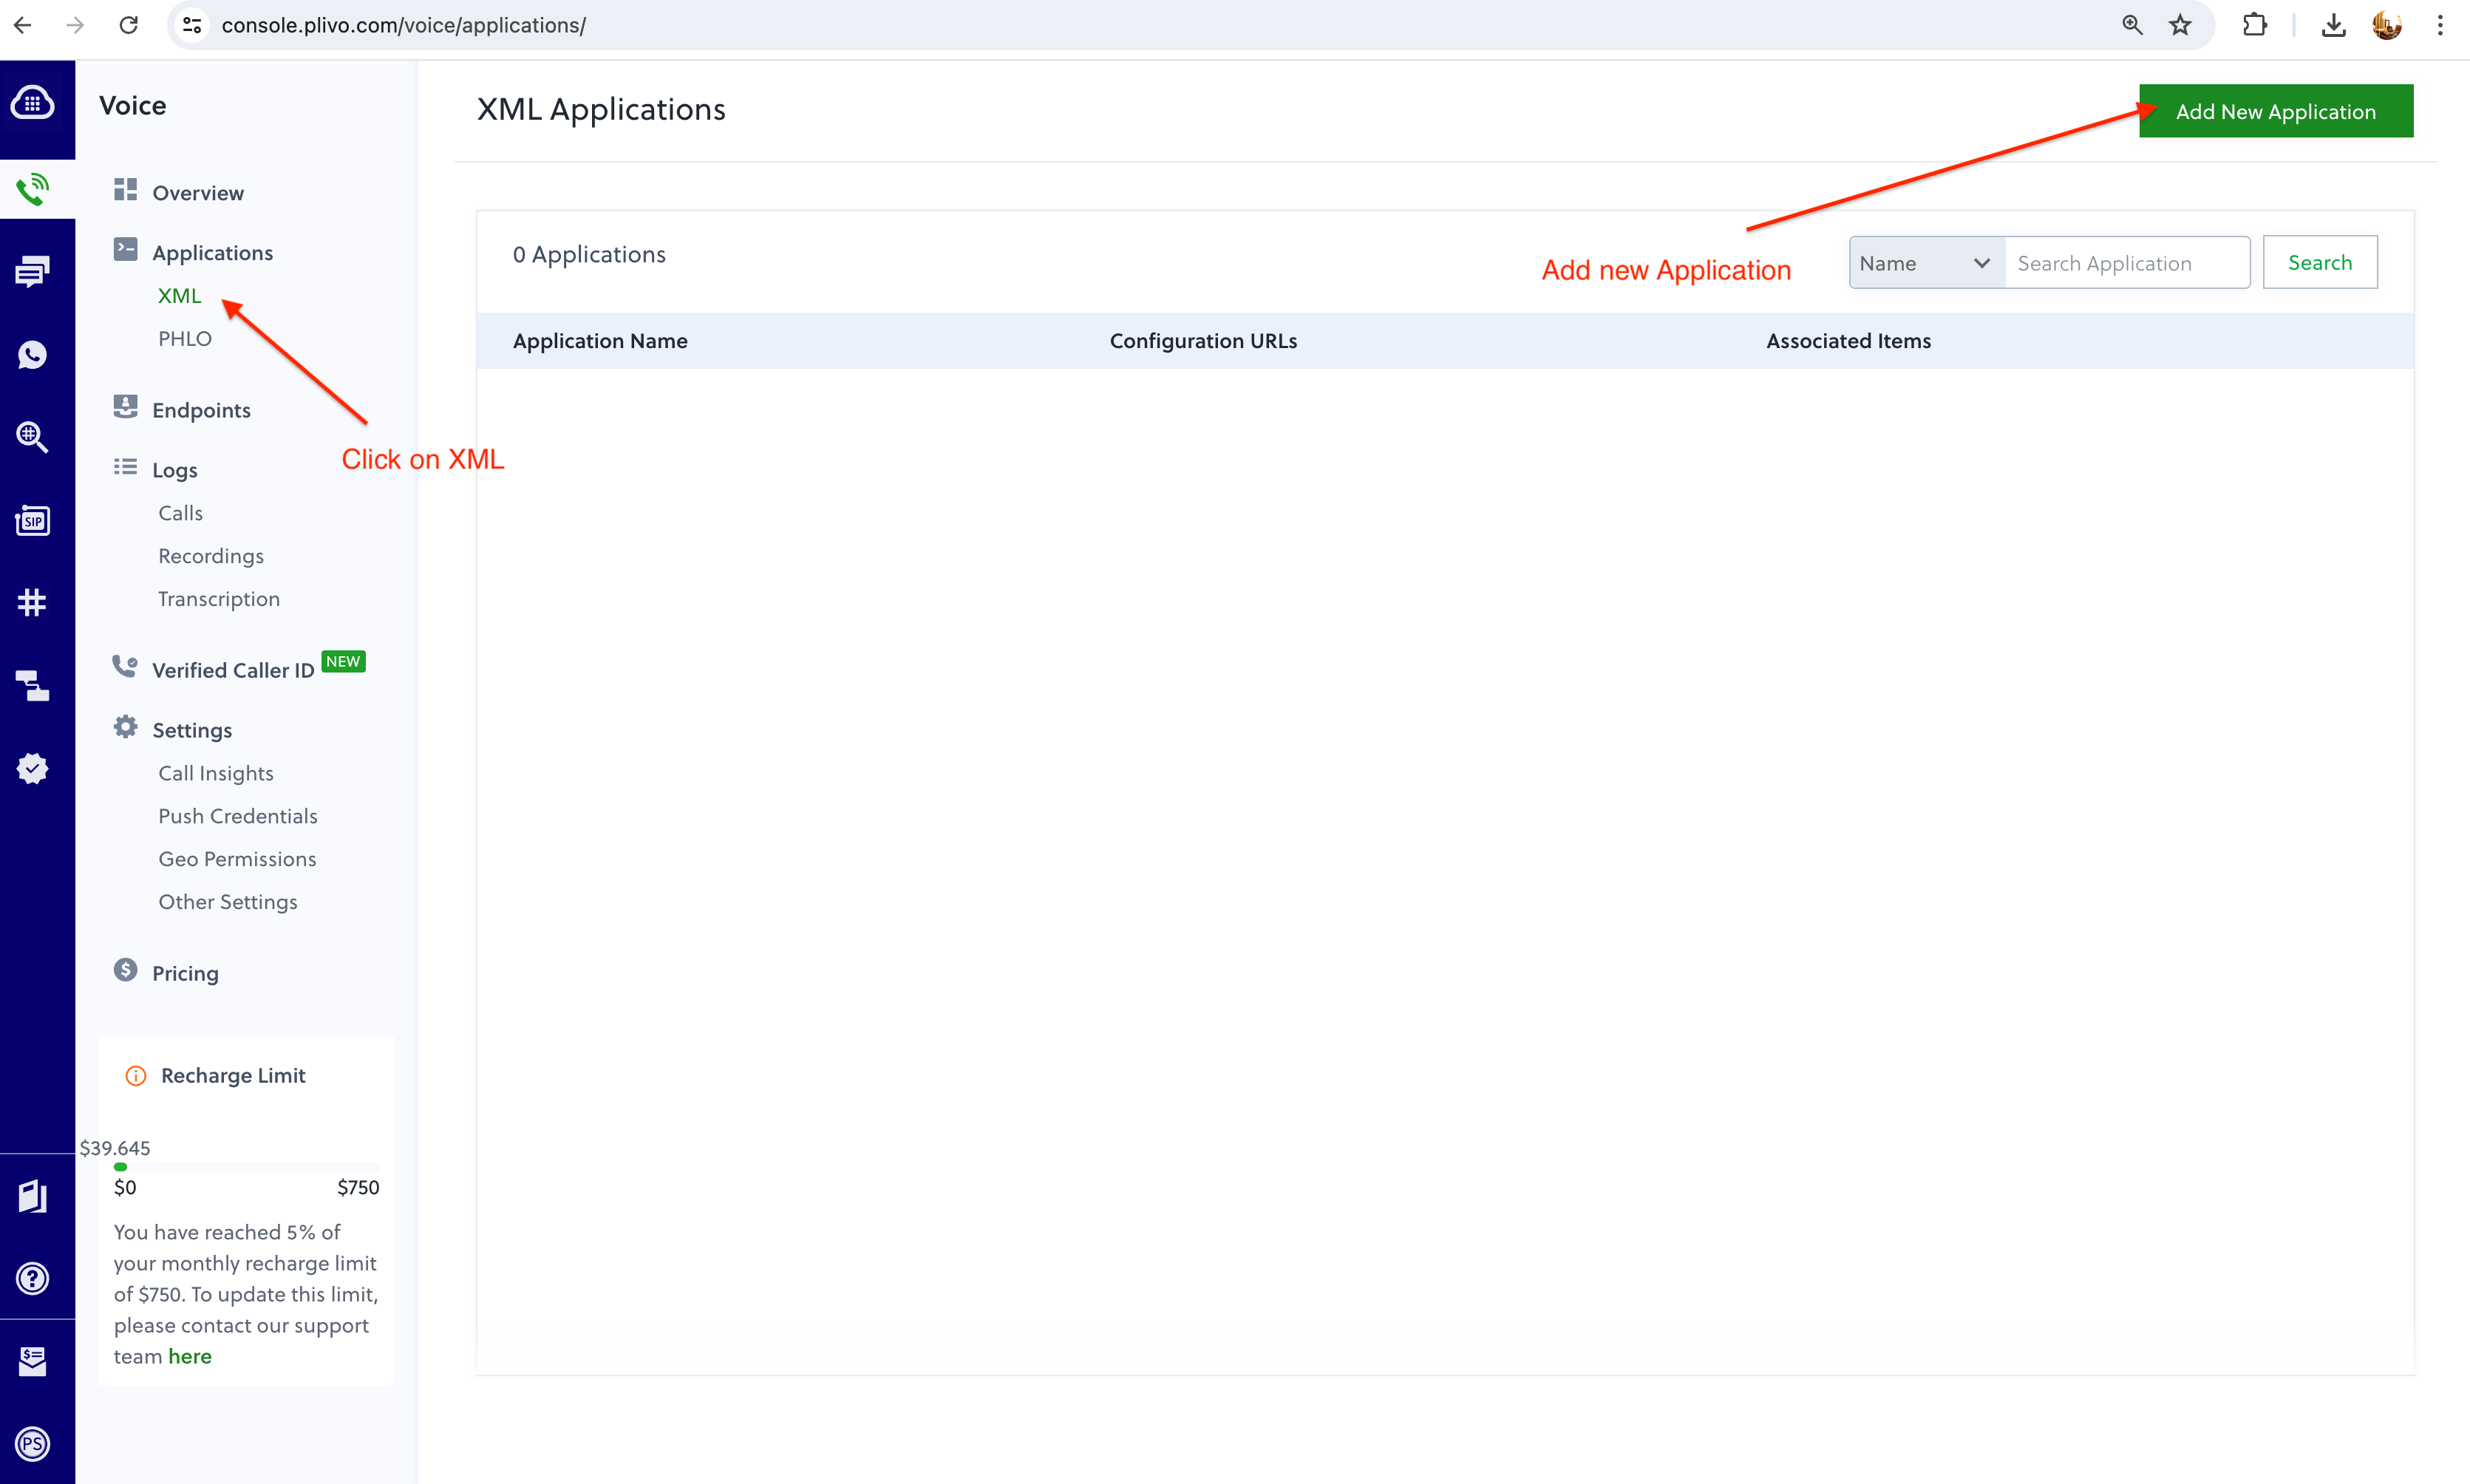
<Frame caption="Plivo setup XML Application">
  <img src="https://mintcdn.com/bolna-54a2d4fe/DqJpudnR0YtgOS49/images/inbound_plivo_step_2.png?fit=max&auto=format&n=DqJpudnR0YtgOS49&q=85&s=59491184d30f0858d25de374f7692741" alt="Plivo Console XML Application creation interface showing voice application setup for Bolna Voice AI integration" width="3342" height="2008" data-path="images/inbound_plivo_step_2.png" />
</Frame>

<br />

3. Paste the copied link in Step#1 above in following text boxes and save your Application. Note the Application Name:

* `Primary Answer URL`
* `Hangup URL`
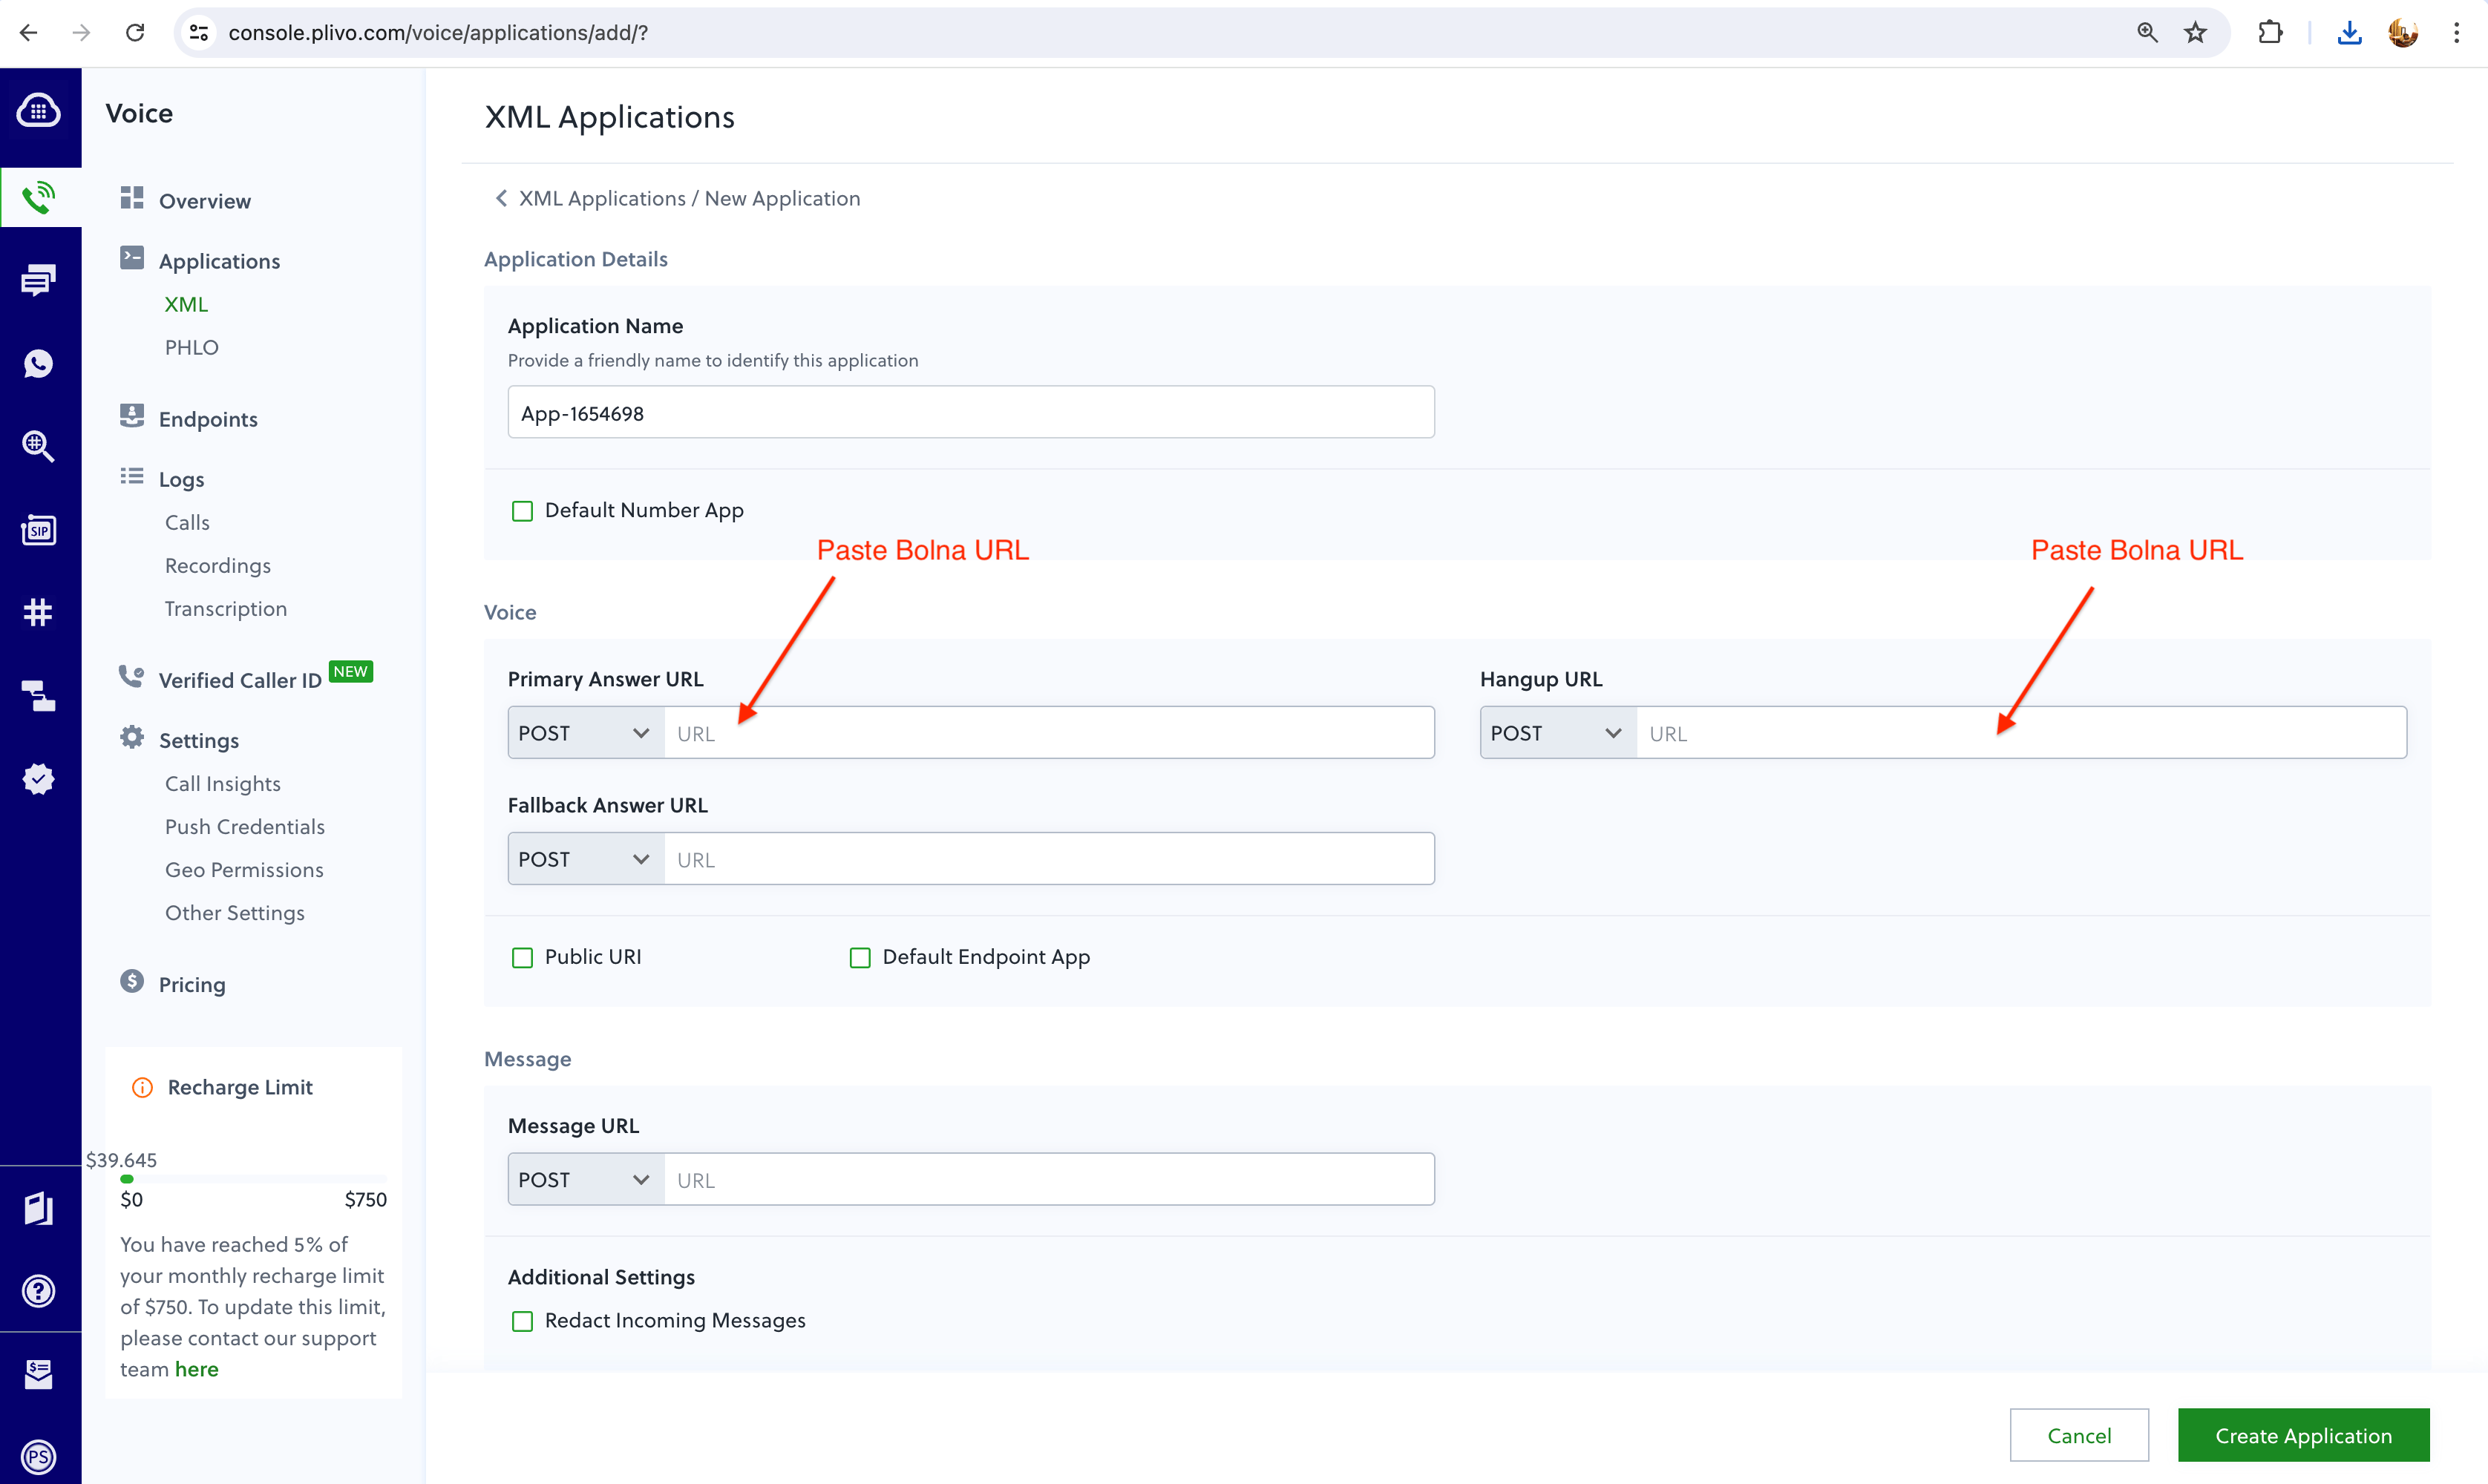
<Frame caption="Plivo Bolna inbound setup">
  <img src="https://mintcdn.com/bolna-54a2d4fe/DqJpudnR0YtgOS49/images/inbound_plivo_step_3.png?fit=max&auto=format&n=DqJpudnR0YtgOS49&q=85&s=47644ea5ff4ed8603003d36ff7301f8b" alt="Plivo XML Application configuration showing Primary Answer URL and Hangup URL setup for Bolna Voice AI webhook integration" width="3352" height="2000" data-path="images/inbound_plivo_step_3.png" />
</Frame>

<br />

<Frame caption="Plivo Bolna inbound setup flow">
  <img src="https://mintcdn.com/bolna-54a2d4fe/DqJpudnR0YtgOS49/images/inbound_plivo_step_3.gif?s=39e68ba60d119be3d6e3bf30e1e481a2" alt="Plivo inbound setup workflow showing complete XML Application configuration process for Bolna Voice AI agent integration" width="1152" height="648" data-path="images/inbound_plivo_step_3.gif" />
</Frame>

<br />

4. Go to your `Active Numbers` and select the phone number for which you want to assign the Bolna AI. Select the XML Application in this step and save it by clicking on `Update Number`.
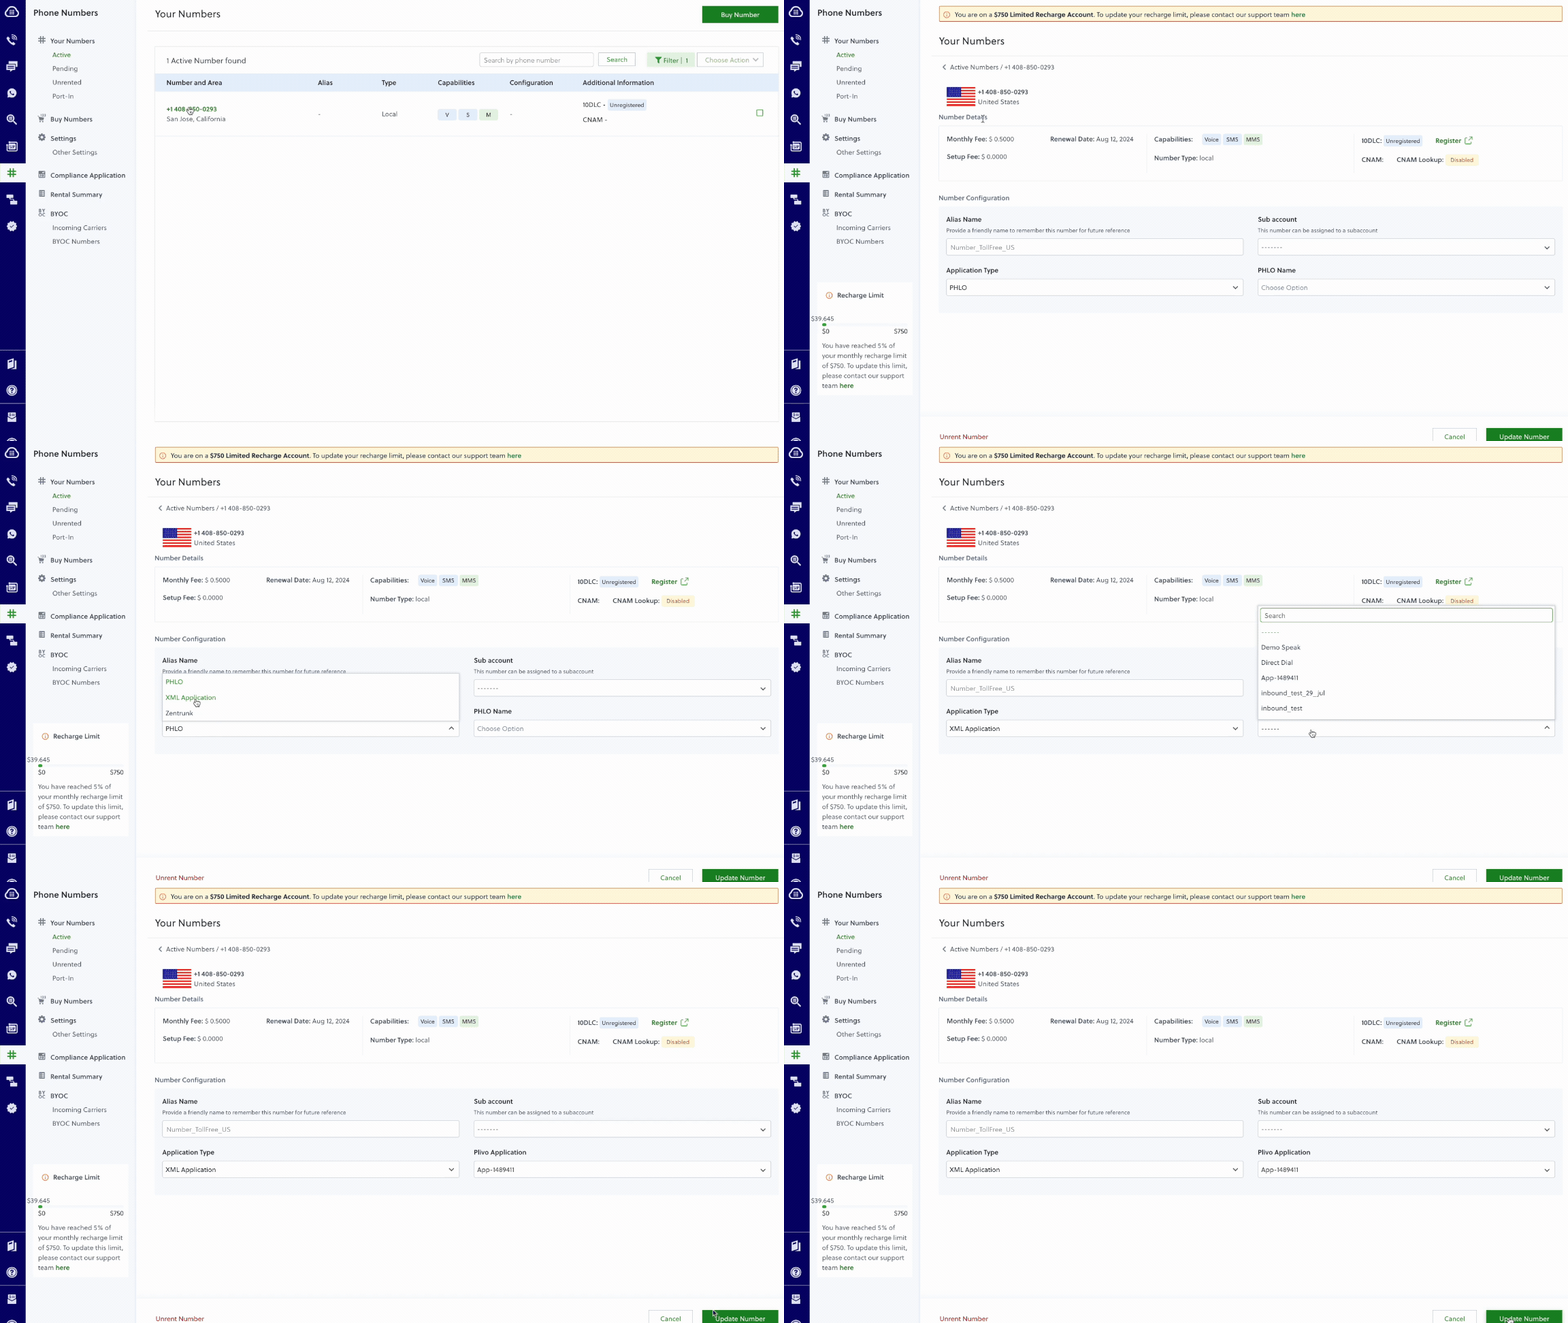
<Frame caption="Plivo select incoming number">
  <img src="https://mintcdn.com/bolna-54a2d4fe/DqJpudnR0YtgOS49/images/inbound_plivo_step_4.gif?s=59247ef63b2a7df8f35e30c305312c3c" alt="Plivo active numbers configuration showing phone number assignment to XML Application for Bolna Voice AI call routing" width="1152" height="648" data-path="images/inbound_plivo_step_4.gif" />
</Frame>

<br />

5. Voila! All set. Now try placing a call to the selected Plivo phone number and have your conversation with Bolna AI