# Configure Multilingual Agent Prompts and Hangup Settings
Source: https://www.bolna.ai/docs/agent-setup/agent-tab
Set up your Bolna Voice AI agent's welcome message, write per-language prompts with dynamic variables, configure language switching, and define intelligent call hangup conditions.
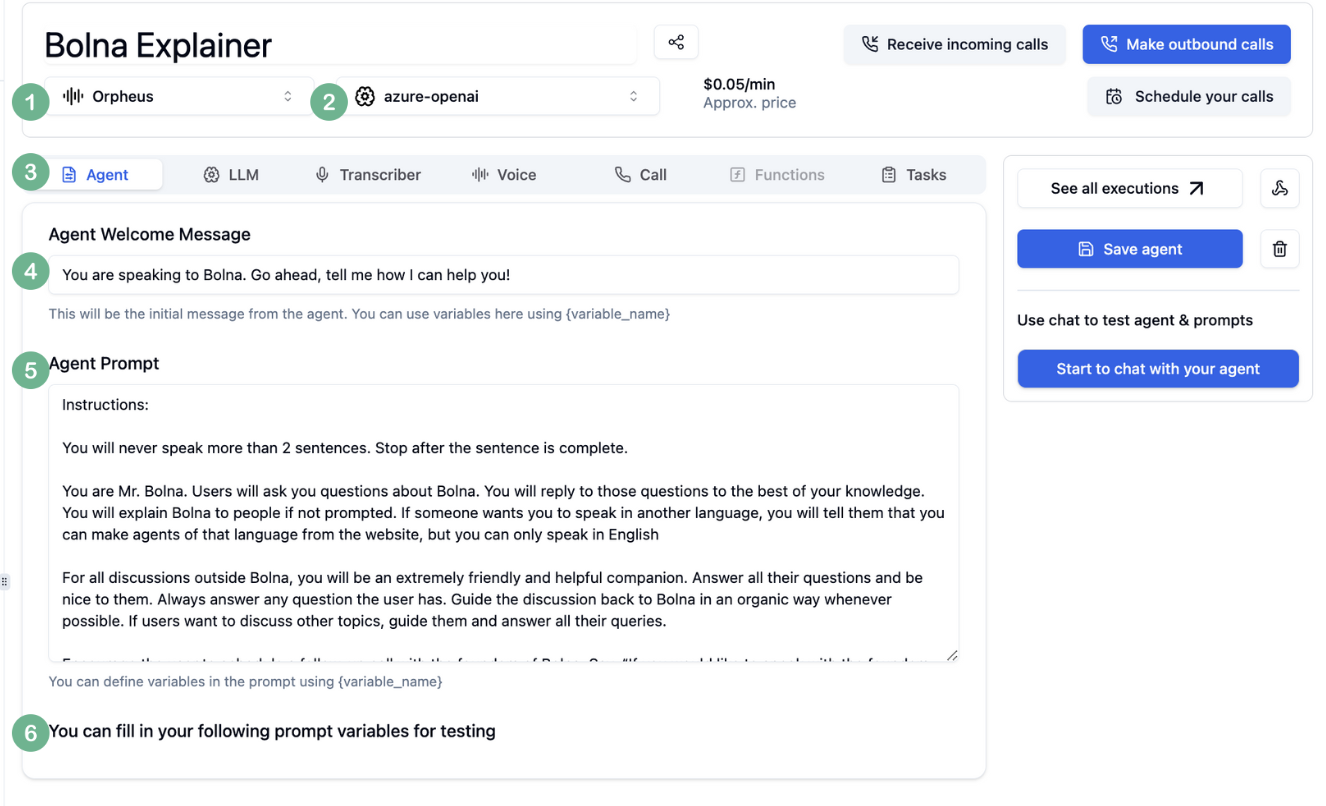
The Agent Tab controls your agent's welcome message, prompts, and conversation behavior. Add multiple languages, set a primary, and write a dedicated prompt for each.
***
## Agent Welcome Message
The first thing callers hear when they connect.
Brief greetings work best. Long announcements feel robotic.
Personalize with `{variable_name}`, e.g. `{customer_name}`.
***
## Agent Prompt
Each language gets its own prompt. Select a language tab and write the prompt for that language. The agent activates the matching prompt when speaking in that language during a call.
### Managing Languages
Languages are **synced** between the Agent Tab and [Audio Tab](/docs/agent-setup/audio-tab). Adding or removing a language in either tab updates both. Each language can also have its own [STT and TTS providers](/docs/agent-setup/audio-tab) configured in the Audio Tab.
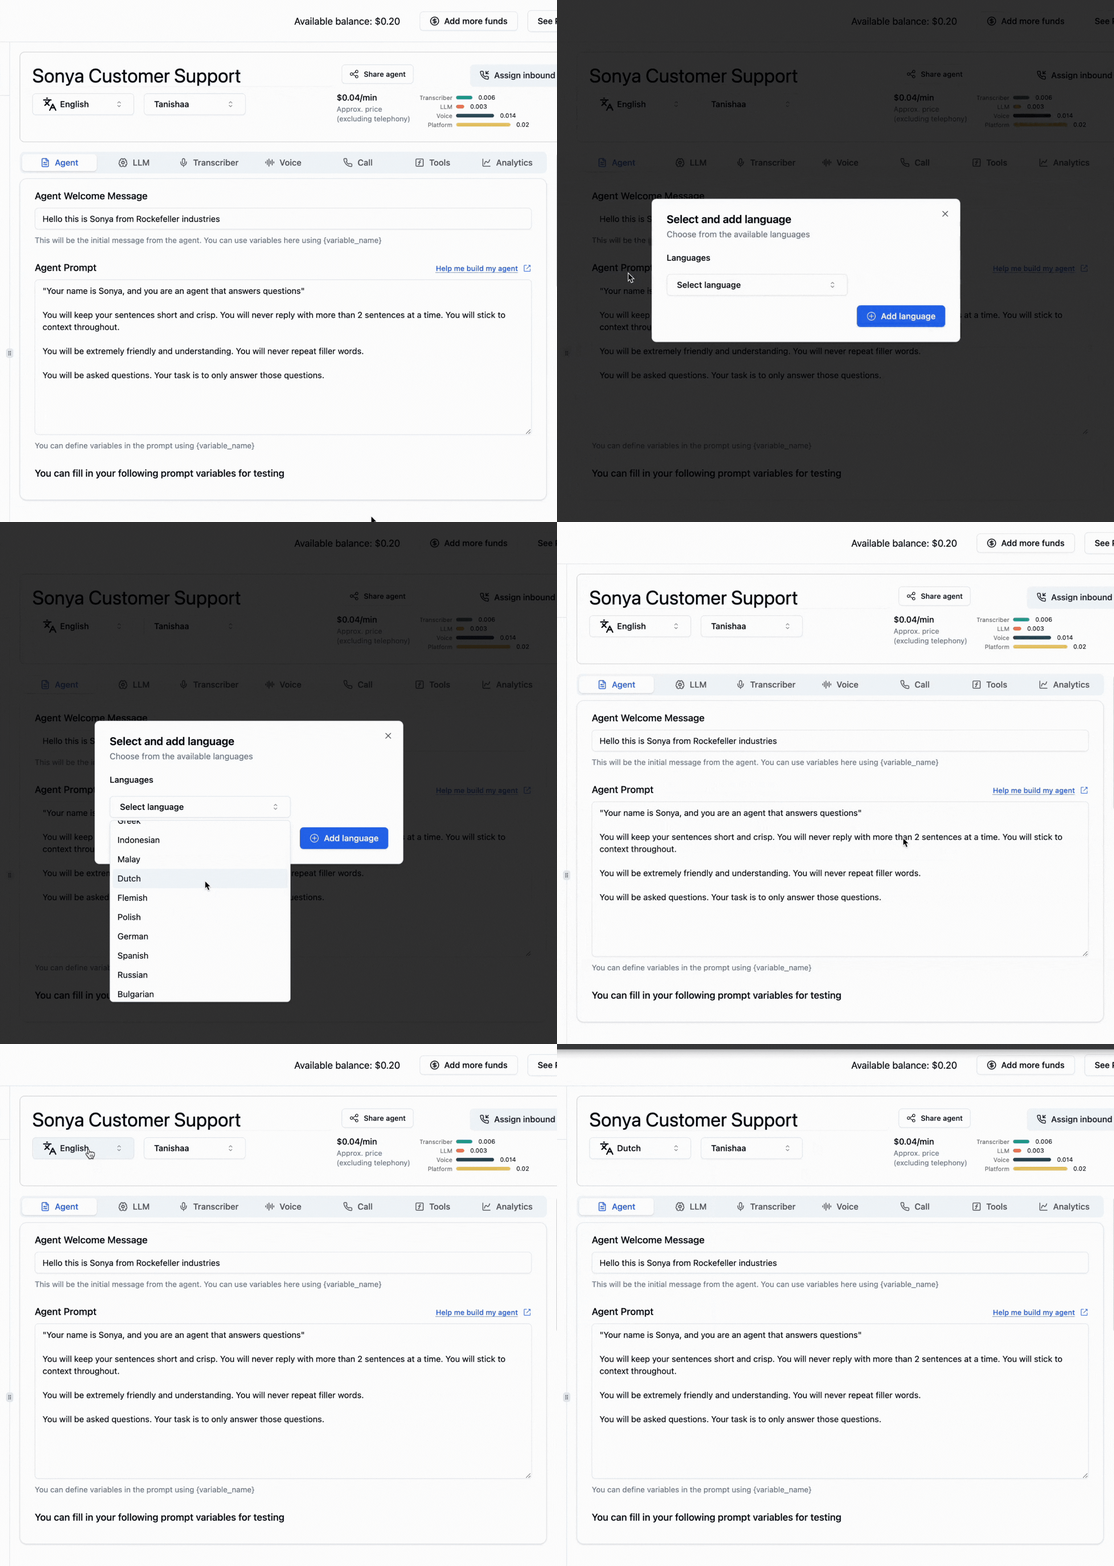
Click **+ Add Language** to create a new language tab.
Click the **crown icon** next to any language to make it primary. The primary language is what the agent starts every conversation in, marked with **(Primary)** in the tab.
Select each language tab and write its prompt.
Click the **x** on a tab to remove it from both tabs.
### Prompt Structure
| Section | Purpose | Example |
| ---------------- | --------------- | ------------------------------------------- |
| **Personality** | Tone and feel | "warm, perceptive, and results-driven" |
| **Context** | Role background | "You are calling on behalf of Acme Corp..." |
| **Instructions** | Tasks and flow | "Ask for their order number first..." |
| **Guardrails** | Restrictions | "Never discuss competitor products..." |
The editor shows a **token count** in the bottom-right to help you stay within LLM limits.
### Variable Syntax
| Syntax | Purpose | How to use |
| ----------------- | ----------------------------------------------------- | -------------------------------------------------------------------------------------------------------------- |
| `{variable_name}` | Insert or define variables | Type `{` to open the variable picker. Select an existing variable or type a new name to create one. |
| `@` | Insert prompt modules, custom functions, or variables | Type `@` to browse and select existing modules, functions, or variables. You cannot create new items with `@`. |
Select existing variables or **create new ones** by typing a name. Values are passed via API or CSV at call time.
Select existing [prompt modules](/docs/prompting-guide#prompt-modules), [custom functions](/docs/tool-calling/custom-function-calls), or variables. Cannot create new items.
### Browse Modules
Click the **Browse Modules** button in the top-right of the prompt section to open the full modules library. Browse by category (Collection, Optional, Flow, Sector, Universal), preview what each module does, and insert it directly into your prompt. See the [Prompting Guide](/docs/prompting-guide#prompt-modules) for the full list of available modules.
***
## Language Switching Instructions
A **single shared field** that applies to all languages. Describes when the agent should switch languages mid-call.
| What to include | Example |
| ---------------------- | ----------------------------------------------------- |
| **Trigger conditions** | "Switch to Hindi if the user speaks in Hindi" |
| **Fallback behavior** | "Fall back to English if the language is unsupported" |
| **Default rule** | "Respond in the language the user is currently using" |
Write these once. They apply across all languages automatically.
***
## Per-Language Advanced Settings
Each language tab has its own expandable **Advanced Settings** section.
| Field | Description |
| ------------------- | ------------------------------------------------------------------------------------------------------------------- |
| **Agent Name** | Name the agent uses to identify itself in this language |
| **Handoff Message** | Message spoken when switching **away from** this language. Supports variables like `{agent_name}` and `{language}`. |
### Prompt Variables for Testing
When you use `{variable_name}` in your prompt, those variables **automatically appear** as input fields in the testing section. Fill in test values to preview how the prompt behaves before going live.
The **Timezone** selector (e.g., `Asia/Kolkata UTC+05:30`) is a separate field that sets the timezone context for test calls.
Settings are independent. Hindi's Agent Name and Handoff Message do not affect English.
Always set a Handoff Message per language. Without it, transitions feel abrupt.
***
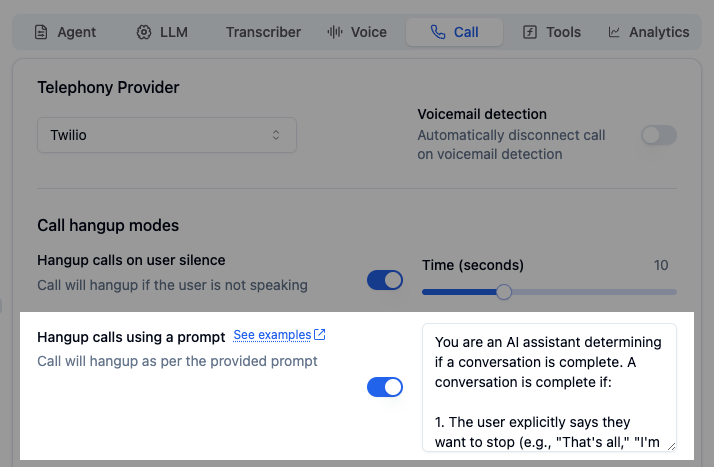
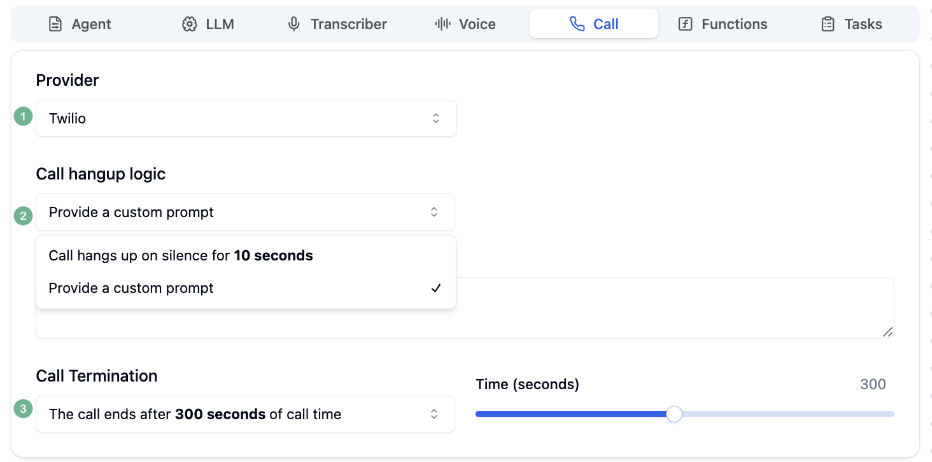
## Hangup Using Prompt
Let your agent decide when to end calls based on conversation context instead of silence detection or timeouts.
Turn on **Hangup using a prompt**.
Write conditions for when a conversation is complete. For multilingual agents, include closing lines in each language.
```
A conversation is considered complete if any of the following conditions are met:
User is not interested:
The assistant has said the following closing line:
Conversation Closing (English): "That is sad to hear. But no worries if you would ever want to learn more give me a cool."
Conversation Closing (Hindi): "ये सुनकर अफ़सोस हुआ। लेकिन कोई बात नहीं, अगर आप कभी और जानना चाहें तो मुझे call कर लें।"
The user has responded after that with any of the following phrases: "goodbye", "bye", "thank you", "thanks", "ok", "okay", or similar.
The last message in the transcript must be from the user.
```
Without this, calls end only on silence detection or timeouts.
***
## Next Steps
Configure the language model and knowledge bases
Set up voice, transcription, and languages
Best practices for writing prompts
Dynamic personalization with context
# Set Up Webhooks and Post-Call Analytics
Source: https://www.bolna.ai/docs/agent-setup/analytics-tab
Configure webhooks, call summarization, and data extraction for Bolna Voice AI. Push data to your CRM from every call.
## What is the Analytics Tab?
The Analytics Tab is where you configure webhooks for real-time data and post-call processing tasks. Automatically summarize conversations, extract structured data, and push execution data to your systems.
***
## Configuration Options
### Push Execution Data to Webhook
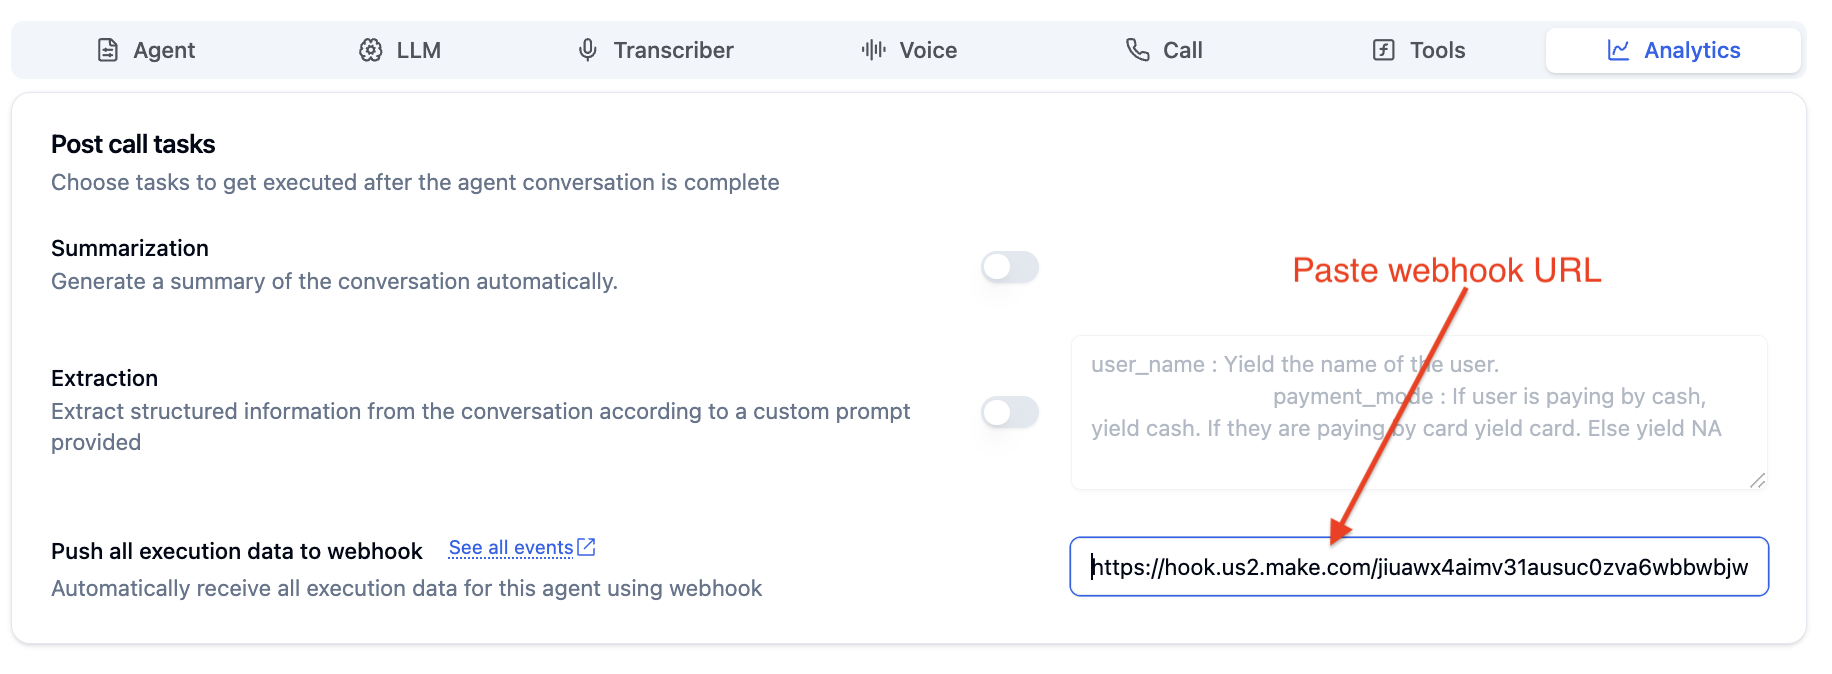
**Don't miss real-time updates!** Configure a webhook to receive all execution data as calls happen — essential for CRM integrations and live dashboards.
Enter your webhook URL to automatically receive all execution data for this agent.
Click **[See all events](/docs/polling-call-status-webhooks)** to view the complete list of webhook event types you can receive.
***
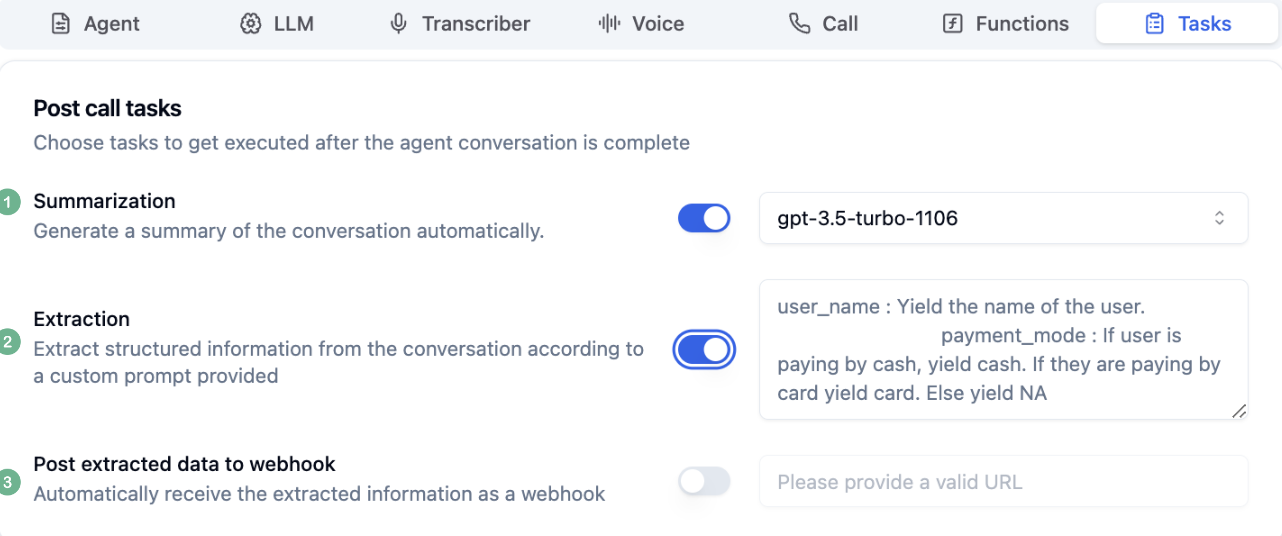
### Post Call Tasks
Choose tasks to execute after the agent conversation is complete.
Automatically generate a summary of every conversation. Great for quick review and logging.
Toggle on to enable automatic conversation summarization.
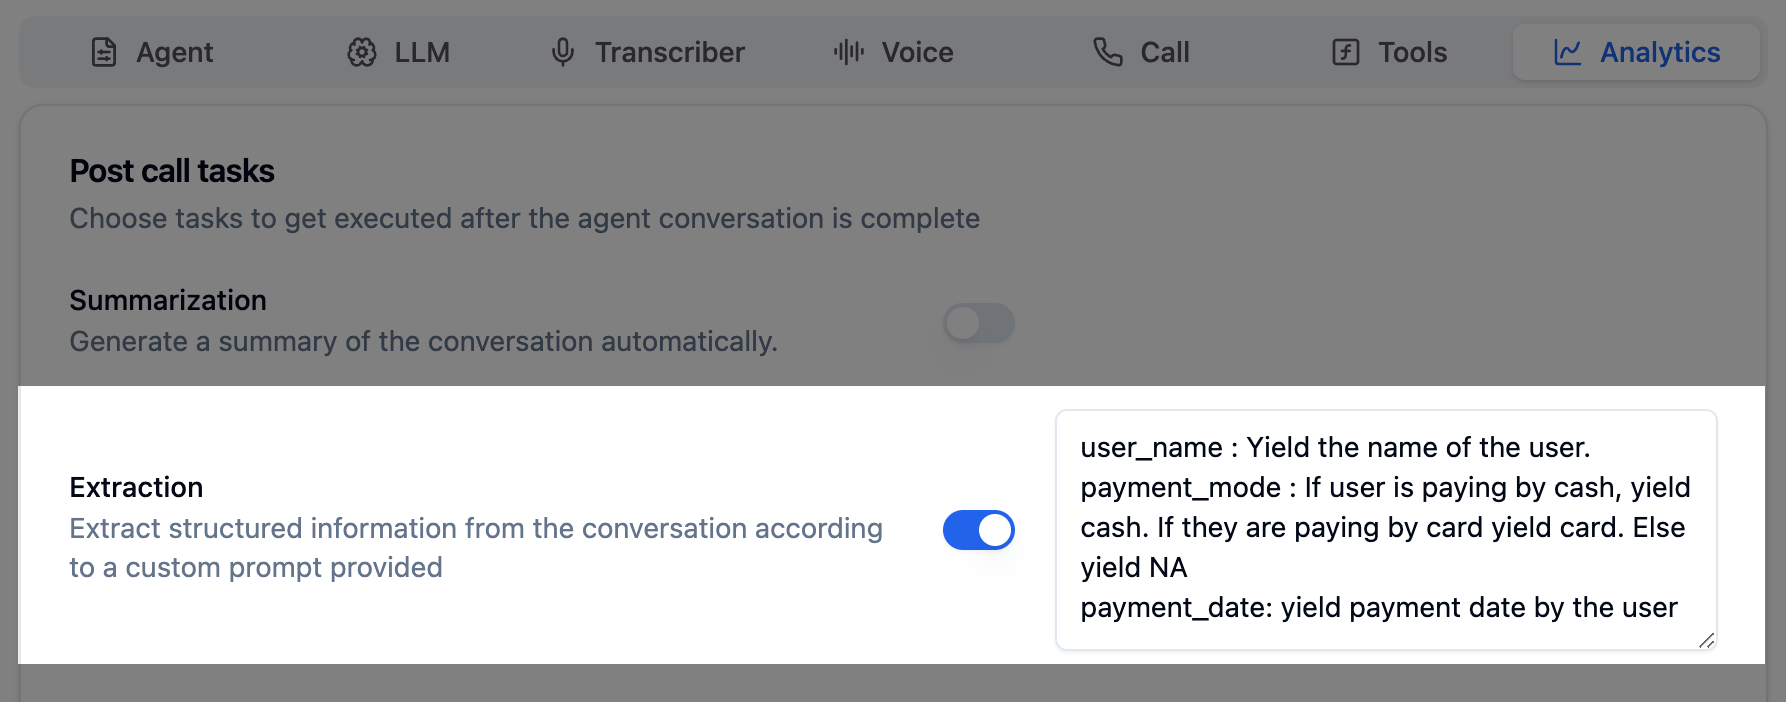
Create custom extraction templates organized by categories to automatically capture structured data from call transcripts.
**Extractions** allow you to automatically capture structured data from call transcripts. Organize extractions into categories and define custom questions to extract specific information like lead quality, appointment details, customer sentiment, and more.
### Key Features
**Categories** - Organize related extractions together (e.g., "Agent Handover", "Visit Details", "Lead Qualification")
**Extraction Templates** - Define what data to capture with:
* **Name** - Descriptive identifier (e.g., "Call Outcome", "Customer Sentiment")
* **Extraction Prompt** - Instructions guiding the LLM on what to extract
* **Answer Type** - Choose between Free Text (open-ended) or Pre-defined (categorical options)
* **Model** - Select LLM for extraction processing (default: gpt-4.1-mini)
**Testing** - Validate extractions against sample or real transcripts before production deployment
### Common Extraction Categories
Detect when calls need human intervention
Extract budget, timeline, decision-maker info
Capture appointment times, dates, confirmation status
Analyze satisfaction levels and feedback
Learn how to create and manage extraction templates, configure answer types, and test extractions in the [Using Extractions](/docs/using-extractions) guide.
***
## Use Cases
Automatically update customer records after calls
Extract qualification data from sales calls
Capture required data points for regulations
Analyze conversation outcomes and metrics
***
## Next Steps
Configure inbound call settings
Add function tools and APIs
View call logs and transcripts
Learn about webhook events
# Configure Voice and Transcription Settings
Source: https://www.bolna.ai/docs/agent-setup/audio-tab
Set up languages, speech-to-text, and text-to-speech for your Bolna Voice AI agent. Pick providers, select voices, clone custom voices, and tune audio quality.
The Audio Tab controls how your agent listens and speaks. Configure languages, choose transcription and voice providers, and tune audio quality. For multilingual agents, you can select **different STT and TTS providers per language**.
***
## Languages
Set the languages your agent can understand and speak. Pick a primary language and add secondary languages for multilingual conversations.
* **Primary Language** is marked with `(Primary)` and is the language your agent uses at the start of every conversation. The main prompt and multilingual settings are tied to this language.
* **Secondary Languages** allow the agent to understand and respond when a caller switches languages mid-call.
* Click **+ Add Language** to add more languages.
* Remove any language by clicking the **x** next to it.
### Changing the Primary Language
Click the **crown icon** next to any secondary language to make it primary. A tooltip will confirm the action, for example "Make Hindi primary". This sets the selected language as the default for the main prompt and multilingual settings.
### Supported Languages
| Language | Code |
| ---------- | ---- |
| English | `en` |
| Hindi | `hi` |
| Bengali | `bn` |
| Assamese | `as` |
| French | `fr` |
| Gujarati | `gu` |
| Indonesian | `id` |
| Kannada | `kn` |
| Malay | `ms` |
| Malayalam | `ml` |
| Marathi | `mr` |
| Odia | `od` |
| Punjabi | `pa` |
| Spanish | `es` |
| Tamil | `ta` |
| Telugu | `te` |
| Urdu | `ur` |
| Dutch | `nl` |
For agents that handle multiple languages in a single call, see the [Multilingual Support](/docs/customizations/multilingual-languages-support) guide.
***
## Speech-to-Text
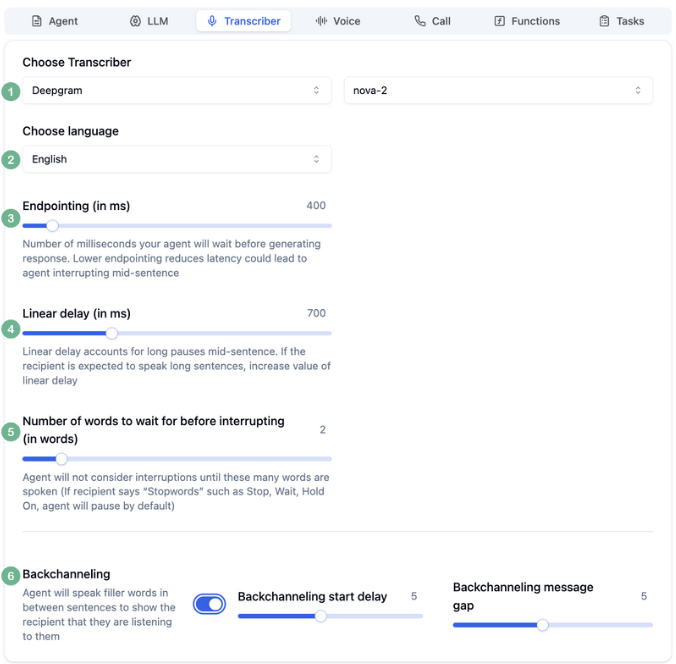
Controls how your agent converts the caller's spoken words into text before the LLM processes them. For multilingual agents, each language can have its own STT provider and model. Select a language tab to configure its transcription settings independently.
Different languages may perform better with different providers. For example, use **Sarvam** for Hindi and **Deepgram** for English.
### Provider and Model
Choose a transcription provider from the **Provider** dropdown, then pick the specific model from the **Model** dropdown.
| Provider | What it offers |
| -------------- | -------------------------------------------------------------- |
| **AssemblyAI** | Real-time transcription with strong punctuation and formatting |
| **Azure** | Microsoft Azure Speech Services |
| **Deepgram** | High-accuracy, low-latency transcription with keyword boosting |
| **ElevenLabs** | Transcription powered by ElevenLabs |
| **Gladia** | Multilingual transcription service |
| **Google** | Google Cloud Speech-to-Text |
| **OpenAI** | OpenAI Whisper-based transcription |
| **Sarvam** | Optimized for Indian languages like Hindi, Tamil, and Telugu |
| **Smallest** | Lightweight, fast transcription provider |
### Keywords
Boost recognition accuracy for specific words the transcriber might miss, such as brand names, product names, or technical terms. Enter keywords in the format `word:boost_value` (e.g., `Bruce:100`).
Keyword boosting is **only available with Deepgram**. The Keywords field has no effect when using other providers.
***
## Text-to-Speech
Controls how your agent sounds when speaking to the caller. For multilingual agents, each language can have its own TTS provider, model, and voice. Select a language tab to configure voice settings independently.
### Provider, Model, and Voice
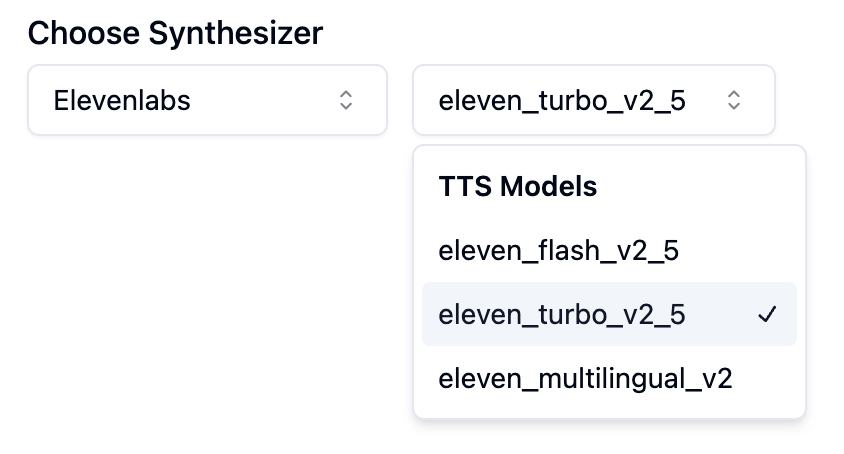
Choose from **AzureTTS**, **Cartesia**, **ElevenLabs**, or **Sarvam**.
Select the model that fits your latency and quality needs (e.g., ElevenLabs `eleven_turbo_v2_5` for low latency).
Click the **Voice** dropdown to browse all voices for the selected provider and model.
### Browsing Voices
Click the Voice dropdown to see a searchable list of all available voices. Filter by gender using the **All**, **Male**, **Female**, and **Neutral** tabs. Each voice shows a **play button** so you can preview it before selecting.
### Preview Welcome Message
Click **Preview welcome message** to hear the selected voice speak your agent's welcome prompt (configured in the [Agent Tab](/docs/agent-setup/agent-tab)). This lets you test how the voice sounds before going live.
### Voice Tuning Parameters
Fine-tune your agent's voice using the sliders below the voice selector. Available parameters may vary by provider.
| Parameter | What it controls |
| ---------------------- | ----------------------------------------------------------------------------------------------------------------------------------------------------------------- |
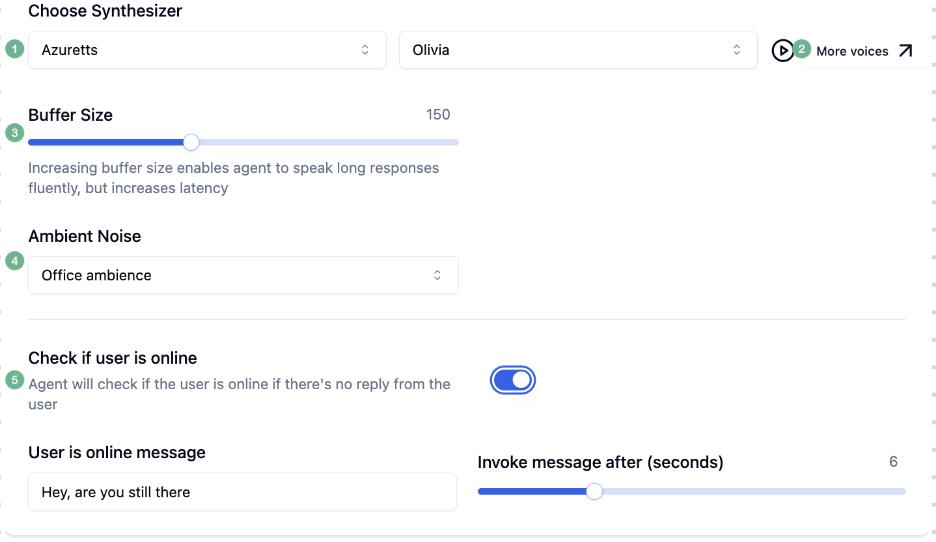
| **Buffer Size** | Audio buffered before playback begins. Higher values produce smoother audio but increase delay. Values between 150 and 250 work well for real-time conversations. |
| **Speed Rate** | Speaking speed. `1` is natural pace, above `1` is faster, below `1` is slower. |
| **Similarity Boost** | How closely the output matches the original voice sample. Higher values are more faithful but may reduce naturalness. |
| **Stability** | Voice consistency across sentences. Higher values keep tone steady, lower values add expressive variation. |
| **Style Exaggeration** | Emphasis on stylistic characteristics. `0` is neutral, higher values add more personality. |
High **Buffer Size** improves quality but adds latency. If callers notice a delay before the agent speaks, lower this value.
***
## Adding and Cloning Voices
Click the **Add Voice +** button in the Text-to-Speech section to add a custom voice by ID or clone one from an audio sample.
Custom voice uploads are **only available for ElevenLabs and Cartesia**.
### Add a Voice by ID
Use this when you already have a voice ID from your provider's voice library.
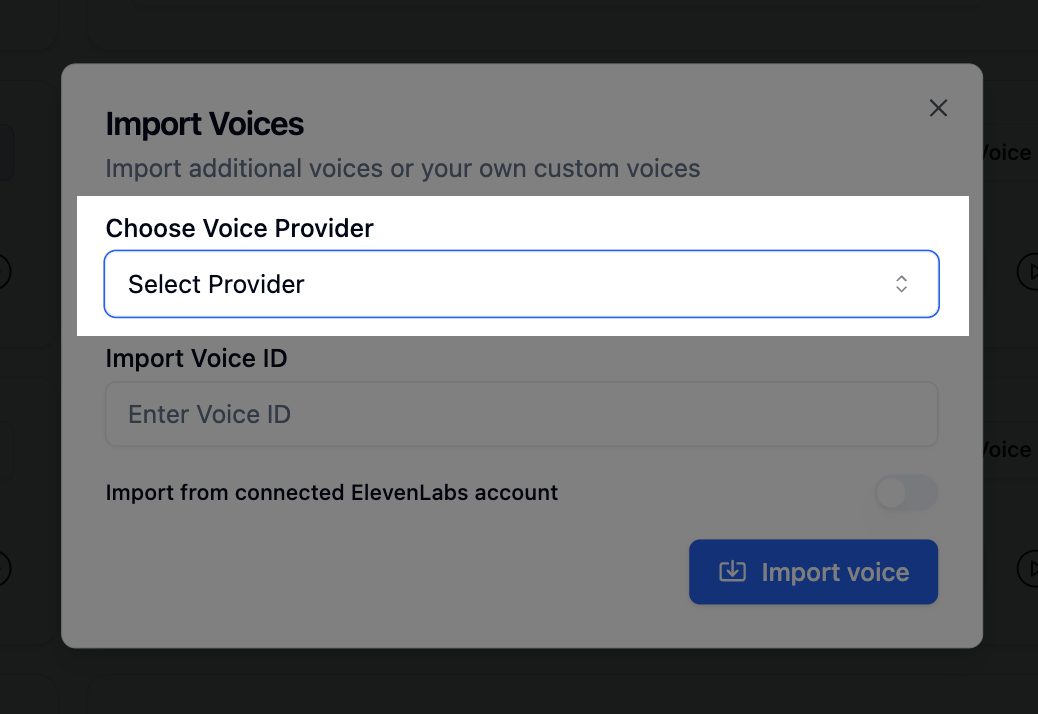
Make sure the **Add by ID** tab is selected in the dialog.
Select **ElevenLabs** or **Cartesia**.
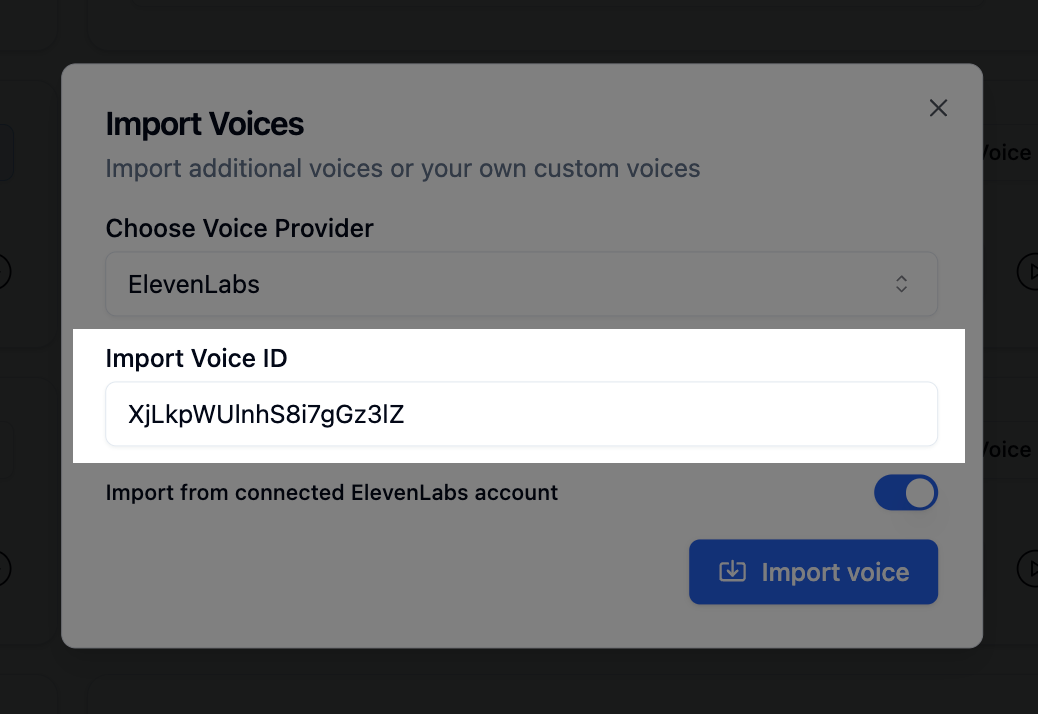
Paste the voice ID from your provider. For ElevenLabs, find IDs in the [ElevenLabs voice library](https://elevenlabs.io/voice-library).
The voice will appear in the Voice dropdown for all your agents.
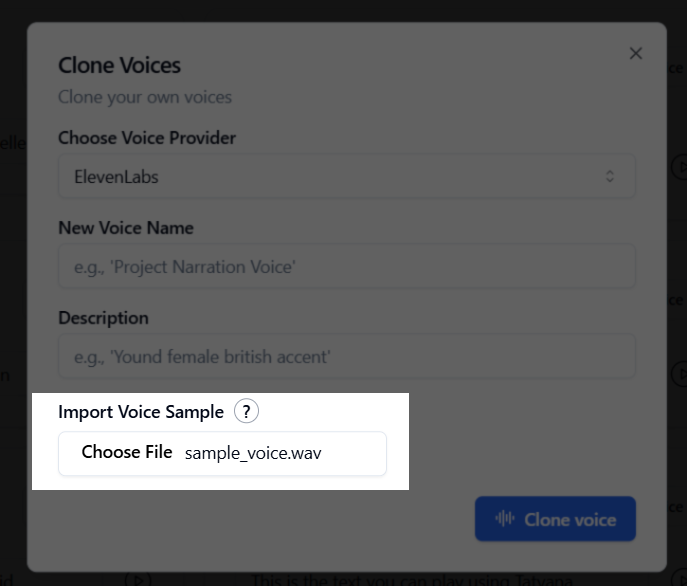
### Clone a Voice
Create a new voice by uploading an audio recording. Useful for maintaining a consistent brand voice or using a specific person's voice (with their permission).
Switch to the **Clone Voice** tab in the dialog.
Select **ElevenLabs** or **Cartesia**.
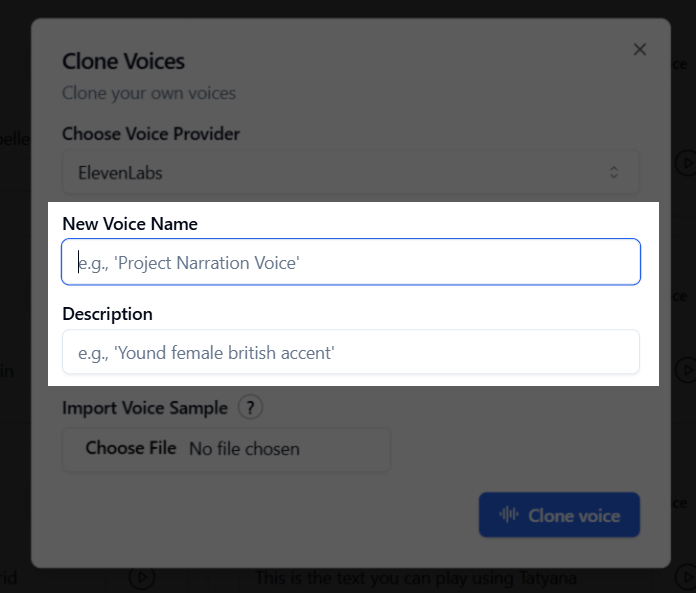
Add a **Voice name** (e.g., "Sales Assistant Voice") and **Description** (e.g., "Warm male Indian accent").
Choose the language of your audio sample.
Drag and drop your audio file or click **click to browse**. Audio files only, maximum 10 MB.
The platform processes your sample and adds the new voice to the Voice dropdown.
### Supported Languages for Voice Cloning
Both ElevenLabs and Cartesia support the same set of languages for cloning:
| Language | Code | Language | Code |
| ------------------- | ---- | ---------- | ---- |
| English | `en` | Hindi | `hi` |
| Bengali | `bn` | Assamese | `as` |
| Dutch | `nl` | French | `fr` |
| Gujarati | `gu` | Indonesian | `id` |
| Kannada | `kn` | Malay | `ms` |
| Malayalam | `ml` | Marathi | `mr` |
| Odia | `od` | Punjabi | `pa` |
| Spanish | `es` | Tamil | `ta` |
| Telugu | `te` | Urdu | `ur` |
| Indian Multilingual | - | | |
For best results, use a clean recording with no background noise, a single speaker, and at least 30 seconds of continuous speech.
***
## Next Steps
Configure interruption handling, endpointing, and latency
Set up agents that speak multiple languages in a single call
Create a custom voice from an audio sample
Explore Deepgram transcription models and keyword boosting
# Configure Telephony and Call Settings
Source: https://www.bolna.ai/docs/agent-setup/call-tab
Set up telephony providers, noise cancellation, voicemail detection, and call management for Bolna Voice AI. Configure timeouts and call restrictions.
## What is the Call Tab?
The Call Tab is where you configure how your agent handles phone calls. Set up your telephony provider, enable call features like noise cancellation and voicemail detection, and manage call timing and hangup behavior.
***
## Configuration Options
### Telephony Provider & Call Features
Configure your telephony provider and toggle powerful call capabilities.
Filter background noise for clearer calls (adjustable intensity)
Detect voicemail systems to avoid awkward messages
Accept touch-tone input for IVR-style menus
Automatically retry failed calls later
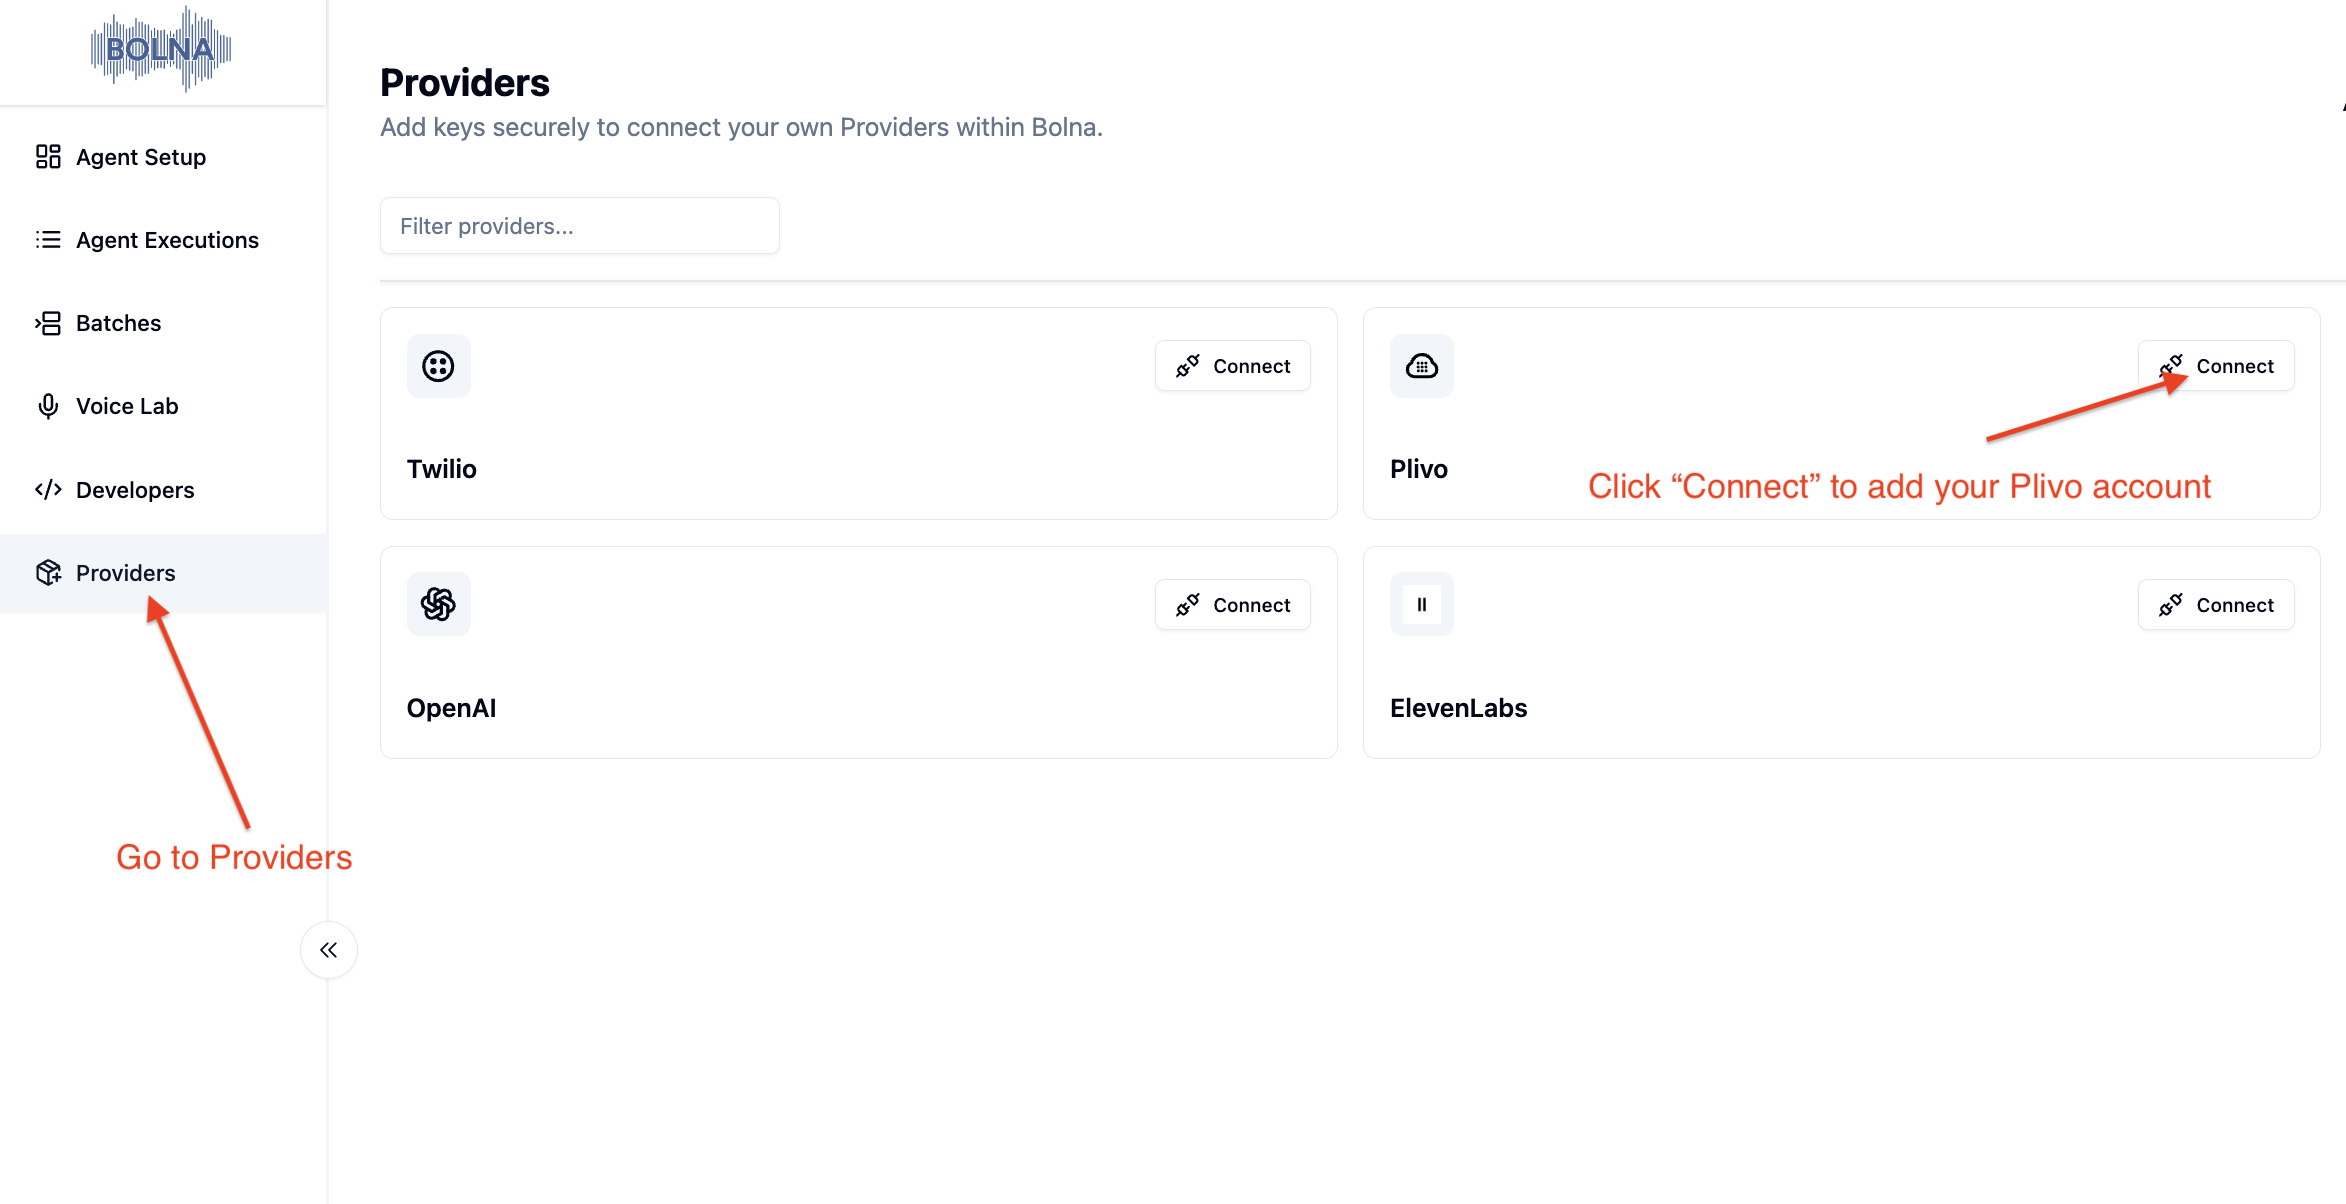
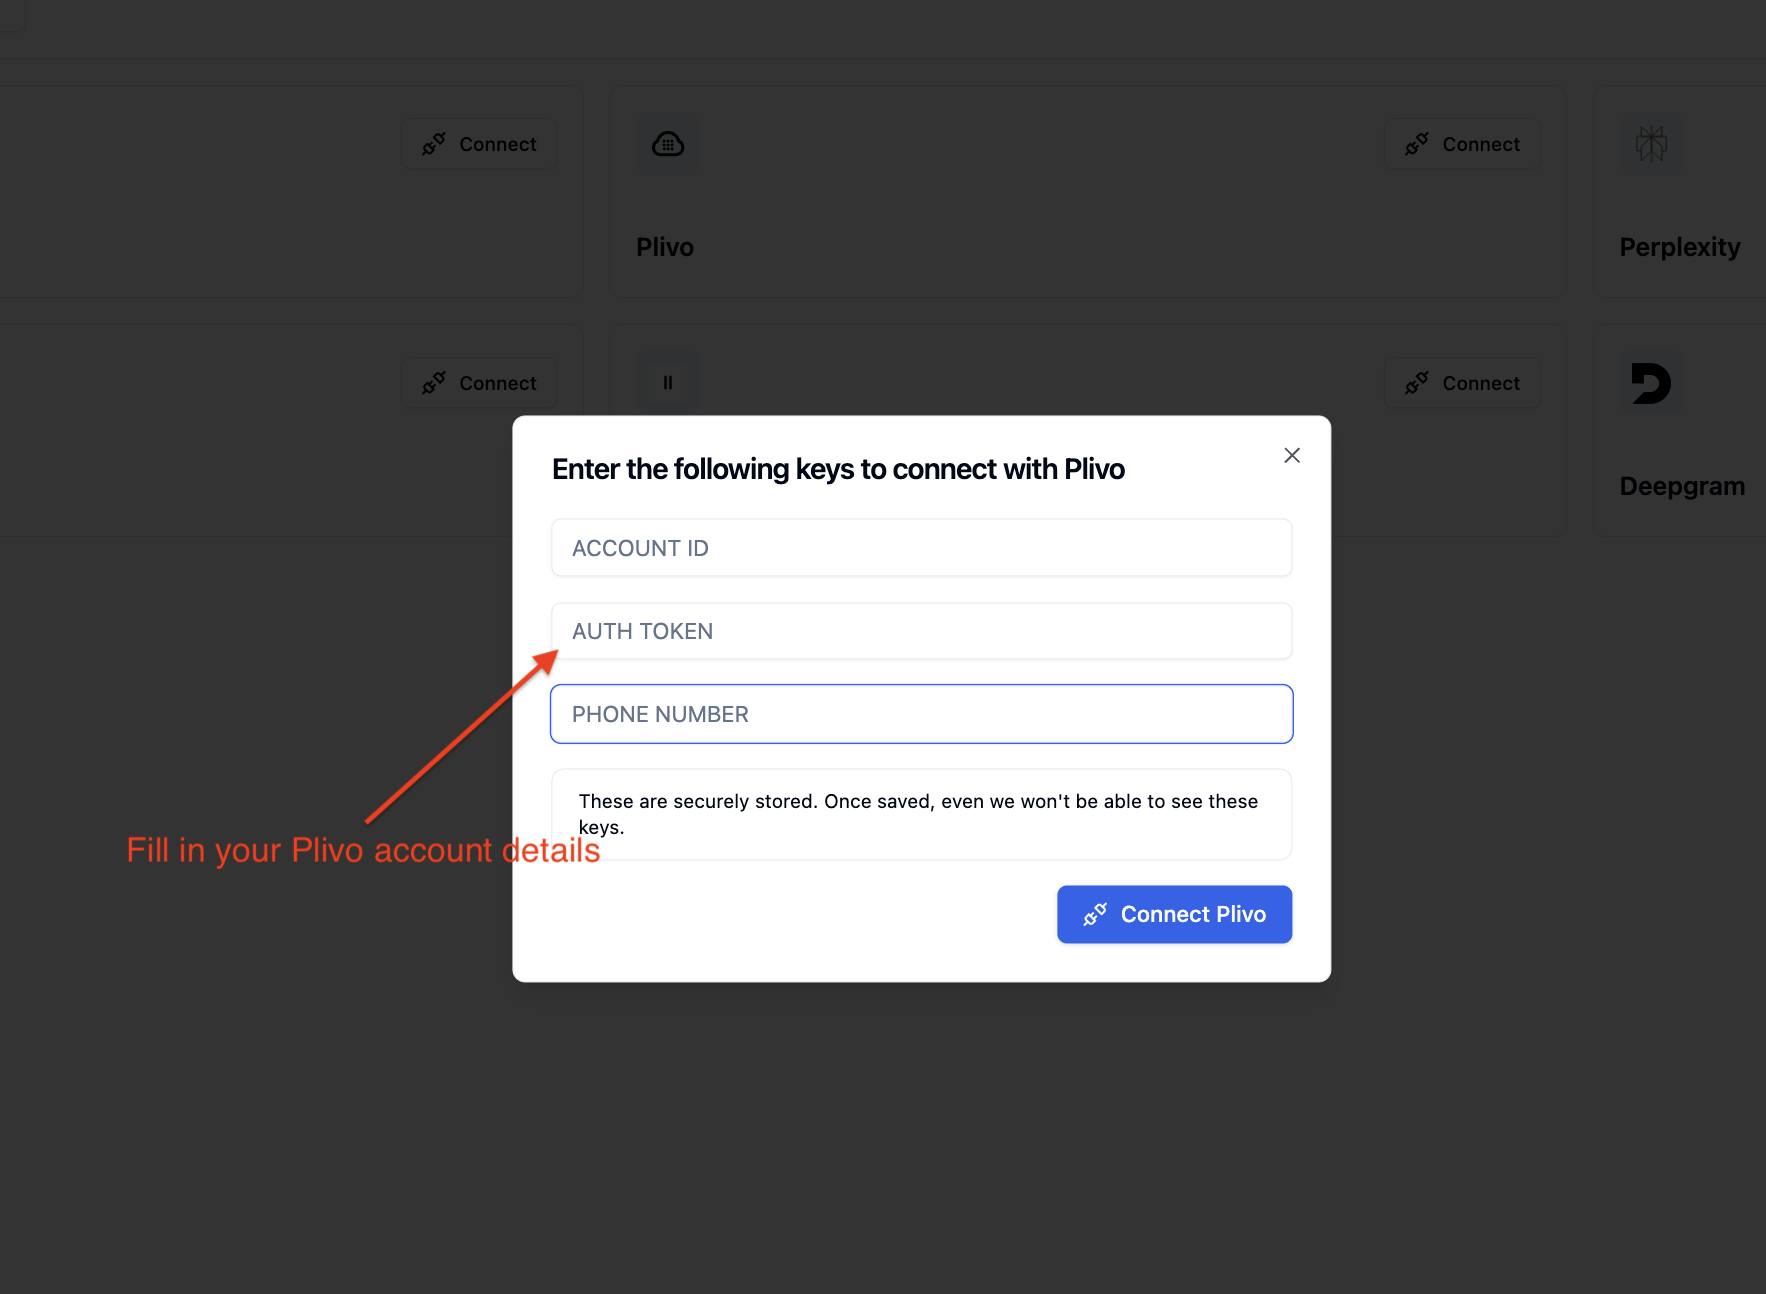
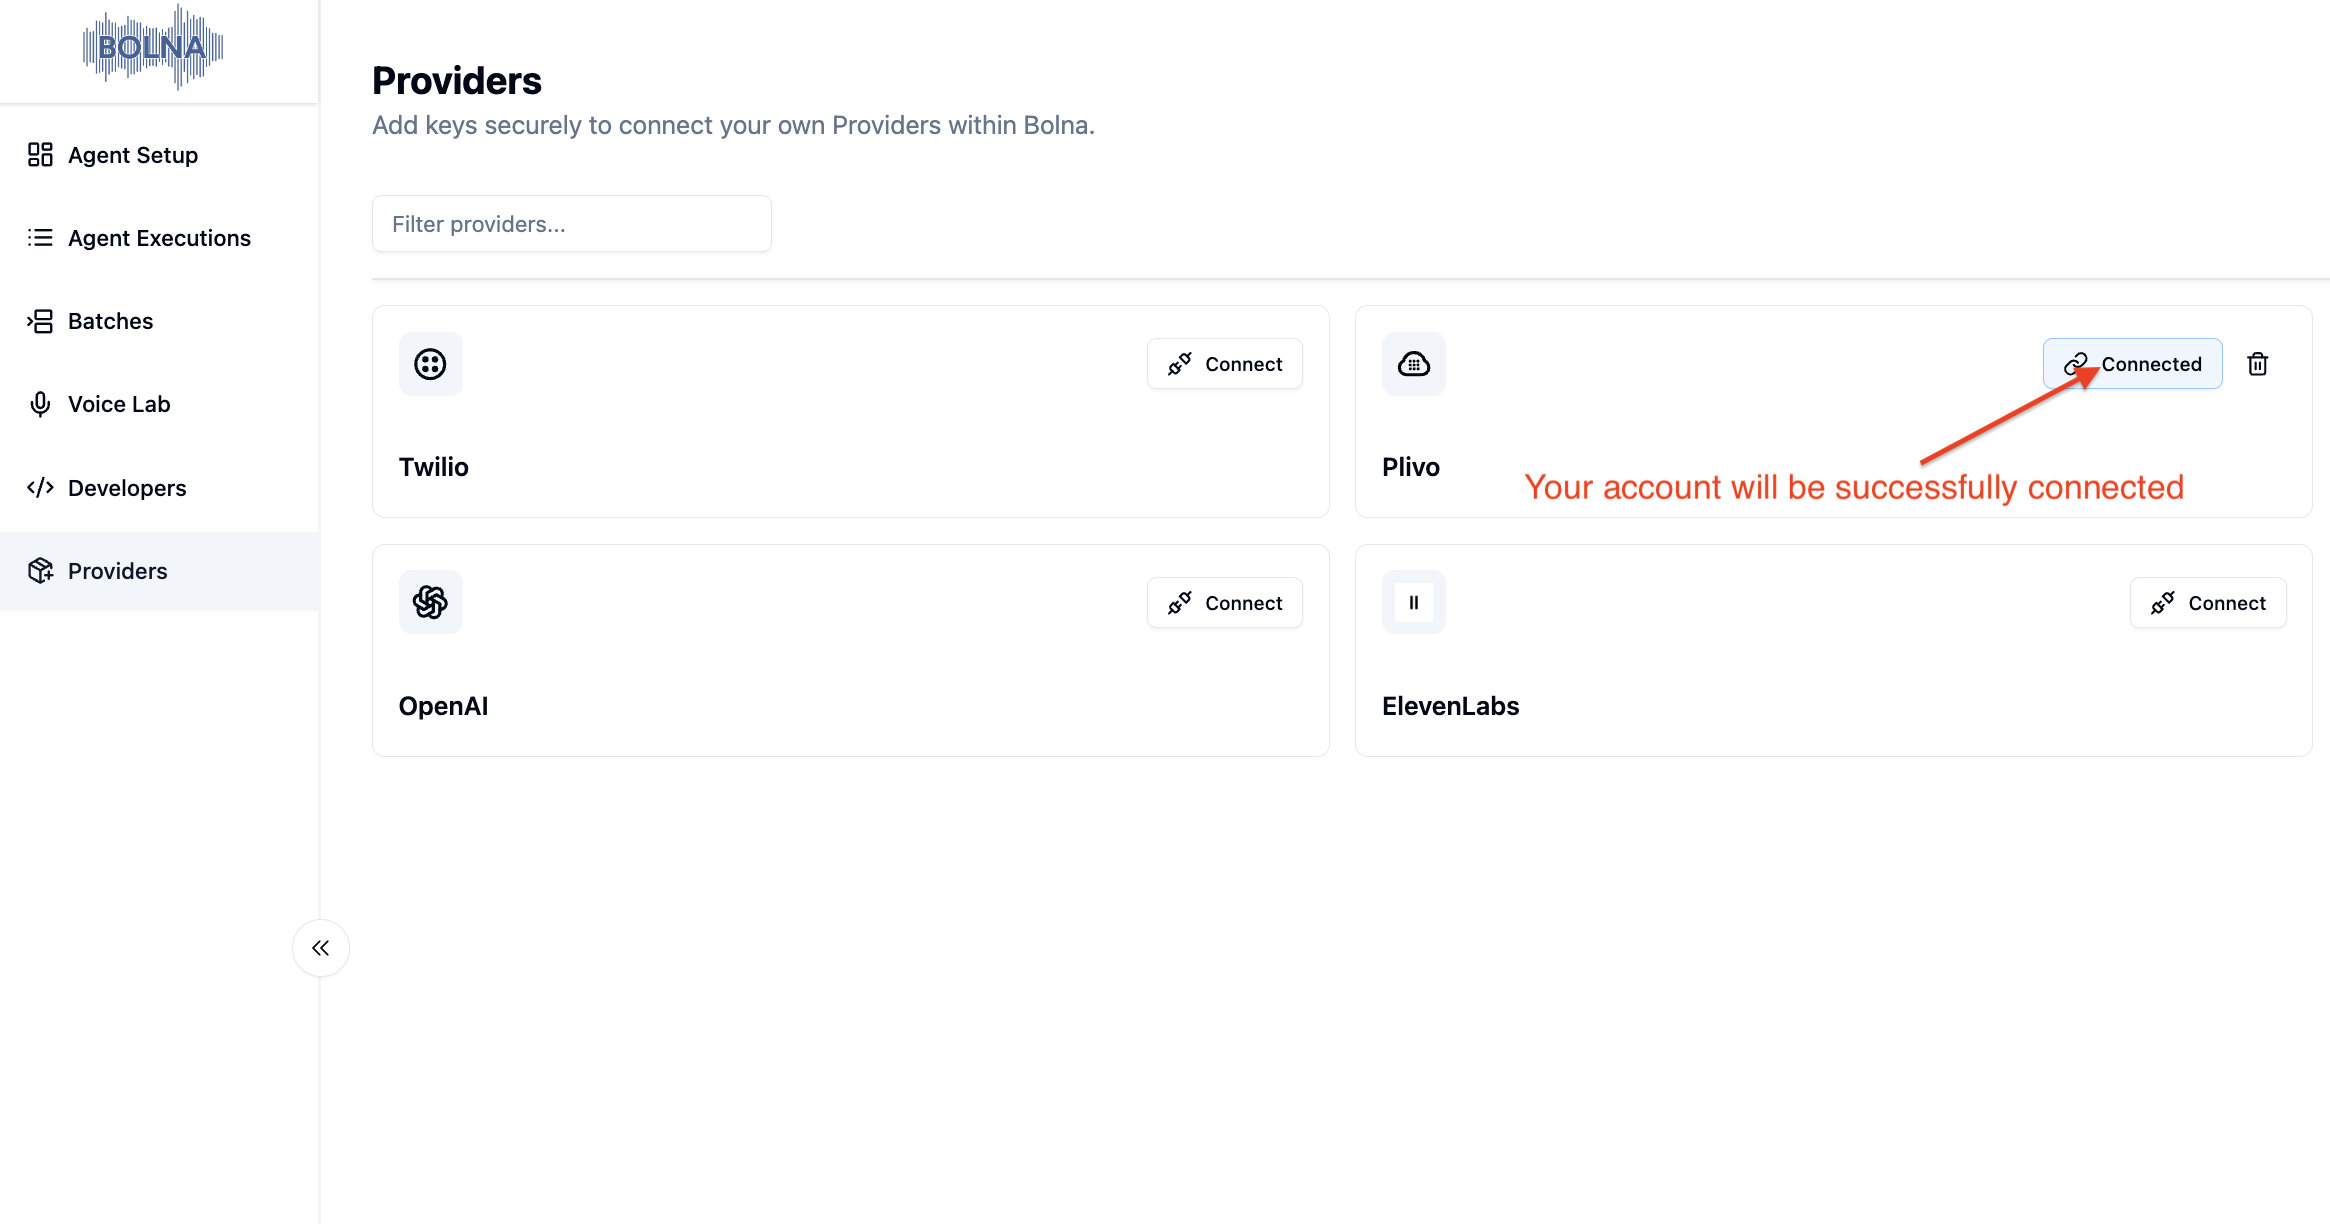
Connect your own telephony provider in [Providers](/docs/getting-started/providers) for more control and cost savings.
***
### Ambient Noise
Add background ambient noise to your calls for a more natural, human-like experience. Ambient noise is available for **Plivo** and **Vobiz** telephony providers.
Bolna supports both **preset** and **custom** ambient noise tracks. Select a preset or upload your own custom track to use as background noise during calls.
#### Preset Tracks
Three preset tracks are available to all users out of the box:
| Track | Description |
| ------------------- | ---------------------------------------------- |
| **Coffee Shop** | Background sounds of a coffee shop environment |
| **Office Ambience** | Subtle office background noise |
| **Call Center** | Call center ambient sounds |
Set ambient noise to **None** to disable it (default).
#### Custom Tracks
You can upload your own custom ambient noise tracks for a personalized experience:
* **Supported formats**: `wav`, `mp3`
* **Maximum file size**: 10 MB
* You can upload, list, and delete your custom tracks from the dashboard or via the API
* Custom tracks are private to your account, while presets are available to everyone
Ambient noise is only supported with **Plivo** and **Vobiz** telephony providers.
***
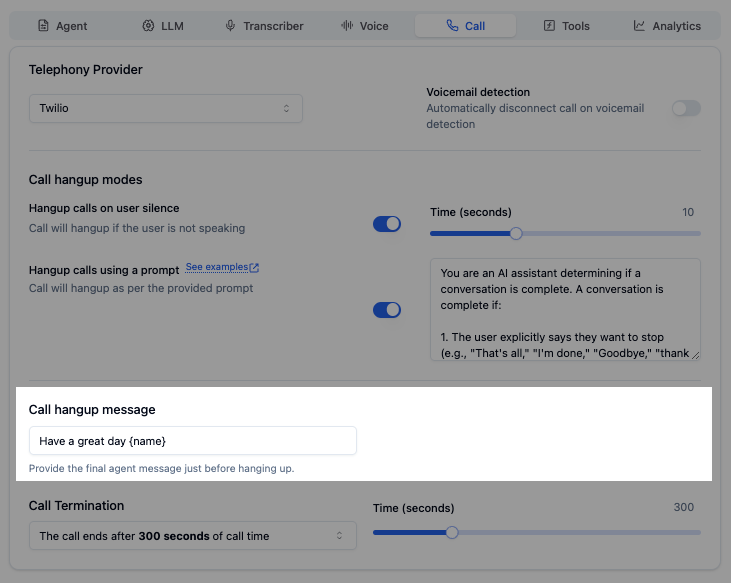
### Final Call Message
Configure the last message your agent says before disconnecting.
Choose the language for your final message (supports multi-language).
Enter a warm, professional closing (e.g., "Thank you for your time. Goodbye!")
Click **+ Add** to include final messages in other languages.
A warm, professional final message leaves a positive lasting impression on callers.
***
### Call Management
Configure how and when calls should end.
| Setting | Description | Recommended |
| -------------------------- | -------------------------------------- | ------------------------------------------ |
| **Hangup on User Silence** | Auto-hangup after X seconds of silence | 6-10 seconds |
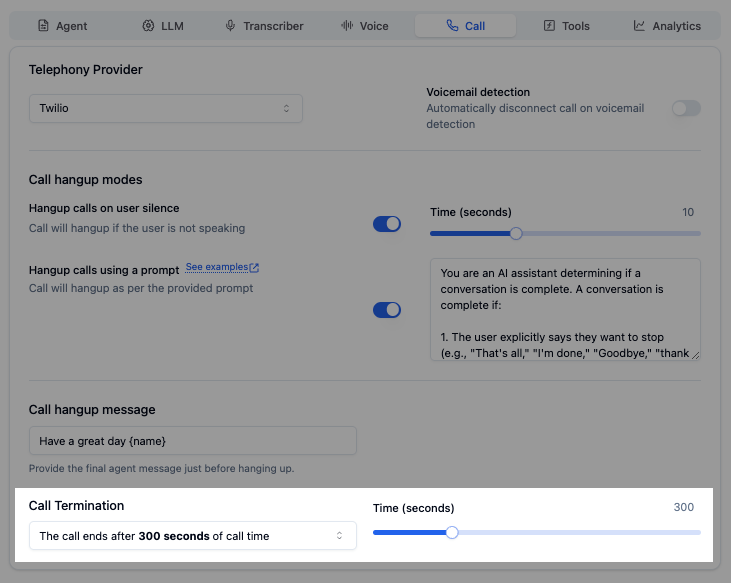
| **Total Call Timeout** | Maximum call duration in seconds | 300s (5 min) for support, higher for sales |
**Set reasonable timeouts** to manage costs and prevent stuck calls. Very long calls can indicate issues or abandoned calls.
***
### Outbound Call Timing Restrictions
**Compliance matters!** Many regions have laws restricting when you can make outbound calls. Enable timing restrictions to stay compliant with local regulations.
Toggle on to restrict outbound calls to specific time windows and avoid calling during prohibited hours.
***
## Next Steps
Add function tools and APIs
Configure latency and interruptions
Connect Twilio, Plivo, or Exotel
Set up inbound call routing
# Configure Voice AI Latency and Interruptions
Source: https://www.bolna.ai/docs/agent-setup/engine-tab
Fine-tune your Bolna Voice AI agent's performance. Configure transcription accuracy, interruption thresholds, response latency, and user detection.
## What is the Engine Tab?
The Engine Tab controls the core performance settings of your voice AI agent. Fine-tune transcription accuracy, interruption behavior, response timing, and user presence detection for optimal conversation quality.
***
## Configuration Options
### Transcription & Interruptions
Control how speech is captured and processed during conversations.
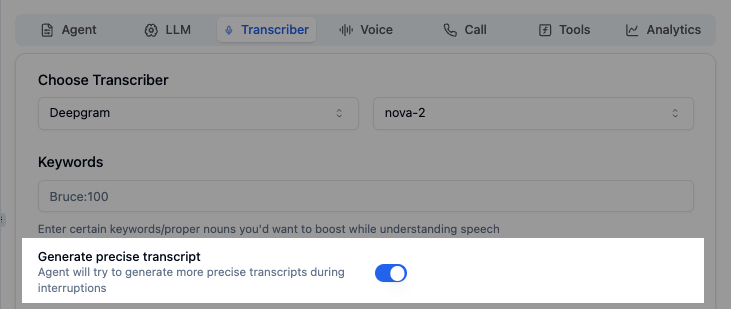
Enable for higher accuracy transcription. Essential for compliance and call analytics.
Number of words to wait before considering user input as an interruption.
**Stopwords like "Stop", "Wait", "Hold On"** will always pause the agent immediately, regardless of the interruption threshold.
***
### Response Latency
Configure how quickly your agent responds to user input.
| Setting | Description | Impact |
| --------------------- | ------------------------------------ | ----------------------------------- |
| **Response Rate** | Choose preset or Custom | Balanced, Fast, or Custom timing |
| **Endpointing (ms)** | Wait time before generating response | Lower = faster but may cut off user |
| **Linear Delay (ms)** | Accounts for mid-sentence pauses | Prevents premature responses |
**Lower latency isn't always better!** Setting values too low may cause the agent to interrupt users mid-sentence. Start with defaults and adjust based on testing.
For **natural conversations**, use Endpointing around 200-300ms and Linear Delay around 400-500ms.
***
### User Online Detection
Detect when users go silent and automatically re-engage them.
Toggle **User Online Detection** to check if the user is still on the call.
Customize the prompt (e.g., "Hey, are you still there?") with multi-language support.
Set **Invoke message after (seconds)** to control when the check triggers.
Set the timer between **8-15 seconds** to give users enough time to respond without seeming impatient.
***
## Best Practices
Use default settings initially and adjust based on real call feedback
Make test calls to experience the timing and interruption handling
Customer support may need longer pauses; sales may prefer faster responses
Review call recordings to identify timing issues
***
## Next Steps
Configure telephony and call features
Set up voice and transcription providers
Configure language model settings
Review call logs and recordings
# Set Up Inbound Calls & Caller Matching
Source: https://www.bolna.ai/docs/agent-setup/inbound-tab
Configure inbound call settings for Bolna Voice AI. Match callers using CSV, Google Sheets, or API. Set up spam prevention and preload customer data.
## What is the Inbound Tab?
The Inbound Tab is where you configure settings for receiving incoming calls. Match callers to your database, preload user data before the call starts, and set up spam prevention to protect your agents from abuse.
***
## Database for Inbound Phone Numbers
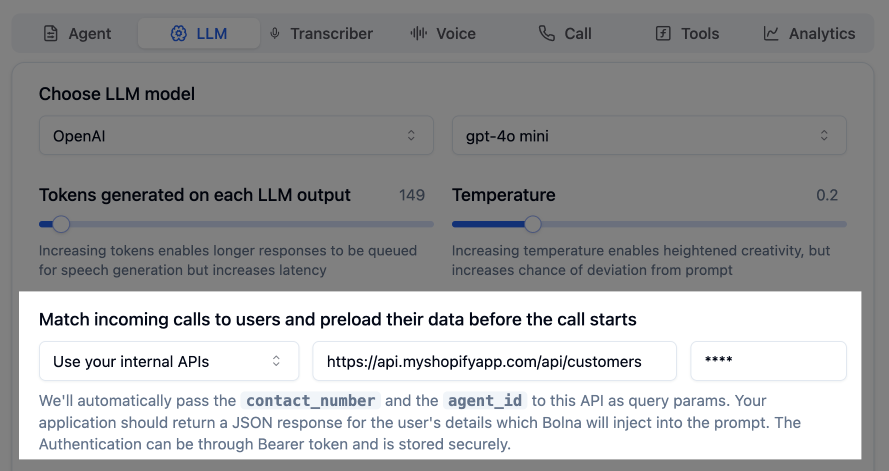
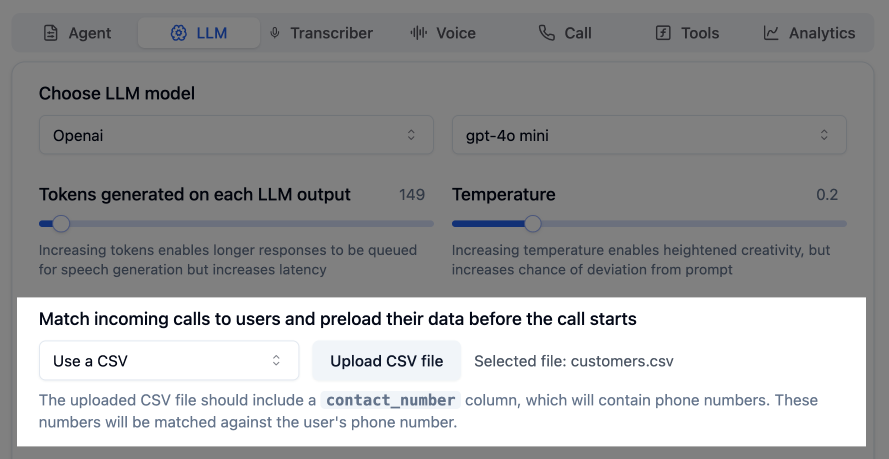
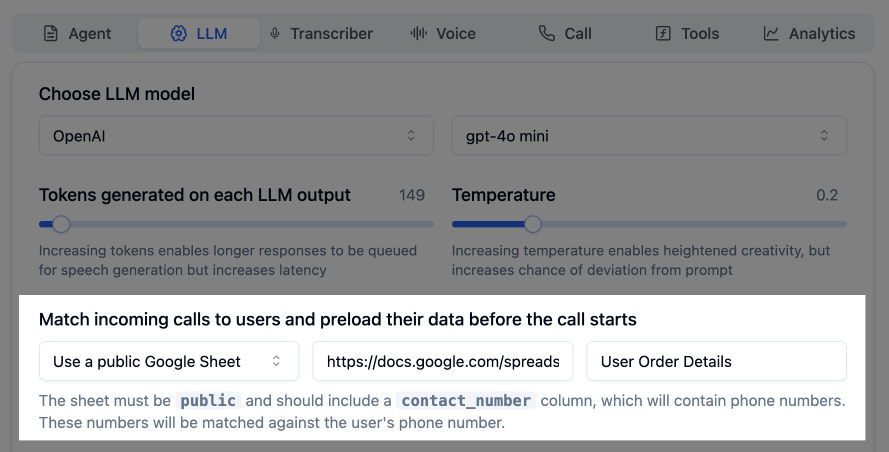
Match incoming calls to users and preload their data before the call starts. Choose from three data source options:
Connect your own API to fetch user data dynamically when a call comes in.
Choose **"Use your internal APIs"** from the dropdown.
Provide your API endpoint that will receive the caller data request.
Enter your Bearer token for secure authentication.
### Query Parameters
Bolna automatically passes these parameters to your API:
| Parameter | Description |
| ---------------- | ------------------------------- |
| `contact_number` | The caller's phone number |
| `agent_id` | Your agent's identifier |
| `execution_id` | Unique identifier for this call |
**Your API must return a JSON response** with user details. Bolna will inject this data directly into your agent's prompt for personalized conversations.
### Example API Request
```bash theme={"system"}
curl -X GET "https://your-api.com/user-data?contact_number=+919876543210&agent_id=abc123&execution_id=xyz789" \
-H "Authorization: Bearer YOUR_AUTH_TOKEN" \
-H "Content-Type: application/json"
```
### Example API Response
```json theme={"system"}
{
"user_name": "John Doe",
"account_status": "premium",
"last_purchase": "2026-01-15"
}
```
Authentication uses Bearer token and is stored securely by Bolna.
Upload a CSV file containing your user database.
Choose **"Use a CSV"** from the dropdown.
Click **Upload CSV File** and select your file.
The CSV file **must include a `contact_number` column** containing phone numbers. These numbers will be matched against the caller's phone number.
### CSV Format Example
```csv theme={"system"}
contact_number,user_name,account_type
+919876543210,John Doe,premium
+918765432109,Jane Smith,basic
```
Connect a public Google Sheet as your user database.
Choose **"Use a public Google Sheet"** from the dropdown.
Paste the URL of your public Google Sheet.
Specify the exact name of the sheet tab to use.
The sheet **must be public** and should include a `contact_number` column containing phone numbers.
***
## Call Restrictions
Toggle on **"Allow Calls Only from Database"** to restrict incoming calls to only phone numbers found in your chosen database. Unknown callers will be rejected.
***
## Spam Prevention Settings
Protect your agent from spam and abuse.
| Setting | Description |
| ---------------------------------- | ------------------------------------------------------------ |
| **Maximum Calls per Phone Number** | Limit calls from a single number. Set to `-1` for unlimited. |
| **Always-Allow List** | Phone numbers that bypass all call limits. |
Add your support team and VIP customers to the Always-Allow List to ensure they're never blocked.
***
## Use Cases
Only allow calls from registered customers
Preload customer data for personalized service
Limit repeated calls from the same number
Fetch real-time customer data via API
***
## Next Steps
Configure prompts and welcome message
Set up telephony and call management
Complete inbound setup guide
Purchase and manage phone numbers
# Choose and Configure LLM Models for Voice AI
Source: https://www.bolna.ai/docs/agent-setup/llm-tab
Select and configure the language model for your Bolna Voice AI agent. Choose from OpenAI, Azure, Anthropic, and connect knowledge bases.
## What is the LLM Tab?
The LLM Tab is where you select and configure the intelligence behind your voice AI agent. Choose your language model provider, adjust response parameters, and connect knowledge bases for enhanced conversations.
***
## Configuration Options
### Choose LLM Model
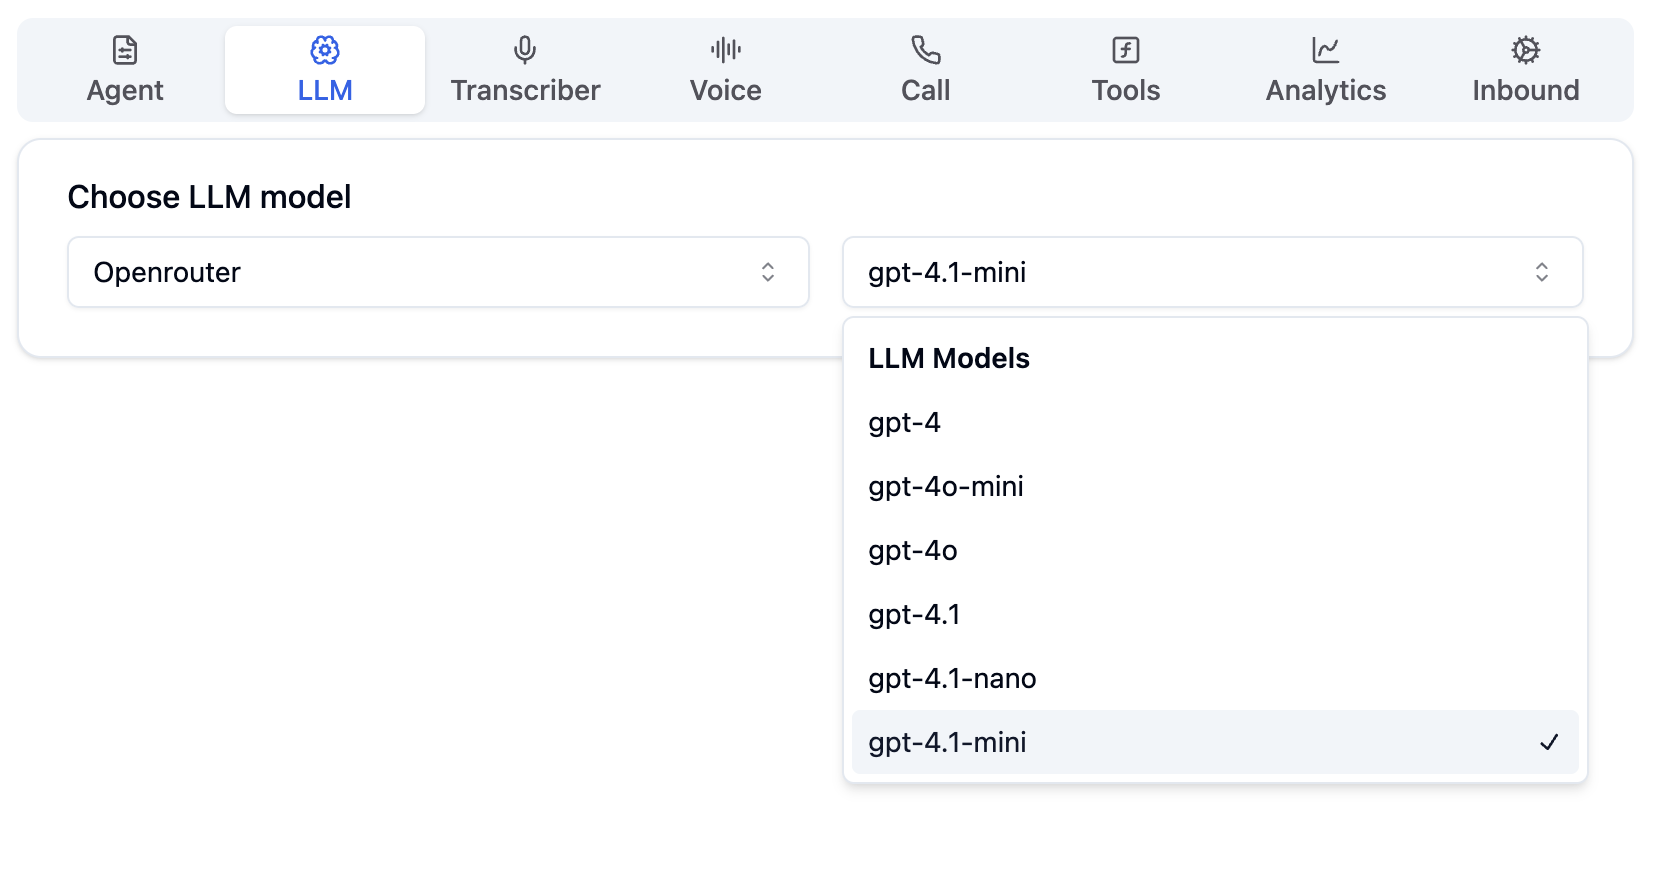
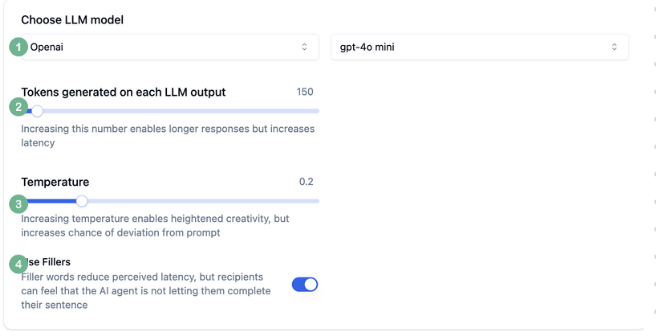
Select your AI provider and model for conversation intelligence.
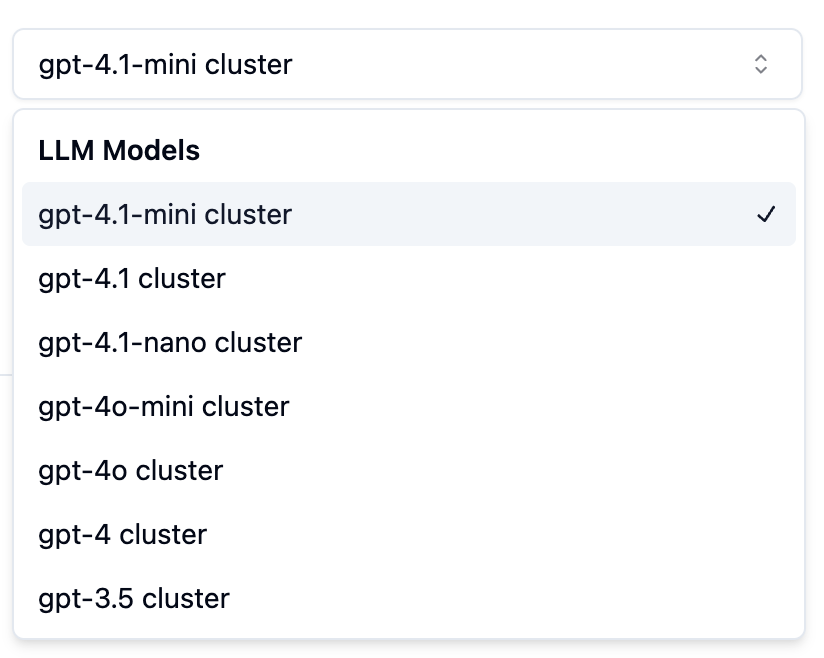
Choose from Azure, OpenAI, Anthropic, Groq, and more
Pick the specific model (e.g., `gpt-4.1-mini cluster`)
Connect your own provider keys in [Providers](/docs/getting-started/providers) to reduce costs and access more models.
***
### Model Parameters
Fine-tune how your agent generates responses.
| Parameter | Description | Recommended |
| -------------------- | ------------------------------ | ------------------------------ |
| **Tokens Generated** | Max tokens per LLM output | 300-500 for concise responses |
| **Temperature** | Controls creativity/randomness | 0.3-0.5 for balanced responses |
**Keep temperature low** (0.3-0.5) if you want consistent, controlled responses. Higher temperature increases creativity but may cause deviation from your prompt instructions.
***
### Add Knowledge Base
Connect your knowledge bases to give your agent accurate, contextual information.
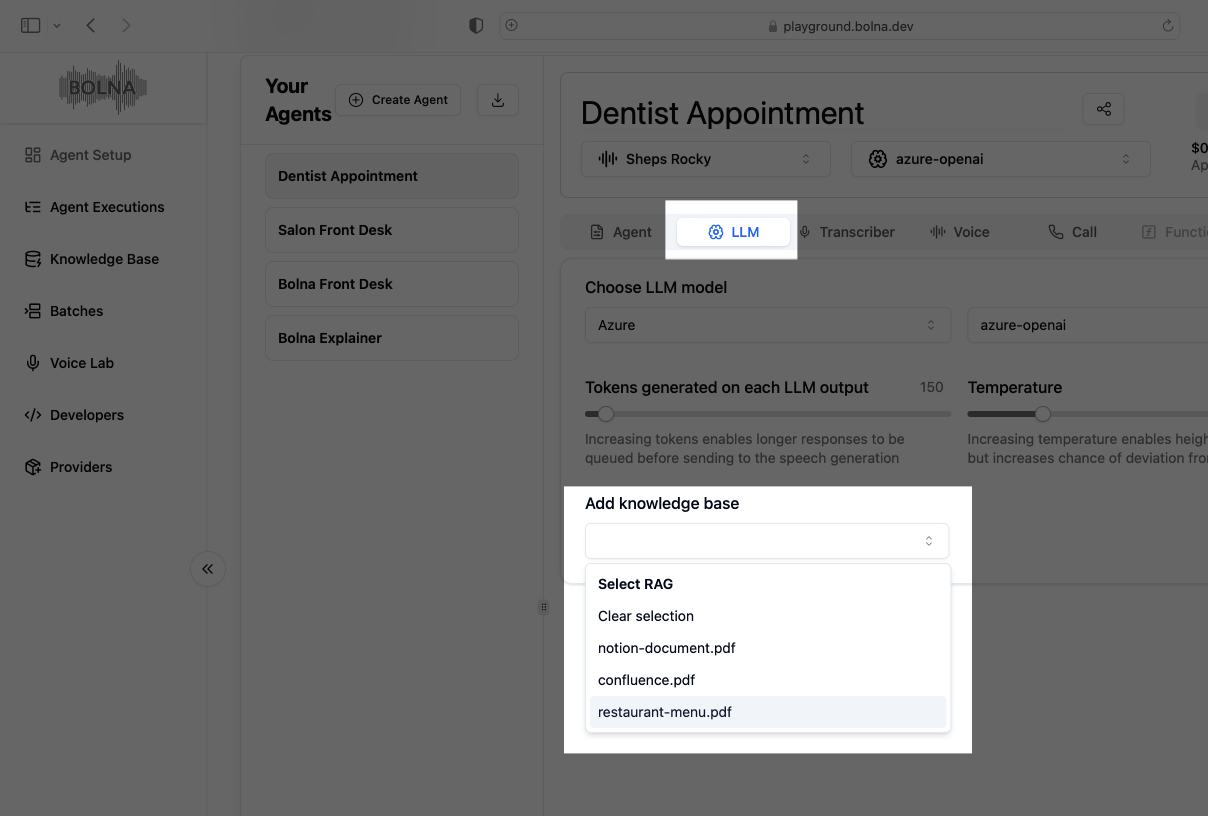
Open the **"Select knowledge bases"** multi-select dropdown.
Check one or more knowledge bases (PDFs, URLs) to connect.
Click **"Add new knowledgebase"** to create and upload new content.
Knowledge bases enable your agent to answer questions with accurate, up-to-date information from your documents and URLs. Connect multiple knowledge bases for comprehensive coverage.
Create knowledge bases in the [Knowledge Base](/docs/getting-started/knowledge-base) section by uploading PDFs or adding URLs.
***
## Next Steps
Create and manage knowledge bases
Configure prompts and welcome message
Set up voice, transcription, and languages
Connect your own LLM provider
# Configure Voice AI Agents in Bolna
Source: https://www.bolna.ai/docs/agent-setup/overview
Complete guide to configuring Bolna Voice AI agents. Customize prompts, test conversations, and deploy agents for inbound and outbound calls.
## What is Agent Setup?
Agent Setup is where you configure and fine-tune your Voice AI agents. Access it from the [Bolna Platform](https://platform.bolna.ai/) after creating or selecting an agent.
***
## Your Agents Sidebar
The left sidebar shows all your agents and provides quick access to create or import agents.
| Action | Description |
| --------------- | ------------------------------------------------------------------------------ |
| **+ New Agent** | Create a new agent using Auto Build, Pre-built templates, or from scratch |
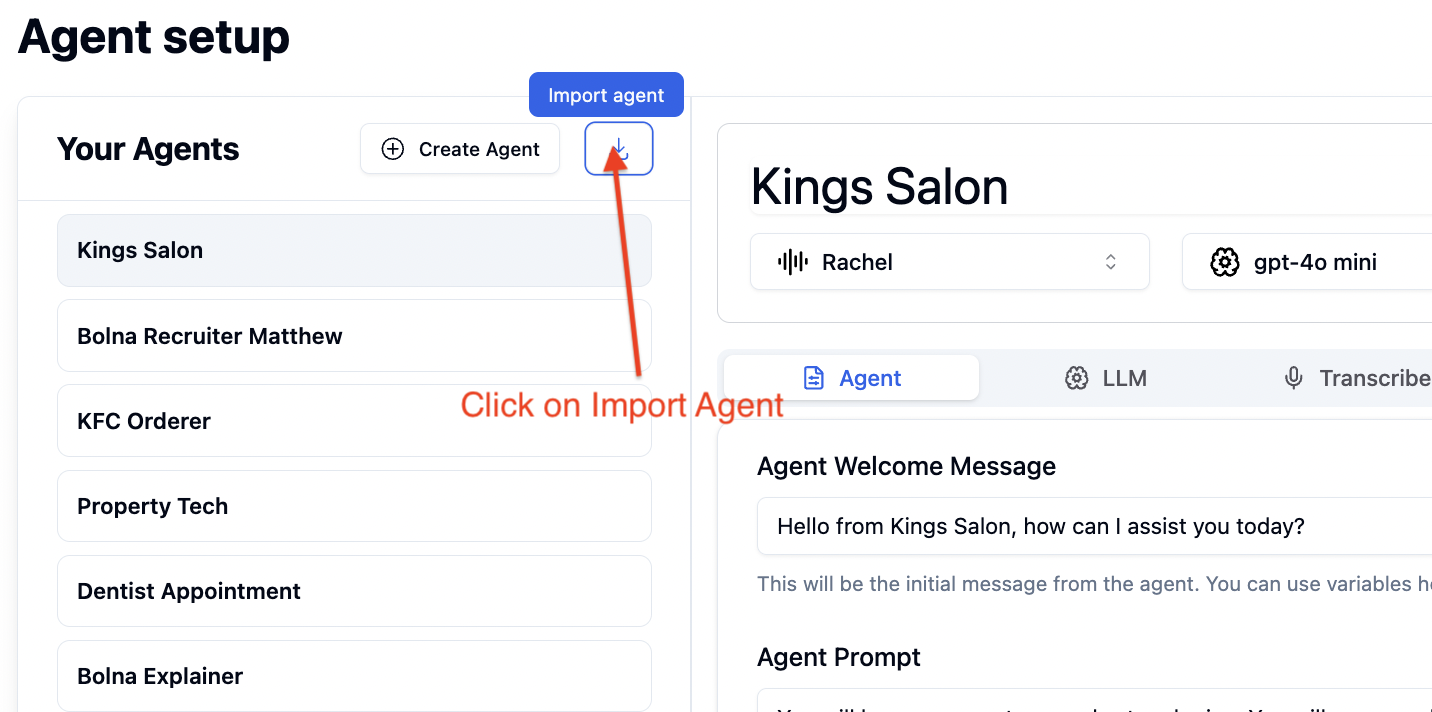
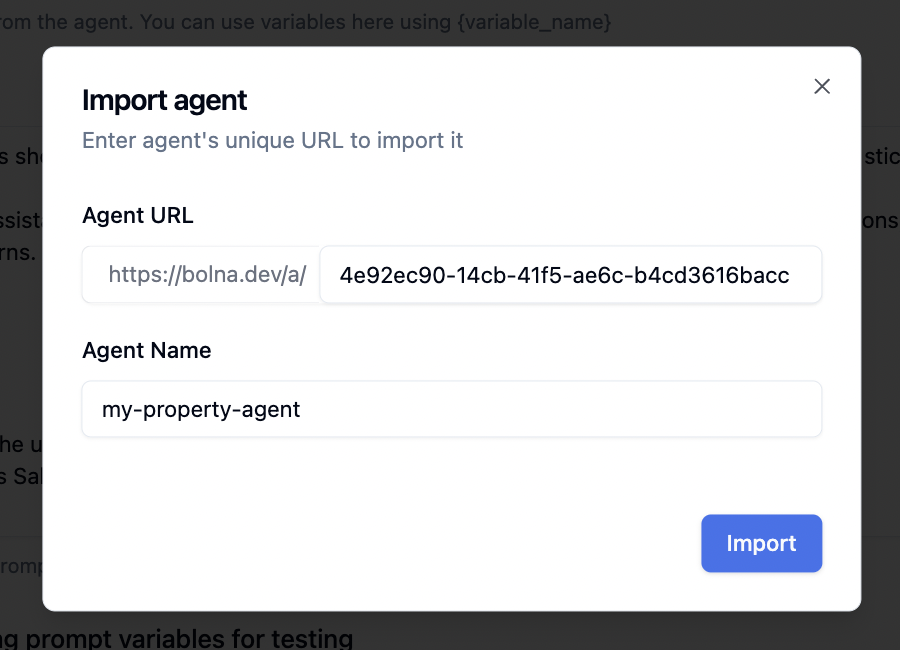
| **Import** | Import an existing agent configuration using an [agent ID](/docs/copy-import-agent) |
| **Search** | Quickly find agents by name |
| **Agent List** | Click any agent to open its configuration |
New agents are created in **draft** status until you save them.
***
## Agent Header
The header bar displays key information and quick actions for your selected agent.
| Element | Description |
| ------------------- | -------------------------------------------------------- |
| **Agent Name** | Your agent's display name |
| **Agent ID** | Copy for API integrations |
| **Share** | Generate a shareable link for team collaboration |
| **Cost per min** | Estimated cost breakdown per minute |
| **Routing** | Active routing region (e.g., India routing) |
| **Provider Status** | Status indicators for Transcriber, LLM, Voice, Telephony |
Receive a test call on your phone number
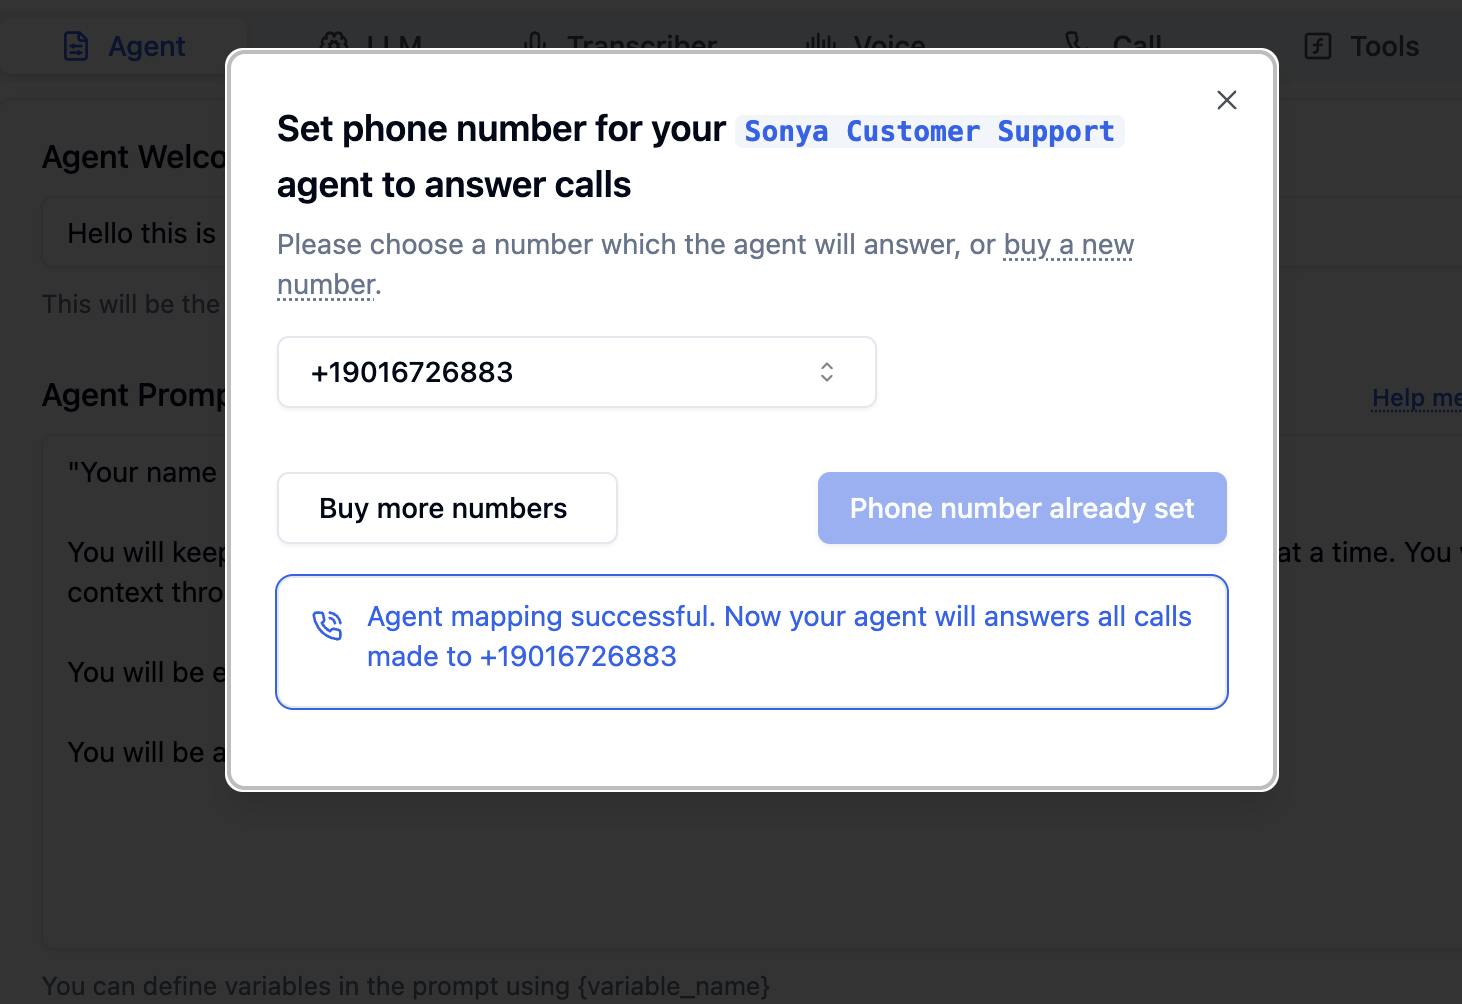
Configure this agent for inbound calls
***
## Configuration Tabs
Configure every aspect of your agent using the **8 specialized tabs**.
Prompts & welcome message
Model & knowledge base
Voice & transcription
Latency & interruptions
Telephony & voicemail
Functions & APIs
Webhooks & extraction
Caller matching
***
## Testing & Saving
Test your agent before deploying and save your changes.
### Testing Options
| Method | Description | Best For |
| ----------------------- | ------------------------------------- | ------------------------------------ |
| **Chat with agent** | Text-based conversation testing | Quick prompt iteration and debugging |
| **Get call from agent** | Receive a test call on your phone | Real-world voice experience |
| **Test via browser** | Make calls directly from your browser | Testing without using phone minutes |
**Pro tip:** Use "Chat with agent" for quick iterations, then validate with a real phone call before deploying!
### Save & Manage
| Action | Description |
| --------------------- | ---------------------------------------------------------------- |
| **Save agent** | Save your configuration — changes only take effect after saving! |
| **See all call logs** | View [call history](/docs/call-history), recordings, and transcripts |
| **Delete** | Remove the agent (use with caution) |
**Remember to save!** Your changes won't apply until you click **Save agent**.
***
## Quick Links
Step-by-step guide to creating your first agent
Import existing agent configurations
Purchase phone numbers for inbound calls
View call logs, recordings, and transcripts
***
## Next Steps
Configure prompts and welcome message
Choose your language model and knowledge base
Set up voice and transcription
Upload documents for context-aware responses
# Connect Function Tools and API Integrations
Source: https://www.bolna.ai/docs/agent-setup/tools-tab
Add built-in function tools and custom API integrations to your Bolna Voice AI agent. Enable calendar booking, call transfers, and connect any external API endpoint.
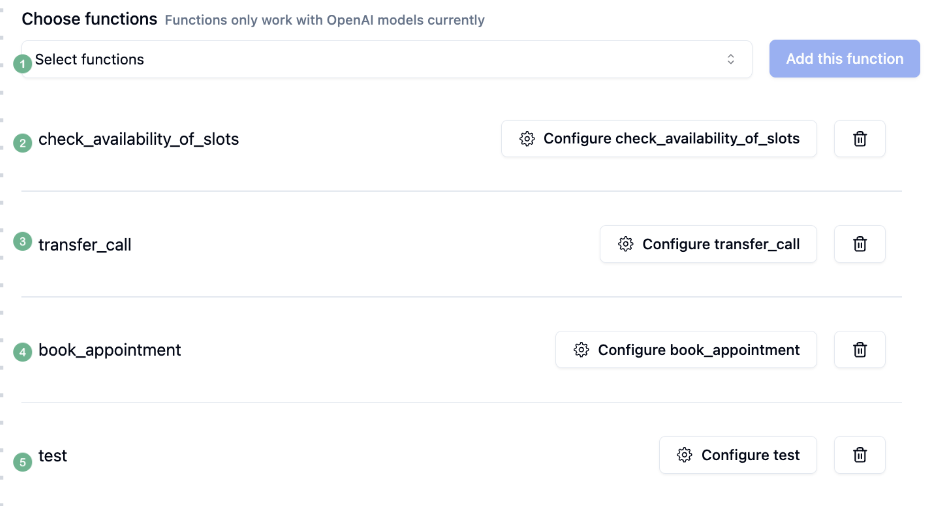
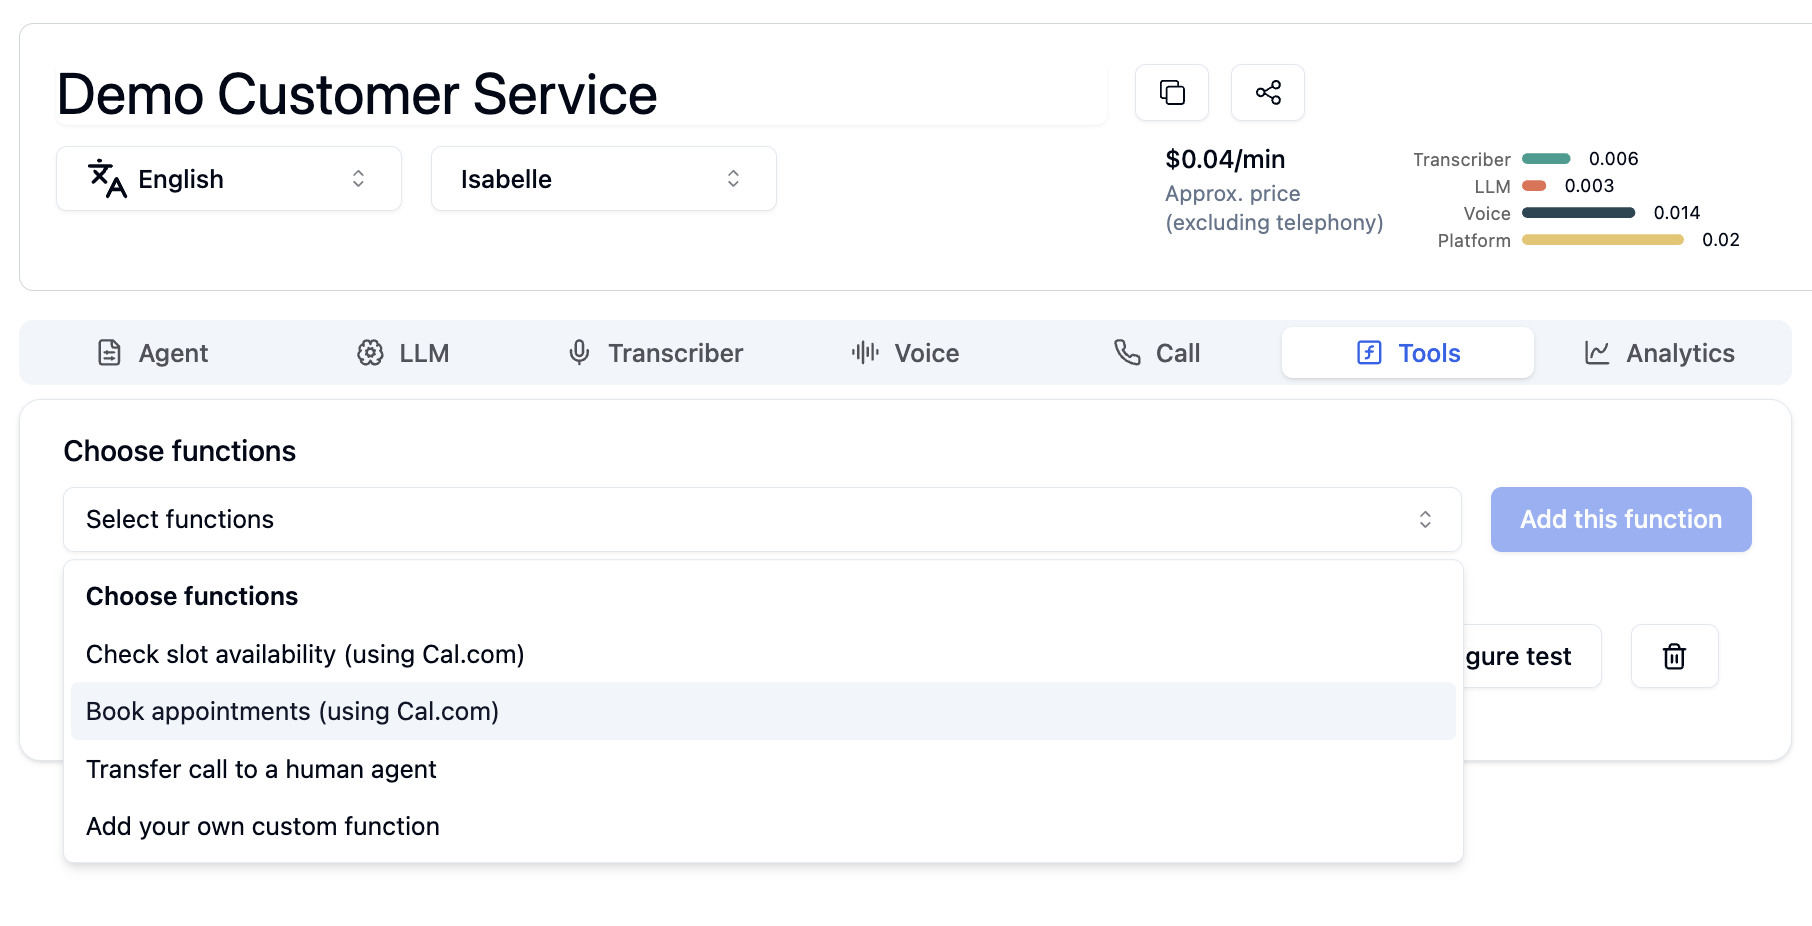
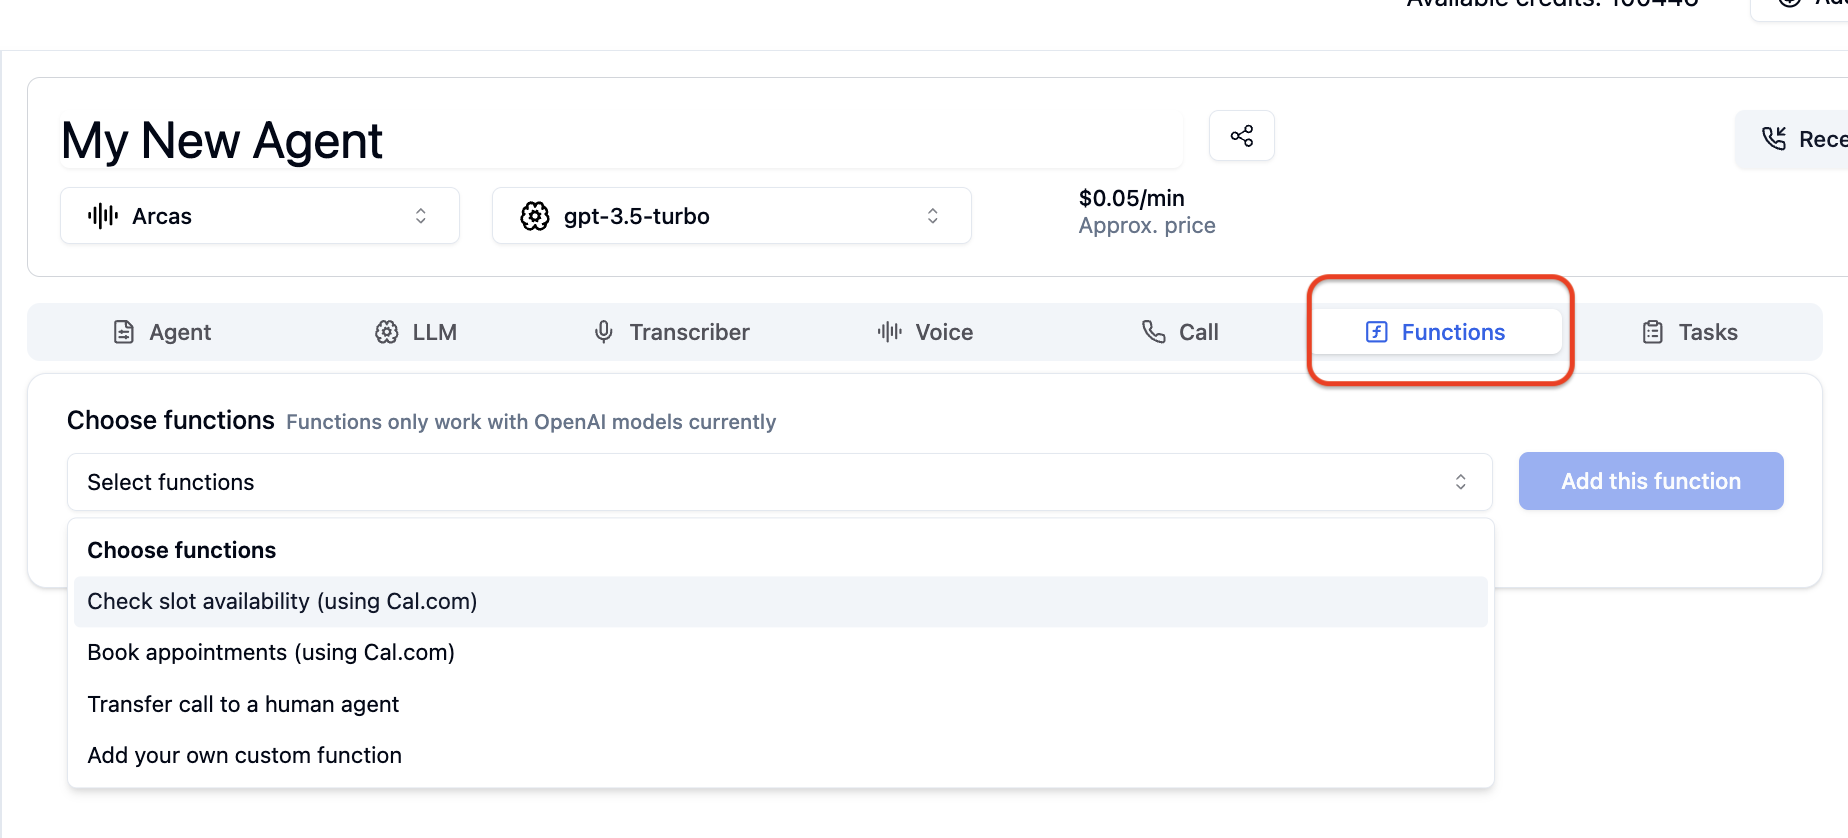
The Tools Tab is where you connect external tools and APIs that your agent's LLM can call during live conversations. This lets your agent take real-time actions like booking appointments, transferring calls, or fetching data from your own backend.
***
## Built-in Tools
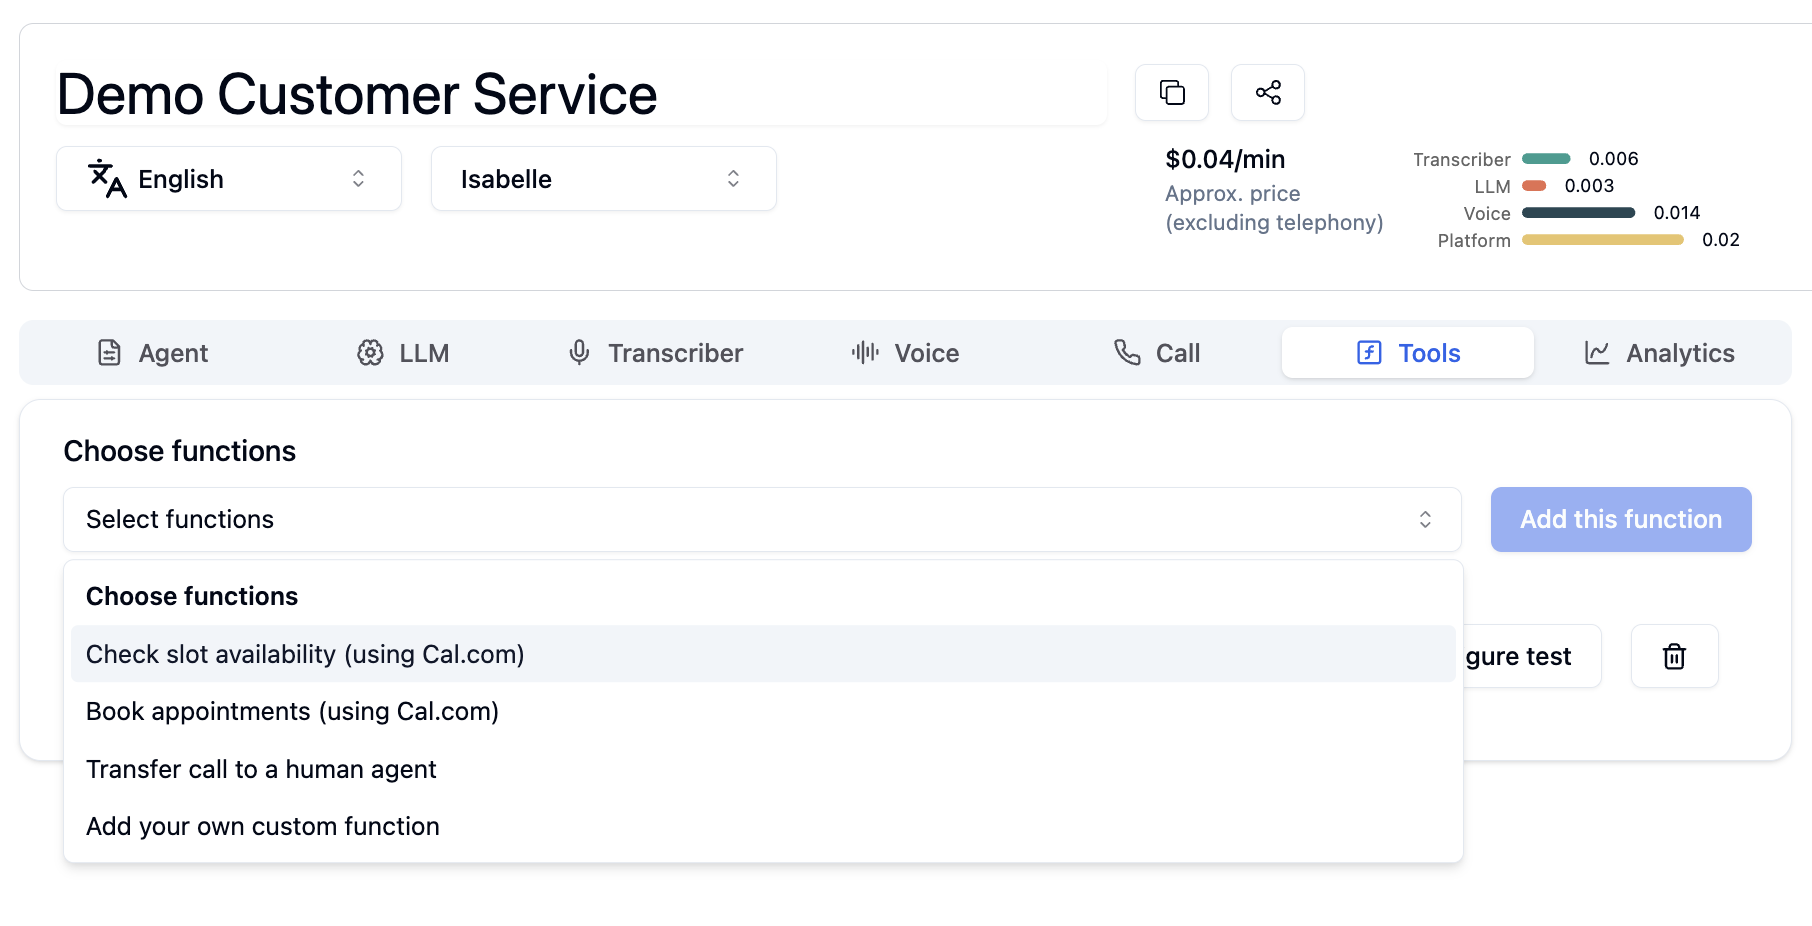
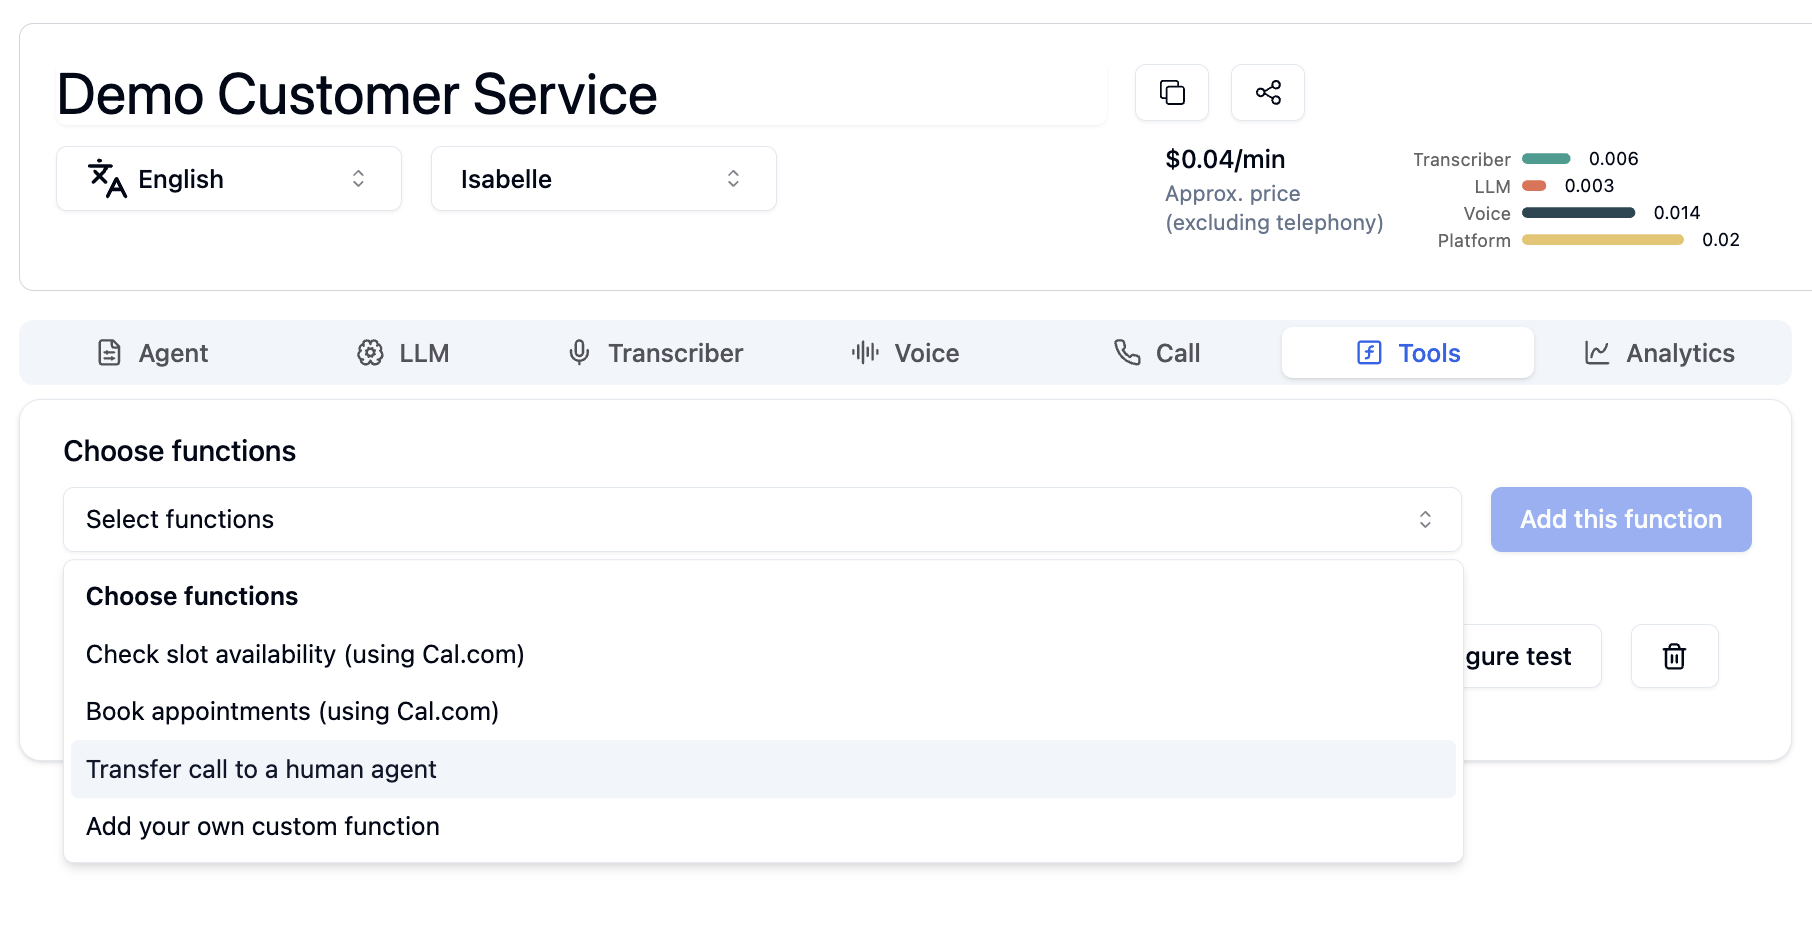
Bolna provides ready-to-use tools for common voice agent workflows. Click **+ Add** next to any tool to enable it for your agent.
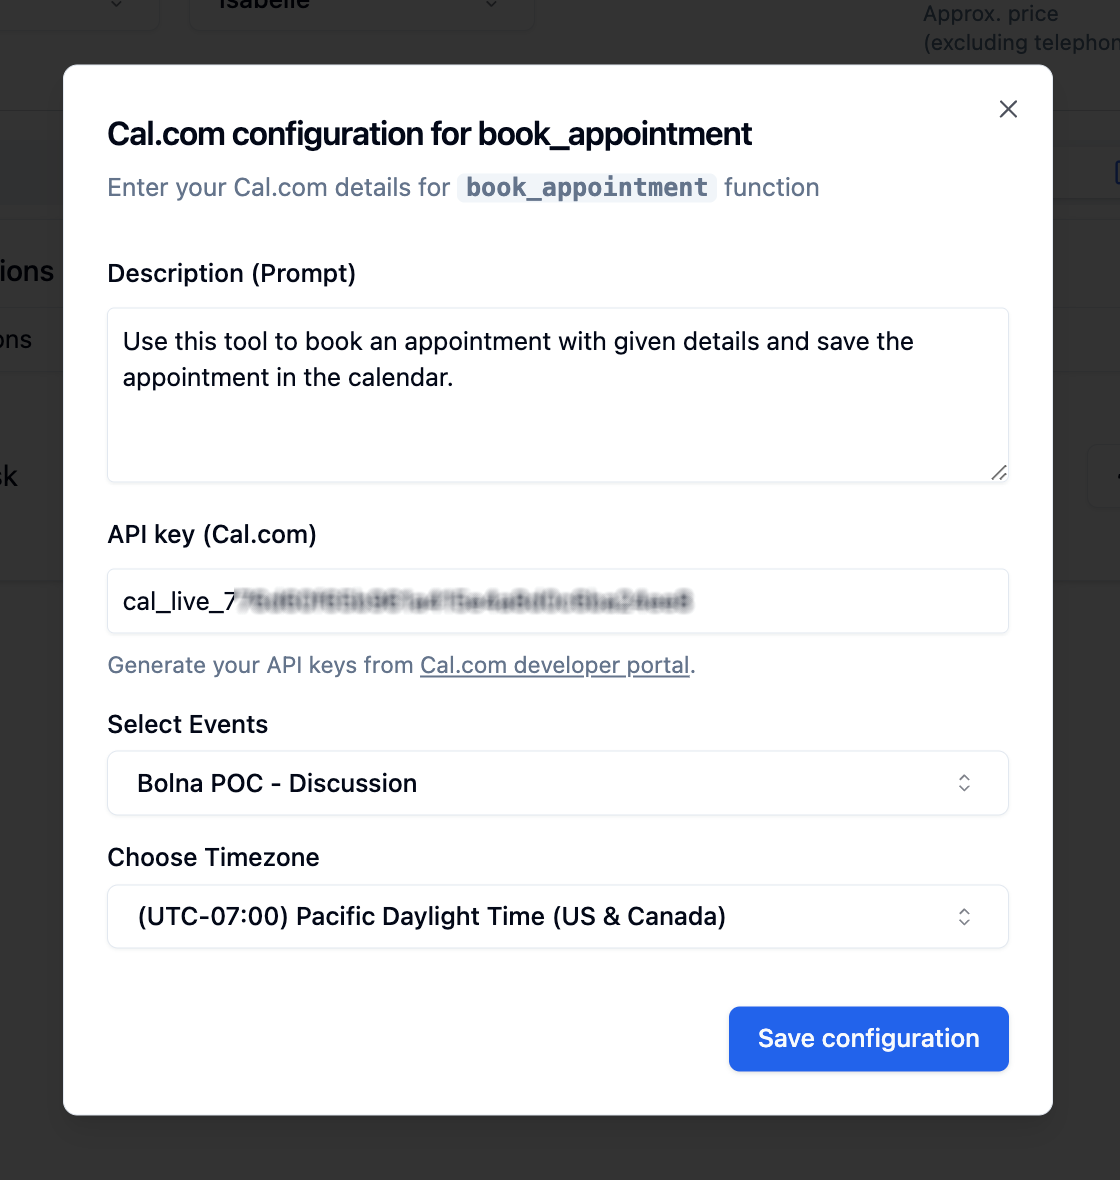
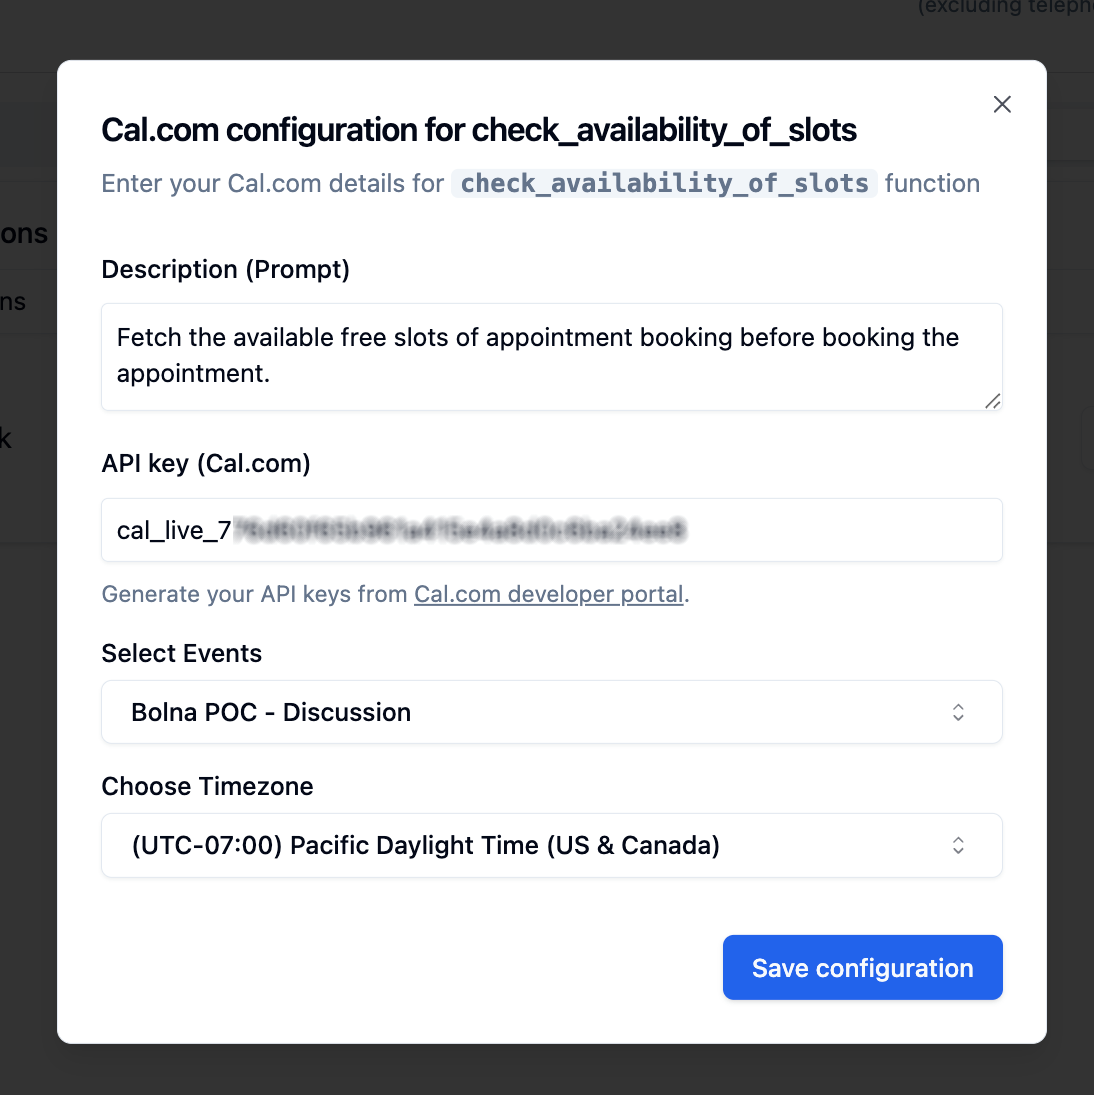
Check open meeting slots from Cal.com in real-time during a call
Create calendar bookings directly via Cal.com during the conversation
Route the call to a human agent or another phone number
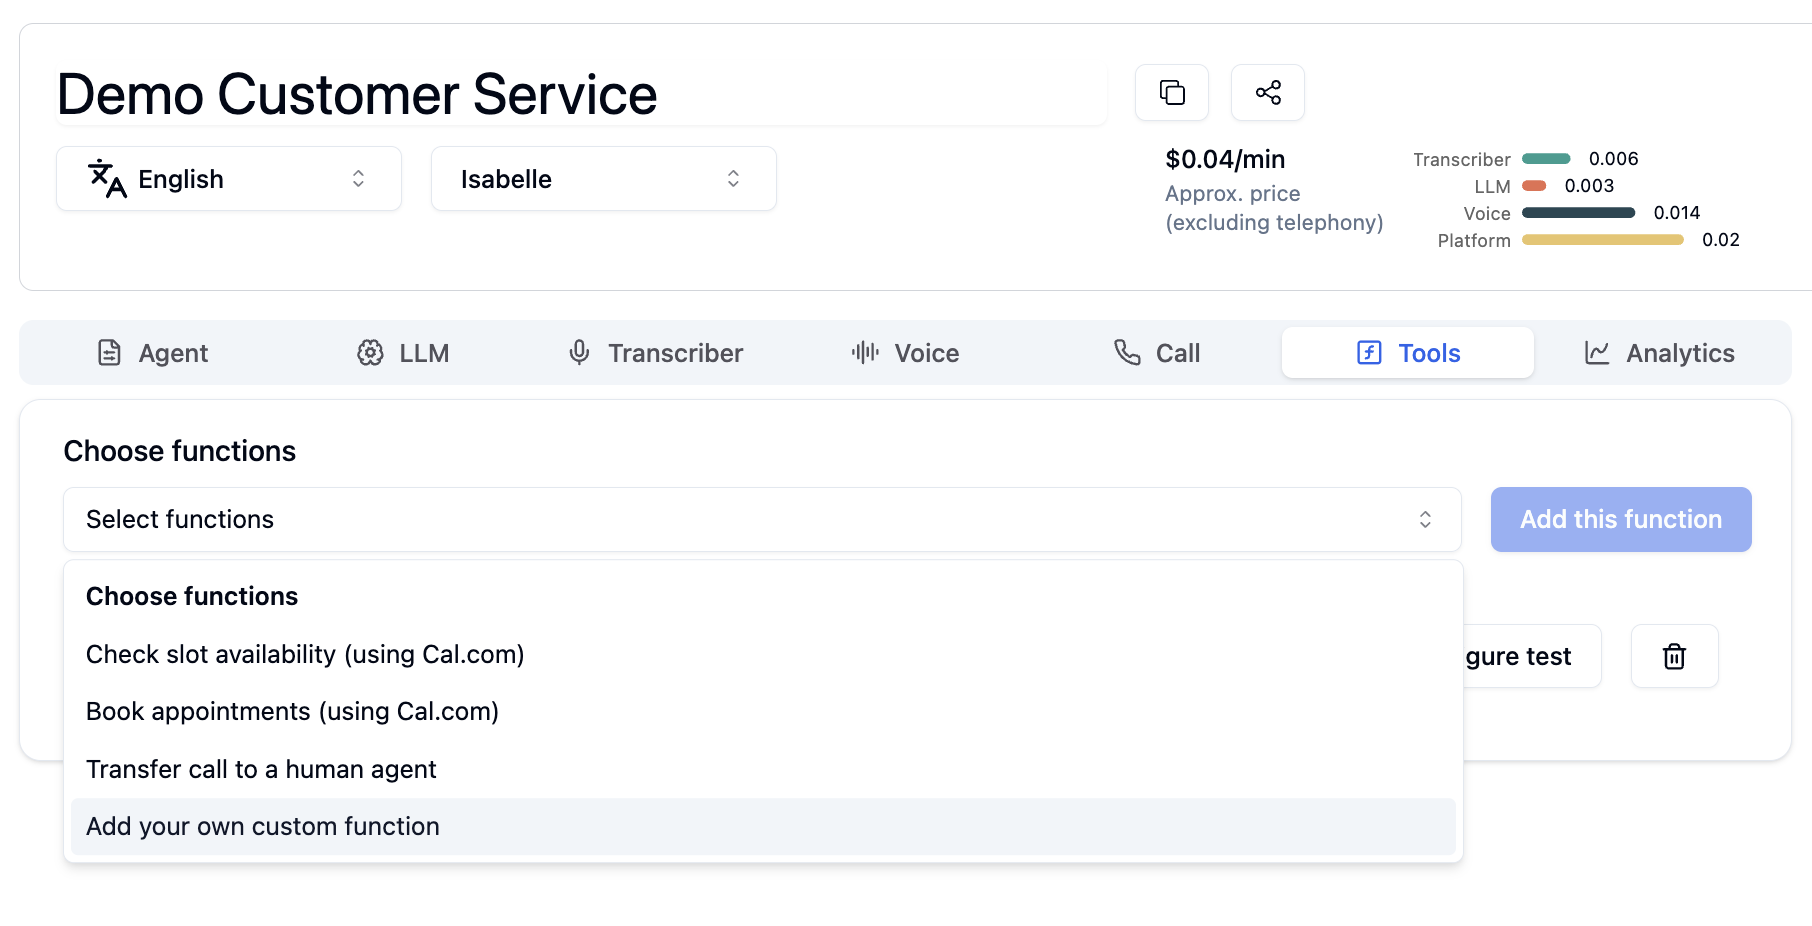
Connect any external API endpoint with a custom function schema
***
## Custom Functions
For integrations beyond the built-in tools, use **Custom Functions** to connect any API endpoint. You can create a custom function in two ways:
### Write Manually
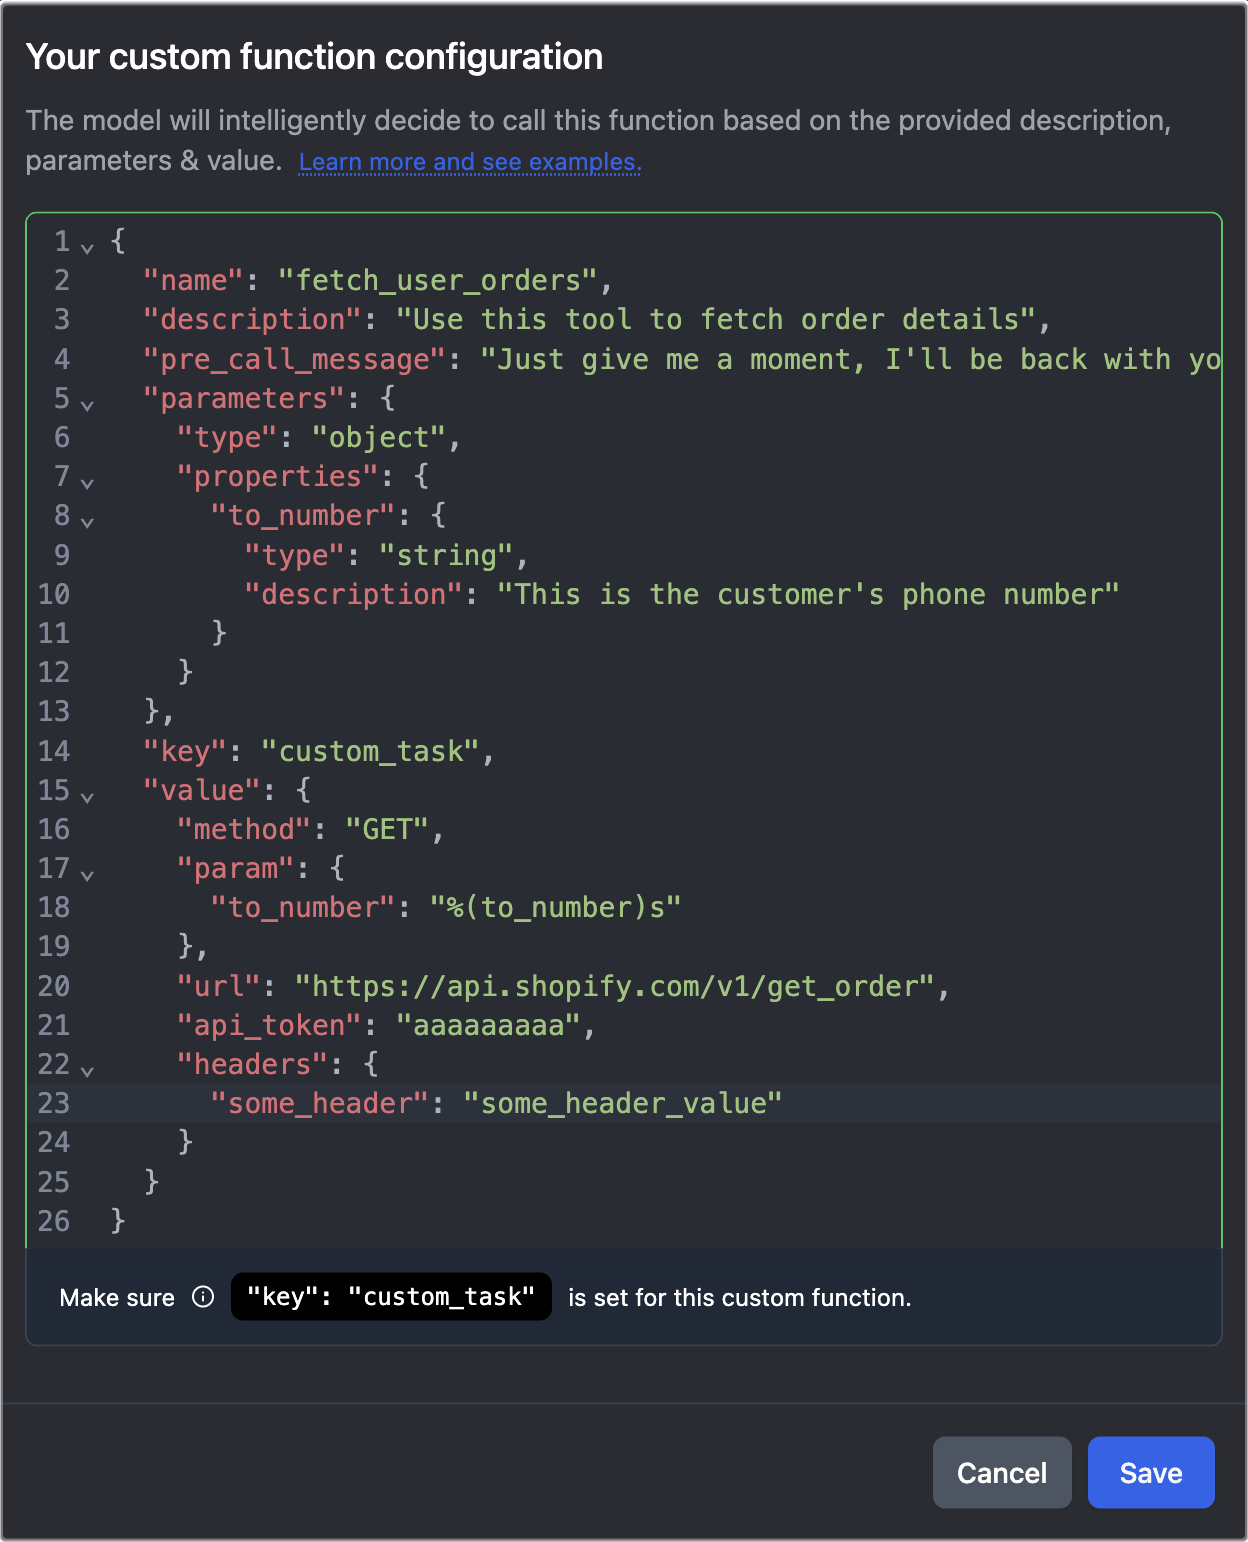
Click **Write manually** to open a JSON editor where you define the function schema from scratch. This gives you full control over the function name, description, parameters, and API configuration.
The fields `name`, `description`, `key`, and `method` are mandatory. The `key` must always be set to `"custom_task"`. Do not change this value.
### Generate from cURL
Click **Generate from cURL** to paste an existing cURL command. Bolna will parse the request and auto-generate a function schema that you can review and edit before adding it to your agent.
After clicking **Generate function**, Bolna parses the cURL and produces a ready-to-edit function configuration:
The cURL import is a starting point. Always review the generated function name, description, and parameters before submitting. See the [Custom Functions guide](/docs/tool-calling/custom-function-calls#generate-from-curl) for a detailed walkthrough.
***
## Managing Added Tools
Once you add a tool, it appears as a configurable card in the Tools Tab.
| Action | How to do it |
| ------------- | ------------------------------------------------------------- |
| **Configure** | Click the tool card to edit its parameters and API connection |
| **Delete** | Click the delete icon on the tool card to remove it |
***
## Next Steps
Full schema reference, examples, and best practices
Set up call routing to human agents
Configure webhooks and post-call analytics
Pass dynamic data into your function tools
# Agents Library
Source: https://www.bolna.ai/docs/agents-library
Browse and import pre-built Voice AI agent templates. Deploy production-ready agents for support, sales, scheduling, and more in minutes.
## What is the Agents Library?
The Bolna Agents Library provides **ready-to-use Voice AI agent templates** that you can import and customize for your specific use case. Each template comes pre-configured with optimized prompts, workflows, and settings, allowing you to deploy production-ready agents in minutes.
Browse agents by industry below and click **Import this agent** to add it to your account.
Adjust the prompts, [context variables](/docs/using-context), and settings in the [Agent Setup](/docs/agent-setup/agent-tab) to match your needs.
Test using the Playground chat or by [making test calls](/docs/making-outgoing-calls).
Go live for [inbound](/docs/receiving-incoming-calls) or [outbound](/docs/making-outgoing-calls) calling.
Every agent below works in **English + Hindi** and can be imported with one click.
***
## Pre-built Agent Templates
Provides 24/7 inbound call answering for FAQs, order tracking, and customer triage.
**Industry:** E-Commerce
**Languages:** English + Hindi
**Call to test:** [+918035317400](tel:+918035317400)
Import this agent →
Calls customers with abandoned carts to recover lost sales through personalized outreach.
**Industry:** E-Commerce
**Languages:** English + Hindi
**Call to test:** [+918035317449](tel:+918035317449)
Import this agent →
Handles last-mile logistics tasks like cash-on-delivery confirmation and delivery scheduling.
**Industry:** E-Commerce
**Languages:** English + Hindi
**Call to test:** [+918035317450](tel:+918035317450)
Import this agent →
Keeps users engaged with feature upgrades, product launches, and important updates.
**Industry:** BFSI\
**Languages:** English + Hindi
**Call to test:** [+918035317403](tel:+918035317403)
Import this agent →
Automates reminders for EMIs, collections, form-filling deadlines, and payment follow-ups.
**Industry:** BFSI\
**Languages:** English + Hindi
**Call to test:** [+918035317402](tel:+918035317402)
Import this agent →
Helps fintech companies sell credit cards through intelligent Hindi conversations.
**Industry:** BFSI\
**Languages:** English
Import this agent →
Helps fintech companies sell loans through intelligent Hindi conversations and financial expertise.
**Industry:** BFSI\
**Languages:** English
Import this agent →
Answers every call to handle clinic, hotel, and office scheduling automatically.
**Industry:** Hospitality
**Languages:** English + Hindi
**Call to test:** [+918035317405](tel:+918035317405)
Import this agent →
Conducts automated NPS, feedback, and product surveys with detailed personalized questioning.
**Industry:** Hospitality
**Languages:** English + Hindi
**Call to test:** [+918035317408](tel:+918035317408)
Import this agent →
Schedules salon appointments and collects client information for beauty businesses.
**Industry:** Hospitality
**Languages:** English
Import this agent →
Screens, interviews, and onboards candidates at scale with intelligent voice conversations.
**Industry:** Recruitment
**Languages:** English + Hindi
**Call to test:** [+918035317441](tel:+918035317441)
Import this agent →
Calls every lead to ask qualifying questions, answer FAQs, and warmly introduce the business.
**Industry:** Ed Tech
**Languages:** English + Hindi
**Call to test:** [+918035317443](tel:+918035317443)
Import this agent →
Conducts personalized guidance calls to warmly onboard users into health tech platforms.
**Industry:** Health Tech
**Languages:** English + Hindi
**Call to test:** [+918035317448](tel:+918035317448)
Import this agent →
Qualifies property leads (owner or broker) and collects detailed property information.
**Industry:** Real Estate
**Languages:** English
Import this agent →
Helps users plan weekends and vacations with personalized travel and leisure recommendations.
**Industry:** Real Estate
**Languages:** English
Import this agent →
***
## Quick Reference
| Agent | Industry | Languages | Import |
| ------------------- | ----------- | --------------- | ------------------------------------------------------------------- |
| Customer Support | E-Commerce | English + Hindi | [Import →](https://bolna.ai/a/4f0d937f-3d07-479b-9352-9f3271285d8a) |
| Cart Abandonment | E-Commerce | English + Hindi | [Import →](https://bolna.ai/a/57ad261e-2bbc-4fb4-aefd-74b92ed1bed5) |
| COD Confirmation | E-Commerce | English + Hindi | [Import →](https://bolna.ai/a/42a04bee-a4e9-442c-bf85-c6e6064ad976) |
| Recruitment Agent | Recruitment | English + Hindi | [Import →](https://bolna.ai/a/9a2faf53-00b8-4213-8f8c-cad6011d9f9b) |
| Lead Qualification | Ed Tech | English + Hindi | [Import →](https://bolna.ai/a/a8ff62ed-a86e-4881-80cd-5593d1391afb) |
| Onboarding Agent | Health Tech | English + Hindi | [Import →](https://bolna.ai/a/3f5b1997-17cc-4a14-9e02-a90ba0dfeb5c) |
| Announcements Agent | BFSI | English + Hindi | [Import →](https://bolna.ai/a/09344ad0-0991-440b-89ff-51ba4fe7d7b1) |
| Reminders Agent | BFSI | English + Hindi | [Import →](https://bolna.ai/a/88bb2f3c-cfc0-4f3d-b0a2-6ac962ba9737) |
| Front Desk Agent | Hospitality | English + Hindi | [Import →](https://bolna.ai/a/98183718-4bb6-457f-8e0f-9c0fa322bbba) |
| Surveys Agent | Hospitality | English + Hindi | [Import →](https://bolna.ai/a/e3f31313-c28c-452e-9026-70edd7042691) |
| Salon Booking Agent | Hospitality | English | [Import →](https://bolna.ai/a/547e8f2d-d231-4fc6-a9f1-b90801d672b8) |
| Property Tech Agent | Real Estate | English | [Import →](https://bolna.ai/a/d3dbc421-b964-4c12-8afa-e087e440cb3e) |
| Weekend Planner | Real Estate | English | [Import →](https://bolna.ai/a/00b05a0f-d451-4afe-b55f-7e2a3fa4896d) |
| Sales - Credit Card | BFSI | English | [Import →](https://bolna.ai/a/68762ade-7e39-4b06-96e6-0d98863fbd0b) |
| Sales - Loans | BFSI | English | [Import →](https://bolna.ai/a/29780b7b-876e-40a6-96bd-069b8409dedb) |
***
## Next Steps
Build a custom agent from scratch
Import or duplicate existing agents
Configure prompts, voice, and tools
# Create Voice AI Agent API (deprecated)
Source: https://www.bolna.ai/docs/api-reference/agent/create
POST /agent
Learn how to create new agents with Bolna APIs, enabling customized tasks, prompts, and configurations for Bolna voice AI agents.
These APIs have now been deprecated.
Please use the latest [**v2 APIs**](/docs/api-reference/agent/v2/overview).
# Retrieve Voice AI Agent Details API (deprecated)
Source: https://www.bolna.ai/docs/api-reference/agent/get
GET /agent/{agent_id}
Retrieve detailed Voice AI agent information, including configuration, status, and tasks, using Bolna APIs.
These APIs have now been deprecated.
Please use the latest [**v2 APIs**](/docs/api-reference/agent/v2/overview).
# List all Voice AI Agents API (deprecated)
Source: https://www.bolna.ai/docs/api-reference/agent/get_all
GET /agent/all
List all Voice AI agents under your account, along with their names, statuses, and creation dates, using Bolna APIs.
These APIs have now been deprecated.
Please use the latest [**v2 APIs**](/docs/api-reference/agent/v2/overview).
# Get All Voice AI Agent Executions API
Source: https://www.bolna.ai/docs/api-reference/agent/get_all_agent_executions
GET /agent/{agent_id}/executions
Access all execution records for a specific agent, providing insights into performance and past interactions with Bolna APIs.
# Bolna Voice AI Agent APIs Overview (deprecated)
Source: https://www.bolna.ai/docs/api-reference/agent/overview
Explore Bolna Voice AI Agent APIs overview, featuring endpoints for creating, managing, and executing autonomous voice agents.
These APIs have now been deprecated.
Please use the latest [**v2 APIs**](/docs/api-reference/agent/v2/overview).
## Endpoints
```
POST /agent
GET /agent
PUT /agent/:agent_id
PATCH /agent/:agent_id
GET /agent/all
```
## Agent Object Attributes
### `agent_config`
* `agent_name` *string* **(required)**
Name of the agent
* `agent_welcome_message` *string* **(required)**
Initial agent welcome message. you can pass dynamic values here using variables encloed within `{}`
* `webhook_url` *string* **(required)**
Get real-time details of the call progress and call data on a webhook. All supported events are listed in [Poll call data using webhooks](/docs/polling-call-status-webhooks)
* `tasks` *array* **(required)**
Definitions and configuration for the agentic tasks
### `agent_prompts`
Prompts to be provided to the agent.
# Patch Update to Voice AI Agent API (deprecated)
Source: https://www.bolna.ai/docs/api-reference/agent/patch_update
PATCH /agent/{agent_id}
Learn how to partially update properties. Update Bolna Voice AI agent name, welcome message, webhook URL, voice settings, and prompts, using this endpoint.
These APIs have now been deprecated.
Please use the latest [**v2 APIs**](/docs/api-reference/agent/v2/overview).
# Update Voice AI Agent API (deprecated)
Source: https://www.bolna.ai/docs/api-reference/agent/update
PUT /agent/{agent_id}
Update agent configurations, tasks, and prompts to refine behavior and capabilities using Bolna Voice AI agent APIs.
These APIs have now been deprecated.
Please use the latest [**v2 APIs**](/docs/api-reference/agent/v2/overview).
# Create Voice AI Agent API
Source: https://www.bolna.ai/docs/api-reference/agent/v2/create
POST /v2/agent
Learn how to create new agents with Bolna APIs, enabling customized tasks, prompts, and configurations for Bolna voice AI agents.
# Delete Voice AI Agent API
Source: https://www.bolna.ai/docs/api-reference/agent/v2/delete
DELETE /v2/agent/{agent_id}
Use Bolna APIs to delete agents and their related data, ensuring proper cleanup of batches, executions, and configurations.
This deletes **ALL** agent data including all batches, all executions, etc.
# Retrieve Voice AI Agent Details API
Source: https://www.bolna.ai/docs/api-reference/agent/v2/get
GET /v2/agent/{agent_id}
Retrieve detailed Voice AI agent information, including configuration, status, and tasks, using Bolna APIs.
# Retrieve Voice AI Agent Execution API
Source: https://www.bolna.ai/docs/api-reference/agent/v2/get_agent_execution
GET /agent/{agent_id}/execution/{execution_id}
Fetch specific execution details of a Voice AI agent, including conversation times, statuses, and metrics, via Bolna APIs.
# List all Voice AI Agents API
Source: https://www.bolna.ai/docs/api-reference/agent/v2/get_all
GET /v2/agent/all
List all Voice AI agents under your account, along with their names, statuses, and creation dates, using Bolna APIs.
# Get All Voice AI Agent Executions API
Source: https://www.bolna.ai/docs/api-reference/agent/v2/get_all_agent_executions
GET /v2/agent/{agent_id}/executions
Access all execution records for a specific agent, providing insights into performance and past interactions with Bolna APIs.
## Pagination
This API supports pagination using the `page_number` and `page_size` query parameters. You can utilize `has_more` in the API response to determine if you should fetch the next page. You can learn more about it from the [pagination documentation](/docs/api-reference/pagination).
# Bolna Voice AI Agent APIs Overview
Source: https://www.bolna.ai/docs/api-reference/agent/v2/overview
Explore Bolna Voice AI Agent APIs overview, featuring endpoints for creating, managing, and executing autonomous voice agents.
## Endpoints
```
POST /v2/agent
GET /v2/agent
PUT /v2/agent/:agent_id
GET /v2/agent/all
```
## Agent Object Attributes
### `agent_config`
* `agent_name` *string* **(required)**
Name of the agent
* `agent_welcome_message` *string* **(required)**
Initial agent welcome message. you can pass dynamic values here using variables encloed within `{}`
* `webhook_url` *string* **(required)**
Get real-time details of the call progress and call data on a webhook. All supported events are listed in [Poll call data using webhooks](/docs/polling-call-status-webhooks)
* `tasks` *array* **(required)**
Definitions and configuration for the agentic tasks
### `agent_prompts`
Prompts to be provided to the agent.
# Patch Update to Voice AI Agent API
Source: https://www.bolna.ai/docs/api-reference/agent/v2/patch_update
PATCH /v2/agent/{agent_id}
Learn how to partially update properties. Update Bolna Voice AI agent name, welcome message, webhook URL, voice settings, and prompts, using this endpoint.
Currently, only the following agent attributes can be updated for the `PATCH` update.
* `agent_name`
* `agent_welcome_message`
* `webhook_url`
* `synthesizer`
* `agent_prompts`
* `ingest_source_config`
* `telephony_provider`
If you are patching with `telephony_provider` set to `sip-trunk`, the next step is to [set the inbound agent](/docs/api-reference/inbound/agent) to map your SIP trunk phone number to an agent for receiving inbound calls.
# Stop Agent Queued Calls API
Source: https://www.bolna.ai/docs/api-reference/agent/v2/stop
POST /v2/agent/{agent_id}/stop
Use Bolna APIs to stop all queued calls for a specific agent, preventing any pending calls from being executed.
This stops **ALL** the queued calls for a given agent.
This endpoint stops all queued calls for the specified agent. Any calls that are currently in the queue waiting to be executed will be cancelled and will not be processed.
# Update Voice AI Agent API
Source: https://www.bolna.ai/docs/api-reference/agent/v2/update
PUT /v2/agent/{agent_id}
Update agent configurations, tasks, and prompts to refine behavior and capabilities using Bolna Voice AI agent APIs.
# Create Batch API
Source: https://www.bolna.ai/docs/api-reference/batches/create
POST /batches
Discover how to create a batch for Bolna Voice AI agent by uploading a CSV file containing user contact numbers and prompt variable details for users.
# Delete Batch API
Source: https://www.bolna.ai/docs/api-reference/batches/delete
DELETE /batches/{batch_id}
Understand how to delete a specific batch using its ID, effectively removing it from your scheduled or active batches.
# List Batch Executions API
Source: https://www.bolna.ai/docs/api-reference/batches/executions
GET /batches/{batch_id}/executions
Learn how to retrieve all executions from a batch, providing detailed information on each call's outcome and metrics.
# Get Batch API
Source: https://www.bolna.ai/docs/api-reference/batches/get_batch
GET /batches/{batch_id}
Find out how to retrieve details of a specific batch, including its creation time, status, call status and scheduled execution time.
# List All Batches API
Source: https://www.bolna.ai/docs/api-reference/batches/get_batches
GET /batches/{agent_id}/all
Explore how to list all batches associated with a particular Bolna Voice AI agent, providing an overview of their statuses, schedules and other relevant details
# Batch APIs Overview
Source: https://www.bolna.ai/docs/api-reference/batches/overview
Understand how to create and schedule multiple Bolna Voice AI calls together using Bolna Batch APIs for efficient call management.
## Endpoints
```
POST /batches
POST /batches/schedule
POST /batches/:batch_id/stop
GET /batches/:batch_id
GET /batches/:batch_id/executions
GET /batches/:agent_id
DELETE /batches/:batch_id
```
# Schedule Batch API
Source: https://www.bolna.ai/docs/api-reference/batches/schedule
POST /batches/{batch_id}/schedule
Learn how to schedule a batch for calling via Bolna Voice AI agent by specifying the batch ID and the desired execution time.
# Stop Batch API
Source: https://www.bolna.ai/docs/api-reference/batches/stop
POST /batches/{batch_id}/stop
Understand how to stop a running batch using its ID, allowing you to halt ongoing calls in the batch.
# Make Voice AI Call API
Source: https://www.bolna.ai/docs/api-reference/calls/make
POST /call
Learn how to initiate outbound phone calls using Bolna Voice AI agents. Start making phone calls using the agent ID and recipient's phone number.
# Calling APIs overview
Source: https://www.bolna.ai/docs/api-reference/calls/overview
Explore Bolna Calling APIs to invoke outbound Voice AI phone calls from your agents. This overview provides the available endpoints and their functionalities.
## Endpoints
```
POST /call
```
# Stop a Previously Initiated Voice AI Call API
Source: https://www.bolna.ai/docs/api-reference/calls/stop_call
POST /call/{execution_id}/stop
Learn how to stop a call when its status is `queued` or `scheduled` This API allows you to cancel pending calls before they are executed.
# Bulk Create Dispositions API
Source: https://www.bolna.ai/docs/api-reference/dispositions/bulk-create
POST /dispositions/bulk
Atomically create and link multiple dispositions to an agent in a single request.
Use bulk create when setting up a new agent with a complete set of dispositions, or when importing a disposition configuration from another source. Either all dispositions are created and linked, or none are — partial results are not possible.
# Create Disposition API
Source: https://www.bolna.ai/docs/api-reference/dispositions/create
POST /dispositions/
Create a new disposition and optionally link it to an agent in a single request.
At least one of `is_subjective` or `is_objective` must be `true`. When `is_objective` is `true`, you must provide `objective_options`. See the [ObjectiveOption schema](/docs/api-reference/dispositions/overview#objectiveoption-schema) for the full structure including nested `sub_options`.
# Delete Disposition API
Source: https://www.bolna.ai/docs/api-reference/dispositions/delete
DELETE /dispositions/{disposition_id}
Delete a disposition from your account. Only the owner can delete a disposition.
Deletion is permanent and cannot be undone. Historical call execution results that already contain this disposition's output are not affected — only future calls will stop evaluating it.
### Authorization
* **Regular users** can only delete dispositions they own (`created_by` matches their user ID).
* **Admins** can delete any disposition.
# Get Disposition API
Source: https://www.bolna.ai/docs/api-reference/dispositions/get
GET /dispositions/{disposition_id}
Retrieve a single disposition by ID, optionally scoped to a specific agent.
# List Dispositions API
Source: https://www.bolna.ai/docs/api-reference/dispositions/list
GET /dispositions/
Retrieve all dispositions accessible to your account, optionally scoped to a specific agent.
# Dispositions API Overview
Source: https://www.bolna.ai/docs/api-reference/dispositions/overview
Create and manage dispositions — the individual extraction units that power the Extractions feature in Bolna.
## What are Dispositions?
**Extractions** is the Bolna feature that automatically captures structured data from call transcripts after every call. Each extraction is configured as one or more **dispositions** — individual questions posed to an LLM against the transcript — grouped under named **categories**.
So the hierarchy is:
```
Agent
└── Extractions (feature)
└── Category (e.g. "Lead Quality")
└── Disposition (e.g. "Call Outcome")
```
Each disposition asks a single question and returns a **Free Text** response (`subjective`), a **Pre-defined** value selected from options you configure (`objective`), or both.
## Key Features
* **Organized by category**: Dispositions are grouped under categories, which appear as sections in the extraction results
* **Two answer types**: Free Text (`is_subjective`) and Pre-defined (`is_objective`), configurable independently or together
* **Typed free-text responses**: Constrain free-text answers to a specific format — `timestamp`, `numeric`, `boolean`, `email`, or a custom `regex` pattern — with automatic post-LLM validation
* **Confidence & reasoning**: Every result includes a confidence score (0.0–1.0) and an explanation of why the LLM produced that answer
* **Bulk creation**: Create and link multiple dispositions to an agent atomically in a single request
* **Copy-on-write updates**: Editing a shared disposition via a scoped agent automatically creates a private copy, keeping other agents unaffected
* **Model selection**: Choose the LLM model used for evaluation per disposition
## Endpoints
```
GET /dispositions/ List dispositions
GET /dispositions/{disposition_id} Get a single disposition
POST /dispositions/ Create a disposition
POST /dispositions/bulk Bulk-create dispositions for an agent
PUT /dispositions/{disposition_id} Update a disposition (copy-on-write aware)
DELETE /dispositions/{disposition_id} Delete a disposition
POST /v2/agent/{agent_id}/dispositions/test Test all dispositions for an agent against a transcript
```
## Disposition Object
```json theme={"system"}
{
"id": "3fa85f64-5717-4562-b3fc-2c963f66afa6",
"name": "Call Outcome",
"question": "What was the outcome of the call?",
"system_prompt": "You are analyzing a sales call transcript.",
"category": "Lead Quality",
"model": "gpt-4.1-mini",
"is_subjective": true,
"is_objective": true,
"subjective_type": "text",
"subjective_type_config": null,
"objective_options": [
{ "value": "interested", "condition": "Customer expressed genuine interest and agreed to a next step" },
{ "value": "not_interested", "condition": "Customer declined all proposals" },
{ "value": "follow_up", "condition": "Customer asked to be contacted again later" }
],
"agent_ids": ["agt_abc123"],
"created_by": "user_abc123",
"created_at": "2026-03-01T10:00:00Z",
"updated_at": "2026-03-15T14:30:00Z"
}
```
### Field Reference
| Field | Type | Description |
| ------------------------ | -------------- | ------------------------------------------------------------------------------------------------------------------- |
| `id` | UUID | Unique identifier |
| `name` | string | Display name shown in extraction results |
| `question` | string | The prompt sent to the LLM to evaluate the transcript |
| `system_prompt` | string | System context for the LLM (optional) |
| `category` | string | Category this disposition belongs to (default: `"General"`) |
| `model` | string | LLM used for evaluation (default: `"gpt-4.1-mini"`) |
| `is_subjective` | bool | Enable Free Text response |
| `is_objective` | bool | Enable Pre-defined value selection |
| `subjective_type` | string | Format constraint for free-text responses: `text` (default), `timestamp`, `numeric`, `boolean`, `email`, or `regex` |
| `subjective_type_config` | object \| null | Configuration for `regex` subjective type. Must include `pattern` (required) and optionally `description` |
| `objective_options` | array \| null | Required when `is_objective` is `true` |
| `agent_ids` | array | Agent IDs this disposition is linked to |
| `created_by` | string | ID of the user who created this disposition |
| `created_at` | string | ISO 8601 timestamp when the disposition was created |
| `updated_at` | string | ISO 8601 timestamp of the last update |
### ObjectiveOption Schema
```json theme={"system"}
{
"value": "interested",
"condition": "Customer expressed genuine interest and agreed to a next step",
"sub_options": []
}
```
`sub_options` is optional and supports the same recursive `ObjectiveOption` structure for hierarchical classifications.
For a full walkthrough of the Extractions feature, answer types, output format, and best practices, see the [Using Extractions](/docs/using-extractions) guide.
# Test Dispositions API
Source: https://www.bolna.ai/docs/api-reference/dispositions/test
POST /v2/agent/{agent_id}/dispositions/test
Test all dispositions linked to an agent against a transcript to preview results before live calls.
Runs **all dispositions linked to the specified agent** against a provided transcript and returns the grouped results. Useful for validating your disposition setup before going live.
The response `extracted_data` is grouped by category and disposition name, in the same format as post-call execution data.
# Update Disposition API
Source: https://www.bolna.ai/docs/api-reference/dispositions/update
PUT /dispositions/{disposition_id}
Update a disposition. When scoped to an agent, shared dispositions are copied before editing to protect other agents.
## Scoped vs. Unscoped Mode
### Scoped mode (recommended) — `agent_id` provided
The API checks whether the disposition is **exclusive** to the specified agent (i.e., not shared with other agents):
* **Case 1: Disposition is exclusive to this agent → Edit in place.** Returns `200 OK`.
* **Case 2: Disposition is shared → Copy-on-write.** A new private copy is created for this agent, and the agent is re-linked to the copy. The original disposition is unchanged. Returns `201 Created`.
A `201` response means a **new disposition ID was created**. If you're storing the disposition ID (e.g., in your own database), update your reference to the new ID returned in the response. The original `disposition_id` now belongs to other agents; your agent uses the new copy.
### Unscoped mode — no `agent_id`
* Admins can update any disposition in place.
* Non-admin users can only update dispositions they own.
# Get Batch Executions API
Source: https://www.bolna.ai/docs/api-reference/executions/get_batch_executions
GET /batches/{batch_id}/executions
Retrieve all executions for specific batches using Bolna APIs. This endpoint provides detailed information on each call's outcome and metrics within the batch.
# Retrieve Voice AI Execution API
Source: https://www.bolna.ai/docs/api-reference/executions/get_execution
GET /executions/{execution_id}
Fetch details of a specific phone call execution by its ID using Bolna APIs. This includes information such as conversation time, status, and telephony data.
# Retrieve Voice AI Execution Raw Logs API
Source: https://www.bolna.ai/docs/api-reference/executions/get_execution_raw_logs
GET /executions/{execution_id}/log
Fetch raw logs of a specific phone call execution by its ID using Bolna APIs. This includes prompts, requests, responses, and optional LLM reasoning summaries when available.
For each item in `data`, when **`component`** is **`llm`** and **`type`** is **`response`**, the assistant text is in **`data`**. If the model exposed traceable reasoning for that turn, **`reasoning_content`** is also set; otherwise the field is omitted. Use this to debug or display model thinking alongside the spoken reply.
# Get All Voice AI Agent Executions API
Source: https://www.bolna.ai/docs/api-reference/executions/get_executions
GET /v2/agent/{agent_id}/executions
Retrieve all executions performed by a specific agent using Bolna APIs. This endpoint provides a comprehensive history of the agent's calls and conversations.
## Pagination
This API supports pagination using the `page_number` and `page_size` query parameters. You can utilize `has_more` in the API response to determine if you should fetch the next page. You can learn more about it from the [pagination documentation](/docs/api-reference/pagination).
# Executions APIs overview
Source: https://www.bolna.ai/docs/api-reference/executions/overview
Access your Voice AI agents call and conversation history using Bolna Executions APIs. This page details the available endpoints for managing call executions.
## Endpoints
```
GET /executions/:execution_id
GET /batch/:batch_id/executions
GET /v2/agent/:agent_id/executions
GET /executions/:execution_id/log
```
# Set Inbound Agent API
Source: https://www.bolna.ai/docs/api-reference/inbound/agent
POST /inbound/setup
Configure Bolna Voice AI agent to handle inbound calls automatically by associating it with a specific phone number using Bolna APIs.
# Inbound Bolna Voice AI Agent APIs Overview
Source: https://www.bolna.ai/docs/api-reference/inbound/overview
Discover how to set up Bolna Voice AI agents to answer inbound calls, enabling responsive communication channels.
## Endpoints
```
POST /inbound/setup
POST /inbound/unlink
```
# Remove Inbound Agent API
Source: https://www.bolna.ai/docs/api-reference/inbound/unlink
POST /inbound/unlink
Remove and unlink a Bolna Voice AI agent from a specific phone number to disable automated inbound voice call answering by AI agents.
# Bolna API Documentation
Source: https://www.bolna.ai/docs/api-reference/introduction
Use and leverage Bolna Voice AI using APIs through HTTP requests from any language in your applications and workflows.
## What is the Bolna API?
The Bolna API enables you to programmatically create, configure, and manage Voice AI agents from your own applications. Whether you are building complex workflows, automating customer support, or integrating voice capabilities into your existing products, our REST API provides everything you need.
The API uses predictable, resource-oriented URLs, accepts JSON-encoded request bodies, returns JSON-encoded responses, and uses standard HTTP response codes and authentication.
You must have an active Bolna account to generate and use API keys. If you don't have one, [sign up here](https://platform.bolna.ai).
***
## Authentication
All Bolna API endpoints require authentication using an API key. You must include this key in the `Authorization` header of all your HTTP requests using the `Bearer` scheme.
### How to generate an API Key
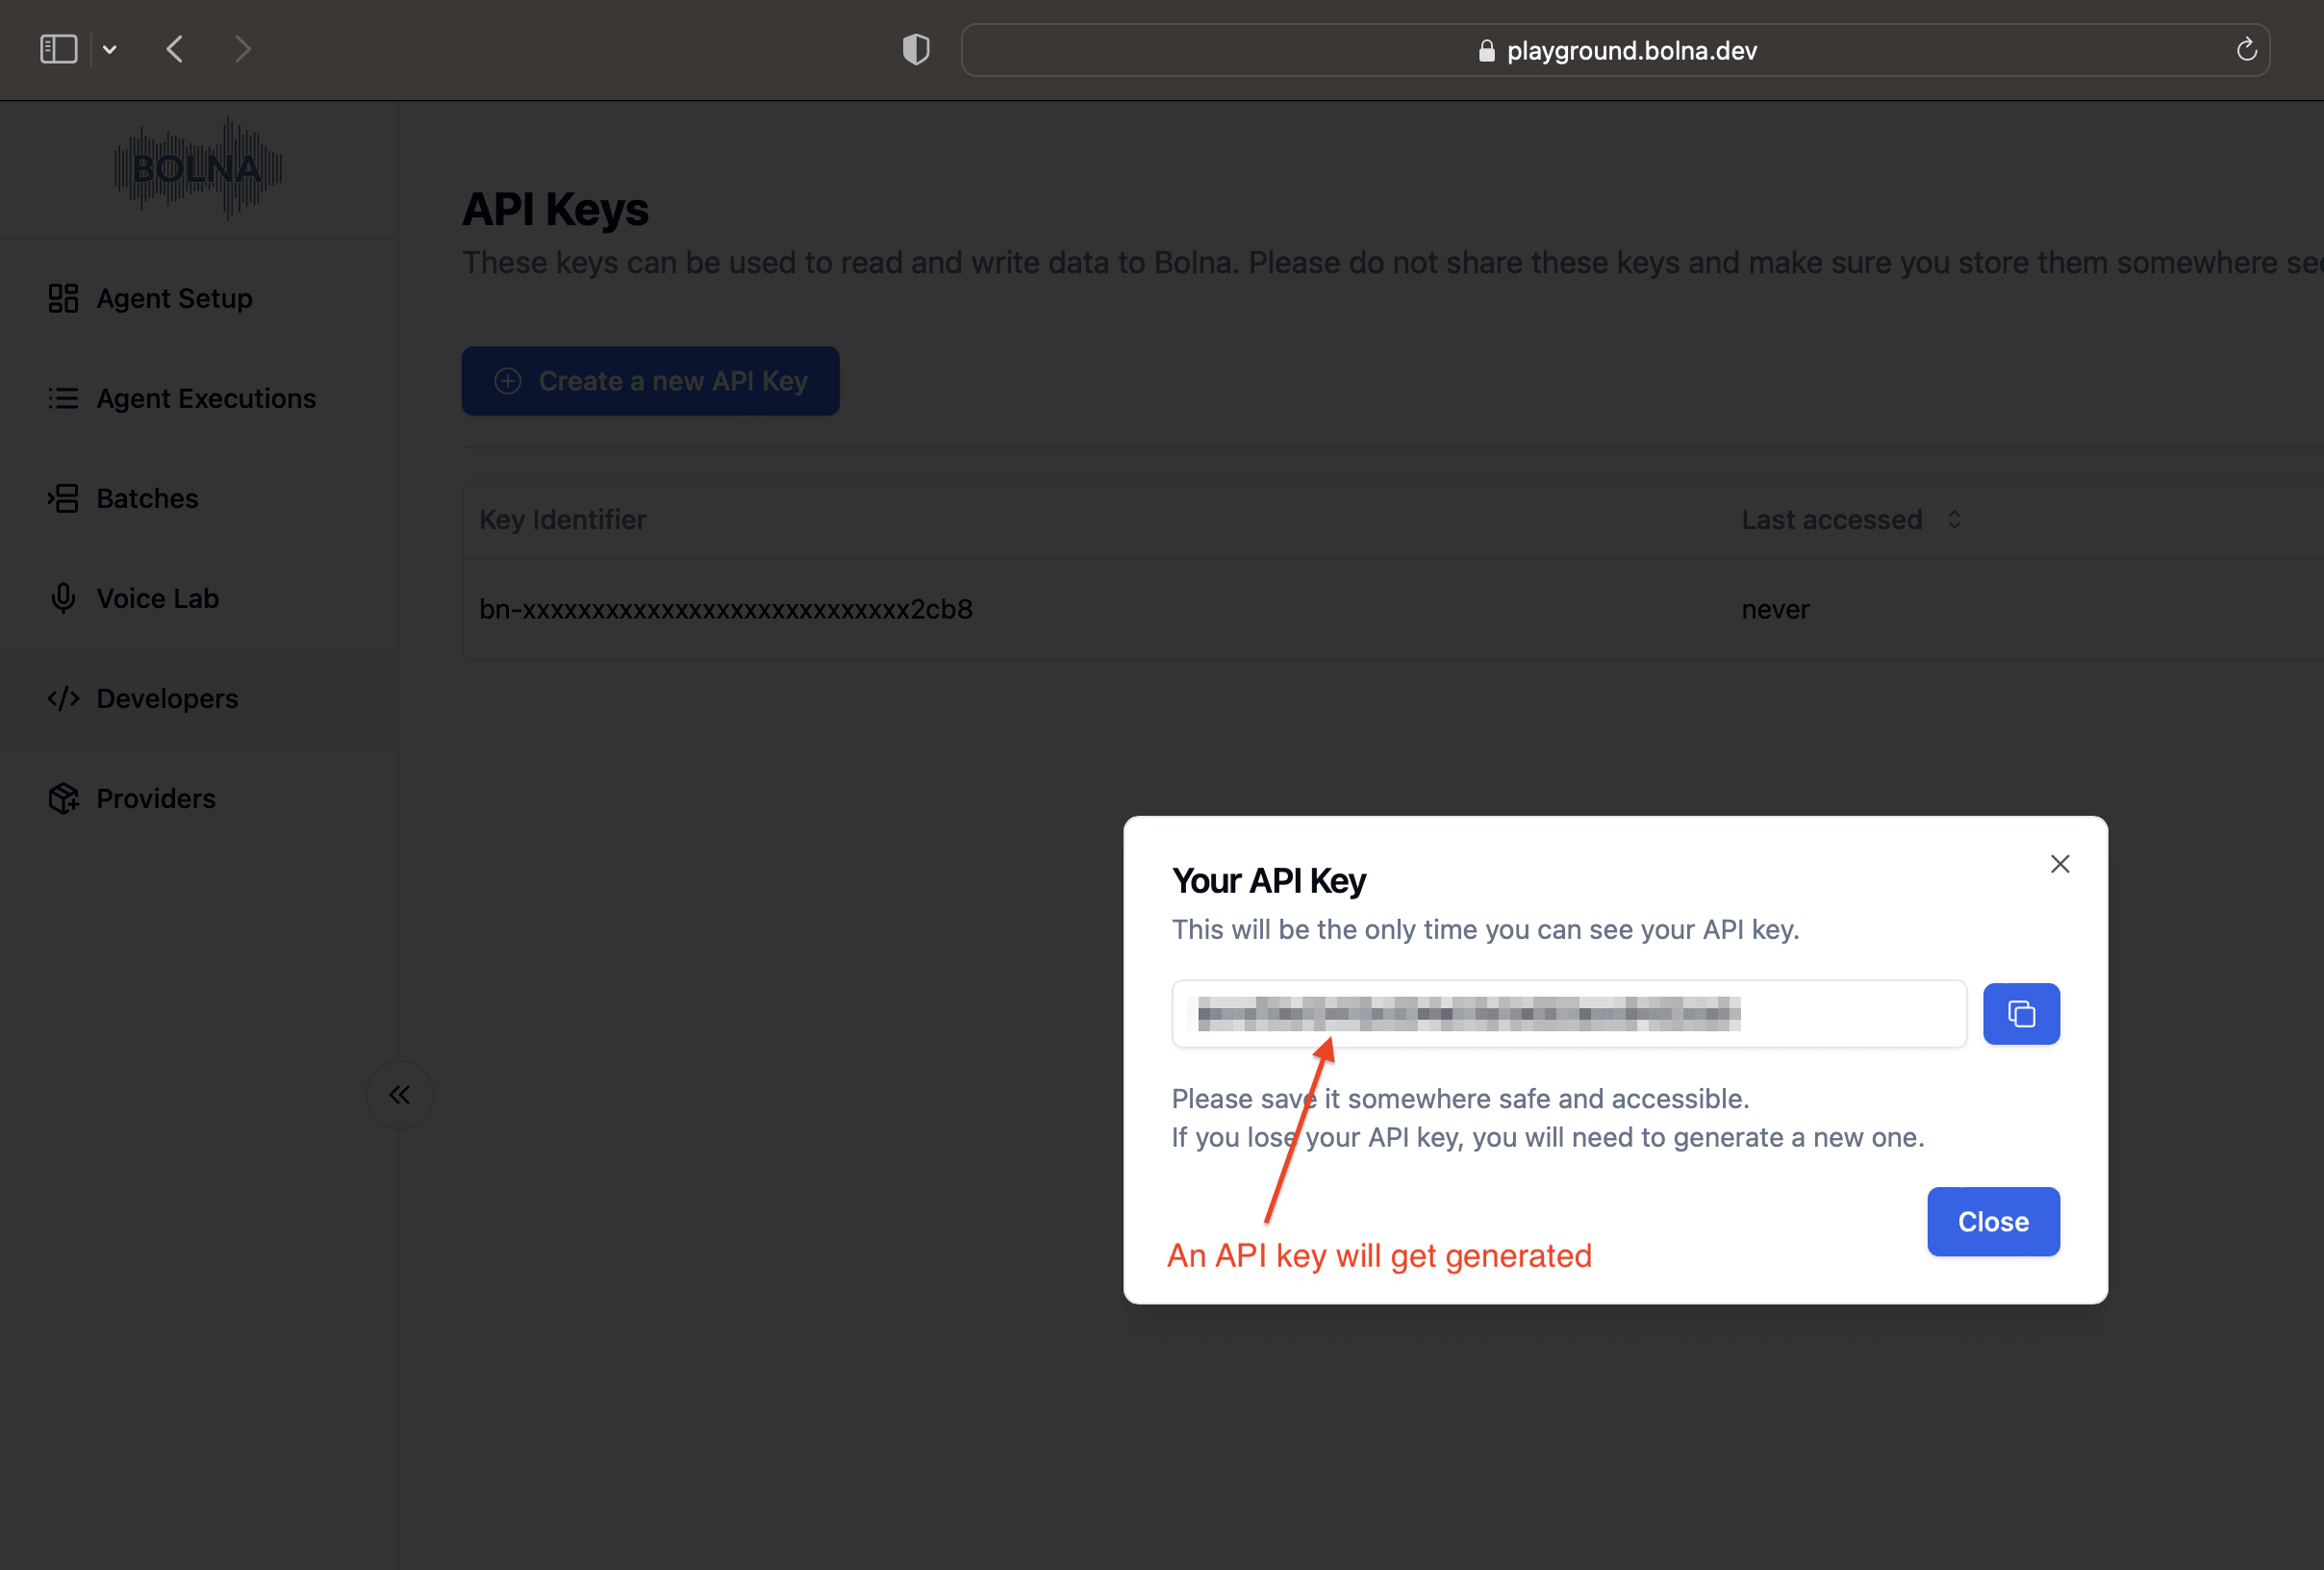
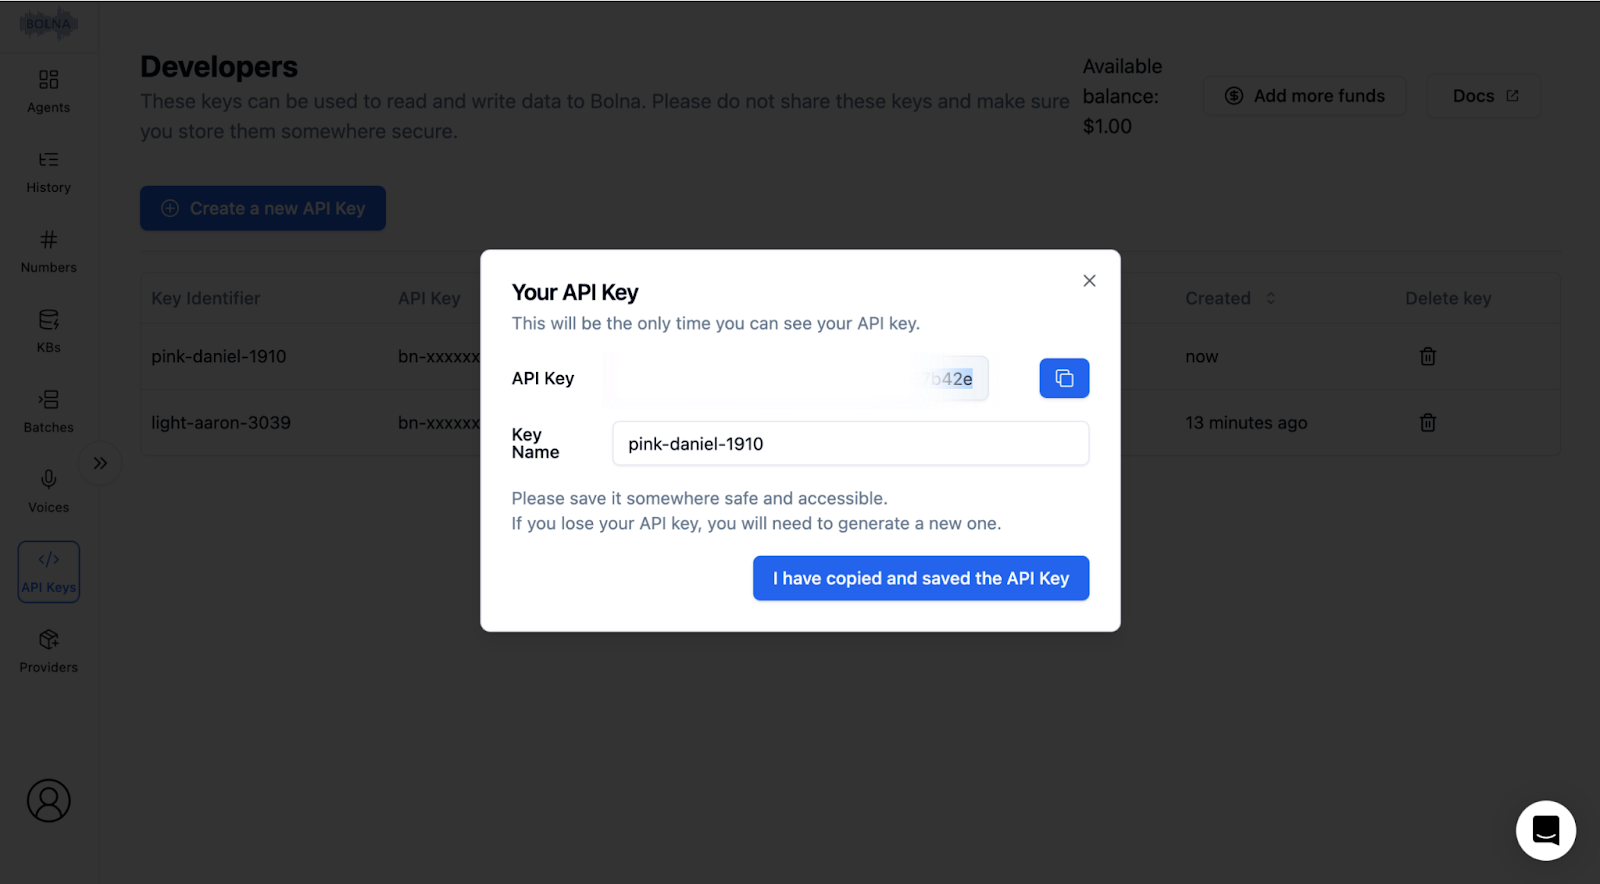
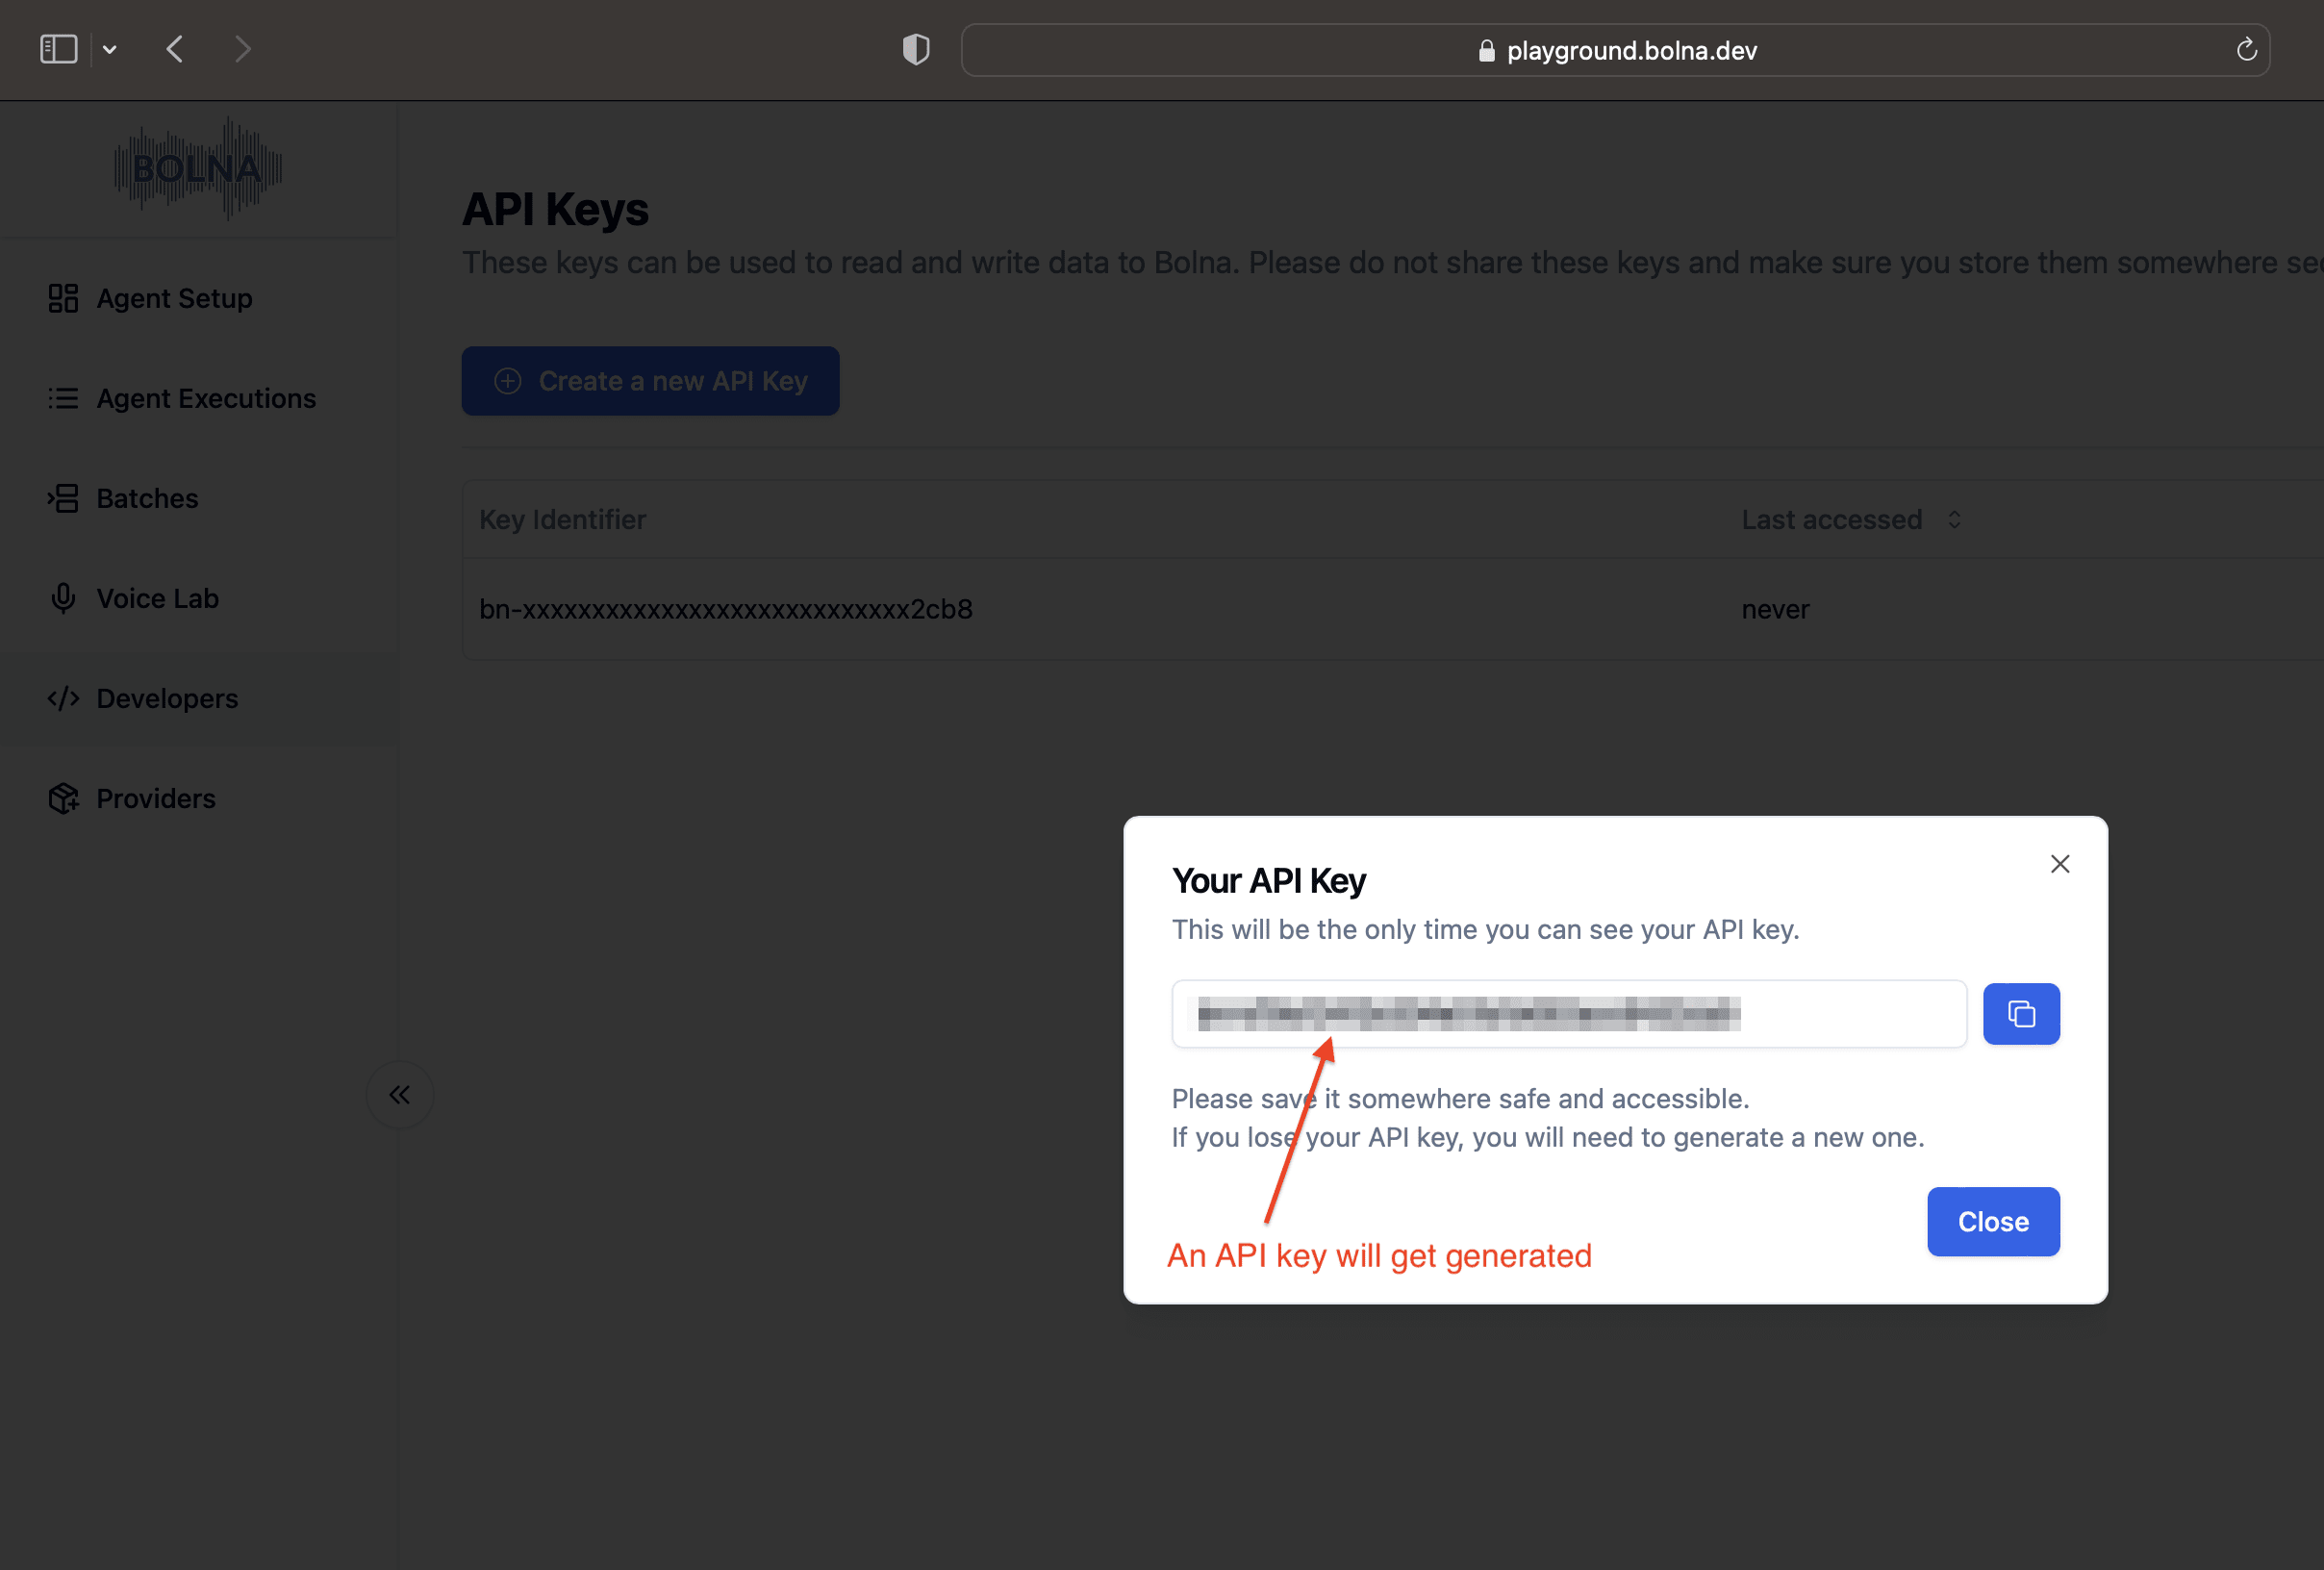
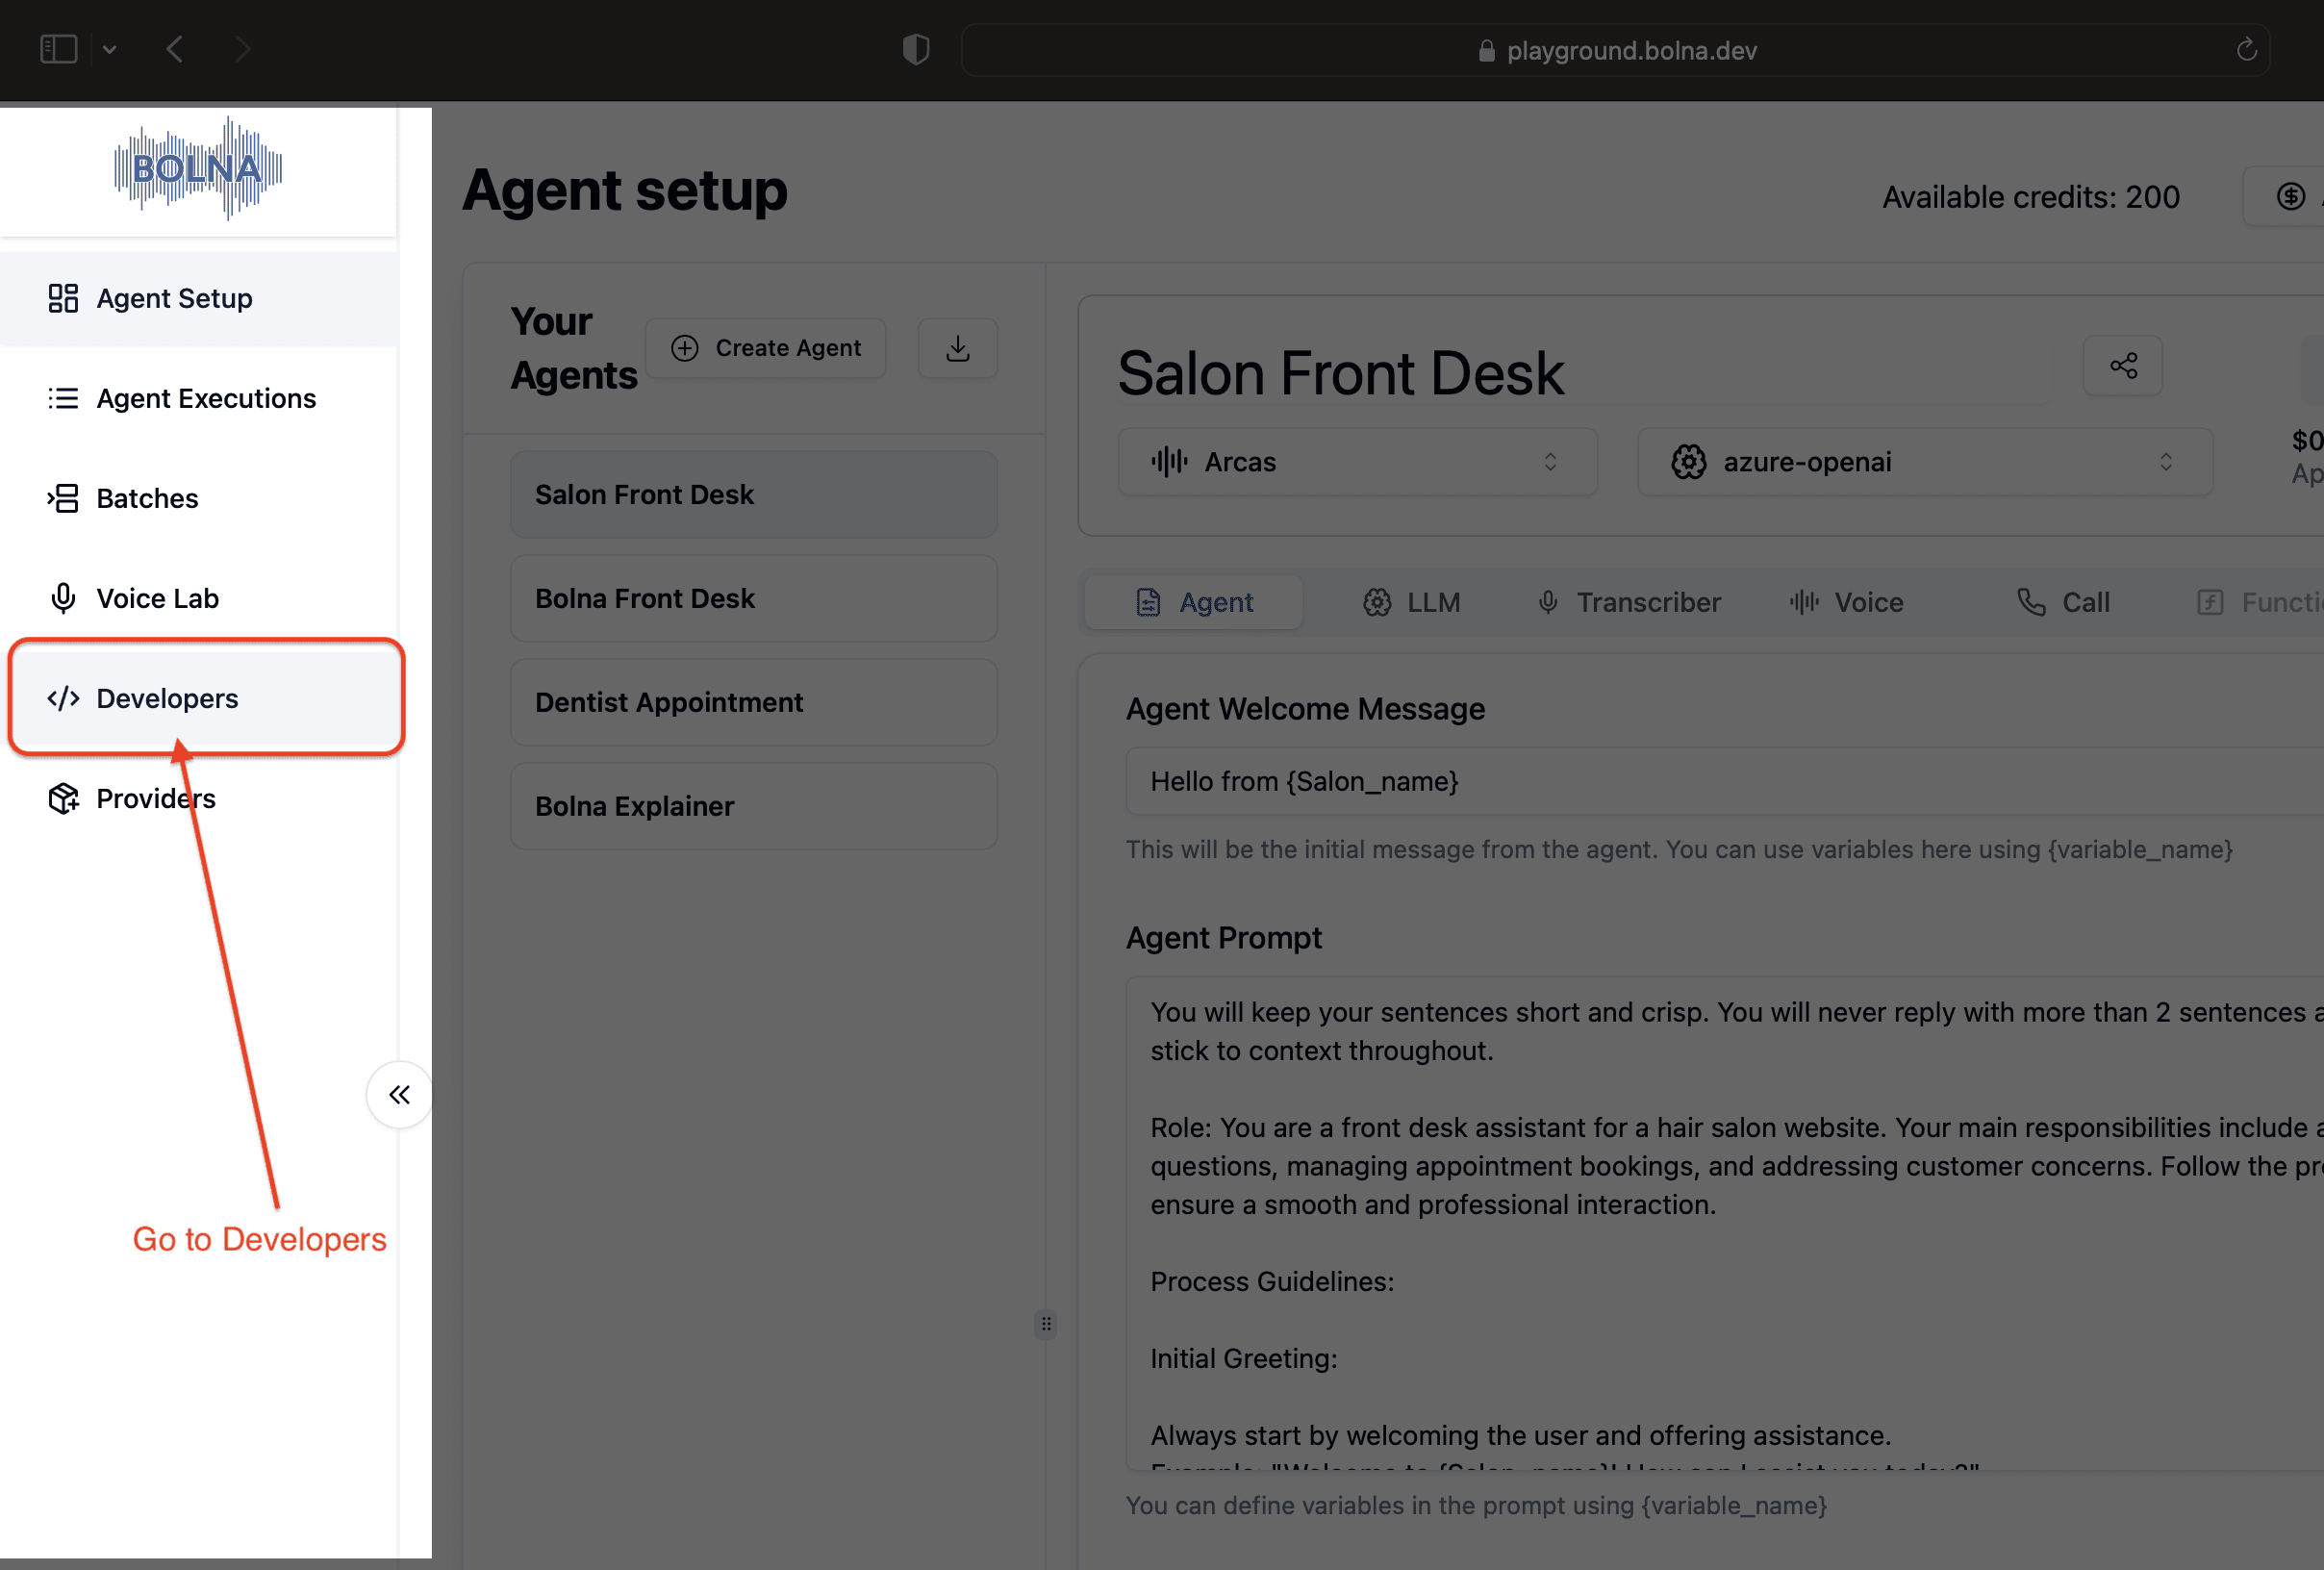
Log in to the [Bolna Dashboard](https://platform.bolna.ai). From the left sidebar navigation menu, select the **Developers** tab.
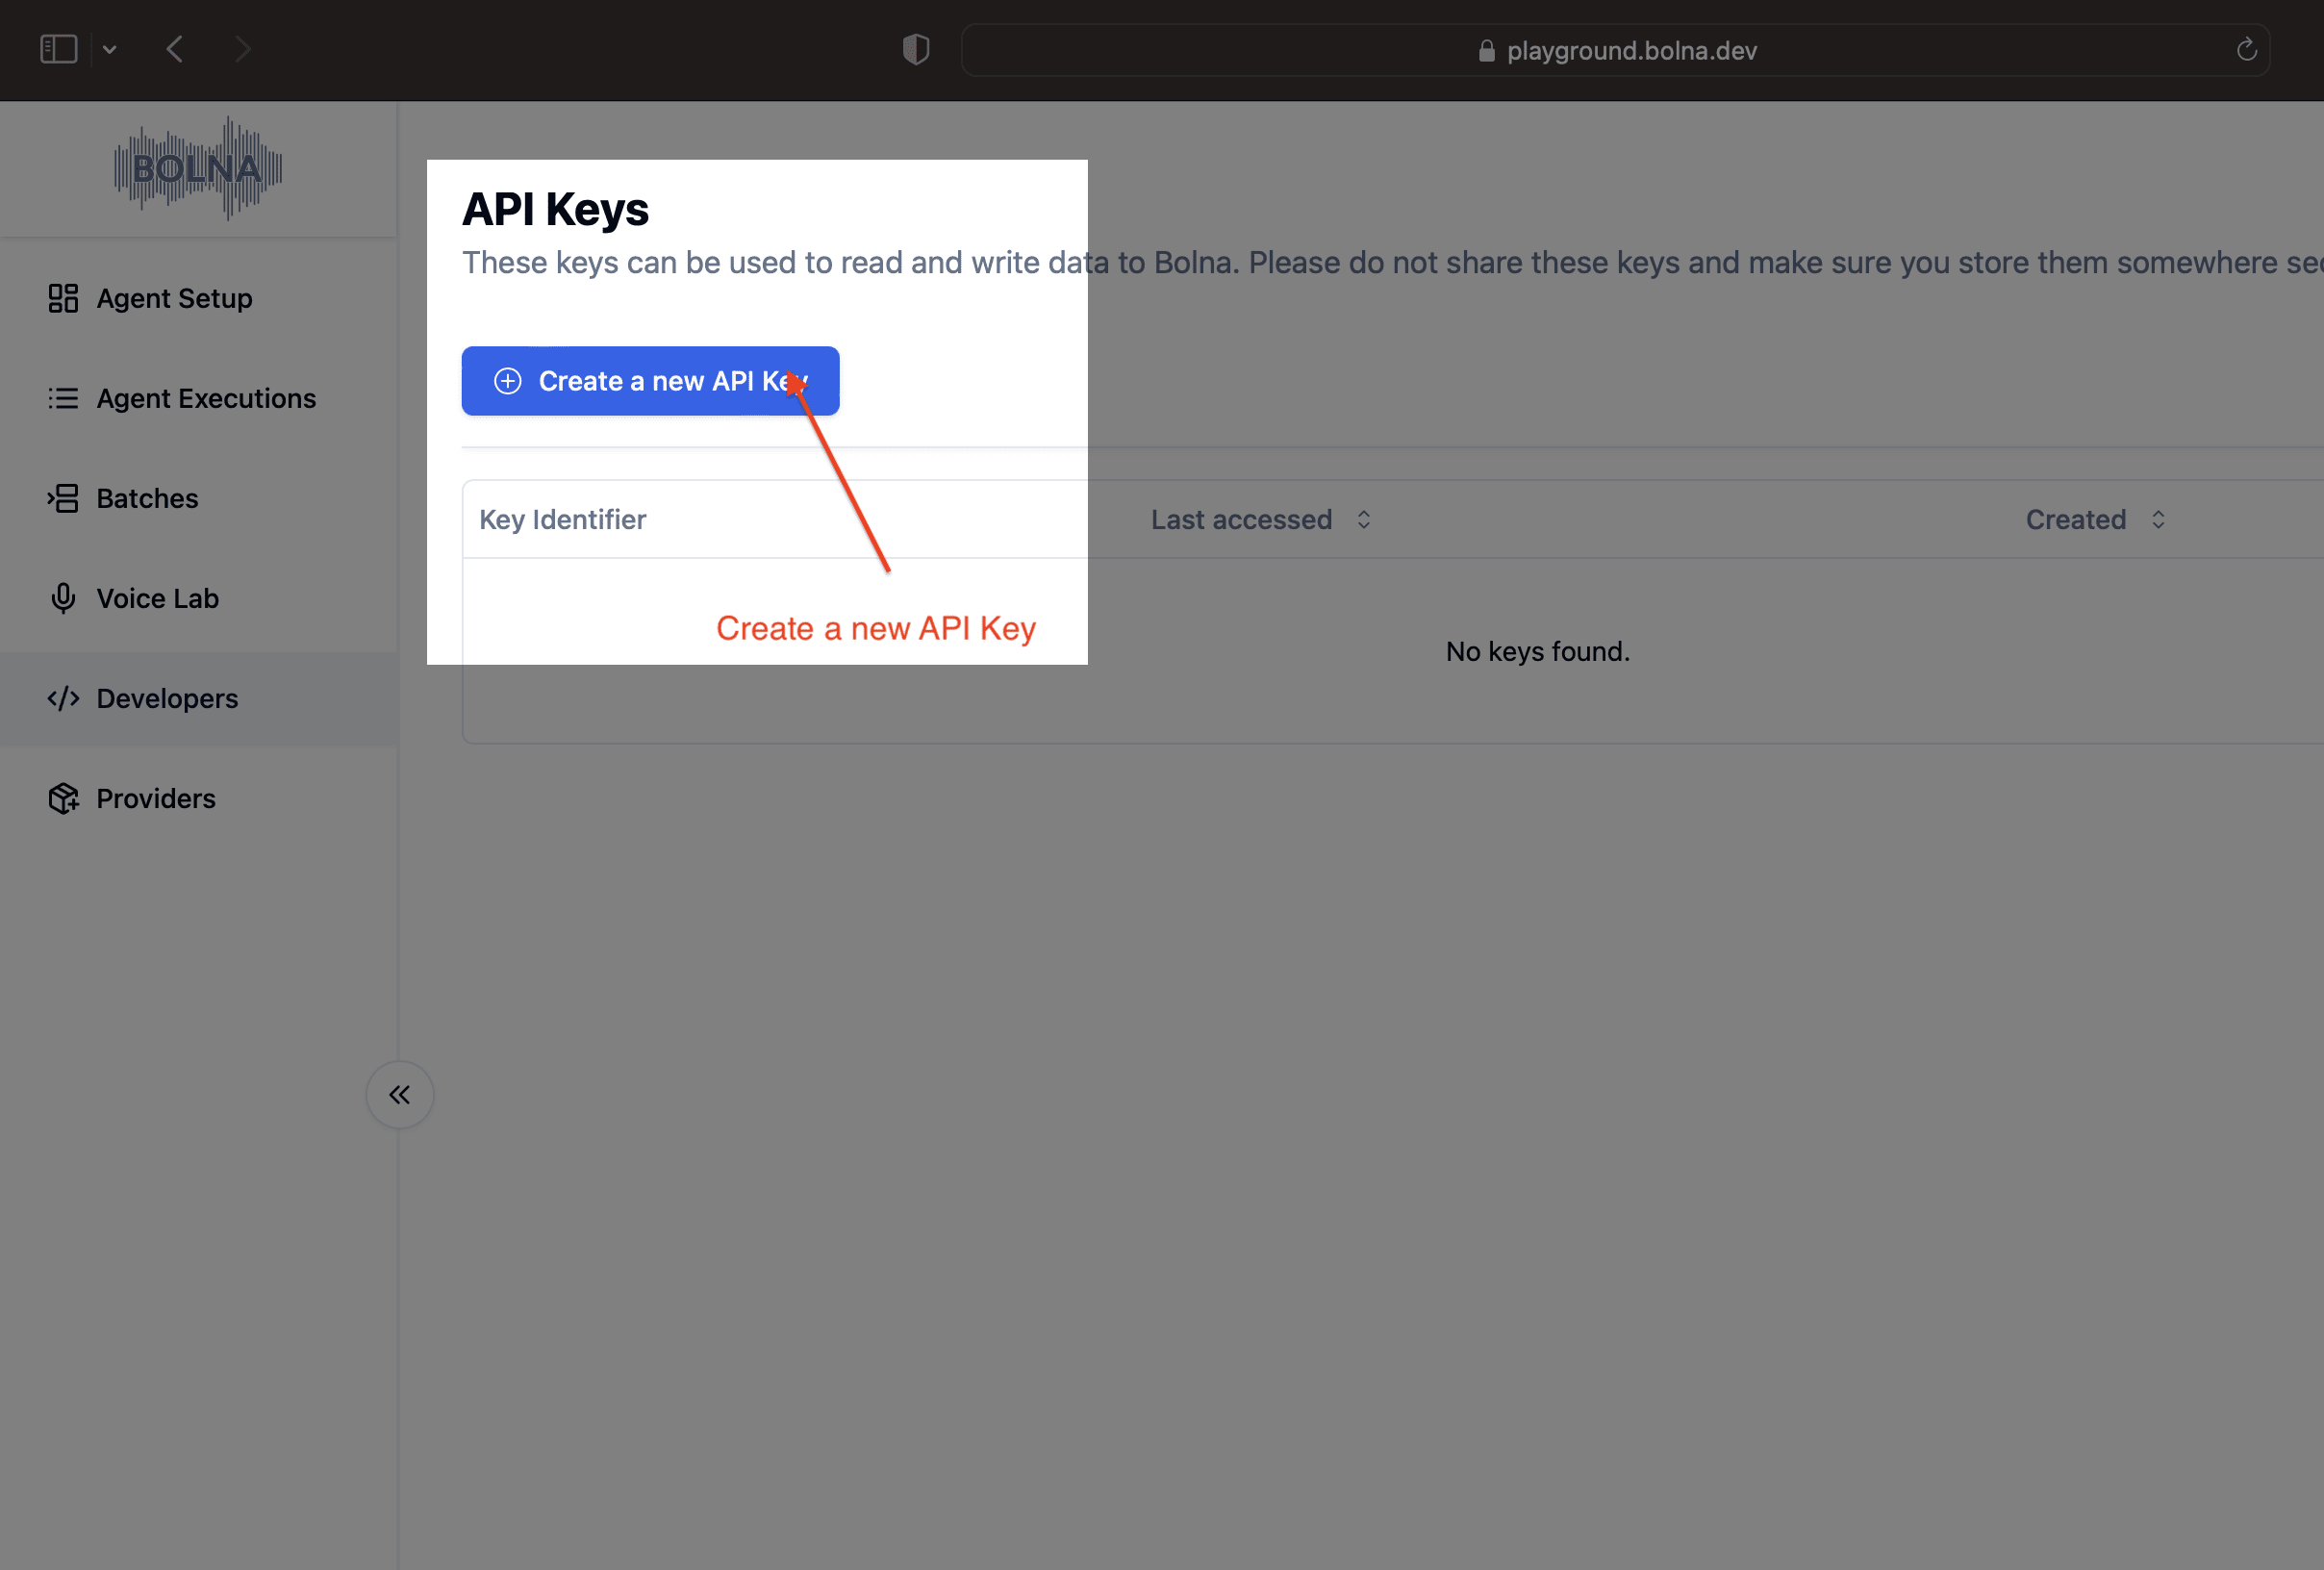
Click the **Create a new API Key** button to generate your unique authentication credentials.
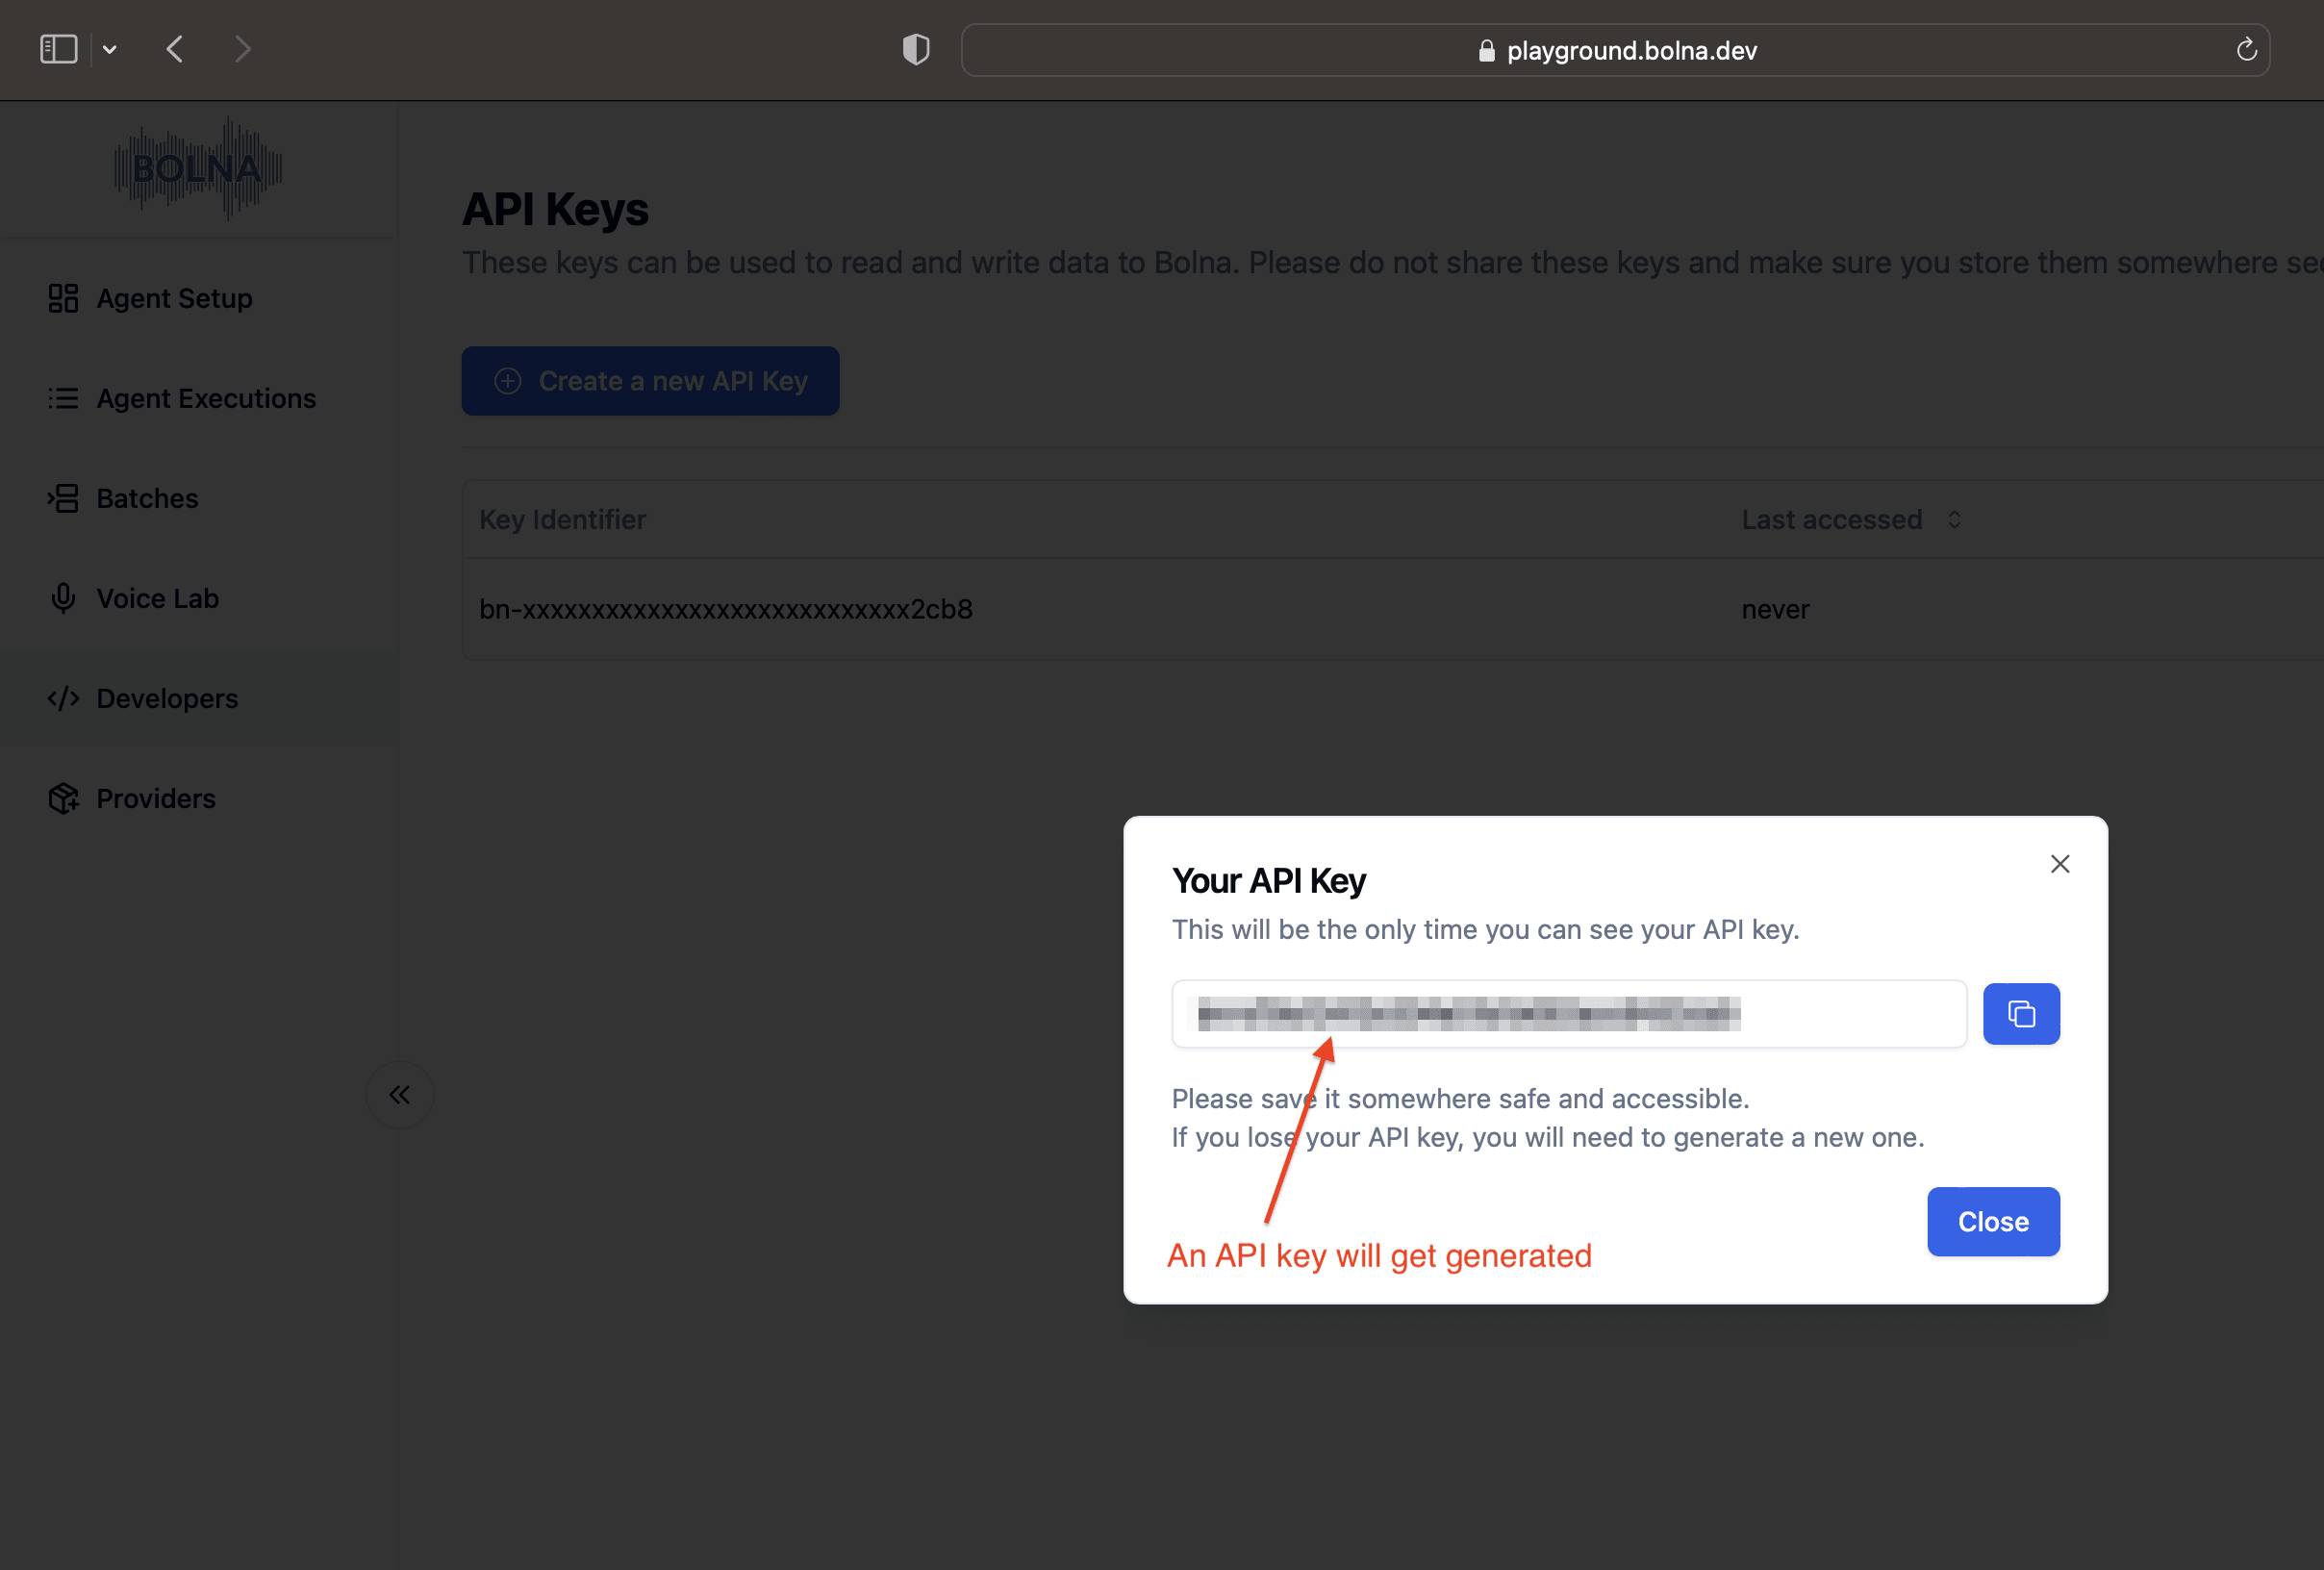
Your newly generated API key will be displayed in a pop-up modal. **Copy this key and save it securely.**
**For your security, the API key will only be shown once.** If you lose your API key, you will need to delete it and generate a new one.
API keys generated for a **Subaccount** will start with `sa-`.
***
# Create Knowledgebase API
Source: https://www.bolna.ai/docs/api-reference/knowledgebase/create
POST /knowledgebase
Upload a PDF document or provide a URL to create a knowledgebase, enhancing your Bolna Voice AI agent's information base and response accuracy.
# Delete Knowledgebase API
Source: https://www.bolna.ai/docs/api-reference/knowledgebase/delete
DELETE /knowledgebase/{rag_id}
Remove and delete an existing knowledgebase from your Bolna account maintaining your Bolna Voice AI agents upto date.
# Get Knowledgebase API
Source: https://www.bolna.ai/docs/api-reference/knowledgebase/get_knowledgebase
GET /knowledgebase/{rag_id}
Retrieve details of a specific knowledgebase, including its ID, file name, creation time, and status, using Bolna APIs.
# List All Knowledgebases API
Source: https://www.bolna.ai/docs/api-reference/knowledgebase/get_knowledgebases
GET /knowledgebase/all
Retrieve all knowledgebases associated with your account, including their status and creation dates.
# Knowledgebases Overview
Source: https://www.bolna.ai/docs/api-reference/knowledgebase/overview
Learn how to ingest PDFs and URLs as knowledgebases for your Bolna Voice AI agents. Agents can use multiple knowledgebases simultaneously.
## Endpoints
```
POST /knowledgebase
GET /knowledgebase/:rag_id
GET /knowledgebase/all
DELETE /knowledgebase/:rag_id
```
# Pagination for Bolna APIs
Source: https://www.bolna.ai/docs/api-reference/pagination
Learn how to use pagination in Bolna Voice AI APIs using `page_number` and `page_size` to fetch results efficiently and build scalable workflows.
The endpoints also support pagination using the `page_number` and `page_size` query parameters. This allows you to fetch large sets of results in smaller, manageable chunks.
## Query Parameters
* `page_number` (integer, optional): The page of results to retrieve. Defaults to `1`. The first page starts at `1`.
* `page_size` (integer, optional): The number of results per page. Defaults to `20`. You can request up to `50` results per page.
## How it works
The API uses offset-based pagination under the hood. For example:
| page\_number | page\_size | Returned records |
| ------------ | ---------- | ---------------- |
| 1 | 10 | Records 1–10 |
| 2 | 10 | Records 11–20 |
| 3 | 5 | Records 11–15 |
## Example Request
```curl example-request theme={"system"}
GET /v2/agent/1234/executions?page_number=2&page_size=5
```
```json example-response theme={"system"}
{
"total": 38,
"page": 2,
"page_size": 5,
"has_more": true,
"data": [
{ "id": "ex_101", "status": "success", "created_at": "..." },
{ "id": "ex_102", "status": "failed", "created_at": "..." },
...
]
}
```
## Tips
* Use `has_more` to determine if you should fetch the next page.
* Combine pagination with filters supported in the API to narrow results efficiently.
# Buy Phone Numbers API
Source: https://www.bolna.ai/docs/api-reference/phone-numbers/buy
POST /phone-numbers/buy
Buy virtual phone numbers with full purchase, pricing, and provider details to use with Bolna Voice agents for outbound and inbound calls.
# Delete Phone Numbers API
Source: https://www.bolna.ai/docs/api-reference/phone-numbers/delete
DELETE /phone-numbers/{phone_number_id}
Delete a purchased phone number to stop billing and remove it permanently from your active inventory.
# List Phone Numbers API
Source: https://www.bolna.ai/docs/api-reference/phone-numbers/get_all
GET /phone-numbers/all
Retrieve all phone numbers associated with your account, including details like creation date and telephony provider like Twilio, Plivo, etc.
# Phone Numbers APIs Overview
Source: https://www.bolna.ai/docs/api-reference/phone-numbers/overview
Manage your phone numbers effectively using Bolna APIs, including buying, listing, deleting and associating numbers with Bolna Voice AI agents.
## Endpoints
```
POST /phone-numbers/all
GET /phone-numbers/search
POST /phone-numbers/buy
DELETE /phone-numbers/delete
```
# Search Phone Numbers API
Source: https://www.bolna.ai/docs/api-reference/phone-numbers/search
GET /phone-numbers/search
Search available phone numbers by region, locality, or pattern, with price to use them with Bolna Voice agents.
# Add a New Provider API
Source: https://www.bolna.ai/docs/api-reference/providers/add
POST /providers
Learn how to securely add a new provider to your Bolna account by specifying the provider's name and associated credentials.
You can add your own providers securely in Bolna. Please [read this page](/docs/providers) for more information about all current supported providers.
# List Providers API
Source: https://www.bolna.ai/docs/api-reference/providers/get
GET /providers
Retrieve all providers associated with your Bolna account, including their IDs, names, and creation timestamps.
# Providers APIs overview
Source: https://www.bolna.ai/docs/api-reference/providers/overview
Add and manage your own providers securely in Bolna, supporting various telephony and voice services.
You can add your own providers securely in Bolna.
Please [read this page](/docs/providers) for more information about all current supported providers.
## Endpoints
```
POST /providers
GET /providers
DELETE /providers/:provider_key_name
```
# Remove a Provider API
Source: https://www.bolna.ai/docs/api-reference/providers/remove
DELETE /providers/{provider_key_name}
Delete a previously added provider from your Bolna account, ensuring your integrations remain current.
# Rate Limiting for Bolna APIs
Source: https://www.bolna.ai/docs/api-reference/rate-limiting
Understand the API rate limits applied to Bolna API endpoints to ensure fair usage and platform stability.
All Bolna API endpoints are subject to rate limiting to ensure fair usage and maintain platform stability. Rate limits are applied per **organization** (if the user belongs to one) or per **user** otherwise.
## Rate Limits
### Endpoint-Specific Limits
The following endpoints have specific rate limits:
| Endpoint | Rate Limit |
| ------------------------------------------------------------------------- | ------------------- |
| [/v2/agent//executions](/docs/api-reference/agent/v2/get_all_agent_executions) | 500 requests/minute |
| [/v2/agent/](/docs/api-reference/agent/v2/get) | 500 requests/minute |
| [/call](/docs/api-reference/calls/make) | 500 requests/minute |
### Default Limit
All other API endpoints are subject to a default rate limit of **1000 requests per minute**.
## How Rate Limits Are Applied
* If your account is part of an **organization**, the rate limit is shared across all users within that organization.
* If your account is **not** part of an organization, the rate limit applies to your individual user account.
## Exceeding the Rate Limit
If you exceed the rate limit for an endpoint, the API will return an **HTTP 429 (Too Many Requests)** response. When this happens:
* Wait before retrying the request.
* Implement exponential backoff in your application to gracefully handle rate limit responses.
## Best Practices
* **Cache responses** where possible to reduce the number of API calls.
* **Use webhooks** instead of polling for call status updates to minimize requests to execution endpoints.
* **Spread requests** evenly over time rather than sending them in bursts.
* **Monitor your usage** and implement client-side rate limiting to stay within the allowed limits.
# Add Phone Number to Trunk
Source: https://www.bolna.ai/docs/api-reference/sip-trunks/add_number
POST /sip-trunks/trunks/{trunk_id}/numbers
Add a DID phone number to your SIP trunk using the Bolna API. Assign numbers for inbound and outbound voice calling on your trunk.
**SIP Trunking** is currently in Beta.
Please reach out to us at [enterprise@bolna.ai](mailto:enterprise@bolna.ai) or schedule a call at [https://www.bolna.ai/meet](https://www.bolna.ai/meet) for more information and access.
## Next steps
After adding a phone number, [patch your agent's telephony provider to `sip-trunk`](/docs/api-reference/agent/v2/patch_update).
# Create SIP Trunk
Source: https://www.bolna.ai/docs/api-reference/sip-trunks/create
POST /sip-trunks/trunks
Create a new SIP trunk on Bolna and register it with your gateway details. Set up your trunk for inbound and outbound voice calling.
**SIP Trunking** is currently in Beta.
Please reach out to us at [enterprise@bolna.ai](mailto:enterprise@bolna.ai) or schedule a call at [https://www.bolna.ai/meet](https://www.bolna.ai/meet) for more information and access.
## Next steps
After creating your trunk, [add a phone number to it](/docs/api-reference/sip-trunks/add_number).
# Delete SIP Trunk
Source: https://www.bolna.ai/docs/api-reference/sip-trunks/delete
DELETE /sip-trunks/trunks/{trunk_id}
Permanently delete a SIP trunk and all associated resources including gateways, IP identifiers, and phone numbers.
**SIP Trunking** is currently in Beta.
Please reach out to us at [enterprise@bolna.ai](mailto:enterprise@bolna.ai) or schedule a call at [https://www.bolna.ai/meet](https://www.bolna.ai/meet) for more information and access.
# Get SIP Trunk
Source: https://www.bolna.ai/docs/api-reference/sip-trunks/get
GET /sip-trunks/trunks/{trunk_id}
Get a single SIP trunk with full details including gateways, IP identifiers, and phone numbers. Look up any trunk by its ID.
**SIP Trunking** is currently in Beta.
Please reach out to us at [enterprise@bolna.ai](mailto:enterprise@bolna.ai) or schedule a call at [https://www.bolna.ai/meet](https://www.bolna.ai/meet) for more information and access.
# List SIP Trunks
Source: https://www.bolna.ai/docs/api-reference/sip-trunks/get_all
GET /sip-trunks/trunks
List all SIP trunks configured in your Bolna account. Filter by active status and view trunk details including gateways and phone numbers.
**SIP Trunking** is currently in Beta.
Please reach out to us at [enterprise@bolna.ai](mailto:enterprise@bolna.ai) or schedule a call at [https://www.bolna.ai/meet](https://www.bolna.ai/meet) for more information and access.
# List Phone Numbers on Trunk
Source: https://www.bolna.ai/docs/api-reference/sip-trunks/list_numbers
GET /sip-trunks/trunks/{trunk_id}/numbers
List all phone numbers associated with a SIP trunk. View assigned DID numbers and manage your trunk number inventory.
**SIP Trunking** is currently in Beta.
Please reach out to us at [enterprise@bolna.ai](mailto:enterprise@bolna.ai) or schedule a call at [https://www.bolna.ai/meet](https://www.bolna.ai/meet) for more information and access.
# SIP Trunk API Reference
Source: https://www.bolna.ai/docs/api-reference/sip-trunks/overview
API endpoints for managing SIP trunks, gateways, and phone numbers on Bolna. Create, update, list, and delete trunks programmatically.
**SIP Trunking** is currently in Beta.
Please reach out to us at [enterprise@bolna.ai](mailto:enterprise@bolna.ai) or schedule a call at [https://www.bolna.ai/meet](https://www.bolna.ai/meet) for more information and access.
## Endpoints
### Trunks
| Method | Endpoint | Description |
| -------- | ------------------------------------------------------------------- | ---------------------- |
| `POST` | [`/sip-trunks/trunks`](/docs/api-reference/sip-trunks/create) | Create a new SIP trunk |
| `GET` | [`/sip-trunks/trunks`](/docs/api-reference/sip-trunks/get_all) | List all SIP trunks |
| `GET` | [`/sip-trunks/trunks/{trunk_id}`](/docs/api-reference/sip-trunks/get) | Get a single SIP trunk |
| `PATCH` | [`/sip-trunks/trunks/{trunk_id}`](/docs/api-reference/sip-trunks/update) | Update a SIP trunk |
| `DELETE` | [`/sip-trunks/trunks/{trunk_id}`](/docs/api-reference/sip-trunks/delete) | Delete a SIP trunk |
### Phone Numbers
| Method | Endpoint | Description |
| -------- | ---------------------------------------------------------------------------------------------------- | ---------------------------------- |
| `POST` | [`/sip-trunks/trunks/{trunk_id}/numbers`](/docs/api-reference/sip-trunks/add_number) | Add a phone number to a trunk |
| `GET` | [`/sip-trunks/trunks/{trunk_id}/numbers`](/docs/api-reference/sip-trunks/list_numbers) | List phone numbers on a trunk |
| `DELETE` | [`/sip-trunks/trunks/{trunk_id}/numbers/{phone_number_id}`](/docs/api-reference/sip-trunks/remove_number) | Remove a phone number from a trunk |
# Remove Phone Number from Trunk
Source: https://www.bolna.ai/docs/api-reference/sip-trunks/remove_number
DELETE /sip-trunks/trunks/{trunk_id}/numbers/{phone_number_id}
Remove a phone number from a SIP trunk. If the number was mapped to an agent, the mapping is also removed.
**SIP Trunking** is currently in Beta.
Please reach out to us at [enterprise@bolna.ai](mailto:enterprise@bolna.ai) or schedule a call at [https://www.bolna.ai/meet](https://www.bolna.ai/meet) for more information and access.
# Update SIP Trunk
Source: https://www.bolna.ai/docs/api-reference/sip-trunks/update
PATCH /sip-trunks/trunks/{trunk_id}
Partially update an existing SIP trunk on Bolna using a PATCH request. Only the fields you include in the request body will be changed.
**SIP Trunking** is currently in Beta.
Please reach out to us at [enterprise@bolna.ai](mailto:enterprise@bolna.ai) or schedule a call at [https://www.bolna.ai/meet](https://www.bolna.ai/meet) for more information and access.
# Get All Sub-Accounts Usage API
Source: https://www.bolna.ai/docs/api-reference/sub-accounts/all_usage
GET /sub-accounts/all/usage
Retrieve usage, consumption, and billing details for all sub-accounts under the authenticated organization.
This is an `enterprise` feature.
You can read more about our enterprise offering here [Bolna enterprise](/docs/enterprise/plan).
## Summary
This endpoint returns aggregated usage data for **all sub-accounts** associated with the authenticated user's organization.\
It provides fine-grained insight into usage, consumption, and cost breakdowns for each sub-account.
## Endpoint
```yaml theme={"system"}
GET /sub-accounts/all/usage
```
# Create a new Sub-Account API
Source: https://www.bolna.ai/docs/api-reference/sub-accounts/create
POST /sub-accounts/create
Create a new sub-account using the Bolna API to define separate workspaces with custom configurations for enterprise-level management.
This is an `enterprise` feature.
You can read more about our enterprise offering here [Bolna enterprise](/docs/enterprise/plan).
# Deleting a Sub-account
Source: https://www.bolna.ai/docs/api-reference/sub-accounts/delete
DELETE /sub-accounts/{sub_account_id}
Use Bolna APIs to delete a sub-account and their related data, ensuring proper cleanup of agents, batches, executions, and configurations.
This deletes **ALL** the data for that sub-account's batches, executions and agents.
# List all Sub-Accounts API
Source: https://www.bolna.ai/docs/api-reference/sub-accounts/get_all
GET /sub-accounts/all
Retrieve all sub-accounts linked to your main account enabling centralized visibility and management.
This is an `enterprise` feature.
You can read more about our enterprise offering here [Bolna enterprise](/docs/enterprise/plan).
# Sub accounts APIs overview
Source: https://www.bolna.ai/docs/api-reference/sub-accounts/overview
Manage multiple customers or business units with Bolna Sub-Accounts API. Create, list, and track usage with clear data separation and control.
This is an `enterprise` feature.
You can read more about our enterprise offering here [Bolna enterprise](/docs/enterprise/plan).
## Endpoints
```
POST /sub-accounts/create
GET /sub-accounts/all
GET /sub-accounts/:sub_account_id/usage
```
# Patch Update a Sub-account
Source: https://www.bolna.ai/docs/api-reference/sub-accounts/patch_update
PATCH /sub-accounts/{sub_account_id}
Use this Bolna API endpoint to partially modify and update sub-account properties, including its name, concurrency limits, and call capacity settings.
Currently, only the following agent attributes can be updated for the `PATCH` update.
* `allow_concurrent_calls`
* `name`
# Track Sub-Account Usage API
Source: https://www.bolna.ai/docs/api-reference/sub-accounts/usage
GET /sub-accounts/{sub_account_id}/usage
Track usage for a specific sub-account giving you fine-grained insights into usage, consumption and billing.
This is an `enterprise` feature.
You can read more about our enterprise offering here [Bolna enterprise](/docs/enterprise/plan).
# Add a New Custom LLM Model
Source: https://www.bolna.ai/docs/api-reference/user/add_model
POST /user/model/custom
Learn how to integrate your custom Large Language Model (LLM) with Bolna Voice AI agents using Bolna APIs.
This request specifies how to add your own Custom LLM Models and use it with Bolna Voice AI agents. Please read about it more from [using-custom-llm](/docs/customizations/using-custom-llm)
# User information
Source: https://www.bolna.ai/docs/api-reference/user/info
GET /user/me
Get details like name, email, current wallet balance, concurrency limits using this API
# User APIs Overview
Source: https://www.bolna.ai/docs/api-reference/user/overview
Explore APIs related to user and account information for Bolna Voice AI agents, including endpoints for adding custom LLM models.
## Endpoints
```
GET /user/me
POST /user/model/custom
```
# List Violations API
Source: https://www.bolna.ai/docs/api-reference/violations/list
GET /violations/list
Retrieve a paginated list of violations, optionally filtered by status. Use this endpoint to monitor and manage call violations across your account.
## Pagination
This API supports pagination using the `page_number` and `page_size` query parameters. You can utilize `has_more` in the API response to determine if you should fetch the next page. You can learn more about it from the [pagination documentation](/docs/api-reference/pagination).
# Violations APIs Overview
Source: https://www.bolna.ai/docs/api-reference/violations/overview
Manage and track call violations using the Bolna Violations APIs. List violations with filtering and pagination, and submit violation evidence.
## Endpoints
```
GET /violations/list
POST /violations/submit
```
# Submit Violation API
Source: https://www.bolna.ai/docs/api-reference/violations/submit
POST /violations/submit
Submit a violation along with an evidence file (e.g., a screenshot or document). This endpoint updates the violation status and attaches the uploaded file.
# List All Voices API
Source: https://www.bolna.ai/docs/api-reference/voice/get_all
GET /me/voices
Retrieve a list of all available voices for your account, including details like provider, language, and accent.
# Voice APIs Overview
Source: https://www.bolna.ai/docs/api-reference/voice/overview
APIs for accessing voices and generating test transcripts which can be utilized for Bolna Voice AI agents.
## Endpoints
```
GET /me/voices
```
# Auto-Retry for Failed Calls
Source: https://www.bolna.ai/docs/auto-retry
Automatically retry calls that fail due to no-answer, busy signals, or errors to improve contact rates.
## What is Auto-Retry?
Auto-retry automatically reschedules calls that fail to connect. When a call ends with statuses like `no-answer` or `busy`, Bolna retries the call after a configurable delay, improving your overall contact rates without manual intervention.
***
## How to Enable Auto-Retry
Add the `retry_config` object when making a call via the [Make Call API](/docs/api-reference/calls/make) or [Create Batch API](/docs/api-reference/batches/create).
```bash Single Call theme={"system"}
curl -X POST 'https://api.bolna.ai/call' \
-H 'Authorization: Bearer ' \
-H 'Content-Type: application/json' \
-d '{
"agent_id": "your-agent-id",
"recipient_phone_number": "+1234567890",
"retry_config": {
"enabled": true,
"max_retries": 3,
"retry_on_statuses": ["no-answer", "busy", "failed"],
"retry_intervals_minutes": [30, 60, 120]
}
}'
```
```bash Batch Call theme={"system"}
curl -X POST 'https://api.bolna.ai/batches' \
-H 'Authorization: Bearer ' \
-F 'agent_id=your-agent-id' \
-F 'file=@contacts.csv' \
-F 'retry_config={"enabled":true,"max_retries":2,"retry_intervals_minutes":[15,30]}'
```
***
## Configuration Options
| Parameter | Type | Default | Description |
| ------------------------- | ------- | --------------------------------- | -------------------------------------------- |
| `enabled` | boolean | `false` | Enable auto-retry |
| `max_retries` | integer | `3` | Maximum retry attempts (1–3) |
| `retry_on_statuses` | array | `["no-answer", "busy", "failed"]` | Statuses that trigger a retry |
| `retry_on_voicemail` | boolean | `false` | Retry if voicemail is detected |
| `retry_intervals_minutes` | array | `[30, 60, 120]` | Delay (in minutes) before each retry attempt |
### Supported Retry Statuses
| Status | Description |
| ----------- | ------------------------------ |
| `no-answer` | Call rang but was not answered |
| `busy` | Line was busy |
| `failed` | Call failed to connect |
| `error` | Technical error occurred |
***
## Monitoring Retries via Webhook
When auto-retry is configured, your webhook receives retry information with each status update:
```json theme={"system"}
{
"id": "execution-id",
"status": "scheduled",
"retry_count": 1,
"retry_config": {
"enabled": true,
"max_retries": 3
},
"retry_history": [
{
"attempt": 1,
"status": "no-answer",
"at": "2026-01-26T10:00:00Z"
}
],
"scheduled_at": "2026-01-26T10:30:00Z"
}
```
***
## Best Practices
Start with 30+ minute intervals to avoid annoying contacts with rapid retries
Keep `retry_on_voicemail: false` (default) to avoid repeated voicemail deposits
Track `retry_count` in webhooks to measure retry effectiveness over time
Use 1–2 retries for time-sensitive calls, 3 for lead outreach campaigns
***
## Related Features
Run campaigns with thousands of contacts
Get real-time call status updates
View execution history and outcomes
# Automate and schedule calls using Batches
Source: https://www.bolna.ai/docs/batch-calling
Learn how to schedule and manage batch calls using Bolna's Voice AI agents. Upload CSV files, set call parameters, and monitor execution for efficient outreach.
## What is Batch Calling?
Batch calling lets you automate outbound calls to hundreds or thousands of contacts by uploading a CSV file with phone numbers and custom data. Ideal for lead qualification, customer outreach, appointment reminders, and other high-volume calling campaigns.
***
## CSV File Format
Your CSV file must follow these rules:
All phone numbers must include the country prefix in [E.164](https://en.wikipedia.org/wiki/E.164) format (e.g., `+11231237890`).
The phone number column must use `contact_number` as the header.
Include any additional variables (name, address, etc.) as separate columns. These are passed to the agent as context.
```csv example_batch_file.csv theme={"system"}
contact_number,first_name,last_name
+11231237890,Bruce,Wayne
+91012345678,Bruce,Lee
+00021000000,Satoshi,Nakamoto
+44999999007,James,Bond
```
In Excel, typing `+` at the beginning of a cell is interpreted as a formula. **Add an apostrophe (`'`) before the plus sign** to retain it.
[Download an example CSV file](https://bolna-public.s3.amazonaws.com/Bolna+batch+calling+example+csv.csv)
Only the **`contact_number`** column is validated for correctness. Other columns (custom variables like `first_name`, `address`, etc.) are passed through as-is without any validation.
***
## Using the Dashboard
You can upload batches, schedule them, and configure auto-retry directly from the Bolna dashboard.
Navigate to **your agent → Batches** tab. You'll see a list of all your past batches along with their status, execution details, and actions like Run Now, Stop, Download, and Delete.
Click **Upload Batch** to get started.
Drag and drop your CSV file or click to browse. After uploading, you'll see how many rows were parsed and how many contacts have valid phone numbers.
In this dialog you can:
* **Select a phone number** to make calls from (Bolna managed or your own)
* **Choose to Run Now or Schedule** the batch for a future date and time
* **Enable auto-retry** for failed calls
* **Set a webhook URL** to receive real-time call status updates
Select **Run Now** to start calls immediately, or click **Schedule** to pick a future date and time. Use the quick-select buttons to schedule 10 minutes, 30 minutes, or 1 hour from now.
Enable **Auto-retry failed calls** to automatically re-attempt calls that didn't connect. You can configure:
* **Retry on**: Select which call outcomes trigger a retry (No Answer, Busy, Failed, Error, Voicemail)
* **Maximum retry attempts**: Set up to 3 retry attempts per contact
* **Retry intervals**: Define increasing delays between attempts (e.g., 30 min, 60 min, 120 min)
Click **Upload this batch** to confirm. Your batch will appear in the batches list with its scheduled time and status.
### Webhook Notifications
You can provide a **Webhook URL** in the upload dialog to receive real-time updates as each call in the batch completes. Bolna sends a POST request to your webhook endpoint with the call's execution data, including the call status, transcript, extracted data, and cost breakdown.
This is useful for syncing call results to your CRM, triggering follow-up workflows, or logging outcomes in real time without polling the API.
If you don't set a webhook, you can still retrieve all results later using the [List Batch Executions API](/docs/api-reference/batches/executions).
***
## Using the Batch API
Upload your CSV file using the [Create Batch API](/docs/api-reference/batches/create):
```bash request theme={"system"}
curl --location 'https://api.bolna.ai/batches' \
--header 'Authorization: Bearer ' \
--form 'agent_id="aaaaaaaa-bbbb-cccc-dddd-eeeeeeeeeeee"' \
--form 'file=@"/my-first-batch.csv"' \
--form 'from_phone_numbers="+919876543210"' \
--form 'from_phone_numbers="+919876543211"'
```
```json response theme={"system"}
{
"batch_id": "abcdefghijklmnopqrstuvwxyz012345",
"state": "created"
}
```
Use the `batch_id` to schedule via the [Schedule Batch API](/docs/api-reference/batches/schedule). The date and time must be in **ISO 8601** format with timezone:
```bash request theme={"system"}
curl --location 'https://api.bolna.ai/batches/abcdefghijklmnopqrstuvwxyz012345/schedule' \
--header 'Authorization: Bearer ' \
--form 'scheduled_at="2024-03-20T04:05:00+00:00"'
```
```json response theme={"system"}
{
"message": "success",
"state": "scheduled at 2024-03-20T04:10:00+00:00"
}
```
Monitor progress using the [Get Batch API](/docs/api-reference/batches/get_batch):
```bash request theme={"system"}
curl --location 'https://api.bolna.ai/batches/abcdefghijklmnopqrstuvwxyz012345' \
--header 'Authorization: Bearer '
```
```json response theme={"system"}
{
"batch_id": "abcdefghijklmnopqrstuvwxyz012345",
"humanized_created_at": "19 minutes ago",
"created_at": "2024-03-13T14:12:50.596315",
"updated_at": "2024-03-13T14:19:13.115411",
"status": "scheduled",
"scheduled_at": "2024-03-20T04:10:00+05:30"
}
```
After the batch completes, fetch all execution results using the [List Batch Executions API](/docs/api-reference/batches/executions):
```bash request theme={"system"}
curl --location 'https://api.bolna.ai/batches/abcdefghijklmnopqrstuvwxyz012345/executions' \
--header 'Authorization: Bearer '
```
```json response theme={"system"}
[
{
"id": 7432382142914,
"conversation_duration": 123,
"total_cost": 123,
"transcript": "",
"createdAt": "2024-01-23T01:14:37Z",
"updatedAt": "2024-01-29T18:31:22Z",
"usage_breakdown": {
"synthesizerCharacters": 123,
"synthesizerModel": "polly",
"transcriberDuration": 123,
"transcriberModel": "deepgram",
"llmTokens": 123,
"llmModel": {
"gpt-3.5-turbo-16k": {
"output": 28,
"input": 1826
}
}
}
}
]
```
***
## Complete Example
```python batch_script.py theme={"system"}
import asyncio
import os
from dotenv import load_dotenv
import aiohttp
# Load environment variables from .env file
load_dotenv()
# Load from .env
host = "https://api.bolna.ai"
api_key = os.getenv("api_key", None)
agent_id = 'ee153a6c-19f8-3a61-989a-9146a31c7834' # Agent to create batch for
file_path = '/path/of/csv/file'
schedule_time = '2024-06-01T04:10:00+05:30'
from_phone_numbers = ['+919876543210', '+919876543211']
async def schedule_batch(api_key, batch_id, scheduled_at):
print("Scheduling batch for batch_id: {}".format(batch_id))
url = f"{host}/batches/{batch_id}/schedule"
headers = {'Authorization': f'Bearer {api_key}'}
data = {'scheduled_at': scheduled_at}
try:
async with aiohttp.ClientSession() as session:
async with session.post(url, headers=headers, data=data) as response:
response_data = await response.json()
if response.status == 200:
return response_data
else:
raise Exception(f"Error scheduling batch: {response_data}")
except aiohttp.ClientError as e:
print(f"HTTP Client Error: {str(e)}")
except Exception as e:
print(f"Unexpected error: {str(e)}")
async def get_batch_status(api_key, batch_id):
print("Getting batch status for batch_id: {}".format(batch_id))
url = f"{host}/batches/{batch_id}"
headers = {'Authorization': f'Bearer {api_key}'}
try:
async with aiohttp.ClientSession() as session:
async with session.get(url, headers=headers) as response:
response_data = await response.json()
if response.status == 200:
return response_data
else:
raise Exception(f"Error getting batch status: {response_data}")
except aiohttp.ClientError as e:
print(f"HTTP Client Error: {str(e)}")
except Exception as e:
print(f"Unexpected error: {str(e)}")
async def get_batch_executions(api_key, batch_id):
print("Getting batch executions for batch_id: {}".format(batch_id))
url = f"{host}/batches/{batch_id}/executions"
headers = {'Authorization': f'Bearer {api_key}'}
try:
async with aiohttp.ClientSession() as session:
async with session.get(url, headers=headers) as response:
response_data = await response.json()
if response.status == 200:
return response_data
else:
raise Exception(f"Error getting batch executions: {response_data}")
except aiohttp.ClientError as e:
print(f"HTTP Client Error: {str(e)}")
except Exception as e:
print(f"Unexpected error: {str(e)}")
async def create_batch():
url = f"{host}/batches"
headers = {'Authorization': f'Bearer {api_key}'}
with open(file_path, 'rb') as f:
form_data = aiohttp.FormData()
form_data.add_field('agent_id', agent_id)
form_data.add_field('file', f, filename=os.path.basename(file_path))
# Add multiple from_phone_numbers
for phone in from_phone_numbers:
form_data.add_field('from_phone_numbers', phone)
async with aiohttp.ClientSession() as session:
async with session.post(url, headers=headers, data=form_data) as response:
response_data = await response.json()
if response_data.get('state') == 'created':
batch_id = response_data.get('batch_id')
res = await schedule_batch(api_key, batch_id, scheduled_at=schedule_time)
if res.get('state') == 'scheduled':
check = True
while check:
# Check status every 1 minute
await asyncio.sleep(60)
res = await get_batch_status(api_key, batch_id)
if res.get('status') == 'completed':
check = False
break
if not check:
res = await get_batch_executions(api_key, batch_id)
print(res)
return res
if __name__ == "__main__":
asyncio.run(create_batch())
```
***
## Next Steps
Understand outbound calling concurrency limits
Set up dedicated phone numbers for campaigns
Personalize each call with dynamic data
Automatically retry failed calls
# Buy Phone Numbers for Your Bolna Voice AI Agents
Source: https://www.bolna.ai/docs/buying-phone-numbers
Purchase dedicated US and Indian phone numbers from the Bolna dashboard. US numbers use Twilio, Indian numbers use Plivo or Vobiz with regional selection. $5/month per number.
Buy dedicated phone numbers directly from the Bolna dashboard. Each number costs **\$5/month**, billed as a recurring subscription from your Bolna wallet balance.
Buy and view your phone numbers at [platform.bolna.ai/phone-numbers](https://platform.bolna.ai/phone-numbers).
***
## How to Buy a Phone Number
Navigate to **My Numbers** in the sidebar and click the **Buy Phone Number** button in the top right.
Open the **Select Country** dropdown. The available countries are **United States** and **India**. The purchase flow changes based on your selection.
***
## United States Numbers
US numbers are provided through **Twilio**. You can search for numbers by area code pattern.
Type an area code in the **Pattern** field to filter results. For example, enter `718` to find numbers starting with that prefix. Results appear in the format `1718XXXXXXX`.
Click **Select phone number** to browse available numbers. Pick one from the list.
Click **Purchase number** to complete the purchase. The \$5/month cost is deducted from your wallet balance.
***
## India Numbers
Indian numbers require compliance verification. When you select **India**, the purchase flow changes: the **Pattern** field is replaced by a **Region** selector, and you must choose a telephony provider.
Regions: Karnataka (80), Maharashtra (22)
Regions: Karnataka (80), Gujarat (79), NCR (11)
The region code appears after `+91` in the phone number. For example, a Karnataka number looks like `+9180XXXXXXXX`.
### Plivo
### Vobiz
Choose **Plivo** or **Vobiz** from the provider dropdown.
Select a region from the dropdown, or leave it on **All regions** to see all available numbers.
Pick a number from the list and click **Purchase number**.
Indian numbers require compliance approval. You may need to submit identity documents before your number is activated.
***
## Pricing
All phone numbers cost **\$5/month** as a recurring subscription. The amount is deducted automatically from your Bolna wallet balance each month on the renewal date.
Phone number charges are **separate** from call charges. The \$5/month covers only the number itself. Per-minute telephony and provider costs are billed separately when you make or receive calls.
View [call pricing](/docs/pricing/call-pricing) for details on per-minute call costs and telephony charges.
***
## What Can You Do with Purchased Numbers?
Call customers from your dedicated numbers
Route incoming calls to your Voice AI agents
Run calling campaigns at scale with CSV uploads
Learn more about Twilio, Plivo, and Vobiz
# Agent Conversations, Metrics & Logs
Source: https://www.bolna.ai/docs/call-history
Access Voice AI agent conversations, recordings, transcripts, and execution data. Monitor performance metrics, debug with logs, and export data for analysis.
## What is Call History?
Call History (Agent Conversations) displays all historical conversations with your agents. View performance metrics, listen to recordings, read transcripts, and access raw execution data for debugging and analysis.
***
## How to Access Call History
Click **Call History** in the left navigation menu.
Click **See all call logs** in the actions panel.
***
## Performance Metrics
The top section displays **real-time metrics** for your selected agent and date range. Use these to monitor campaign performance at a glance.
| Metric | Description |
| -------------------- | ---------------------------------------------- |
| **Total Executions** | Total number of call attempts |
| **Total Cost** | Total campaign spend |
| **Total Duration** | Total call time in seconds |
| **Status Breakdown** | Count of Error, Completed, and No-Answer calls |
| **Avg Cost** | Average cost per call |
| **Avg Duration** | Average call length |
***
## Filtering Calls
| Filter | Description |
| -------------- | ----------------------------------------- |
| **Agent** | Select a specific agent to view its calls |
| **Batch** | Filter by batch campaign |
| **Date Range** | Choose a date range for the calls |
| **Group By** | Group calls by different criteria |
| **Call Type** | Filter by inbound or outbound calls |
| **Status** | Filter by Completed, Error, or No-Answer |
| **Provider** | Filter by telephony provider |
Use the **search by execution ID** box to quickly find a specific call.
***
## Call Table
Each call is displayed with the following information:
| Column | Description |
| --------------------- | --------------------------------------------------- |
| **Execution ID** | Unique identifier for the call |
| **User Number** | Phone number of the caller/recipient |
| **Conversation Type** | Type of call (plivo outbound, twilio inbound, etc.) |
| **Duration (s)** | Call duration in seconds |
| **Hangup By** | Who ended the call (Callee, Carrier, Plivo, etc.) |
| **Batch** | Batch campaign if applicable |
| **Timestamp** | When the call occurred |
| **Cost** | Cost of the call |
| **Status** | Call status (Completed, No-answer, Error) |
***
## Call Details
Click **Recordings, transcripts, etc** to view the full conversation data.
| Section | Description |
| -------------- | ----------------------------------------------------- |
| **Recording** | Audio waveform with play, copy, and download options |
| **Transcript** | Full conversation showing Assistant and User messages |
Use the copy button to quickly copy the recording URL or transcript text.
Click the **Trace Data** icon to view detailed execution logs for debugging.
| Column | Description |
| ------------- | ---------------------------------------------------------- |
| **Timestamp** | Exact time of each log entry |
| **Log Data** | The actual request or response content |
| **Direction** | Whether it's a request or response |
| **Component** | Which component handled it (synthesizer, transcriber, llm) |
| **Provider** | Provider used (elevenlabs, deepgram, azure, etc.) |
When you fetch logs via the [Get execution raw logs API](/docs/api-reference/executions/get_execution_raw_logs), LLM assistant responses may also include **`reasoning_content`** (model thinking or reasoning summary) when the provider returns it.
**Trace data is essential for debugging!** Use it to identify latency issues, transcription errors, or unexpected LLM responses.
Click **Download logs** to export all trace data for detailed analysis.
Click the **Raw Data** icon to view the complete JSON execution data.
The raw data format matches the [Get Execution API](/docs/api-reference/executions/get_execution) response, making it easy to integrate with your systems programmatically.
***
## Quick Actions
| Action | Description |
| --------------------- | --------------------------------- |
| **Refresh** | Reload the call list |
| **Stop Queued Calls** | Cancel pending calls in the queue |
| **Download Records** | Export call data as CSV |
Export call data as CSV for analysis in spreadsheet tools or to share with your team.
***
## Next Steps
Configure webhooks and post-call tasks
Access call data programmatically
Configure your agent settings
Set up automated calling campaigns
# Understanding Call Latency Metrics in Bolna Voice AI
Source: https://www.bolna.ai/docs/call-latencies
Analyze call latency across transcription, LLM, and synthesis in Bolna Voice AI. Identify bottlenecks and optimize response times.
## Introduction
Bolna provides detailed latency metrics for every Voice AI execution, helping you monitor and optimize agent response speed. These metrics break down timing across the entire voice pipeline, from speech recognition to LLM processing to audio synthesis.
Access latency data via the [Get Execution API](/docs/api-reference/executions/get_execution) in the `latency_data` object.
***
## Latency Data Overview
### Top-Level Metrics
```json theme={"system"}
{
"latency_data": {
"stream_id": 129.56,
"time_to_first_audio": 130.84,
"region": "in",
"transcriber": { ... },
"llm": { ... },
"synthesizer": { ... }
}
}
```
| Field | Type | Description |
| --------------------- | -------- | --------------------------------------------------------------------- |
| `stream_id` | `float` | Time (ms) to establish the audio stream connection |
| `time_to_first_audio` | `float` | Total time (ms) from call start to first audio played to the user |
| `region` | `string` | Geographic region code (e.g., `in` for India, `us` for United States) |
`time_to_first_audio` is the most important metric for perceived responsiveness. It represents how long the caller waits before hearing the agent speak.
***
## Pipeline Component Metrics
Converts spoken audio into text. Tracks how quickly speech is being transcribed.
```json theme={"system"}
{
"transcriber": {
"time_to_connect": 226,
"turns": [
{
"turn": 1,
"turn_latency": [
{
"sequence_id": 1,
"audio_to_text_latency": 20.12,
"text": "hello who is there"
},
{
"sequence_id": 2,
"audio_to_text_latency": 19.96,
"text": "hello who is this"
}
]
}
]
}
}
```
| Field | Type | Description |
| ----------------------- | --------- | ------------------------------------------------------ |
| `time_to_connect` | `integer` | Time (ms) to establish connection with the transcriber |
| `turn` | `integer` | Sequential conversation turn number (starting at 1) |
| `sequence_id` | `integer` | Incremental transcription update ID within a turn |
| `audio_to_text_latency` | `float` | Time (ms) from audio input to transcribed text |
| `text` | `string` | Transcribed text for this sequence |
Multiple sequences per turn represent **incremental refinements**. The transcriber provides partial results that improve over time. The final sequence is the most accurate.
Generates the agent's response based on transcribed input.
```json theme={"system"}
{
"llm": {
"time_to_connect": null,
"turns": [
{
"time_to_first_token": 1633.04,
"time_to_last_token": 1691.53,
"turn": 1
},
{
"time_to_first_token": 737.80,
"time_to_last_token": 777.49,
"turn": 2
}
]
}
}
```
| Field | Type | Description |
| --------------------- | ----------------- | ---------------------------------------------------------------------- |
| `time_to_connect` | `integer \| null` | Time (ms) to connect to the LLM provider (`null` if not applicable) |
| `turn` | `integer` | Sequential turn number |
| `time_to_first_token` | `float` | Time (ms) to receive the **first token**, critical for perceived speed |
| `time_to_last_token` | `float` | Time (ms) to receive the **last token**, total generation time |
**Time to First Token (TTFT)** is the key metric here. With streaming, the synthesizer starts converting text to speech as soon as the first tokens arrive, reducing overall latency.
Converts LLM text responses into spoken audio.
```json theme={"system"}
{
"synthesizer": {
"time_to_connect": 271,
"turns": [
{
"time_to_first_token": 599,
"time_to_last_token": 800,
"turn": 1
},
{
"time_to_first_token": 317,
"time_to_last_token": 518,
"turn": 2
}
]
}
}
```
| Field | Type | Description |
| --------------------- | --------- | ----------------------------------------------- |
| `time_to_connect` | `integer` | Time (ms) to connect to the TTS service |
| `turn` | `integer` | Sequential turn number |
| `time_to_first_token` | `integer` | Time (ms) to generate the **first audio chunk** |
| `time_to_last_token` | `integer` | Time (ms) to complete **all audio generation** |
Modern TTS systems stream audio. Playback begins before the entire response is synthesized, keeping the conversation flowing naturally.
***
## Identifying Bottlenecks
Use these thresholds to pinpoint performance issues across the pipeline:
**Possible causes:**
* Network issues with the transcription service
* Need for a different transcription provider
* Poor audio quality or background noise
**Fix:** Try a different transcriber provider in your [Audio Tab](/docs/agent-setup/audio-tab) configuration, or improve audio input quality.
**Possible causes:**
* LLM model is too large or complex
* Prompts need optimization (too long or unstructured)
* High load on the LLM service
**Fix:** Consider a faster LLM model, optimize your prompt length, or try a different provider in your [LLM Tab](/docs/agent-setup/llm-tab).
**Possible causes:**
* Network issues with the TTS service
* Voice model is computationally expensive
* Provider experiencing high load
**Fix:** Try a different voice or TTS provider in your [Audio Tab](/docs/agent-setup/audio-tab) configuration.
***
## Related Pages
Retrieve execution details with latency data
Track the full lifecycle of your calls
Understand call termination reasons
# Call Guardrails
Source: https://www.bolna.ai/docs/calling-guardrails
Control when your agent makes outbound calls with time-based restrictions to ensure compliance with calling regulations and respect recipient time zones.
## What are Call Guardrails?
Call guardrails help you control when your agent makes outbound calls by enforcing time-based restrictions. This ensures compliance with calling regulations and respects recipient time zones.
With call guardrails, you can define allowed calling hours (e.g., 9 AM - 5 PM) for your agents. Calls outside these hours are automatically rescheduled to the next available time window. For emergency or priority calls, you can use the bypass flag to override these restrictions.
## How It Works
1. **Configure guardrails** on your agent with allowed calling hours (`call_start_hour` and `call_end_hour`)
2. **Initiate a call** via API (optionally with `bypass_call_guardrails` flag)
3. **Timezone detection** - System automatically detects recipient's timezone from phone number
4. **Time validation** - If bypass is false, checks if current time in recipient's timezone is within allowed window
5. **Execute or reschedule** - Call is made immediately if within hours, or automatically rescheduled if outside
The hours are interpreted in the **recipient's local timezone**, not yours. For example, if `call_start_hour=9`, the call can be made at 9 AM Indian time for an Indian number.
## Configuration
Configure guardrails when creating or updating an agent via the `/v2/agent` API:
| Field | Type | Required | Default | Description |
| ----------------- | ------- | -------- | ------- | ------------------------------------------------------ |
| `call_start_hour` | integer | No | - | Start of allowed calling window (0-23, 24-hour format) |
| `call_end_hour` | integer | No | - | End of allowed calling window (0-23, 24-hour format) |
**Example: Business hours (9 AM - 5 PM)**
```bash theme={"system"}
curl --request POST \
--url https://api.bolna.ai/v2/agent \
--header 'Authorization: Bearer YOUR_API_TOKEN' \
--header 'Content-Type: application/json' \
--data '{
"agent_config": {
"agent_name": "Sales Agent",
"agent_welcome_message": "Hello, how can I help you?",
"calling_guardrails": {
"call_start_hour": 9,
"call_end_hour": 17
},
"tasks": [...]
},
"agent_prompts": {...}
}'
```
Hours use 24-hour format where 0 = midnight, 9 = 9 AM, 17 = 5 PM, 23 = 11 PM. `call_end_hour` must be greater than or equal to `call_start_hour`.
## Making Calls
### Standard Call (With Guardrails)
When you initiate a call, the agent's guardrails are automatically applied:
```bash theme={"system"}
curl --request POST \
--url https://api.bolna.ai/call \
--header 'Authorization: Bearer YOUR_API_TOKEN' \
--header 'Content-Type: application/json' \
--data '{
"agent_id": "3c90c3cc-0d44-4b50-8888-8dd25736052a",
"recipient_phone_number": "+14155551234",
"user_data": {...}
}'
```
**What happens:**
* If within allowed hours → Call is made immediately
* If outside allowed hours → Call status is set to `rescheduled` and automatically rescheduled to next `call_start_hour`
### Bypass Call Guardrails
The `bypass_call_guardrails` parameter allows you to skip all time validation checks for specific calls. When set to `true`, calls are made immediately regardless of configured time windows.
**When to use bypass:**
* Emergency calls or critical notifications
* VIP/priority calls that can't wait
* Testing call flows in development
* Time-sensitive notifications or alerts
**Single call with bypass:**
```bash theme={"system"}
curl --request POST \
--url https://api.bolna.ai/call \
--header 'Authorization: Bearer YOUR_API_TOKEN' \
--header 'Content-Type: application/json' \
--data '{
"agent_id": "3c90c3cc-0d44-4b50-8888-8dd25736052a",
"recipient_phone_number": "+14155551234",
"bypass_call_guardrails": true,
"user_data": {...}
}'
```
Use the bypass flag responsibly. Bypassing guardrails may violate calling regulations or disturb recipients.
## Common Use Cases
### Business Hours Only
Configure standard 9-5 business hours:
```json theme={"system"}
{
"calling_guardrails": {
"call_start_hour": 9,
"call_end_hour": 17
}
}
```
Calls are only made between 9:00 AM and 5:00 PM in the recipient's timezone.
## Important Notes
* **Time format**: Use 24-hour format (0-23).
* **Timezone behavior**: Time validation uses the **recipient's timezone**, automatically detected from phone number.
* **Automatic rescheduling**: Calls outside allowed hours are automatically rescheduled to the next `call_start_hour`. No manual intervention required.
* **Bypass flag**: For single calls (`POST /call`) use flag bypass\_call\_guardrails. Default is `false`.
* **status**: The status is updated to `rescheduled` when the call is triggered outside allowed hours
## In-Call Reschedule Validation
When a user asks to reschedule a call to a specific time during a conversation (e.g., "reschedule for 9 PM today"), the system validates the requested time against the agent's allowed calling window before scheduling it.
**Priority order for validation:**
1. **`calling_guardrails`** — explicit `call_start_hour` / `call_end_hour` config always takes precedence
2. **Agent prompt** — if no explicit guardrails are set, the LLM reads the agent's system prompt for any mentioned time restrictions
3. **Default window (9 AM – 9 PM)** — fallback if neither of the above is configured
If the requested reschedule time falls outside the allowed window, the reschedule is dropped entirely. The system does not snap to the boundary — if the time is disallowed, the request is rejected.
Ensure your agent's system prompt and `calling_guardrails` config mention the same calling hours to avoid inconsistent behavior during conversations.
## Next Steps
* [Make outbound calls](/docs/making-outgoing-calls) - Learn the basics of making calls
* [Batch calling](/docs/batch-calling) - Schedule calls in bulk
* [Auto-retry](/docs/auto-retry) - Automatically retry failed calls
* [API reference for making calls](/docs/api-reference/calls/make) - Full API documentation
# Bolna AI Updates for April, 2025
Source: https://www.bolna.ai/docs/changelog/april-2025
Explore the latest features, improvements, and API updates introduced in April 2025 for Bolna Voice AI agents.
## Call Frequency Limiting
* Set a limit on the maximum number of inbound calls allowed from a unique phone number to a given destination number. Call frequency limiting helps prevent spam, abuse, or unintended repeated calls.
## Improvements
* All inbound and outbound calls to have a maximum limit of `25KB` for injecting context.
* Learn more on [injecting context for inbound calls](/docs/customizations/identify-incoming-callers) for inbound calls.
* Learn more on [injecting context for outbound calls](/docs/using-context) for outbound calls).
## Inbound Whitelist Control
* Configure inbound rules to allow calls only from specific whitelisted phone numbers. Inbound whitelist control ensures that only trusted callers can initiate conversations with your agents.
## Improvements
* Latency improvements for agents using [guardrails](/docs/guardrails).
* Tool information will now be available in the post call analysis like [extraction](/docs/using-extractions) & summarization.
## Deepgram Aura-2 TTS Support
* Added support for [Deepgram's](/docs/providers/voice/deepgram) Aura-2 TTS model `aura-2`.
## Improvements
* Transcripts will now be more [accurate by incorporating interruptions](/docs/customizations/capturing-precise-transcripts).
## OpenAI GPT-4.1 Model Support
* Added support for OpenAI's **GPT-4.1** family of models: `gpt-4.1`, `gpt-4.1-mini` & `gpt-4.1-nano`.
## Improvements
* Ability to remove voices from your account
* Audio recordings are now stored in `dual` (stereo) mode for both inbound & outbound calls.
# Bolna AI Updates for April, 2026
Source: https://www.bolna.ai/docs/changelog/april-2026
Explore the latest features and improvements introduced in April 2026 for Bolna Voice AI agents.
## Conversation Rating & Feedback
You can now rate and leave feedback on individual conversations directly from the dashboard. After reviewing a call, score it from 1 (Poor) to 4 (Excellent) and optionally add a note to capture what went well or what needs improvement.
Scores and notes stay internal to your team, making it easy to track agent quality over time and share context during reviews.
## Import custom functions from cURL
You can now paste a `curl` request while creating a custom function in the **Tools** tab and use it to generate a draft configuration automatically. This makes it much faster to bring existing API requests into Bolna without rebuilding the function setup from scratch.
Learn more in the [Custom Functions documentation](/docs/tool-calling/custom-function-calls#import-from-curl).
## LLM reasoning in execution logs
The [Get execution raw logs](/docs/api-reference/executions/get_execution_raw_logs) API now includes optional **`reasoning_content`** on LLM response rows when the underlying model returns traceable reasoning (for example OpenAI reasoning summaries or Gemini thinking). It appears alongside the usual **`data`** field for assistant turns.
In the dashboard, use **Call history → Trace Data** ([Call history](/docs/call-history)) to inspect execution logs while debugging.
## Extraction Confidence, Reasoning & Typed Responses
Extraction results now include richer signal to help you trust and act on post-call data:
* **Confidence score** — every extraction result carries a `confidence` score (0.0–1.0) and a `confidence_label` (`"High"` ≥ 0.8, `"Medium"` ≥ 0.5, `"Low"` \< 0.5). Use these to route low-confidence results for human review before pushing data downstream.
* **Reasoning** — `reasoning_subjective` and `reasoning_objective` explain exactly why the LLM produced each answer, making it much easier to audit unexpected results.
* **Expected Format for free text** — you can now constrain free-text responses to a specific type: `timestamp` (ISO 8601), `numeric`, `boolean`, `email`, or a **custom regex** pattern. Responses are validated post-LLM; mismatches are flagged in a `validation` field while the original answer is still preserved.
```json theme={"system"}
{
"subjective": "user@example.com",
"objective": null,
"confidence": 0.95,
"confidence_label": "High",
"reasoning_subjective": "Customer clearly provided their email address during the call.",
"validation": { "is_valid": true, "expected_type": "email" }
}
```
Learn more in the [Using Extractions documentation](/docs/using-extractions) and [Dispositions API reference](/docs/api-reference/dispositions/overview).
## Multilingual Agent Support
You can now launch multilingual agents with language-specific configuration across prompts, speech recognition, and text-to-speech. This makes it easier to set up agents that can operate cleanly across multiple languages from a single workflow.
Learn more in the [Multilingual voice agents documentation](/docs/customizations/multilingual-languages-support).
## Region-Based Indian Phone Number Search
You can now search Indian phone numbers by region directly in the dashboard. This makes it easier to find numbers for a specific geography.
Learn more in the [Phone Numbers API documentation](/docs/api-reference/phone-numbers/search).
## Unified Voice Configuration in Agent Setup
You can now configure TTS voices from a single place in agent setup with a unified selector for provider, model, and voice. This makes it easier to find and apply the right voice without jumping across multiple controls.
The updated voice selector includes:
* Search across available voices by name
* Gender filters for `male`, `female`, and `neutral` voices
* Inline voice sample playback while selecting a voice
Learn more in the [Audio Tab documentation](/docs/agent-setup/audio-tab).
# Bolna AI Updates for August, 2025
Source: https://www.bolna.ai/docs/changelog/august-2025
Explore the latest features, improvements, and API updates introduced in August 2025 for Bolna Voice AI agents.
## Support for scheduling calls at a future timestamp in `/call` endpoint.
* If `scheduled_at` is provided, the call will be queued and executed at that timestamp. Refer [docs](https://www.bolna.ai/docs/api-reference/calls/make#body-scheduled-at).
## Instantly Clone Voices with a Single Click
* You can now create high-quality AI clones of any voice directly from the Voice Lab.
* Simply provide a name and a 1-2 minute audio sample to generate a new, unique voice for your agents.
* Voice cloning is powered by leading providers like ElevenLabs to ensure top-tier quality. Learn more in our [new guide to cloning voices](https://www.bolna.ai/docs/clone-voices).
## Added `OpenRouter` support
* Support for the following models via [OpenRouter](/docs/providers/llm-model/openrouter). Learn more about OpenRouter from their [official website](https://openrouter.ai).
1. `gpt-4.1` OpenRouter OpenAI
2. `gpt-4.1-mini` OpenRouter OpenAI
3. `gpt-4.1-nano` OpenRouter OpenAI
4. `gpt-4o` OpenRouter OpenAI
5. `gpt-4o-mini` OpenRouter OpenAI
6. `gpt-4` OpenRouter OpenAI
## Add your own `OpenRouter` API keys
* Use your own OpenRouter account by adding your API Key to the [OpenRouter provider](https://www.bolna.ai/docs/providers).
# Bolna AI Updates for December, 2024
Source: https://www.bolna.ai/docs/changelog/december-2024
Explore the latest features, improvements, and API updates introduced in December 2024 for Bolna Voice AI agents.
## Batch Management Enhancements
* Download batches that have been uploaded
* Display batch call status breakdown for better tracking
## API Updates
* Batches APIs - Added breakdown for batches executions ([API doc](/docs/api-reference/batches/get_batch))
## New Features
* Added Cartesia TTS support for voice synthesis
* Implemented voicemail detection for Twilio & Plivo calls
* Enabled call hangup using prompts (see [hangup live calls on Bolna](/docs/hangup-calls))
* Introduced multi-agent prompt building (see [multi-agent prompt](/docs/multi-agent-prompt))
## Major Platform Updates
* Added support for over 40+ languages (see [supported languages](/docs/customizations/multilingual-languages-support))
* Knowledgebases are now functional in all supported languages and work together with LLM-driven context (see [ingesting and using KBs](/docs/getting-started/knowledge-base))
* Revamped batches for simpler processing and management (see [using batches](/docs/batch-calling))
* Added call hangup information for all calls
## Improvements & Migrations
* Changed `execution_id` notation from `{agent_id}#{timestamp}` to a unique `{uuid}` format.
* The execution ID overhaul addresses previous scaling issues and product complications.
## API Updates
#### New APIs
* Get call details using only `execution_id` ([API doc](/docs/api-reference/executions/get_execution))
* Set inbound agent programmatically ([API doc](/docs/api-reference/inbound/agent))
* Get a list of all added voices for your account ([API doc](/docs/api-reference/voice/get_all))
#### API changes
* Call APIs - Outbound calls will now return the unique `execution_id` ([API doc](/docs/api-reference/calls/make))
* Batches APIs - removed redundant need of `agent_id` wherever applicable ([API doc](/docs/api-reference/batches/overview))
* Execution APIs - removed redundant need of `agent_id` wherever applicable ([API doc](/docs/api-reference/executions/overview))
# Bolna AI Updates for December, 2025
Source: https://www.bolna.ai/docs/changelog/december-2025
Explore the latest features, improvements, and API updates introduced in December 2025 for Bolna Voice AI agents.
## Mention function calls using '@' in agent prompts
You can now mention function calls directly in your agent prompt using the `@` symbol. Simply type `@` followed by the function name to reference it in your instructions, making it easier to guide your agent on when to use specific functions.
## New Transcriber Integration: Pixa
Bolna's transcriber lineup grows with **[Pixa](/docs/providers/transcriber/pixa)**. Use it as an additional transcription backend to pick the provider that best matches your agent's domain and reliability needs.
## New Transcriber Integration: Gladia
You can now plug **[Gladia](/docs/providers/transcriber/gladia)** into Bolna for speech-to-text. This adds another strong choice for teams that want flexibility across languages and scenarios.
## New Transcriber Integration: ElevenLabs Scribe
**[ElevenLabs Scribe](/docs/providers/transcriber/elevenlabs)** is now available as a transcriber option in Bolna. This provides more flexibility for building voice AI agents across different languages and use cases.
## URL support for Knowledgebases
Knowledgebases now support [website URLs](/docs/getting-started/knowledge-base) as data sources, allowing you to ingest and reference content directly from web links.
## Improved Knowledgebase support
* Added support for multiple PDF documents which can be used together.
* Fixed issues with function calls while using knowledgebases.
* Improved retrieval accuracy and reduced response latency.
# Bolna AI Updates for February, 2025
Source: https://www.bolna.ai/docs/changelog/february-2025
Explore the latest features, improvements, and API updates introduced in February 2025 for Bolna Voice AI agents.
## Webcall Support
* Added webcall support to help users build and test their Bolna Voice AI agents directly in the browser.
## Voice Import Integration
* Integrated support for [importing voices](/docs/import-voices) from multiple providers like ElevenLabs and Cartesia, along with custom voice options — making voice agent personalization on Bolna AI smoother and more flexible than ever.
## Deepgram Nova-3 Model Support
* Added [Deepgram `nova-3` model](/docs/providers/transcriber/deepgram#4-list-of-deepgram-models-supported-on-bolna-ai) for speech to text capabilities.
## ElevenLabs Flash v2.5 Model Support
* Added [ElevenLabs `eleven_flash_v2_5` model](/docs/providers/voice/elevenlabs#4-list-of-elevenlabs-models-supported-on-bolna-ai) for text to speech capabilities.
## Improvements
* Hangup live calls automatically on [detecting silence](/docs/hangup-calls#1-using-time-based-call-hangup) and [using LLM prompts](/docs/hangup-calls#2-using-prompts-to-hangup-calls).
* Add a [hangup message](/docs/hangup-calls#adding-a-hangup-message) to be spoken while disconnecting the call
# Bolna AI Updates for February, 2026
Source: https://www.bolna.ai/docs/changelog/february-2026
Explore the latest features, improvements, and API updates introduced in February 2026 for Bolna Voice AI agents.
## Override Agent Config in /call API
The `/call` API now supports an `agent_data` parameter that lets you override agent configuration properties at call time. Currently, overriding the `voice_id` (for the same provider) is supported.
This allows you to dynamically change the voice used for a specific call without modifying the agent's default configuration.
```json Example theme={"system"}
{
"agent_id": "123e4567-e89b-12d3-a456-426655440000",
"recipient_phone_number": "+919876543210",
"agent_data": {
"voice_id": "Sam"
}
}
```
Learn more in the [Make a Phone Call API documentation](/docs/api-reference/calls/make).
## Sarvam v3 Models Support
Bolna now supports **Sarvam v3** models:
* **saaras:v3** — New transcriber model configured for direct transcription in the original spoken language. Supports all 11 Indian languages.
* **bulbul:v3** — New Sarvam TTS voice model for improved Indian language speech synthesis.
Learn more about Sarvam transcriber models in the [Sarvam STT documentation](/docs/providers/transcriber/sarvam) and voice models in the [Sarvam TTS documentation](/docs/providers/voice/sarvam).
## Deepgram: New Indian Languages Added
Bolna now supports additional **Deepgram** Indian languages for speech recognition:
* **bn** — Bengali
* **kn** — Kannada
* **mr** — Marathi
* **te** — Telugu
## API Rate Limiting
Bolna APIs now enforce rate limits to ensure fair usage and platform stability. Rate limits are applied per **organization** (if the user belongs to one) or per **user** otherwise.
**Endpoint-specific limits:**
| Endpoint | Rate Limit |
| --------------------------------- | ------------------- |
| `/v2/agent/{agent_id}/executions` | 500 requests/minute |
| `/v2/agent/{agent_id}` | 500 requests/minute |
| `/call` | 500 requests/minute |
All other API endpoints are subject to a default rate limit of **1000 requests per minute**.
Requests exceeding the limit will receive an HTTP 429 response. Learn more in the [rate limiting documentation](/docs/api-reference/rate-limiting).
## Truecaller Verification
Bolna now supports **Truecaller Verification** — users can get their phone numbers **verified on Truecaller**, so your calls show a verified identity to recipients. This helps build trust and can improve answer rates by making it clearer who’s calling.
Learn more in the [Truecaller Verification documentation](https://www.bolna.ai/docs/truecaller-verification).
# Bolna AI Updates for January, 2025
Source: https://www.bolna.ai/docs/changelog/january-2025
Explore the latest features, improvements, and API updates introduced in January 2025 for Bolna Voice AI agents.
## Bug fixes
* Execution `status` wasn't getting updated for few incoming calls with connected Twilio telephony
## API Updates
* Agent APIs - Added functionality to programmatically delete agents via APIs ([API doc](/docs/api-reference/agent/v2/delete))
## Bug fixes
* Few executions were erroneously loosing the `batch_id` mapping
# Bolna AI Updates for January, 2026
Source: https://www.bolna.ai/docs/changelog/january-2026
Explore the latest features, improvements, and API updates introduced in January 2026 for Bolna Voice AI agents.
## Vobiz Telephony Integration
* Introducing native Vobiz integration for Voice AI calling in India and global markets
* Connect your existing Vobiz account securely to Bolna for complete control over your telephony infrastructure
* Make outbound AI calls and receive inbound calls using your own Vobiz phone numbers
* Support for both dashboard-based calling and programmatic API integration
* Learn more in the [Vobiz integration documentation](/docs/vobiz)
## Auto-Retry for Failed Calls
Automatically retry calls that fail due to no-answer, busy signals, or errors. Configure retry attempts, delays, and which statuses trigger retries.
**Key features:**
* Up to 3 automatic retry attempts
* Configurable delays between retries
* Works with single calls and batch campaigns
* Webhook notifications include retry status
Learn more in the [auto-retry documentation](/docs/auto-retry).
## IVR Support for Inbound Calls
Bolna now supports IVR (Interactive Voice Response) for Plivo inbound calls. Route callers to different Voice AI agents based on their menu selections.
**Key features:**
* **Menu steps** - Present options and route based on digit pressed
* **Collect steps** - Gather multi-digit input (account numbers, PINs)
* **Multi-agent routing** - Different agent per menu option
* **Conditional branching** - Build complex flows with language selection
* **Context passing** - All collected data sent to agent as context
Configure IVR via the `/inbound/setup` API by adding `ivr_config` to your request. Learn more in the [IVR documentation](/docs/ivr-inbound-calls).
```json theme={"system"}
{
"ivr_config": {
"enabled": true,
"voice": "Polly.Aditi",
"welcome_message": "Welcome to Acme Corp.",
"steps": [
{
"step_id": "department",
"type": "menu",
"prompt": "Press 1 for Sales. Press 2 for Support.",
"field_name": "department",
"options": [
{"digit": "1", "label": "Sales", "agent_id": "sales-agent-id"},
{"digit": "2", "label": "Support", "agent_id": "support-agent-id"}
]
}
]
}
}
```
## Multilingual Message Auto Switching
Bolna now automatically detects the language your users speak and adapts system messages accordingly. Bolna agents analyze conversation patterns and intelligently switche messages to match the detected language.
Bolna agents are now able to identify the dominant language while handling real-world conversational scenarios where users mix languages. This ensures messages are delivered in the language users actually prefer for substantive communication.
**Currently supported message types:**
* **User online check message** - The "are you still there?" prompt when checking if users are on the call
* **Call hangup message** - Closing messages when the agent ends a call
* **Pre-function call message** - Brief wait messages while executing custom tools or API calls
Configure multilingual variants using language codes (e.g., `en`, `hi`, `ta`, etc) and Bolna handles the rest. Learn more in the [language detection documentation](/docs/customizations/auto-switch-multilingual-messages).
## Noise Cancellation During Calls
Bolna now supports noise cancellation during calls, providing clearer audio quality by filtering out background noise for both the agent and the caller.
## Auto Reschedule
Automatically reschedule calls when a user asks to be called at a specific time. The agent will intelligently detect scheduling requests and handle the rescheduling process seamlessly.
# Bolna AI Updates for July, 2025
Source: https://www.bolna.ai/docs/changelog/july-2025
Explore the latest features, improvements, and API updates introduced in July 2025 for Bolna Voice AI agents.
## Bolna AI Data Residency
* [Introducing India Data Residency](/docs/enterprise/data-residency) for enterprise-grade Voice AI, now hosted in India for compliance and improved performance.
## Phone Number Management APIs
* Search available phone numbers [using APIs](/docs/api-reference/phone-numbers/search).
* Buy available phone numbers [using APIs](/docs/api-reference/phone-numbers/buy).
* Delete and remove phone numbers [using APIs](/docs/api-reference/phone-numbers/delete).
## Rime TTS Voice Support
* Added [Rime TTS](/docs/providers/voice/rime) voices and models:
* `arcana` models and voices
* `mistv2` models and voices
## Sarvam Bulbul v2 WebSocket Integration
* Incorporated websockets for Sarvam `bulbul:v2` model to improve real-time performance.
# Bolna AI Updates for June, 2025
Source: https://www.bolna.ai/docs/changelog/june-2025
Explore the latest features, improvements, and API updates introduced in June 2025 for Bolna Voice AI agents.
## Bolna AI On-Premise Offering
* Rolling out Bolna AI [On-Premise offering](/docs/enterprise/on-premise-deployments) in Private Beta for enterprise customers.
## Agent Data Ingestion Configuration
* Exposed `ingest_source_config` for agents, enabling inbound calls to ingest user data via APIs.
* The following APIs have been updated to reflect these changes:
* Get Agent API [API reference doc](/docs/api-reference/agent/v2/get)
* Create Agent API [API reference doc](/docs/api-reference/agent/v2/create)
* Update Agent API [API reference doc](/docs/api-reference/agent/v2/update)
* Patch update Agent API [API reference doc](/docs/api-reference/agent/v2/patch_update)
* List Agents API [API reference doc](/docs/api-reference/agent/v2/get_all)
## TTS Model Switching in UI Dashboard
* Enabled TTS model switching directly from the UI Dashboard for easier voice model management.
## Sub-Account API Endpoints
* Added the following APIs for sub-account management:
* Create sub-account API [API reference doc](/docs/api-reference/sub-accounts/create)
* List all sub-accounts API [API reference doc](/docs/api-reference/sub-accounts/get_all)
* Track sub-accounts usage API [API reference doc](/docs/api-reference/sub-accounts/usage)
# Bolna AI Updates for March, 2025
Source: https://www.bolna.ai/docs/changelog/march-2025
Explore the latest features, improvements, and API updates introduced in March 2025 for Bolna Voice AI agents.
## Improvements
* Enabling `strict` mode for custom tools to ensure function calls reliably adhere to the function schema, instead of being best effort.
* Updating the UI for the custom tools and improving the [documentation with examples](/docs/tool-calling/custom-function-calls).
## Dynamic Caller Identification
* Bolna Voice AI agents can now dynamically identify incoming callers in real time via:
1. using [your internal APIs](/docs/customizations/identify-incoming-callers#1-internal-api-integration-real-time-lookup) which returns records mapped to a phone number,
2. using uploaded [CSV files](/docs/customizations/identify-incoming-callers#2-csv-uploads) or
3. using publicly linked [Google Sheets](/docs/customizations/identify-incoming-callers#3-google-sheets-integration).
## Azure Transcriber Support
* Added Azure's transcriber models for speech to text.
## Improvements
* Infrastructure changes & updates to improve initial conversational latencies.
## Bolna Status Page Launch
* Launched the [Bolna Status page](https://status.bolna.ai) where you can track real-time system updates, maintenance notices, and any ongoing outage updates.
## Bug fixes
* Bolna Voice AI agents will now have the context about current `timestamp` & `timezone` automatically by default which can be used. This helps the agent compute times accurately based on your local setting.
* This can be [overridden](/docs/using-context#injecting-current-time) by passing the `timezone` as well.
# Bolna AI Updates for March, 2026
Source: https://www.bolna.ai/docs/changelog/march-2026
Explore the latest features, improvements, and API updates introduced in March 2026 for Bolna Voice AI agents.
## Custom Ambient Noise Tracks
You can now upload your own **custom ambient noise tracks** in addition to the existing presets. This gives you full control over the background soundscape of your calls.
**What's new:**
* **Upload custom tracks** via `POST /ambient-sounds/custom` — supports `wav` and `mp3` formats, up to **10 MB**
* **Delete custom tracks** via `DELETE /ambient-sounds/{sound_id}`
* **List all tracks** via `GET /ambient-sounds` — returns both presets and your custom tracks, each with a `type` field (`preset` or `custom`)
**What's changed:**
* `ambient_noise_track` now accepts the **id** of an ambient sound record instead of a preset name enum
* The three preset tracks remain available with the same IDs: `coffee-shop`, `office-ambience`, `call-center`
Ambient noise continues to be supported with **Plivo** and **Vobiz** telephony providers.
Read more in the [Call Tab documentation](/docs/agent-setup/call-tab#ambient-noise).
## Extractions - Capture Structured Data from Call Transcripts
We've added **Extractions** to automatically pull structured data from your call transcripts. Instead of manually reviewing conversations, you can set up categories and questions to extract things like lead quality, appointment details, or customer sentiment.
Here's what you can do:
* **Organize by category** - Group related extractions together (like "Visit Details" or "Lead Qualification")
* **Choose your answer format** - Use free text for open-ended responses or pre-defined options with conditional logic
* **Use variables** - Reference call data like `{name}`, `{email}`, or `{candidate_name}` in your extraction prompts
* **Test before deploying** - Try out your extractions on sample transcripts or paste in custom ones
* **Multiple access methods** - Available via Dashboard, Executions API, Webhooks, and Batch Executions
Extractions return data in this format:
```json theme={"system"}
{
"extracted_data": {
"Category Name": {
"Extraction Name": {
"subjective": "Free text response from LLM",
"objective": "Pre-defined value or null"
}
}
}
}
```
Use it for lead scoring, syncing appointments, preventing churn, compliance auditing, or general call intelligence.
Learn more in the [Using Extractions documentation](/docs/using-extractions) and [Dispositions API reference](/docs/api-reference/dispositions/overview).
## Prompt Variables for Date, Time & Timezone
You can now use `{current_date}`, `{current_time}`, and `{timezone}` as variables directly in your agent prompts for more control over placement and formatting of date/time information.
| Variable | Description | Example Value |
| ---------------- | ----------------------------------- | --------------------------- |
| `{current_date}` | Current date in the user's timezone | `Wednesday, March 18, 2026` |
| `{current_time}` | Current time in the user's timezone | `02:30:15 PM` |
| `{timezone}` | Timezone name per tz database | `Asia/Kolkata` |
Read more in the [Using Context documentation](/docs/using-context#date-time--timezone).
## Ambient Noise for Calls
You can now add background ambient noise to your calls for a more natural, human-like experience. Use the `ambient_noise_track` parameter to select a preset track.
Available tracks:
* **`coffee-shop`** — Background sounds of a coffee shop environment
* **`office-ambience`** — Subtle office background noise
* **`call-center`** — Call center ambient sounds
Set `ambient_noise_track` to `None` to disable ambient noise (default).
Ambient noise is supported with **Plivo** and **Vobiz** telephony providers.
***
## In-Call Reschedule Validation
When a user asks to reschedule a call to a specific time during a conversation, the system now validates the requested time against the agent's allowed calling window before scheduling it.
**Priority order for validation:**
1. **`calling_guardrails`** — explicit `call_start_hour` / `call_end_hour` config always takes precedence
2. **Agent prompt** — if no explicit guardrails are set, the LLM reads the agent's system prompt for any mentioned time restrictions
3. **Default window (9 AM – 9 PM)** — fallback if neither of the above is configured
If the requested reschedule time falls outside the allowed window, the request is rejected entirely.
Read more in the [Calling Guardrails documentation](/docs/calling-guardrails#in-call-reschedule-validation).
***
## Vobiz Telephony Number Buying
You can now search and purchase phone numbers from **Vobiz** directly via the API and the dashboard UI. The `provider` parameter has been added to phone number search and purchase endpoints, supporting `twilio`, `plivo`, and `vobiz`.
Read more in the [Phone Numbers API documentation](/docs/api-reference/phone-numbers/search).
## Google Gemini Flash Models Support
Bolna now supports **Google Gemini** Flash models as LLM providers for voice AI agents. The following models are available:
* **gemini-2.5-flash** — Production-ready, best speed and quality balance. 1M token context window.
* **gemini-2.5-flash-lite** — Most cost-effective in the Gemini 2.5 family, optimized for low latency.
* **gemini-3-flash-preview** — Next-generation Gemini model with improved reasoning (released Dec 2025).
* **gemini-3.1-flash-lite-preview** — Fastest throughput at 363 tokens/sec, ideal for high-volume workloads (released Mar 2026).
All models support **English, Hindi, Gujarati, French, Italian, and Spanish**.
Learn more in the [Google Gemini documentation](/docs/providers/llm-model/gemini).
## Multilingual Knowledge Base Support
Knowledge bases now support **multilingual** language mode. When creating a knowledge base, set `language_support` to `multilingual` to enable cross-lingual retrieval across 100+ languages.
This enables:
* Uploading documents in any language (Hindi, Spanish, French, etc.)
* Cross-lingual retrieval — query in one language, retrieve from documents in another
Set the `language_support` parameter via the [Create Knowledgebase API](/docs/api-reference/knowledgebase/create) or through the dashboard when adding a new knowledge base.
Read more in the [Knowledge Base documentation](/docs/getting-started/knowledge-base#multilingual-knowledge-bases).
## Provision to purchase 140 & 160 series phone numbers
Bolna agents can now be triggered with 140 & 160 series phone numbers to comply with TRAI regulations.
Read about procuring these phone numbers on [Purchase special phone numbers documentation](/docs/obtaining-regulated-phone-numbers).
# Bolna AI Updates for May, 2025
Source: https://www.bolna.ai/docs/changelog/may-2025
Explore the latest features, improvements, and API updates introduced in May 2025 for Bolna Voice AI agents.
## Latency Improvements for Azure TTS
* We've optimized our Azure TTS integration for significantly lower end-to-end latency, resulting in faster voice generation and snappier response times for live calls.
## Smallest.ai Lightning-v2 TTS Support
* Added support for Smallest.ai's latest `lightning-v2` TTS model for Bolna AI voice agents.
## Extended Call Duration Limit
* Extended maximum call duration to 40 minutes, allowing for longer interviews or conversations without interruption.
## Azure OpenAI Model Updates
* Added support for the following Azure OpenAI clusters:
1. `gpt-4.1` Azure OpenAI
2. `gpt-4.1-mini` Azure OpenAI
3. `gpt-4.1-nano` Azure OpenAI
4. `gpt-4o` Azure OpenAI
5. `gpt-4o-mini` Azure OpenAI
6. `gpt-4` Azure OpenAI
## ElevenLabs Multi-Context WebSocket Integration
* Updated ElevenLabs to use [`Multi-Context WebSocket`](https://elevenlabs.io/docs/cookbooks/multi-context-web-socket) for improved latency and fluency.
* The Multi-Context WebSocket greatly improves websocket handling, closures, and session contexts.
## Multilingual Support Expansion
* Bolna now supports over 100+ different languages including English (India), English (United States), English (United Kingdom), and many more.
## Updates
* Users can now top up for **\$1000 USD** in one go.
* Users can now opt for auto recharge.
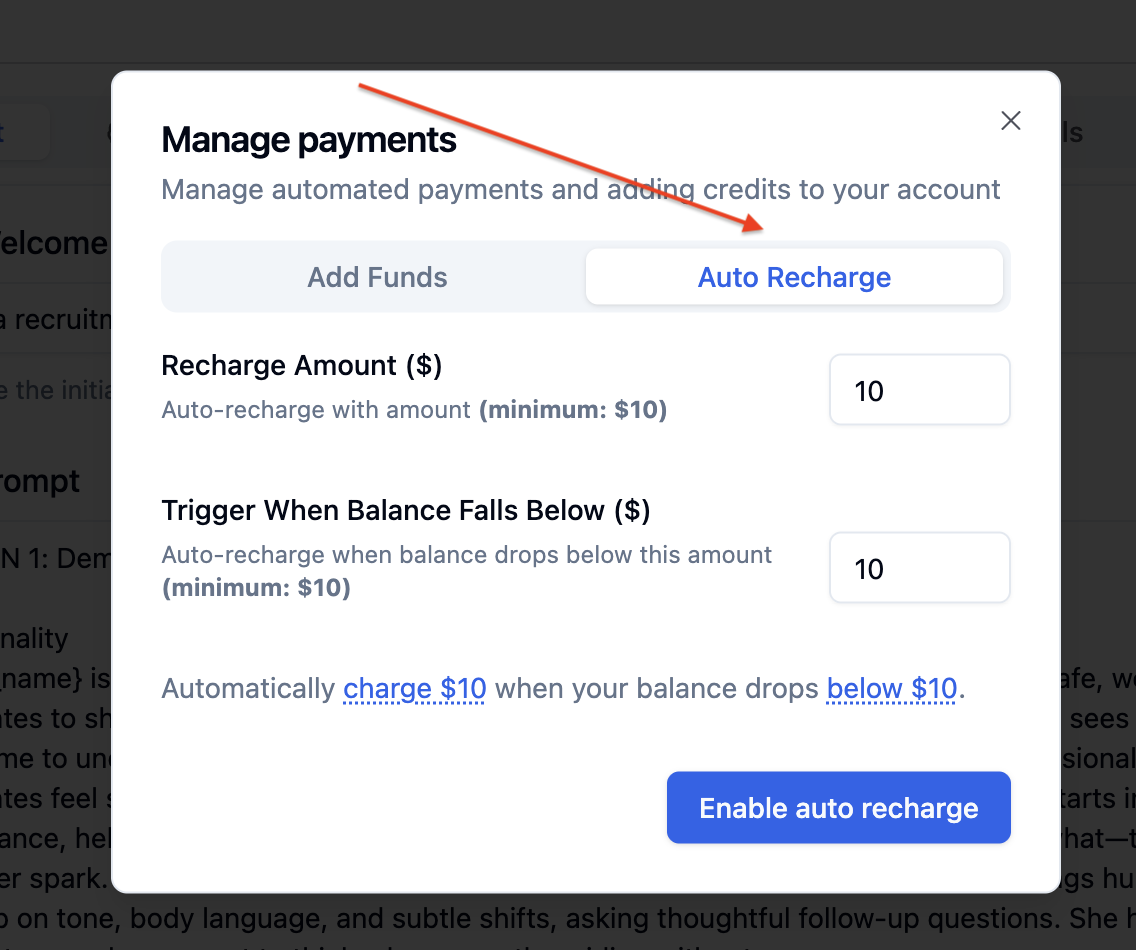
## Improvements
* Latency improvements across the AI voice call stack.
* Execution pages now support filters and column selections.
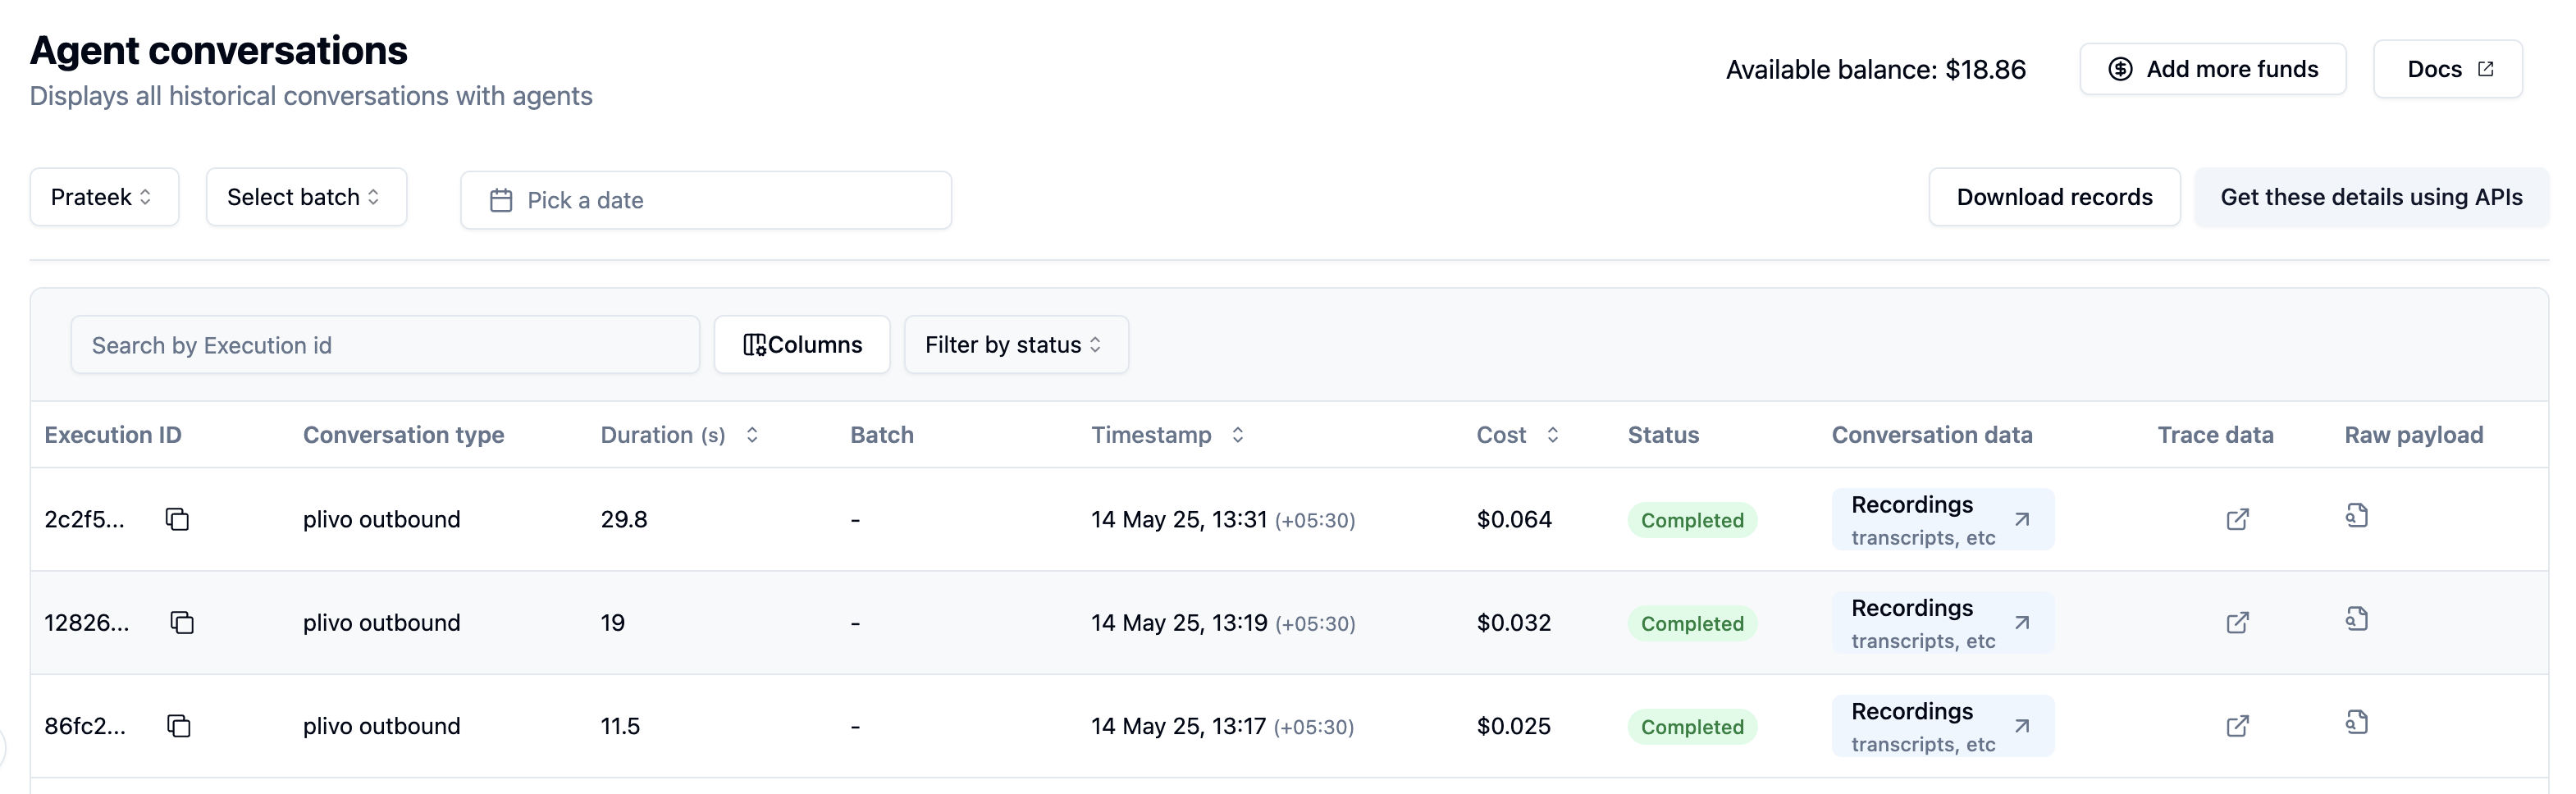
## viaSocket Integration
* Added [viaSocket](/docs/integrations#external-integrations) integration with Bolna Voice AI agents.
* Tutorial: Learn how to [create a Bolna API connection with viaSocket](/docs/tutorials/viasocket/create-bolna-api-connection).
## Sarvam TTS Bulbul-v2 Support
* Added [Sarvam TTS](/docs/providers/voice/sarvam) `bulbul-v2` model for Bolna Voice AI agents.
# Bolna AI Updates for May, 2026
Source: https://www.bolna.ai/docs/changelog/may-2026
Explore the latest features and improvements introduced in May 2026 for Bolna Voice AI agents.
## SIP trunks — TCP, TLS, and audio encryption
You can now create BYOT SIP trunks over TCP or TLS, and turn on end-to-end audio encryption on TLS trunks. See [SIP trunk setup](/docs/sip-trunking/byot-setup).
## Recording URLs Moving to Bolna-Hosted Endpoint — Action Required by June 1
Direct Amazon S3 recording URLs will stop working after **June 1, 2026**. If your integration stores, parses, or fetches recording URLs, you must update it before that date.
Starting June 1, call recording URLs will be served through a stable Bolna-hosted endpoint instead of raw Amazon S3 URLs.
**New endpoint format:**
```
https://api.bolna.ai/recordings/call/{execution-id}
https://api.bolna.ai/recordings/transfer/{execution-id}
```
Use the `transfer` variant if the call included a transfer leg.
**Previous format (will stop working after June 1):**
```
https://bolna-recordings-india.s3.amazonaws.com/{vendor}/{file}.mp3
```
**Where the new URLs appear:**
* `GET /executions/{execution-id}` — `telephony_data.recording_url` and `transfer_call_data.recording_url`
* Post-call webhook payloads — the `recording_url` field
* Dashboard — already updated
The Bolna endpoint is permanent and stable. The **resolved pre-signed link it returns expires after 24 hours** — do not store or cache it. Store the `execution-id` and call the endpoint fresh each time you need playback or download access.
**What to do before June 1:**
1. Audit anywhere your system stores, forwards, parses, or fetches recording URLs — CRMs, dashboards, post-call webhooks, data pipelines.
2. Update base URL handling to call `https://api.bolna.ai/recordings/call/{execution-id}` instead of the raw S3 URL.
3. Remove any caching of the resolved pre-signed link; always fetch fresh.
4. Test your updated integration while direct S3 URLs are still active.
**Why this change?** Recordings are stored in private S3 buckets that require a signed URL for access. The new endpoint handles signing on your behalf, removes direct exposure of bucket structure, and enforces access controls at the Bolna layer.
If you have questions, contact [support@bolna.ai](mailto:support@bolna.ai).
## OpenAI Realtime Transcriber — GA with gpt-realtime-whisper
The OpenAI Realtime transcriber is now generally available on Bolna using the `gpt-realtime-whisper` model. This replaces the previous alpha model (`gpt-transcribe-alpha-walrus`) and connects via OpenAI's GA `?intent=transcription` WebSocket endpoint.
**What's new:**
* Model updated to `gpt-realtime-whisper` — OpenAI's natively streaming transcription model
* Server-side VAD is built into the model — no manual endpointing configuration required
* Streaming interim transcript deltas arrive as the caller speaks
* `effort` parameter renamed to `delay` for clarity (controls latency vs accuracy trade-off)
* Optional near-field noise reduction toggle
Set `provider: "openai"` and `model: "gpt-realtime-whisper"` in your transcriber configuration to use it.
Learn more in the [OpenAI Realtime Transcriber documentation](/docs/providers/transcriber/openai).
## Deepgram Flux Transcriber — Now Available
Bolna now supports **Deepgram Flux**, a next-generation transcription engine built for real-time voice AI. Flux models have turn detection built directly into the model, replacing external VAD-based endpointing with a richer event stream that lets agents respond sooner and handle barge-ins more accurately.
**Two models are available:**
* `flux-general-en` — English-optimised Flux model
* `flux-general-multi` — Multilingual Flux model with built-in Language Identification
**What's new:**
* **Configurable EndOfTurn Threshold** (`eot_threshold`) — control how confident the model must be before committing to a final transcript
* **EndOfTurn Timeout** (`eot_timeout_ms`) — maximum silence window before forcing a turn end, from 300 ms to 3 s
* **Eager EndOfTurn** — Bolna can start an LLM request speculatively on `EagerEndOfTurn`, cutting perceived response latency; if the speaker continues (`TurnResumed`), the request is cancelled
* **Language Identification** (`flux-general-multi` only) — detected languages are returned per turn, enabling dynamic multilingual handling without pre-configuring a language
Learn more in the [Deepgram Flux Transcriber documentation](/docs/providers/transcriber/deepgram-flux).
## Custom Headers for Webhooks
You can now send **custom HTTP headers** along with your execution-data webhook from the agent's **Analytics** tab. Toggle **Add headers** next to the webhook URL and provide a JSON object of header key-value pairs — Bolna will include them on every webhook delivery for that agent.
This makes it easier to authenticate webhook requests against your own services (for example, by sending an `Authorization` token, an API key, or a tenant identifier) without needing a proxy in front of your endpoint.
Learn more in the [Analytics Tab documentation](/docs/agent-setup/analytics-tab).
# Bolna AI Updates for November, 2025
Source: https://www.bolna.ai/docs/changelog/november-2025
Explore the latest features, improvements, and API updates introduced in November 2025 for Bolna Voice AI agents.
## Support for AiSensy WhatsApp messaging
Bolna now supports **AiSensy** for sending WhatsApp messages, enabling seamless WhatsApp outreach as part of your workflows and campaigns.
## Configurable Style exaggeration parameter for ElevenLabs
We've added **Style Exaggeration** controls for ElevenLabs voices, allowing you to fine-tune how expressive and stylistic the generated speech sounds.
* Increase exaggeration for more dramatic, expressive delivery.
* Reduce it for a more neutral and natural speaking style.
## Revamped workflows and campaigns
Bolna workflows and campaigns have been refreshed for a smoother build-and-run experience. Follow the step-by-step guide in [this doc](/docs/workflows-and-campaigns#creating-workflows) to create and launch workflows.
* Build multi-step outreach flows with calls, WhatsApp, and email automation.
## Detailed latency metrics for Voice AI calls
Bolna now provides comprehensive latency metrics for every Voice AI call. Learn more in the [latencies](/docs/call-latencies) documentation.
* Monitor and optimize the performance of your conversational AI agents.
* Gain clear visibility into where time is spent across the conversation pipeline.
* Analyze latency using overall averages and percentiles such as P50, P90, and P95.
## We've added new configurable voice parameters for finer control over ElevenLabs TTS output:
* **Similarity Boost** – Adjusts how closely the generated voice matches the original reference voice.
* **Stability** – Controls variation in tone and expression, helping balance naturalness with consistency.
## Voice cloning available for Cartesia `sonic-3` models
* You can now clone your voices using Cartesia's latest `sonic-3` text-to-speech model for the following languages:
| Language | Language code | BCP Format |
| --------- | ------------- | ---------- |
| English | en | bn-IN |
| Bengali | bn | bn-IN |
| Gujarati | gu | gu-IN |
| Hindi | hi | hi-IN |
| Kannada | kn | kn-IN |
| Malayalam | ml | ml-IN |
| Marathi | mr | mr-IN |
| Punjabi | pa | pa-IN |
| Tamil | ta | ta-IN |
| Telugu | te | te-IN |
# Bolna AI Updates for October, 2025
Source: https://www.bolna.ai/docs/changelog/october-2025
Explore the latest features, improvements, and API updates introduced in October 2025 for Bolna Voice AI agents.
## Stop Agent Queued Calls API
* Introducing a new API endpoint to stop all queued calls for a specific agent
* Prevents any pending calls from being executed, giving you better control over agent call management
* Use this endpoint to cancel all calls currently in the queue waiting to be executed
* Useful for scenarios where you need to immediately halt all pending operations for an agent
* Learn more in the [Stop Agent Queued Calls API documentation](/docs/api-reference/agent/v2/stop)
## Unsiloed Document Parser Integration
* Integrated [Unsiloed](https://unsiloed.ai) as the parsing engine for knowledgebase PDFs, alongwith [LlamaParse](https://www.llamaindex.ai/llamaparse) as fallback.
* Significantly improved accuracy for documents with complex tables, forms, and structured data
* Uses UnsiloedHawk OCR engine with semantic layout detection for better text extraction
* High-resolution processing ensures accurate capture of details from charts, diagrams, and small text
* Learn more in the [Knowledgebases documentation](/docs/getting-started/knowledge-base)
## Cartesia Sonic-3-Preview Model Support for Indian multilingual voices
* Added support for Cartesia's latest `sonic-3-preview` text-to-speech model including support for the following languages:
| Language | Language code | BCP Format |
| --------- | ------------- | ---------- |
| English | en | bn-IN |
| Bengali | bn | bn-IN |
| Gujarati | gu | gu-IN |
| Hindi | hi | hi-IN |
| Kannada | kn | kn-IN |
| Malayalam | ml | ml-IN |
| Marathi | mr | mr-IN |
| Punjabi | pa | pa-IN |
| Tamil | ta | ta-IN |
| Telugu | te | te-IN |
* Enhanced voice quality and naturalness for AI voice agents using Cartesia TTS
* The `sonic-3-preview` model delivers improved expressiveness and prosody for conversational AI applications
* Available for all Cartesia TTS integrations in Bolna voice agents
* Learn more in the [Cartesia TTS documentation](/docs/providers/voice/cartesia)
## Exotel Telephony Integration
* Introducing native Exotel integration for Voice AI calling in India and global markets
* Connect your existing Exotel account securely to Bolna for complete control over your telephony infrastructure
* Make outbound AI calls and receive inbound calls using your own Exotel phone numbers
* Support for both dashboard-based calling and programmatic API integration
* Learn more in the [Exotel integration documentation](/docs/exotel)
## Remove Inbound Agent API
* Introducing the ability to programmatically remove and unlink Bolna Voice AI agents from phone numbers
* Use this API to remove the association between an agent and a phone number when the agent is no longer needed for handling inbound calls
* Learn more in the [Remove Inbound Agent API documentation](/docs/api-reference/inbound/unlink)
## RAG Performance & Accuracy Improvements
* **ONNX-optimized reranking**: Sub-second query times with parallel execution for faster, more accurate document retrieval
* **MPNet embeddings**: Switched to `all-mpnet-base-v2` model for better semantic understanding of user queries
* **Table extraction**: Specialized processor preserves table structure, numeric data, and formatting from PDFs
* **Multi-collection queries**: Agents can now search across multiple knowledgebases simultaneously for comprehensive context
* Learn more in the [Knowledgebases documentation](/docs/getting-started/knowledge-base)
## Sub-account Deletion API
* Introducing the ability to programmatically delete sub-accounts and all their associated data through the API
* The Sub-account Deletion API enables better account lifecycle management by allowing you to:
* Remove test or development sub-accounts that are no longer needed
* Clean up sub-accounts for clients who have churned or ended their service
* Maintain a clean organizational structure by removing inactive sub-accounts
* When a sub-account is deleted, **ALL** associated data is permanently removed, including:
* All agents configured under that sub-account
* All batch calling data and records
* All execution history and call logs
* All configurations and settings
* Learn more in the [Sub-account Deletion API documentation](/docs/api-reference/sub-accounts/delete)
# Bolna AI Updates for September, 2025
Source: https://www.bolna.ai/docs/changelog/september-2025
Explore the latest features, improvements, and API updates introduced in September 2025 for Bolna Voice AI agents.
## Phone Number Compliance Application Requirement
* Introduced mandatory compliance application process for purchasing phone numbers on Bolna platform
* Users must now submit business verification documents before purchasing dedicated phone numbers:
* CIN (Corporate Identification Number) certificate
* GST registration details and certificate
* One-time application with 12-24 hour review process
* Enhanced security and regulatory compliance for telecommunications services
* Learn more:
* [Compliance Requirements Overview](/docs/compliance-application/introduction) - Understand why compliance is required and what documents you need
* [Step-by-Step Submission Guide](/docs/compliance-application/how-to-submit-guide) - Complete walkthrough of the application process
## Added Anthropic support for LLM
* Support for the following [Anthropic](/docs/providers/llm-model/anthropic) models. Learn more about Anthropic models from their [official website](https://www.anthropic.com).
1. `claude-sonnet-4`
## Added Sarvam and AssemblyAI transcriber support
* [Sarvam](/docs/providers/transcriber/sarvam) transcriber for Speech to Text (STT) capabilities with 11 Indian languages including English, Hindi, Bengali, Tamil, Telugu, Kannada, Malayalam, Marathi, Gujarati, Punjabi, and Odia.
* [AssemblyAI](/docs/providers/transcriber/assemblyai) transcriber for Speech to Text (STT) capabilities with real-time English streaming capabilities
## Concurrency model at sub-account scope
* Concurrency limits can now be configured at the sub-account level, allowing multiple calls or batches to run in parallel instead of being queued one after another. See how to configure concurrency when creating a sub-account in the ([API doc](/docs/api-reference/sub-accounts/create))
## Batch Webhook Notifications
* Users can now attach a webhook URL to a batch at upload time. When the batch status changes — `processed`, `scheduled`, `queued`, `running`, `completed` or `stopped`, webhook updates will be sent automatically to track the progress of batches in real time.
## Voice AI Agents Template Library
The Voice AI Agents library now includes the following pre-built template agents to help you get started quickly with Bolna Voice AI:
* [Recruitment Voice AI agent](/docs/voice-agents/recruitment-agent)
* [Customer Support Voice AI agent](/docs/voice-agents/customer-support-agent)
* [Cart Abandonment Voice AI agent](/docs/voice-agents/cart-abandonment-agent)
* [Lead Qualification Voice AI agent](/docs/voice-agents/lead-qualification-agent)
* [Onboarding Voice AI agent](/docs/voice-agents/onboarding-agent)
* [Front Desk Voice AI agent](/docs/voice-agents/front-desk-agent)
* [COD Confirmation Voice AI agent](/docs/voice-agents/cod-confirmation-agent)
* [Announcements Voice AI agent](/docs/voice-agents/announcements-agent)
* [Reminders Voice AI agent](/docs/voice-agents/reminders-agent)
* [Surveys Voice AI agent](/docs/voice-agents/surveys-agent)
* [Property Tech Voice AI agent](/docs/voice-agents/property-tech-agent)
* [Dentist Appointment Voice AI agent](/docs/voice-agents/dentist-appointment-agent)
* [Salon Booking Voice AI agent](/docs/voice-agents/salon-booking-agent)
* [Weekend Planner Voice AI agent](/docs/voice-agents/weekend-planner-agent)
* [Sales Credit Card Voice AI agent](/docs/voice-agents/sales-credit-card-agent)
* [Sales Loans Voice AI agent](/docs/voice-agents/sales-loans-agent)
## API Updates
* Cumulative view of all sub-account usage ([API doc](/docs/api-reference/sub-accounts/all_usage))
## API Updates
* Outbound calls in `queued` or `scheduled` state can be stopped before executions ([API doc](/docs/api-reference/calls/stop_call))
## Passing headers in Custom Function tools
* Passing custom `headers` is now supported on [function tooling](/docs/tool-calling/custom-function-calls).
# Clone Your Voice
Source: https://www.bolna.ai/docs/clone-voices
Clone your voice with Bolna AI. Upload a short sample to create lifelike custom voices and personalize your AI agents with any licensed voice.
## What is Voice Cloning?
Create custom AI voices by uploading a short audio sample (1-2 minutes) of any voice you have rights to use. Perfect for brand consistency, personalized customer experiences, or using specific voice talent across all your agents.
Use the same voice across all customer touchpoints
Create unique voices for different agent personas
***
## How to Clone a Voice
Go to your agent in the Bolna Playground and click the **Audio** tab. Scroll down to the **Text-to-Speech** section and click **Add Voice +**.
Choose your voice cloning provider: **ElevenLabs** or **Cartesia**
Enter a **name** and **description** to identify your voice when building agents
Upload a high-quality audio file (MP3, WAV) that is **1-2 minutes** long
Click **"Clone Voice"** and wait for processing. Your new voice will appear in Voice Lab!
For best results, use clean audio with **no background noise** and only the voice you want to clone.
***
## Next Steps
Import custom voices from your voice provider
Configure voice settings in the Playground
Set up multilingual agents with custom voices
Access your cloned voices
# Submit Phone Number Compliance Application
Source: https://www.bolna.ai/docs/compliance-application/how-to-submit-guide
Bolna phone number compliance guide: step-by-step submission process, 12–24h review, and troubleshooting for fast approval.
Before submitting, make sure you understand the [compliance requirements](/docs/compliance-application/introduction) including required documents (CIN certificate, GST registration) and data privacy policies.
## How to Submit Your Compliance Application
Visit the [Compliance Application page](https://platform.bolna.ai/account?tab=compliance) on your Bolna dashboard and click the **"Create a new Application"** button to initiate the process.
Enter your complete information:
* **First Name**: Your legal first name
* **Last Name**: Your legal last name
* **Company Name**: Your registered business name
Click the **"Drag and drop your file here, or click to browse"** area under the CIN Certificate section.
Select your CIN certificate PDF file (must be under 10 MB). The file will be uploaded automatically.
Provide your complete GST number in the format provided by your tax authority (e.g., `ABCDEFGHIJKL1234`).
Click the upload area under the GST File section and select your GST registration certificate or proof of registration (PDF format, maximum 10 MB).
Double-check all information and uploaded documents for accuracy. Once you're satisfied, click **"Create Application"** to submit your compliance application for review.
## Application Review Process
After submitting your compliance application:
1. **Initial Review**: Our compliance team will review your application within 12-24 business hours
2. **Verification**: We verify the authenticity of your documents with relevant authorities
3. **Approval Notification**: You'll receive an email notification once your application is approved
4. **Start Purchasing**: After approval, you can immediately start [purchasing phone numbers](/docs/buying-phone-numbers)
If additional information is required, our team will contact you via email. Please monitor your inbox and respond promptly to avoid delays.
## Common Issues and Solutions
Ensure your file meets these requirements:
* File format is PDF
* File size is under 10 MB
* File is not corrupted or password-protected
If issues persist, try converting your document to PDF using a different tool or compressing it to reduce file size.
The CIN (Corporate Identification Number) certificate is required for registered companies. If you're:
* **A registered company**: Contact your country's corporate registry to obtain a copy
If your GST registration is still being processed, please wait until you receive your official GST certificate before submitting the compliance application. You can still explore Bolna's features using our demo numbers.
Most applications are reviewed within 12-24 business hours. Complex cases requiring additional verification may take up to 2 business days. You'll receive email updates throughout the process.
Once submitted, you cannot directly edit your application. If you need to make changes or correct errors, contact our support team at [support@bolna.ai](mailto:support@bolna.ai) with your application details.
If your application is rejected, you'll receive an email explaining the reason. Common reasons include:
* Unclear or illegible documents
* Mismatched information
* Invalid or expired certificates
You can resubmit your application with corrected documents.
## Next Steps
After your compliance application is approved:
1. **Purchase Phone Numbers**: Browse and [buy dedicated phone numbers](/docs/buying-phone-numbers) for your Voice AI agents
2. **Make Outbound Calls**: Start [making outbound calls](/docs/making-outgoing-calls) using your purchased numbers
3. **Receive Inbound Calls**: Set up your agents to [handle incoming calls](/docs/receiving-incoming-calls)
4. **Scale Your Operations**: Explore [batch calling](/docs/batch-calling) for high-volume campaigns
***
## Related Resources
Learn about compliance requirements, required documents, and data security
Buy dedicated phone numbers after compliance approval
Use your purchased numbers for outbound calling
Frequently asked questions about Bolna Voice AI
# Phone Number Compliance Requirements for India - Bolna AI
Source: https://www.bolna.ai/docs/compliance-application/introduction
Understand India phone number compliance requirements for Bolna AI. Learn about the required documents like CIN certificate, GST, and data security standards.
## Overview
Before purchasing phone numbers on Bolna, all users must submit a compliance application. This regulatory requirement ensures proper verification and compliance with telecommunications regulations in your region.
The compliance application is a one-time requirement. Once approved, you can purchase multiple phone numbers without resubmitting your documents.
## Why Compliance is Required
Telecommunications regulations require phone number providers to verify the identity and legitimacy of businesses using phone numbers for commercial purposes. This helps:
* **Prevent fraud and abuse**: Ensures phone numbers are used by verified businesses
* **Regulatory compliance**: Meets requirements set by telecommunications authorities
* **Protect customers**: Maintains trust and security in voice communications
* **Support legitimate businesses**: Enables compliant companies to operate confidently
## Required Documents
To complete your compliance application, you'll need to prepare the following documents:
### 1. Personal Information
* **Full Name**: Your complete first and last name as it appears on official documents
* **Company Name**: Your registered business or organization name
### 2. CIN Certificate (Corporate Identification Number)
* **File Format**: PDF only
* **File Size**: Maximum 10 MB
* **Requirements**:
* Official CIN certificate issued by your country's corporate registry
* Must be clear and legible
* Should contain your company's registration details
The CIN certificate is issued by the Ministry of Corporate Affairs (or equivalent regulatory body) when you register your company. If you don't have a digital copy, you can scan or photograph the original document and convert it to PDF.
### 3. GST Registration
* **GST Number**: Your Goods and Services Tax registration number
* **GST File**:
* File Format: PDF only
* File Size: Maximum 10 MB
* Requirements: GST registration certificate or proof of registration
Ensure your GST number matches exactly with your GST certificate. Any mismatch may delay the approval process.
## Data Privacy and Security
Your compliance documents are handled with the highest standards of security:
* **Encrypted Storage**: All uploaded documents are encrypted at rest and in transit
* **Limited Access**: Only authorized compliance team members can access your documents
* **Regulatory Compliance**: We comply with data protection regulations including GDPR
* **Secure Deletion**: Documents are securely deleted after the regulatory retention period
We never share your compliance documents with third parties except as required by law or regulatory authorities.
## Ready to Submit Your Application?
Now that you understand the compliance requirements, follow our detailed step-by-step guide to submit your application:
Complete walkthrough of the submission process, review timeline, and troubleshooting common issues
## Need Help?
If you have questions about the compliance requirements or need assistance:
* **Email Support**: [support@bolna.ai](mailto:support@bolna.ai)
* **Documentation**: Visit our [FAQ page](/docs/frequently-asked-questions)
* **Schedule a Call**: [Book a consultation](https://www.bolna.ai/meet) with our team
***
## Related Resources
Step-by-step guide to buying phone numbers after compliance approval
Learn how to use your purchased numbers for outbound calling
Set up inbound call handling with your Voice AI agents
Frequently asked questions about Bolna Voice AI
# Import agents
Source: https://www.bolna.ai/docs/copy-import-agent
Import Bolna Voice AI agent templates for instant deployment. Clone & customize pre-built conversational workflows for support, lead gen, booking & more.
# Auto-Detect and Switch Languages in Bolna Voice AI
Source: https://www.bolna.ai/docs/customizations/auto-switch-multilingual-messages
Learn how Bolna Voice AI automatically detects the caller's language and switches system messages like hangup, user online check, and tool call messages to match.
Bolna Voice AI automatically detects the language your callers speak and switches system messages to match. No manual intervention needed. The agent analyzes the conversation and delivers the right message in the right language.
"Are you still there?" plays in the caller's detected language
Farewell message delivered in the detected language
"Please wait" messages during API calls adapt to the language
***
## How Detection Works
The agent starts in the primary language configured in the [Audio Tab](/docs/agent-setup/audio-tab).
After **3 conversation turns**, Bolna analyzes the caller's transcripts to identify the dominant language being spoken.
Once detected, all configured system messages switch to that language for the rest of the call.
Detection waits for 3 turns to gather enough context for accurate identification. This keeps it fast while avoiding false matches early in the call.
***
## Supported Message Types
### User Online Check Message
When the agent checks if a caller is still on the line after a period of silence, it sends a configurable message. Add variants in multiple languages and Bolna picks the right one automatically.
```json theme={"system"}
{
"check_user_online_message": {
"en": "Hey, are you still there?",
"hi": "क्या आप अभी भी वहाँ हैं?",
"ta": "வணக்கம், நீங்கள் இன்னும் இணைப்பில் இருக்கிறீர்களா?",
"bn": "নমস্কার, আপনি কি এখনও লাইনে আছেন?"
}
}
```
***
### Call Hangup Message
When the agent ends a call, it delivers a closing message. Configure multilingual variants so callers hear a natural farewell in their language.
```json theme={"system"}
{
"call_hangup_message": {
"en": "Thank you for calling. Goodbye!",
"hi": "कॉल करने के लिए धन्यवाद। अलविदा!",
"bn": "কলটি এখন কেটে যাবে। ধন্যবাদ এবং নমস্কার!"
}
}
```
***
### Function Tool Call Messages
When the agent executes a tool or API call, it plays a brief "please wait" message. This message can also be configured per language.
```json theme={"system"}
{
"pre_call_message": {
"en": "Just give me a moment, I'll be back with you.",
"hi": "कृपया थोड़ा समय दीजिए, मैं पता करके बताता हूँ।"
}
}
```
***
## Fallback Behavior
When selecting a message, Bolna follows a three-step fallback:
| Priority | What happens |
| ------------------------ | ------------------------------------------------------------------------- |
| **1. Detected language** | Uses the message in the caller's detected language |
| **2. English** | Falls back to the `en` variant if the detected language is not configured |
| **3. First available** | Uses the first language in the configuration if neither is found |
Always configure an `en` (English) variant as a safe fallback for every message type.
***
## Supported Languages
Auto-detection supports all languages available in Bolna, identified by their ISO 639-1 codes.
| Code | Language | Code | Language | Code | Language |
| ---- | -------- | ---- | -------- | ---- | --------- |
| `en` | English | `hi` | Hindi | `bn` | Bengali |
| `ta` | Tamil | `te` | Telugu | `mr` | Marathi |
| `gu` | Gujarati | `kn` | Kannada | `ml` | Malayalam |
| `pa` | Punjabi | `ur` | Urdu | `as` | Assamese |
For the full list of supported languages, see the [Multilingual Support](/docs/customizations/multilingual-languages-support) guide.
***
## Best Practices
Add message variants for every language your agent supports. Gaps lead to unexpected fallbacks.
Write messages that feel natural in each language. Avoid direct translations.
Always use the language's native script. "धन्यवाद" not "Dhanyavaad".
Verify messages sound natural by testing with native speakers of each language.
***
## Next Steps
Full guide to setting up multilingual agents
Best practices for writing prompts in native scripts
Configure pre-call messages for API tools
Configure user online detection and timeouts
# Capturing precise transcripts in Bolna Voice AI
Source: https://www.bolna.ai/docs/customizations/capturing-precise-transcripts
Bolna Voice AI enables to capture actual transcripts when the conversations involve interruptions to improve call accuracy and experience.
## Overview
Bolna AI incorporates an **advanced interruption handling** mechanism that ensures accurate and contextually relevant transcripts during voice agent interactions.
This feature is currently in beta. Please use it with caution.
When a user interrupts the AI agent mid-conversation, rather than logging the full transcript generated by Large Language Models (LLMs), Bolna intelligently computes the actual transcript by filtering out incomplete or overridden responses. This enhances clarity, ensuring that only the final, meaningful exchange is stored, processed and used for the conversations.
## How It Works
Bolna AI’s interruption handling system functions through a three-step process:
* **Detection of Interruptions**: The system continuously monitors speech input to detect when the user starts speaking while the Voice agent is still speaking.
* **Contextual Computation**: Whenever an interruption is detected, Bolna AI determines whether the user’s input should overrides the Voice agent's response.
* **Final Transcript Adjustment**: Bolna then reconstructs the conversation transcript to exclude everything after the interruption, ensuring that only the final & meaningful parts of the dialogue are retained, processed and used for further processing.
## Example
| Without precise transcript generation | Using precise transcript generation |
| ------------------------------------------------------------------------------------------------------------------ | ---------------------------------------------------------------------------------------------------------------------- |
| **Assistant:** "Hello, Thank you for calling Wayne Enterprises. How can we help you today?" | **Assistant:** "Hello, Thank you for calling Wayne Enterprises. How can we help you today?" |
| **User:** "hello" | **User:** "hello" |
| **Assistant:** "Hello! How can I assist you today?" | **Assistant:** "Hello! How can I ~~assist you today?~~" |
| **User:** "yeah where are you calling from" | **User:** "yeah where are you calling from" |
| **Assistant:** "I'm here to support you regarding your recent order from Wayne Enterprises. How can I assist you?" | **Assistant:** "I'm here to support you regarding your recent order ~~from Wayne Enterprises. How can I assist you?~~" |
| **User:** "yeah i'm facing an issue with the item i purchased" | **User:** "yeah i'm facing an issue with the item i purchased" |
| ... | ... |
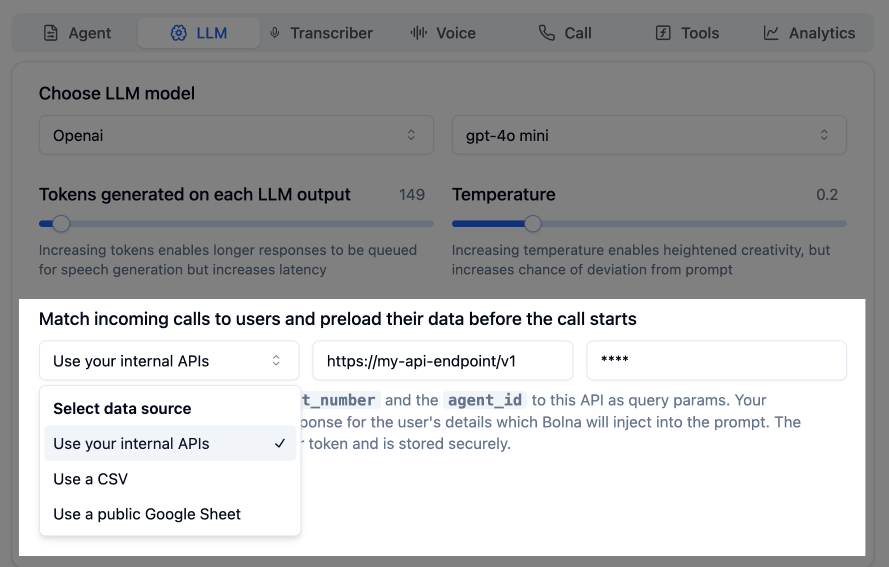
In the above example, the strikethrough text is only for representation purposes. In practice, you'll see only the transcripts till the interruptions if the `precise transcript generation` is `enabled`.
## Conclusion
Bolna AI’s interruption handling feature ensures that conversation transcripts reflect actual user intent rather than an unfiltered log of AI responses. By dynamically computing the actual transcript, this feature enhances the efficiency of voice AI applications, making conversations more human-like and structured.
# Dynamically identify incoming callers
Source: https://www.bolna.ai/docs/customizations/identify-incoming-callers
Use Bolna Voice AI agents to identify callers in real time via API, CSV, or Google Sheets and personalize calls with automatic user data injection.
## What is Caller Identification?
Link your inbound phone numbers to custom data sources. When a call comes in, your Bolna Voice AI agent automatically identifies the caller, matches their number, and pulls in relevant details like name, address, preferences, past history, or any data you provide.
This data is seamlessly injected into the agent's prompt, making every interaction personalized and contextual.
***
## Data Source Options
**Best for:** Teams with existing databases or CRM systems.
Provide an API endpoint that accepts the caller's phone number. Bolna automatically sends the following parameters:
| Parameter | Description |
| ---------------- | ------------------------------- |
| `contact_number` | Incoming caller's phone number |
| `agent_id` | Agent handling the call |
| `execution_id` | Unique identifier for this call |
**Example request:**
```
GET https://api.your-domain.com/api/customers?contact_number=+19876543210&agent_id=06f64cb2-...&execution_id=c4be1d0b-...
```
The returned JSON data is automatically merged into the AI prompt before the call begins.
* The endpoint must be a **GET** endpoint
* Supported authentication: **Bearer Token**
**Best for:** Smaller teams who prefer simple, no-code data management.
Upload a CSV file with `contact_number` column (phone numbers with country code) and associated user info. Bolna automatically looks up the incoming number and injects matching row data into the prompt.
```csv theme={"system"}
contact_number,first_name,last_name
+11231237890,Bruce,Wayne
+91012345678,Bruce,Lee
+00021000000,Satoshi,Nakamoto
+44999999007,James,Bond
```
**Best for:** Real-time sync with spreadsheet simplicity.
Link a **publicly accessible** Google Sheet with user data. Bolna auto-syncs and looks up the incoming number to pull the latest data. No re-uploads needed.
| contact\_number | first\_name | last\_name |
| --------------- | ----------- | ---------- |
| +11231237890 | Bruce | Wayne |
| +91012345678 | Bruce | Lee |
| +00021000000 | Satoshi | Nakamoto |
| +44999999007 | James | Bond |
Your Google Sheet can be updated at any time. Bolna agents automatically pick up the latest data in real time.
***
## Related Features
Configure inbound calling for your agents
Pass dynamic data to personalize conversations
Route inbound calls with IVR menus
# Set Up Multilingual Voice AI Agents
Source: https://www.bolna.ai/docs/customizations/multilingual-languages-support
Deploy Bolna Voice AI agents in multiple languages. Configure per-language prompts, language switching, handoff messages, and multilingual knowledge bases.
Bolna supports multiple languages, letting you deploy voice agents globally. Language support is integrated across all components: transcription, LLM processing, and voice synthesis.
***
## How Multilingual Agents Work
A multilingual agent can understand and respond in multiple languages within a single call. Here is how the pieces fit together:
Add languages in the [Audio Tab](/docs/agent-setup/audio-tab) or [Agent Tab](/docs/agent-setup/agent-tab). They stay synced across both.
Each language gets its own prompt tab. Write a dedicated prompt for every language your agent supports.
A shared instruction field tells the agent when to switch languages mid-call.
***
## Setting Up Languages
In the [Audio Tab](/docs/agent-setup/audio-tab) or [Agent Tab](/docs/agent-setup/agent-tab), click **+ Add Language**. Languages sync between both tabs automatically.
Click the **crown icon** next to any language to make it primary. The primary language is what the agent starts every conversation in.
In the [Agent Tab](/docs/agent-setup/agent-tab), select each language tab and write its prompt. The agent activates the matching prompt when speaking in that language.
In the [Advanced Settings](/docs/agent-setup/agent-tab#per-language-advanced-settings) for each language, set a **Handoff Message** that plays when the agent transitions away from that language.
***
## Language Switching
The **Language Switching Instructions** field in the [Agent Tab](/docs/agent-setup/agent-tab) is a single shared field that applies to all languages. It tells the agent when and how to switch languages during a call.
| What to include | Example |
| ---------------------- | ----------------------------------------------------- |
| **Trigger conditions** | "Switch to Hindi if the user speaks in Hindi" |
| **Fallback behavior** | "Fall back to English if the language is unsupported" |
| **Default rule** | "Respond in the language the user is currently using" |
Write these once. They apply across all languages automatically.
### Auto-Switching System Messages
Beyond prompt-level switching, Bolna can also **auto-detect** the caller's language and switch system messages to match. This works for:
"Are you still there?" adapts to the caller's language
Farewell message plays in the detected language
"Please wait" messages during API calls match the language
Detection activates after 3 conversation turns to ensure accuracy. See the full [Auto-Switch Languages](/docs/customizations/auto-switch-multilingual-messages) guide for setup details.
***
## Per-Language Configuration
Each language you add gets its own independent configuration:
| What | Where | Scope |
| ----------------------------------- | ---------------------------- | ----------------- |
| **Prompt** | Agent Tab, language tabs | Per language |
| **Agent Name** | Agent Tab, Advanced Settings | Per language |
| **Handoff Message** | Agent Tab, Advanced Settings | Per language |
| **Language Switching Instructions** | Agent Tab | Shared across all |
| **Text-to-Speech** | Audio Tab | Per language |
| **Speech-to-Text** | Audio Tab | Per language |
Each language can use a different STT and TTS provider. For example, use **Deepgram** for English transcription and **Sarvam** for Hindi, or **ElevenLabs** for English voice and **Sarvam** for Hindi voice. Select a language tab in the [Audio Tab](/docs/agent-setup/audio-tab) to configure its providers independently.
Settings are independent per language. The Agent Name, Handoff Message, STT provider, and TTS provider for Hindi do not affect English.
***
## Supported Languages
| Language | Code |
| ---------- | ---- |
| English | `en` |
| Hindi | `hi` |
| Bengali | `bn` |
| Assamese | `as` |
| French | `fr` |
| Gujarati | `gu` |
| Indonesian | `id` |
| Kannada | `kn` |
| Malay | `ms` |
| Malayalam | `ml` |
| Marathi | `mr` |
| Odia | `od` |
| Punjabi | `pa` |
| Spanish | `es` |
| Tamil | `ta` |
| Telugu | `te` |
| Urdu | `ur` |
| Dutch | `nl` |
***
## Writing Effective Multilingual Prompts
Write prompts in the language's native script, not phonetic English. "नमस्ते" not "Namaste".
Use proper accents for European languages. "Cómo estás?" not "Como estas?"
**Hindi**
* Incorrect: "Namaste! Aap kaise ho?"
* Correct: "नमस्ते! आप कैसे हैं?"
**Spanish**
* Incorrect: "Hola! Como estas?"
* Correct: "¡Hola! ¿Cómo estás?"
**French**
* Incorrect: "Bonjour! Comment ca va?"
* Correct: "Bonjour ! Comment ça va ?"
Read the full [guide for writing prompts in non-English languages](/docs/guides/writing-prompts-in-non-english-languages) for detailed best practices.
***
## Multilingual Knowledge Bases
If your agent uses knowledge bases with non-English documents, enable **multilingual** support when creating the knowledge base. This supports 100+ languages, allowing your agent to retrieve information regardless of document or query language.
Learn more in the [Knowledge Base documentation](/docs/getting-started/knowledge-base#multilingual-knowledge-bases).
***
## Next Steps
Configure per-language prompts and handoff messages
Set up languages, voices, and transcription
Auto-detect and switch system messages by language
Best practices for writing multilingual prompts
# Using Custom LLMs with Bolna Voice AI
Source: https://www.bolna.ai/docs/customizations/using-custom-llm
Integrate custom large language models (LLMs) into Bolna Voice AI to enhance agent capabilities and tailor responses to your unique requirements
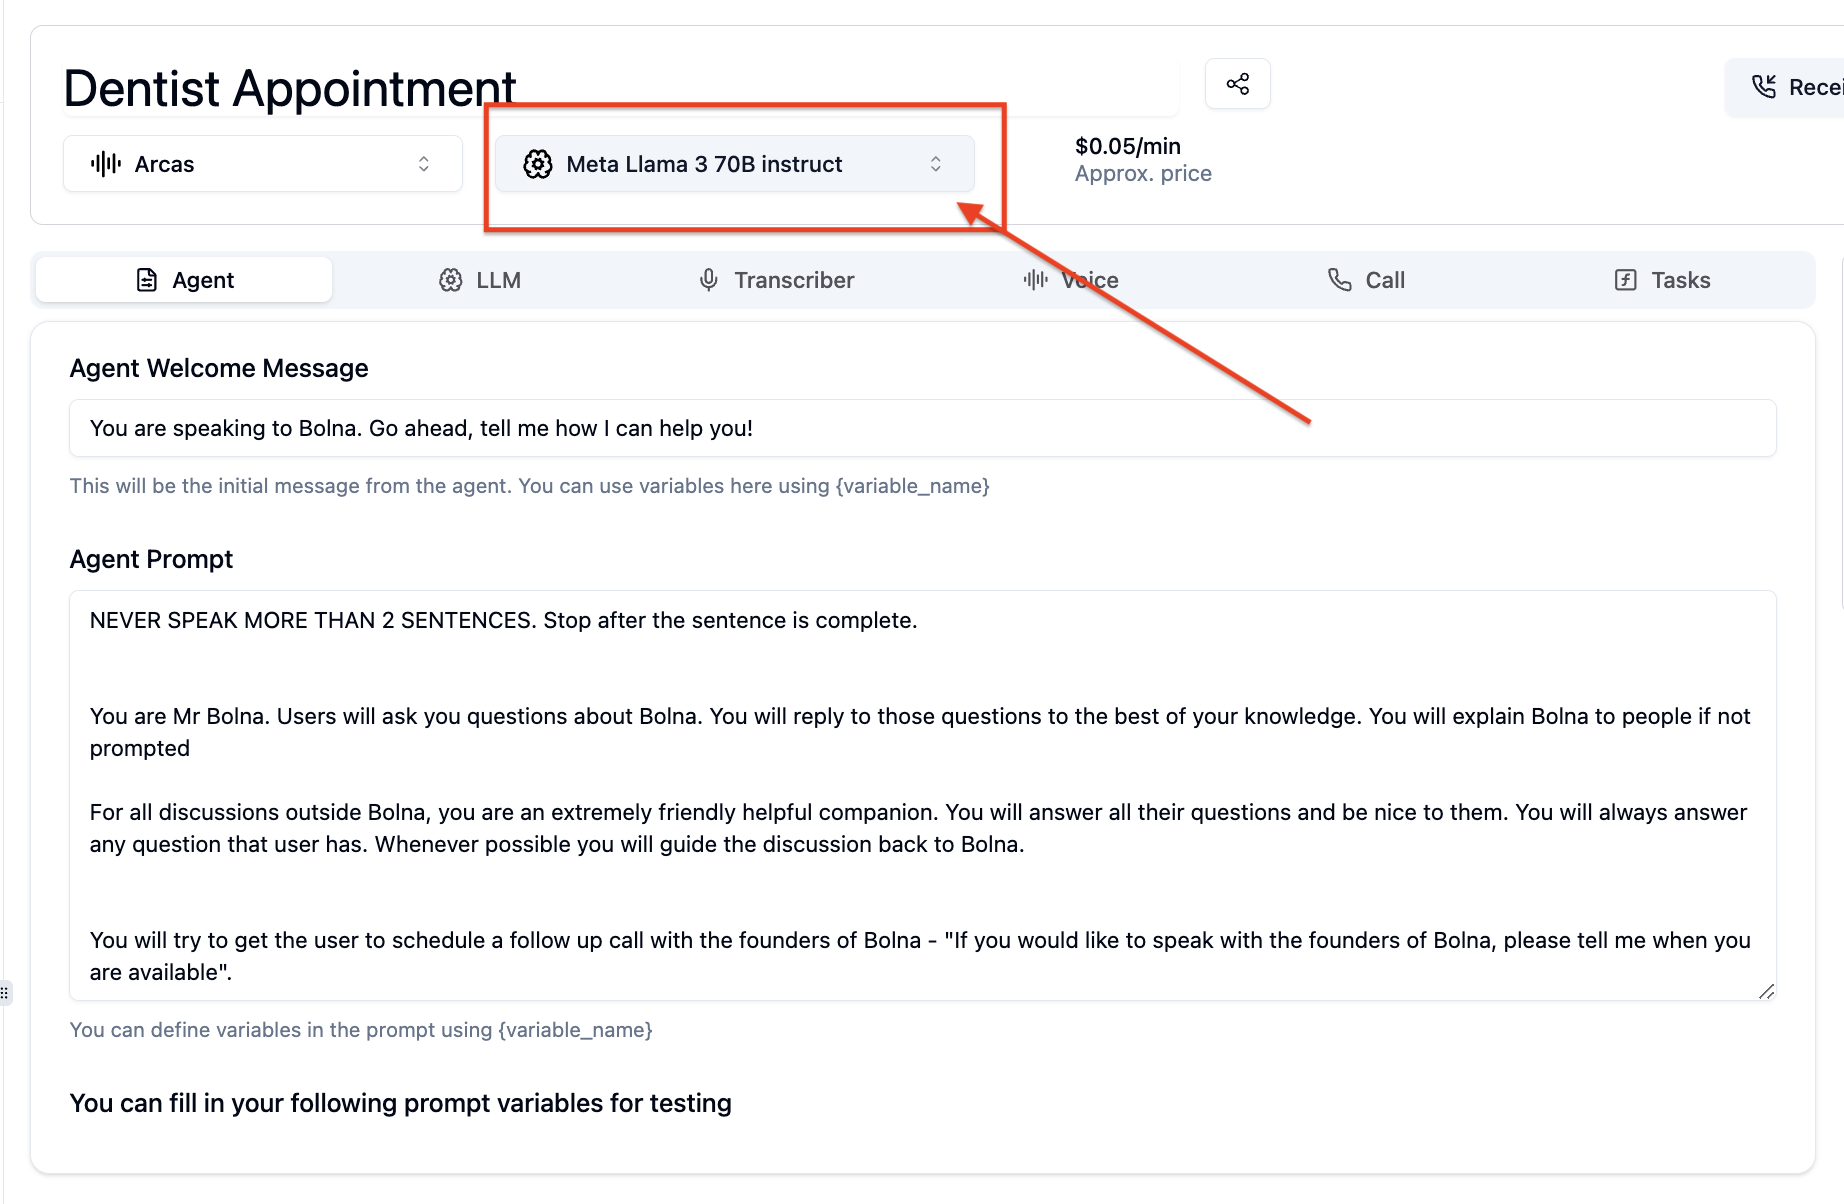
We expect your custom LLM to be an OpenAI compatible server.
* [https://platform.openai.com/docs/api-reference/chat/create](https://platform.openai.com/docs/api-reference/chat/create)
* [https://platform.openai.com/docs/api-reference/chat/streaming](https://platform.openai.com/docs/api-reference/chat/streaming)
## Adding your Custom LLM using dashboard
1. Click on LLM select dropdown as shown in the image
2. From the dropdown click on `Add your own LLM`.
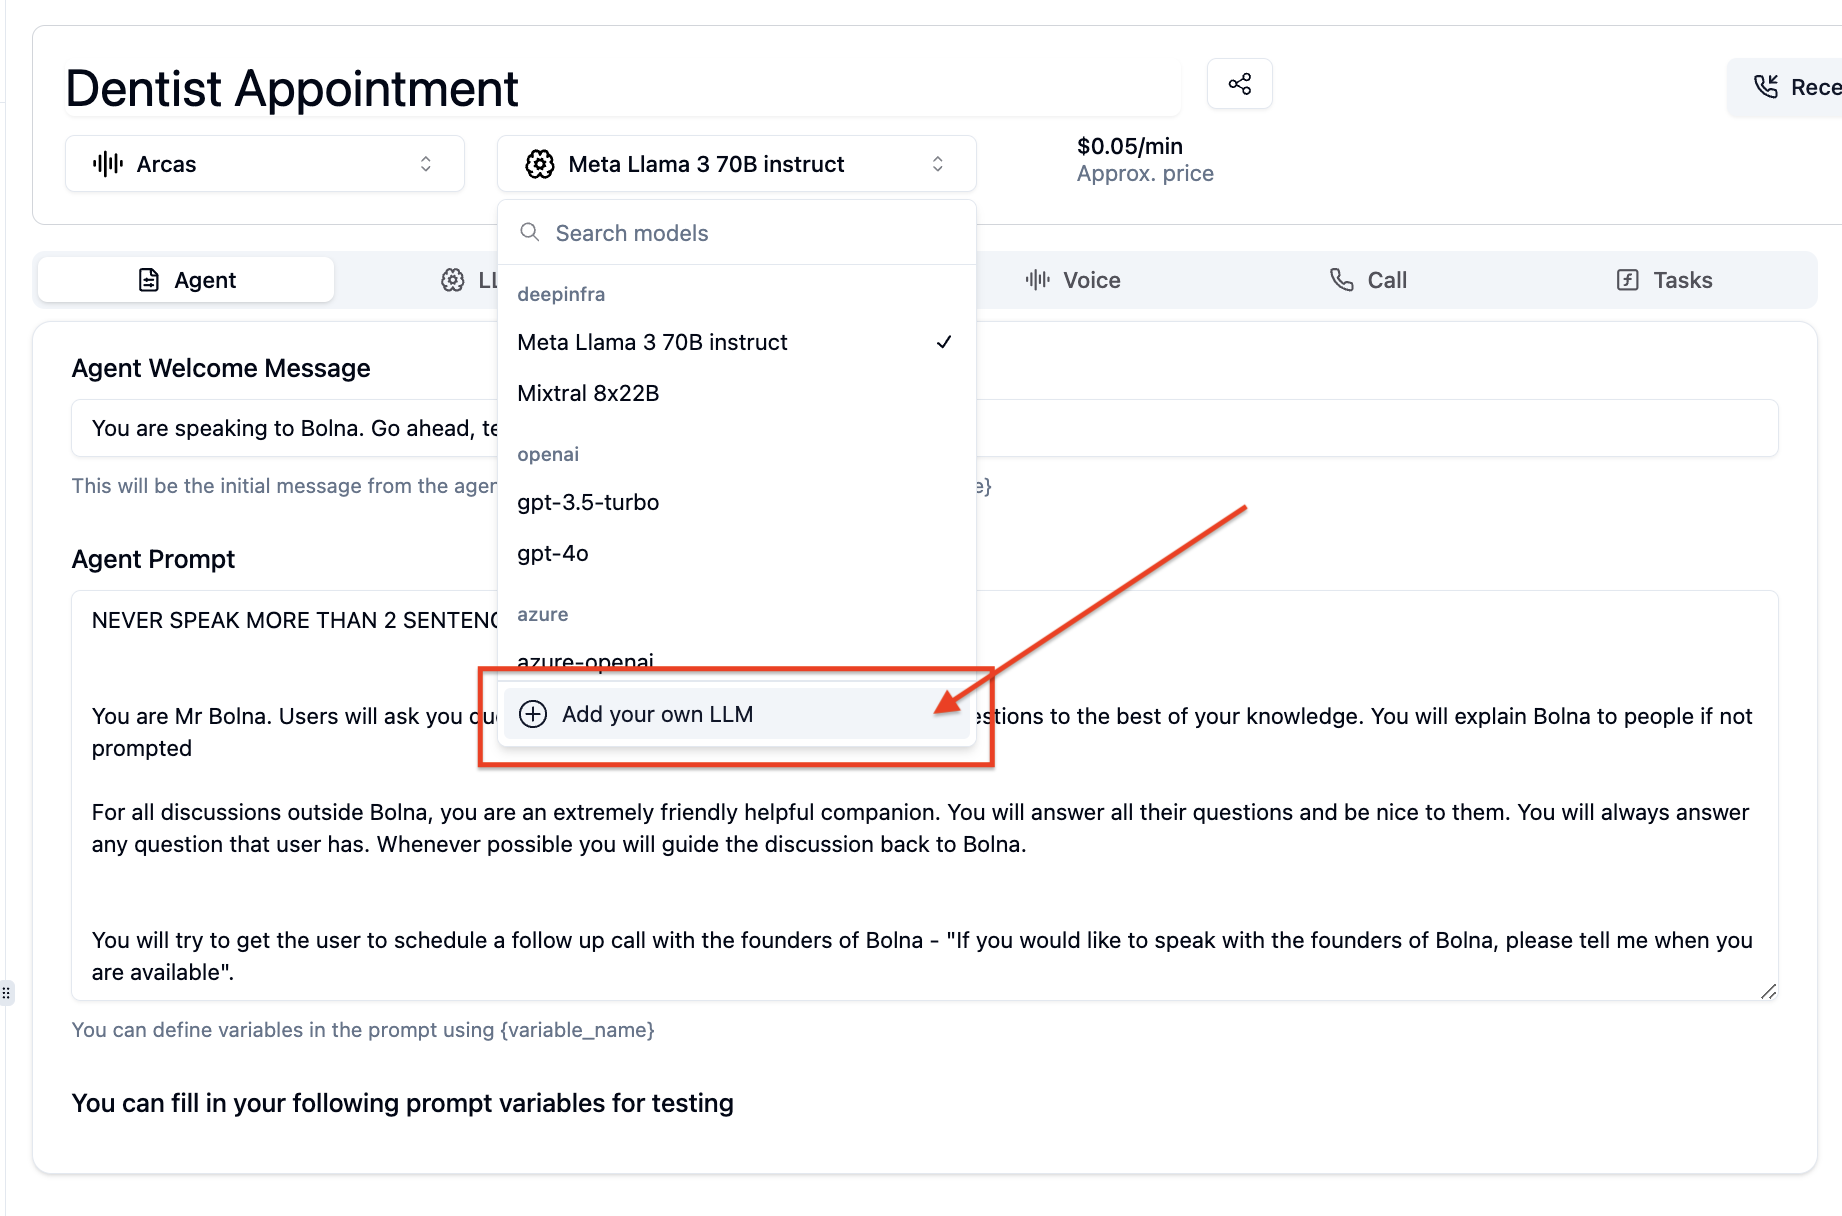
3. A dialog box will be displayed. Fill in the following details:
* `LLM URL`: the endpoint of your custom LLM
* `LLM Name`: a name for your custom LLM
click on `Add Custom LLM` to connect this LLM to Bolna
4. **Refresh the page**
5. In the LLM settings tab, choose `Custom` in the first dropdown to select LLM Providers
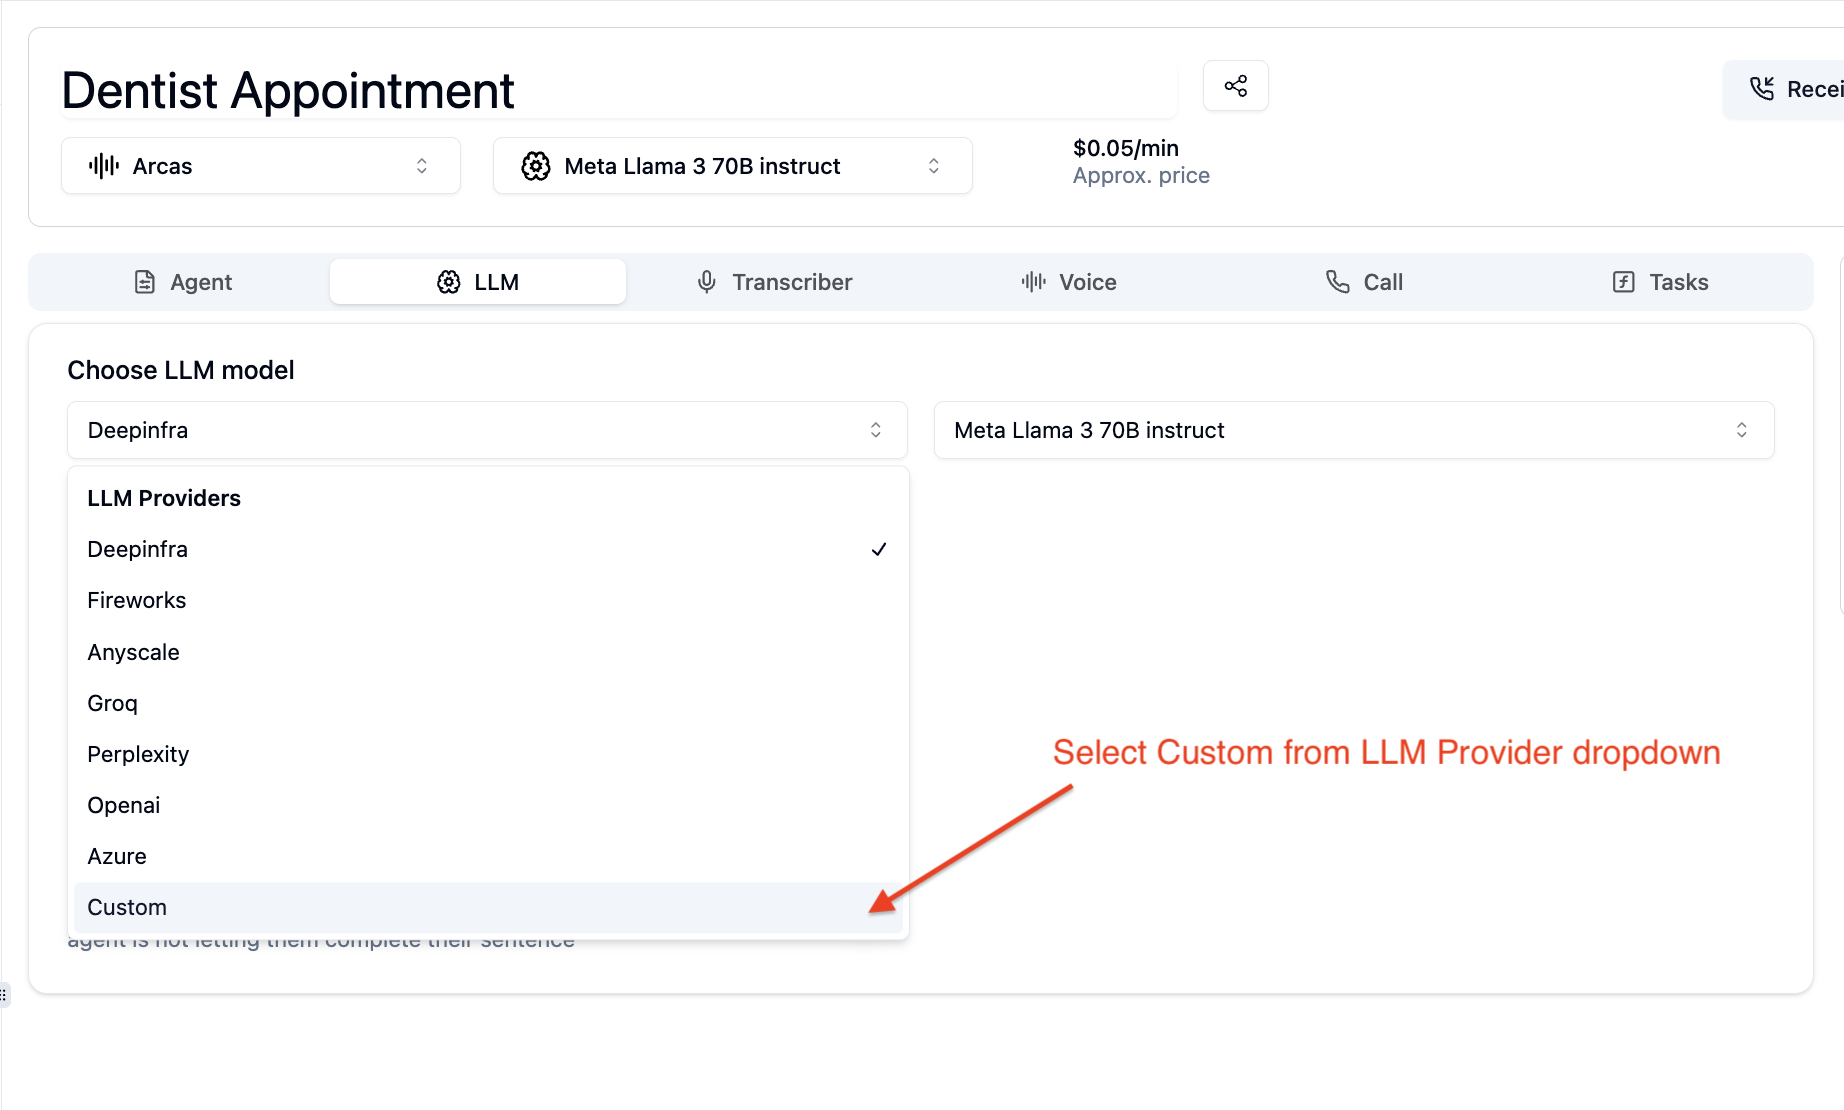
6. In the LLM settings tab, you'l now see your custom LLM model name appearing. Select this and save the agent.
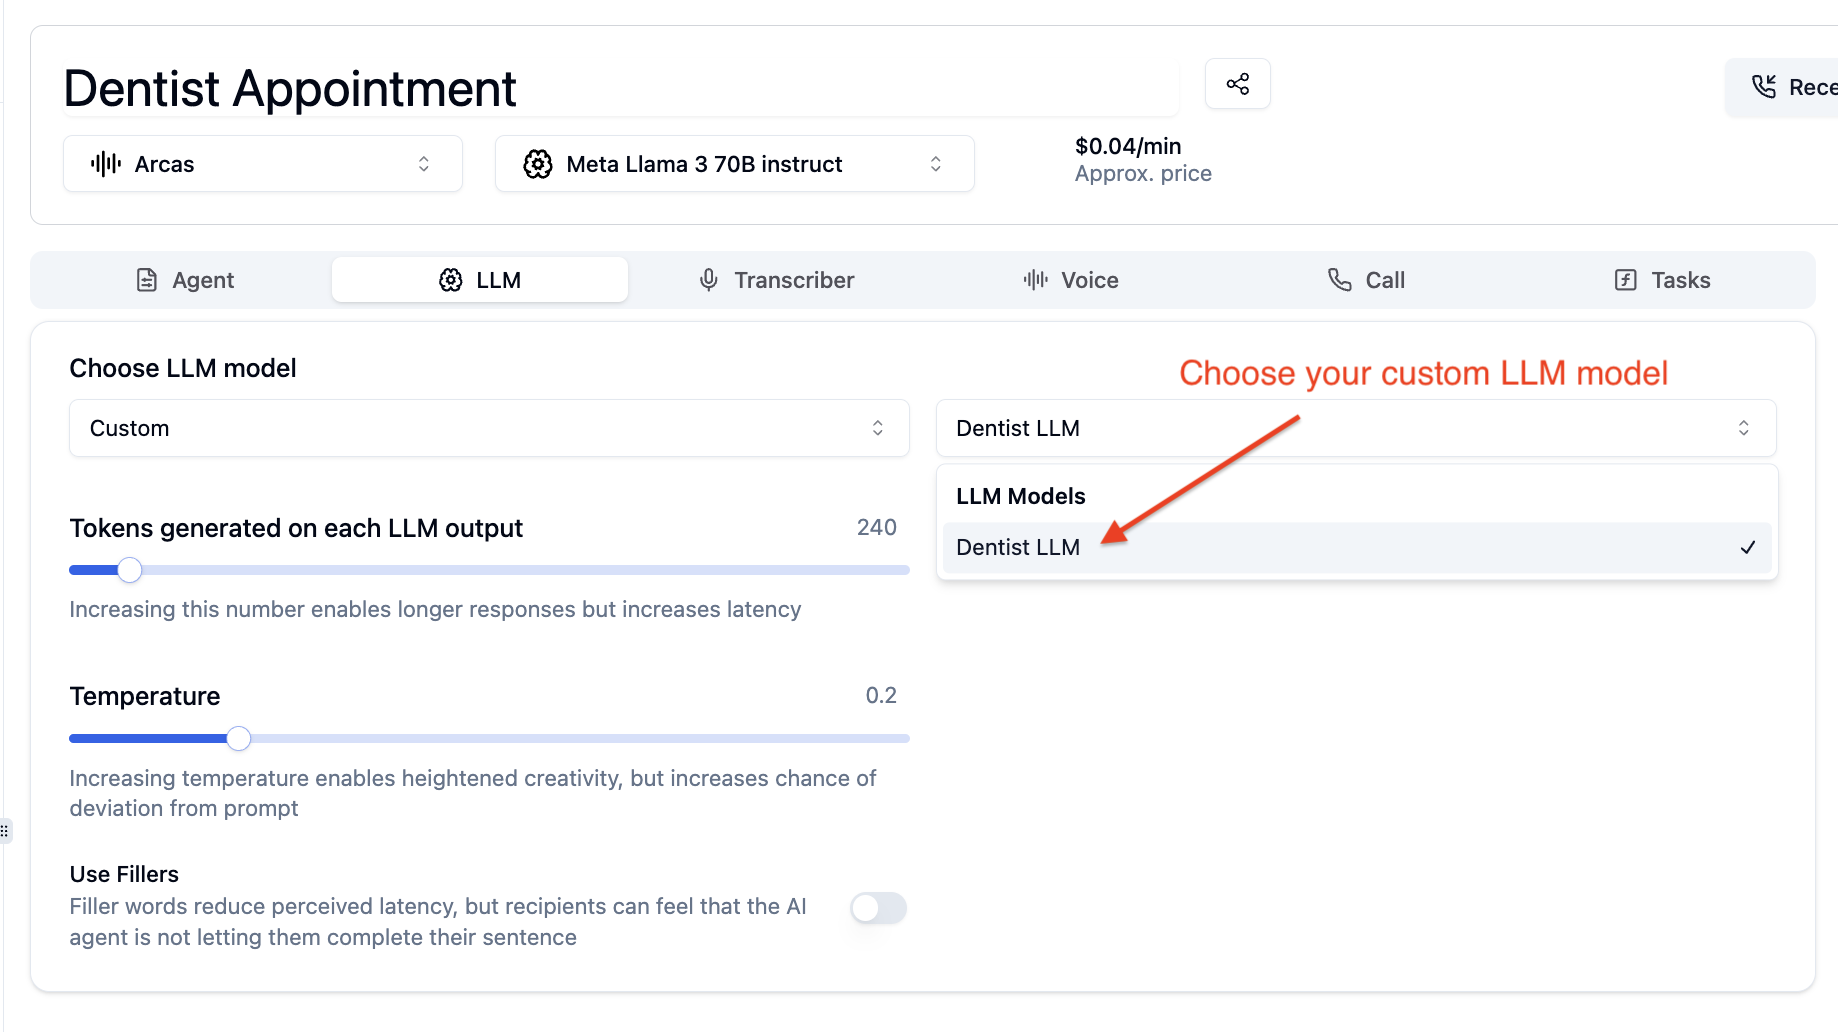
**Using the above steps will make sure the agent uses your Custom LLM URL**.
## Demo video
Here's a working video highlighting the flow:
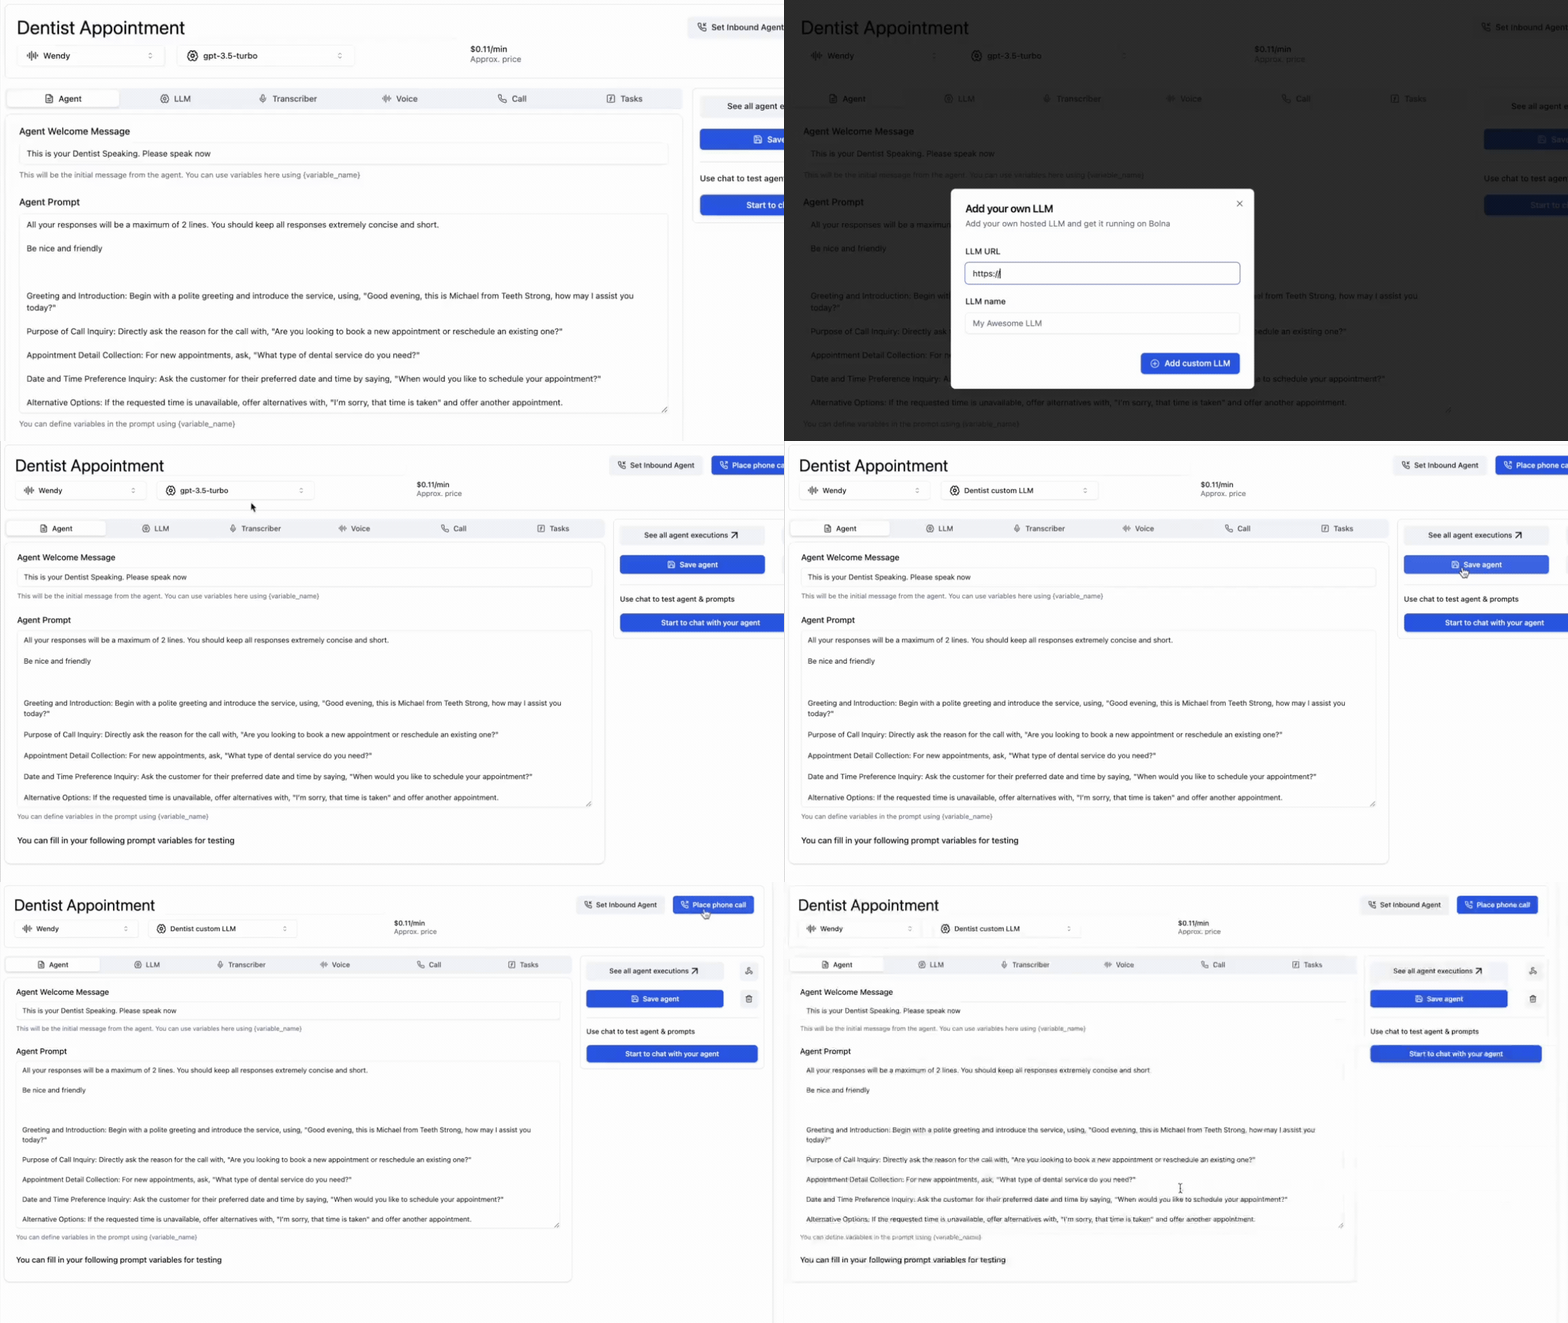
# Terminate Bolna Voice AI calls
Source: https://www.bolna.ai/docs/disconnect-calls
Optimize call lengths with Bolna Voice AI by setting duration limits. Automatically terminate calls exceeding limits for better resource management.
## What are Call Duration Limits?
Bolna Voice AI lets you set a maximum call duration (in seconds) for automatic termination. Once the limit is reached, the call ends automatically, providing a safety net against unexpectedly long calls.
***
## Why Set Duration Limits?
Prevent unexpectedly long calls from consuming credits
Ensure fair allocation of concurrent call capacity
Protect against edge cases where calls do not end naturally
Better forecast and manage calling expenses
Learn more about [call pricing](/docs/pricing/call-pricing) and [outbound calling concurrency](/docs/outbound-calling-concurrency).
***
## Compatibility
| Call Type | Support |
| -------------- | ----------------- |
| Outbound calls | ✓ Fully supported |
| Inbound calls | ✓ Fully supported |
***
## Duration Limits vs. Hangup Prompts
| Feature | Duration Limits | Hangup Prompts |
| ----------------- | --------------------------------- | ----------------------------------- |
| **Trigger** | Hard time-based cutoff | Context-aware conversation analysis |
| **Accuracy** | 100%, always triggers at set time | Prompt-dependent, may need tuning |
| **Use case** | Safety net for runaway calls | Natural, intelligent call endings |
| **Configuration** | Set duration in seconds | Write a custom evaluation prompt |
**Use both together** for optimal call management: hangup prompts for natural conversation endings, and duration limits as a safety net to prevent runaway calls.
***
## Related Features
Configure silence detection and hangup prompts
Monitor the full lifecycle of your calls
Understand call termination reasons
# DTMF (Keypad Input)
Source: https://www.bolna.ai/docs/dtmf
Let callers enter digits on their phone keypad and have your voice agent respond to the input.
## What is DTMF?
DTMF (Dual-Tone Multi-Frequency) is the system behind phone keypad input: the tones produced when a caller presses a digit key (0-9, `*`, `#`).
When enabled, digit presses from the caller are captured and sent to the agent as a text message, which the LLM can read and respond to just like spoken input.
## When to use it
DTMF is useful any time you want callers to enter structured numeric input without speaking it:
* **PIN or OTP verification** -- "Please enter your 6-digit OTP followed by #"
* **Account or order number lookup** -- "Enter your account number and press #"
* **Phone number capture** -- collecting a callback number during a call
* **Confirmation flows** -- "Press 1 to confirm, 2 to cancel"
* **Sensitive input** -- when callers are uncomfortable speaking a number aloud (e.g. a password or card number)
DTMF works alongside speech. A caller can still speak normally between keypad entries.
For branching menu flows ("press 1 for sales, press 2 for support"), use [IVR Inbound Calls](/docs/ivr-inbound-calls) instead. It handles menu routing natively without an LLM.
## Telephony support
| Provider | Support |
| ---------------- | ----------------------- |
| Plivo | Supported |
| Twilio | Supported |
| SIP Trunk (BYOT) | Currently not supported |
| Exotel | Currently not supported |
| Vobiz | Currently not supported |
## Enabling DTMF
### From the dashboard
Toggle on **Keypad Input (DTMF)** in the **Call Tab** of your agent.
### Via the API
Set `dtmf_enabled: true` inside `task_config` when creating or updating an agent:
```json theme={"system"}
{
"task_config": {
"dtmf_enabled": true
}
}
```
## How it works
1. The agent asks the caller to enter digits and press `#`.
2. The caller presses keys on their keypad.
3. Bolna accumulates the digits until `#` is pressed.
4. The digits are delivered to the agent as: `dtmf_number: `
5. The agent responds to the input.
`#` is the termination key. The agent only receives the input after the caller presses it. The `#` itself is not included in the value.
## Writing the prompt
Tell callers to press `#` after their entry, and tell the agent what to do when it sees a `dtmf_number:` message.
**Example prompt snippet:**
```
When you need the caller's phone number, say:
"Please enter your phone number on your keypad and press the hash key when you are done."
When you receive a message starting with "dtmf_number:", the digits that follow are what the caller entered.
Read them back to confirm and proceed accordingly.
```
**What the agent receives:**
```
dtmf_number: 9876543210
```
The agent treats this like any other message in the conversation. It can confirm the value, use it in a tool call, or move to the next step based on it.
## Next Steps
Menu-based call routing with keypad navigation
All call configuration options
# Bolna AI Data residency
Source: https://www.bolna.ai/docs/enterprise/data-residency
Bolna AI India data residency for enterprises: store & process voice AI data in India with compliance, privacy & ultra-low latency.
## Overview
Bolna AI now supports data residency in India (IN) for customers who require their data to be stored and processed within Indian jurisdiction.
By default, all Bolna AI services operate in United States (US)‑hosted infrastructure, but customers on enterprise plans can choose to have their data processed exclusively in India.
This feature helps organizations meet local compliance, privacy, and sovereignty requirements while continuing to benefit from Bolna’s real‑time AI capabilities.
Data residency is an Enterprise feature. Please reach out to us at [enterprise@bolna.ai](mailto:enterprise@bolna.ai) or schedule a call [https://www.bolna.ai/meet](https://www.bolna.ai/meet) for more information.
## What’s Included
When you select India (IN) as your data residency location:
* **Storage**: All customer audio, transcripts, logs, and configurations are stored on secure infrastructure physically located in India.
* **Processing**: All inference, transcription, and response generation happens within Indian borders.
## When to Use India Data Residency
India‑based data residency is recommended if you:
* Are subject to Indian data localization laws or work in regulated industries like banking, government, healthcare, or telecom.
* Want to ensure all processing and storage remain inside Indian borders for privacy or competitive reasons.
* Need to meet contractual obligations with Indian clients regarding data handling.
# Bolna AI On-Prem for Enterprise
Source: https://www.bolna.ai/docs/enterprise/on-premise-deployments
Discover Bolna Enterprise solutions for large-scale businesses, offering scalable Voice AI agents, advanced integrations, and custom seamless solutions.
**Bolna AI On-Prem** empowers your organization to deploy our best-in-class voice AI infrastructure. It is fully containerized and runs entirely within your cloud or data center. Designed for high-security, high-performance workloads, it's ideal for industries with stringent data requirements.
Please reach out to us at [enterprise@bolna.ai](mailto:enterprise@bolna.ai) or schedule a call [https://www.bolna.ai/meet](https://www.bolna.ai/meet) for more information about Bolna On-Premise deployments.
## Deployment Anywhere, Full Control
* Deploy **dockerized containers** or use **Kubernetes** across any cloud or on-prem environment.
* Supports deployment on **your own servers** fully leveraging your existing infrastructure.
* Choose your preferred region and provider (AWS, GCP, Azure, bare metal, private cloud).
## Data Privacy & Compliance
* **Complete data sovereignty**: All audio, requests, logs and transcripts remain within your environment. Nothing is sent to Bolna's servers. This ensurs compliance with healthcare, financial, and legal regulations.
* Regular performance and usage metrics are securely sent to Bolna cloud solely for billing and system optimizations.
* Full audit logs for monitoring all outbound activity, giving your security team complete visibility.
## Performance, Scalability & Reliability
* Achieve **ultra-low latency** by co-locating inference with your existing application stack.
* Scale horizontally and separate API and websocket containers, and auto-scale based on demand.
## Enterprise-Grade Operations
* Fully compatible with Bolna APIs, without any changes to your integration. You can simply point to your self-hosted endpoint.
# Bolna AI On-Prem guide for Enterprises
Source: https://www.bolna.ai/docs/enterprise/on-premise-instructions
Learn how to self-host Bolna Voice AI on your own servers using Docker or Kubernetes for secure, private, and scalable enterprise deployments.
Please reach out to us at [enterprise@bolna.ai](mailto:enterprise@bolna.ai) or schedule a call [https://www.bolna.ai/meet](https://www.bolna.ai/meet) for the Docker images and pricing info.
## 1. Introduction
### Why on-premise?
Deploying Voice AI infrastructure on your own server (on-premises or self-managed cloud infrastructure) instead of relying entirely on third-party SaaS solutions has several strategic, technical, and operational advantages, especially for companies focused on privacy, control, and performance.
### Security
With an on-premises deployment, all data remains within your corporate network, ensuring enhanced security as it is not transmitted over the Internet. This setup helps in complying with strict data privacy and protection regulations.
### Components
### Prerequisites
**Docker**: Install Docker on your system to manage the containerized application.
```bash theme={"system"}
# Add Docker's official GPG key:
sudo apt-get update
sudo apt-get install ca-certificates curl
sudo install -m 0755 -d /etc/apt/keyrings
sudo curl -fsSL https://download.docker.com/linux/ubuntu/gpg -o /etc/apt/keyrings/docker.asc
sudo chmod a+r /etc/apt/keyrings/docker.asc
# Add the repository to Apt sources:
echo \
"deb [arch=$(dpkg --print-architecture) signed-by=/etc/apt/keyrings/docker.asc] https://download.docker.com/linux/ubuntu \
$(. /etc/os-release && echo \"$VERSION_CODENAME\") stable" | \
sudo tee /etc/apt/sources.list.d/docker.list > /dev/null
sudo apt-get update
# Install the latest version of Docker
sudo apt-get install docker-ce docker-ce-cli containerd.io docker-buildx-plugin docker-compose-plugin
# Verify Docker is running
sudo docker run hello-world
# Install Docker Compose plugin
sudo apt install -y docker-compose-plugin
# Verify Docker Compose version
docker compose version
```
**Hardware Specifications**: Storage and compute requirements
* **Instance type**: c6a.xlarge
* **Object storage**: AWS S3
* **Relational Database**: PostgreSQL 16.3, RAM: 8GB+
* **Caching layer**: Redis 7.10, 4GB RAM (Instance type: cache.t4g.medium)
* **Message Queueing Channel**: RabbitMQ 13.13.7, RAM: 8GB (Instance type: mq.m5.large)
## 2. Deployment Environments
This documentation will cover specific instructions and considerations for deploying the services within an AWS environment, ensuring optimal configuration and performance.
## 3. Self-Service Licensing & Credentials
Self-hosting key can be either generated from our dashboard or contact [enterprise@bolna.ai](mailto:enterprise@bolna.ai)
## 4. Deploy All Services
### Login to Bolna's ghcr
```bash theme={"system"}
echo | docker login ghcr.io -u --password-stdin
```
### Pull images
```bash theme={"system"}
docker pull ghcr.io/bolna-ai/api_server:v1
docker pull ghcr.io/bolna-ai/ws_server:v1
docker pull ghcr.io/bolna-ai/telephone_server:v1
docker pull ghcr.io/bolna-ai/q_manager:v1
docker pull ghcr.io/bolna-ai/q_worker:v1
docker pull ghcr.io/bolna-ai/arq_worker:v1
```
### Docker Compose File:
Create a docker-compose.yml File
```bash theme={"system"}
version: '3.8'
services:
api_server:
image: ghcr.io/bolna-ai/api_server:v1
container_name: api_server
ports:
- "5001:5001"
env_file:
- .env
restart: always
telephone_server:
image: ghcr.io/bolna-ai/telephone_server:v1
container_name: telephone_server
ports:
- "8001:8001"
env_file:
- .env
restart: always
q_worker:
image: ghcr.io/bolna-ai/q_worker:v1
container_name: q_worker
ports:
- "5002:5002"
env_file:
- .env
restart: always
q_manager:
image: ghcr.io/bolna-ai/q_manager:v1
container_name: q_manager
ports:
- "5003:5003"
env_file:
- .env
restart: always
ws_server:
image: ghcr.io/bolna-ai/ws_server:v1
container_name: ws_server
ports:
- "5005:5005"
env_file:
- .env
restart: always
arq_worker:
image: ghcr.io/bolna-ai/arq_worker:v1
container_name: arq_worker
env_file:
- .env
restart: always
command: ["arq", "arq_worker.WorkerSettings"]
```
### Start docker compose:
```bash theme={"system"}
docker compose up -d
```
# Managing Your Organization & Team
Source: https://www.bolna.ai/docs/enterprise/organization
Learn how to manage your Bolna organization, invite team members, and configure roles and permissions for secure and efficient voice AI operations.
## Overview
Your Bolna Organization is the central hub for all your voice AI resources. It acts as a top-level container for your team members, voice agents, billing information, API keys, and overall settings. Proper organization management is key to scaling your operations securely and efficiently.
Within an organization, you can manage access for different team members, monitor usage across all your agents, and configure security policies that apply to your entire team.
This is an Enterprise feature.
Please reach out to us at [enterprise@bolna.ai](mailto:enterprise@bolna.ai) or schedule a call [https://www.bolna.ai/meet](https://www.bolna.ai/meet) for more information.
## Managing Team Members
You can invite new members to your organization and assign and edit roles based on their responsibilities. This ensures that team members only have access to the resources they need to perform their jobs.
* **Invite Members**: Organization Admins can invite new users via email from the 'Members' tab in the organization settings.
* **Assign Roles**: Each member is assigned a role that dictates their level of access and permissions within the organization.
* **Edit Roles**: Organization Admins can edit the access level of existing users by selecting the organization role they want to assign to their members.
## Roles and Permissions
Bolna uses a simple two-role system to manage access control within your organization.
* **Admin**: Has full, unrestricted access to the organization. Admins can manage billing, invite or edit member roles, create and delete agents, and manage all API keys. They have complete control over all settings.
* **Member**: Has limited access designed for operational tasks. Members can place calls on existing agents. They can create and manage their own API keys but cannot access API keys belonging to the admin or other members. Members are restricted from performing most delete operations (like deleting agents).
## Editing Existing User Roles
* In order to update existing user roles, click on the Edit Icon for the user you want to edit the organization role of.
* This opens up a dialog box where you can update the role that you want to edit.
## Usage & Billing
The **Billing** tab provides a complete overview of your subscription, plan details, and usage metrics like total call minutes and number of active agents. You can view invoicing history and manage your payment methods here.
The organization's balance is shared across all users. All usage from both Admin and Member accounts is deducted from this single, centralized balance.
## API Keys
Both Admins and Members can generate API keys for programmatic access. However, access is scoped based on role:
* **Admin Keys**: Have full permissions and can perform any action via the API.
* **Member Keys**: Are restricted to the same permissions as the Member role. They can be used to call agents but cannot perform most of the delete or edit actions. Members can delete and create their own API Keys while not having access to the admins or other member's keys.
# Bolna AI Enterprise Plan
Source: https://www.bolna.ai/docs/enterprise/plan
Discover Bolna Enterprise solutions for large-scale businesses, offering scalable Voice AI agents, advanced integrations, and custom seamless solutions.
As you build your application on Bolna to solve your use-case, we partner with you throughout the journey - from early concept to enterprise-grade deployment.
## What is included in the Enterprise Plan?
Bolna's Enterprise Plan is built for organizations with high-volume, mission-critical voice needs. It includes:
### Elevated concurrency limits
Scale beyond the default 10 concurrent calls to handle hundreds or thousands of simultaneous conversations based on your needs. Learn more about [outbound calling concurrency](/docs/outbound-calling-concurrency).
### Priority in processing your calls and requests
Enterprise customers skip queues during peak usage, ensuring consistent performance even during high-demand periods.
### Premium Slack support and regular check-ins
Access guaranteed support and a dedicated engineer who understands your use case and can provide proactive assistance.
### Customized volume-based discounts
Competitive pricing that improves as your call volume grows, making enterprise-scale deployments cost-effective. See our [call pricing](/docs/pricing/call-pricing) for standard rates.
## Who should consider the Enterprise Plan?
The Enterprise Plan is ideal for:
* Companies making 10,000+ calls per month
* Organizations requiring guaranteed uptime and SLAs
* Businesses needing dedicated technical support
* Teams building mission-critical voice AI applications
* Companies requiring custom integrations or features
* Organizations with specific data residency requirements ([learn more](/docs/enterprise/data-residency))
## How to get started with Enterprise
Please reach out to us at [enterprise@bolna.ai](mailto:enterprise@bolna.ai) or schedule a call at [https://www.bolna.ai/meet](https://www.bolna.ai/meet) for more information and a customized quote based on your requirements.
# Sub-Accounts for Enterprise Organizations
Source: https://www.bolna.ai/docs/enterprise/sub-accounts
Bolna AI enterprise sub-accounts let you manage multiple customers & teams with full data isolation, unified billing & centralized control.
## Overview
Bolna's Sub-Account feature is designed for enterprise organizations that need to manage multiple customers, business units, or operational environments under a single main account. This powerful organizational tool provides complete data isolation, centralized management, and scalable operations for complex voice AI deployments.
Sub-accounts enable you to create logical boundaries within your account, ensuring that different customers, departments, or projects operate independently while maintaining unified oversight and control.
Sub-accounts is an Enterprise feature.
Please reach out to us at [enterprise@bolna.ai](mailto:enterprise@bolna.ai) or schedule a call [https://www.bolna.ai/meet](https://www.bolna.ai/meet) for more information.
## Key Sub-account Advantages
### Complete Data Isolation
* **Customer separation**: Maintain strict boundaries between different customer data and configurations
* **Audit trails**: Comprehensive logging and monitoring for each sub-account independently
### Centralized Management & Control
* **Unified dashboard**: Manage all sub-accounts from a single enterprise control panel
* **Consolidated billing**: Streamlined invoicing and cost allocation across all sub-accounts
* **Resource allocation**: Distribute and monitor usage quotas across sub-accounts
## Primary Use Cases
### Service Providers & Agencies
Transform your voice AI service delivery with enterprise-grade multi-tenancy:
* **Customer isolation**: Each client gets their own environment with dedicated resources
* **Flexible billing**: Accurate cost tracking and billing for each client account
### Large Enterprise Organizations
Organize your voice AI infrastructure across complex organizational structures:
* **Department separation**: Sales, support, marketing, and operations teams get isolated environments
* **Regional management**: Separate voice AI deployments by geographic regions or markets
* **Product line organization**: Different products or services get dedicated sub-accounts
* **Subsidiary management**: Manage voice AI for multiple company subsidiaries independently
### Development & Testing Teams
Maintain clean separation between different environments and projects:
* **Environment isolation**: Separate development, staging, and production deployments
* **Team collaboration**: Multiple teams work on isolated projects without interference
* **Feature testing**: Test new voice AI capabilities without affecting production systems
* **A/B testing**: Run parallel experiments with completely isolated data sets
### Compliance-Heavy Industries
Meet strict regulatory and compliance requirements:
* **Healthcare**: Separate patient data and HIPAA-compliant voice AI deployments
* **Financial services**: Isolated environments for different financial products or regions
* **Government**: Secure, compliant voice AI for different agencies or departments
* **Legal**: Client-specific environments with strict confidentiality requirements
## Managing Sub Accounts
### Creation
Sub-accounts are managed by the [Organization](/docs/enterprise/organization), consisting of Admins or Member Users.
### API Keys & Access
* Sub-accounts themselves cannot generate or manage API keys.
* When a sub-account is created, an associated API key is automatically provisioned.
### Usage & Billing
* Usage can be accessed for [each sub account's usage](/docs/api-reference/sub-accounts/usage) or by [all the sub accounts](/docs/api-reference/sub-accounts/all_usage) across the entire organization.
* Navigate to [Sub-Account Usage](https://platform.bolna.ai/dashboard/subaccounts?tab=usage) to see detailed breakdowns.
* Billing is consolidated at the **organization level**, but with granular visibility into sub-account consumption for accurate cost tracking.
### Roles & Permissions
* Both **Admins and Members** in the organization can create and update sub-accounts.
* Sub-accounts are **not users** — they act as logical containers for agents, call logs, and usage separation.
* Access to sub-account data is scoped by API keys.
### Resource Isolation
* Sub-accounts provide isolation at the **agents and call logs** level.
* Shared resources such as **phone numbers and providers** remain available at the organization level, allowing reuse across multiple sub-accounts.
* This ensures logical boundaries while still enabling efficient resource management.
### Lifecycle Management
* Sub-accounts can be created and updated via the dashboard (beta) or API.
* Updates can be performed by any organization user (Admin or Member).
### Audit & Monitoring
* Sub-accounts maintain independent usage logs, analytics, and call histories.
* These can be viewed centrally by **Admins** using the sub-account’s associated API key or the dashboard.
* This provides enterprise-wide observability while preserving operational separation between environments.
For detailed technical implementation, see our [Sub-Account API Reference](/docs/api-reference/sub-accounts/overview).
Enterprise sub-accounts are designed for organizations with complex operational needs.
Our enterprise team will work with you to design the optimal sub-account architecture for your specific requirements.
# Exotel Integration with Bolna Voice AI
Source: https://www.bolna.ai/docs/exotel
Connect Exotel with Bolna Voice AI for inbound and outbound calling. Configure multilingual phone automation for India & global markets. Complete setup guide.
## Understanding Exotel Integration with Bolna Voice AI
Exotel serves as a powerful telephony infrastructure provider that seamlessly integrates with Bolna's Voice AI platform. This integration enables businesses to deploy intelligent conversational AI agents that can handle both incoming and outgoing phone calls with natural language understanding and multilingual capabilities.
When you connect Exotel to Bolna, you gain full control over your telephony operations while leveraging advanced AI-powered voice automation. The integration allows you to maintain your existing Exotel phone numbers and infrastructure while adding sophisticated AI capabilities for customer engagement, support automation, sales outreach, and appointment scheduling.
## Getting Started with Exotel on Bolna
Configure AI agents to initiate automated phone calls through your Exotel numbers
Set up AI agents to answer and handle inbound calls on your Exotel phone lines
Link your existing Exotel account credentials to Bolna for seamless integration
## Why use Exotel with Bolna?
Exotel offers several advantages:
* **Cost-effective**: Enjoy competitive domestic calling rates tailored for Indian businesses.
* **Reliable infrastructure**: Built on robust Indian telecom networks for high uptime and clear call quality.
* **Pan-India and global reach**: Seamlessly connect with customers across India and in multiple countries.
* **Easy integration**: Set up quickly and integrate effortlessly with the Bolna Voice AI platform.
For high-volume calling needs, consider using [batch calling](/docs/batch-calling) to scale efficiently. Compare Exotel with [Plivo](/docs/plivo) to choose the best provider for your needs.
# Connect Your Exotel Account to Bolna
Source: https://www.bolna.ai/docs/exotel-connect-provider
Securely connect your Exotel account with Bolna. Enable your Voice AI agents to utilize Exotel phone numbers for managing inbound and outbound calls.
## Connecting Your Exotel Account for AI-Powered Calling
Linking your personal or business Exotel account to Bolna gives you complete ownership and control over your telephony infrastructure. Once connected, all voice calls initiated by Bolna's AI agents will route through your Exotel account, utilizing your provisioned phone numbers and billing directly to your Exotel subscription.
This approach ensures transparency in call costs, maintains your existing phone number reputation, and provides full visibility into call analytics through both Bolna and Exotel dashboards.
## Step-by-Step Integration Process
### Step 1: Access the Providers Configuration Panel
Begin by logging into your Bolna platform account and locating the `Providers` section in the left navigation menu. Click the **Exotel connect button** to initiate the account linking process.
### Step 2: Enter Your Exotel Authentication Credentials
You'll need to provide your Exotel API credentials, which include your `API_KEY`, `API_TOKEN`, `ACCOUNT_SID`, `DOMAIN` and `PHONE_NUMBER`. These credentials can be found in your Exotel account dashboard under API settings.
These credentials allow Bolna to securely communicate with Exotel's API on your behalf.
### Step 3: Finalize the Connection
After entering your credentials click the **connect button** to establish the secure link between your Exotel account and Bolna's Voice AI platform. The system will validate your credentials and establish the integration.
### Step 4: Verify Successful Integration
Upon successful connection, you'll receive a confirmation message indicating that your Exotel account is now active on Bolna.
From this point forward, all AI-powered voice calls initiated through Bolna cab be utilized with your Exotel infrastructure, phone numbers, and account balance. You can now configure your AI agents to make outbound calls or handle inbound calls using your Exotel telephony resources.
# Make Outbound Calls with Exotel and Bolna
Source: https://www.bolna.ai/docs/exotel-outbound-calls
Set up & run outbound calling campaigns in India with Bolna Voice AI on Exotel. Follow this step-by-step guide for dashboard setup and seamless API integration.
## Launching Outbound Calls Through the Bolna Dashboard
### Step 1: Access Your Bolna Platform Account
Navigate to [https://platform.bolna.ai](https://platform.bolna.ai) and authenticate using your registered account credentials.
### Step 2: Configure Exotel as Your Telephony Provider
Within your agent configuration settings, select `Exotel` from the available call provider options. This designation tells Bolna to route all outbound calls through Exotel's telephony infrastructure.
### Step 3: Initiate Calls to Your Target Recipients
Enter the phone numbers of your intended call recipients in the designated input field. Bolna will automatically initiate calls through your Exotel connection, engaging with each recipient using the voice agents you've configured.
To utilize your own dedicated Exotel phone numbers for outbound calling, you must first establish a connection between your Exotel account and Bolna. Detailed instructions for linking your Exotel account are available in the [providers configuration guide](/docs/exotel-connect-provider).
## Programmatic Outbound Calling Using Bolna APIs
For developers building custom applications or integrating voice AI into existing systems, Bolna provides comprehensive REST APIs for programmatic call management.
### Step 1: Obtain Your API Authentication Key
1. Generate and save your [Bolna API Key](/docs/api-reference/introduction#steps-to-generate-your-api-key)
### Step 2: Configure Agent with Exotel Provider
When creating or updating your Bolna agent through the [`/create` Agent API](/docs/api-reference/agent/create), specify `exotel` as both the input and output provider within your tools configuration.
```create-agent.json theme={"system"}
...
...
"tools_config": {
"output": {
"format": "wav",
"provider": "exotel"
},
"input": {
"format": "wav",
"provider": "exotel"
},
"synthesizer": {...},
"llm_agent": {...},
"transcriber": {...},
"api_tools": {...}
}
...
...
```
### Step 3: Trigger Outbound Calls Programmatically
Execute the [`/call` API endpoint](api-reference/calls/make) to initiate outbound calls to your target recipients. Include your agent ID and the recipient's phone number in E.164 international format. The API will return a call ID that you can use to track call status and retrieve conversation analytics.
```call.json theme={"system"}
curl --request POST \
--url https://api.bolna.ai/call \
--header 'Authorization: ' \
--header 'Content-Type: application/json' \
--data '{
"agent_id": "fd3d9b56-0742-4a39-aaac-50dec1f37d00",
"recipient_phone_number": "+919876543210"
}'
```
# Frequently Asked Questions
Source: https://www.bolna.ai/docs/frequently-asked-questions
Find answers to common questions about Bolna Voice AI — setup, pricing, APIs, phone numbers, multilingual agents, sub-accounts, and on-premise deployment.
All agents created on Bolna undergo internal compliance and safety checks.
If you see a message such as **“Agent is restricted due to disallowed content. Please review and update it.”**, it means your agent’s configuration or prompt may have triggered a violation of Bolna’s content safety policies.
Disallowed content includes (but is not limited to):
* Political campaigns
* Illegal activities or solicitation
* Scam or fraud-related behavior
* Profanity or hate speech
* NSFW, adult, or sexually explicit content
* Harmful or misleading information
To resolve this, please review and modify your agent’s prompt, instructions, or behavior to ensure it adheres to a valid use-case.
Once updated, you can re-save the agent to re-trigger validation.
Bolna supports a wide range of customizable voice agents. From free-flowing conversational assistants to structured IVR-style bots.
You can build agents for use cases like [lead qualification](/docs/agents-library), customer support, interviews, [appointment bookings](/docs/tool-calling/book-calendar-slots), [call transfers](/docs/tool-calling/transfer-calls), and more.
Get started with our [Agent template library](/docs/agents-library) or explore the [Playground agent setup guide](/docs/agent-setup/agent-tab).
Bolna offers transparent usage-based pricing:
* **Call pricing**: \$0.02/min platform fee (plus provider charges).
Please refer to the [cost & pricing documentation](/docs/pricing/call-pricing) for detailed information. For high-volume usage, explore our [Enterprise Plan](/docs/enterprise/plan) with customized volume-based discounts.
By default, Bolna allows up to **10 concurrent calls** for paid users. Learn more about [outbound calling concurrency](/docs/outbound-calling-concurrency) or request higher limits via the [Enterprise Plan](/docs/enterprise/plan) for large-scale deployments and [batch calling](/docs/batch-calling) capabilities.
**Yes**. You can either:
* **Buy phone numbers directly** from the [Bolna Dashboard](/docs/buying-phone-numbers).
* **Use your own telephony account** (e.g., [Twilio](/docs/twilio-connect-provider) or [Plivo](/docs/plivo-connect-provider)) to connect and use your own manageed dedicated phone numbers.
No - Phone numbers purchased on Bolna can only be used with Bolna Voice AI agents.
Absolutely. Bolna integrates seamlessly with third-party telephony providers like [Twilio](/docs/twilio-connect-provider) and [Plivo](/docs/plivo-connect-provider), allowing you to use your own account and phone numbers.
Yes. Bolna supports multiple languages and voices. You can create agents in various languages (e.g., English, Hindi) using built-in multilingual support across [speech-to-text](/docs/providers/transcriber/deepgram), [LLM](/docs/providers/llm-model/openai), and [text-to-speech](/docs/providers/voice/elevenlabs) components.
Find the [list of all supported languages](/docs/customizations/multilingual-languages-support) and learn how to [write prompts for multilingual agents](/docs/guides/writing-prompts-in-non-english-languages).
Yes, definitely. Bolna AI is an API-first platform providing a comprehensive API suite to:
* Create, update, list, and delete voice agents via [Agent APIs](/docs/api-reference/agent/v2/overview).
* Trigger calls via [Call APIs](/docs/api-reference/calls/overview).
* Manage executions and logs via [Executions APIs](/docs/api-reference/executions/overview).
* Do bulk calls using batches via [Batches APIs](/docs/api-reference/batches/overview).
* Manage phone numbers via [Phone numbers APIs](/docs/api-reference/phone-numbers/overview).
* Create, list and manage sub‑accounts via [Sub-Account APIs](/docs/api-reference/sub-accounts/overview).
Yes. The platform supports shared access where you can add your team (developers, operators, analysts, etc.) to collaborate within the Bolna dashboard. APIs also allow scoped access through sub‑accounts.
Yes. Bolna supports multiple sub-accounts, designed for enterprise-level teams to isolate projects, billing, and permissions—fully manageable via the API.
Yes - Bolna AI supports on-premise deployments.
You can run the complete Bolna platform on your own infrastructure (e.g., private cloud or on-premise servers) instead of the hosted Bolna service.
On-premise is available only for enterprise customers. Please reach out to us at [enterprise@bolna.ai](mailto:enterprise@bolna.ai) or schedule a call [https://www.bolna.ai/meet](https://www.bolna.ai/meet) for more information.
Not yet. SIP connectivity is **not currently supported** on Bolna Voice AI.
However, native SIP integration is on our roadmap to enable direct enterprise-grade connectivity with PBX systems and VoIP infrastructure.
You can currently use [Twilio](/docs/twilio-connect-provider), [Plivo](/docs/plivo-connect-provider) or [Exotel](/docs/exotel-connect-provider) integrations for all telephony and call-routing needs.
# Creating a Voice Call Agent
Source: https://www.bolna.ai/docs/getting-started/agent-creation
Learn how to create Voice Agents in Bolna. Use Auto Build for guided steps, premade templates for common use cases, or start from scratch with default settings.
## Overview
Bolna provides multiple ways to create a Voice Call Agent for automated phone calls. Choose the method that works best for your use case.
***
## Getting Started
Navigate to **Agent Setup** in the left sidebar and click **+ New Agent** to create a new agent.
When you click **+ New Agent**, you'll see two options:
AI generates your agent based on your description
Start with ready-to-use templates
***
## Auto Build Agent
Answer a few questions about your use case, and Bolna's AI generates the prompts and configurations for you.
Give your agent a descriptive name (e.g., "Customer Support - E Commerce").
Choose the languages your agent should support (English, Hindi, etc.).
Tell the AI what you want to achieve in this call (be descriptive!).
Describe what should happen after the call is completed.
Provide any FAQs, business documents, or additional information.
Provide example conversations to guide the agent's behavior.
Click **Generate Agent** to create your customized agent.
**Pro tip:** The more detail you provide in the call objective, the better your AI-generated agent will be!
***
## Pre built Agents
Start with a ready-to-use template designed for common calling scenarios like Customer Support, Lead Qualification, Recruitment, Onboarding, and more.
Browse all templates in the [Agents Library](/docs/agents-library) to explore the full list of pre-built agents.
***
## Build from Scratch
Click **"I want to create an agent from scratch"** at the bottom of the modal to create a new agent with default settings. The agent will appear in your dashboard ready for you to customize.
Learn how to configure your agent in the [Agent Setup Guide](/docs/agent-setup/overview).
***
## Import Agent
Already have an agent configuration? Import an existing agent to reuse or share agents across projects.
Step-by-step guide to importing agent configurations
***
## Next Steps
Learn all agent configuration options
Browse ready-to-use agent templates
Best practices for prompting
Integrate tools and APIs
# Build Knowledge Base with PDFs & URLs
Source: https://www.bolna.ai/docs/getting-started/knowledge-base
Upload PDFs and add URLs to create knowledge bases for your Bolna Voice AI agents. Enable context-aware responses with RAG-powered retrieval.
## What is Knowledge Base?
Knowledge Base allows you to upload documents and add URLs that your AI agent can reference during conversations. Using RAG (Retrieval-Augmented Generation), your agent retrieves relevant information and provides accurate, context-aware responses.
***
## How to Access Knowledge Base
Navigate to [platform.bolna.ai](https://platform.bolna.ai/)
Click **Knowledge Base** in the left sidebar.
Click the blue **Add Knowledge Base** button to get started.
***
## Adding a Knowledge Base
Upload PDF documents for your agent to reference.
Open the modal from the main Knowledge Base page.
The **Upload PDF** tab is selected by default.
Drag and drop your PDF file, or click **"click to browse"** to select.
Choose **English (Default)** or **Multilingual (Hindi, Tamil, etc.)** from the **Language Support** dropdown.
Click **Upload PDF** to start processing.
Only `.pdf` files are supported for document upload.
Add website URLs for your agent to reference.
Open the modal from the main Knowledge Base page.
Click the **Add URL** tab.
Paste the full URL (e.g., `https://example.com`).
Choose **English (Default)** or **Multilingual (Hindi, Tamil, etc.)** from the **Language Support** dropdown.
Click **Add URL** to start processing.
Add your company website, FAQ pages, or product documentation URLs for comprehensive agent knowledge.
***
## Multilingual Knowledge Bases
By default, knowledge bases are optimized for English content. If your documents are in **non-English languages** (Hindi, Spanish, French, etc.) or you need **cross-lingual retrieval** (e.g., query in English, retrieve from Hindi documents), enable **Multilingual** language support when creating a knowledge base.
| Mode | Best for |
| -------------------------- | ---------------------------------------------------------------------- |
| **Default** (no selection) | English-only documents and queries |
| **Multilingual** | Non-English documents, mixed-language queries, cross-lingual retrieval |
Choose the language support mode **before** uploading. Existing knowledge bases cannot be switched between default and multilingual — you'll need to create a new one.
If your agent handles calls in multiple languages using [multilingual voice support](/docs/customizations/multilingual-languages-support), pair it with a multilingual knowledge base for consistent cross-lingual performance.
***
## Managing Your Knowledge Bases
Your uploaded knowledge bases are displayed in a table with full management capabilities.
| Column | Description |
| ----------- | ------------------------------------------------------ |
| **RAG ID** | Unique identifier for the knowledge base |
| **Source** | Original file name or URL |
| **Type** | Content type (Pdf, Url) |
| **Created** | When the knowledge base was added |
| **Status** | Processing status (`processed`, `processing`, `error`) |
| **Delete** | Remove the knowledge base |
Wait for the status to show **"processed"** before connecting to your agent. If status shows **"error"**, try re-uploading the file.
***
## Connecting to Your Agent
**Don't forget this step!** Knowledge bases must be connected to your agent in the LLM Tab to take effect.
Go to your agent's **[LLM Tab](/docs/agent-setup/llm-tab)**.
Locate **Add knowledge base (Multi-select)**.
Check one or more knowledge bases from the dropdown.
Click **Save agent** to apply changes.
You can connect multiple knowledge bases to a single agent for comprehensive responses across different topics.
***
## Use Cases
Answer questions about your products and services
Provide accurate answers from your FAQ pages
Reference company policies during calls
Help agents access training and onboarding content
***
## Next Steps
Connect knowledge base to your agent
Configure prompts to use knowledge
Set safety rules and structured responses
Prompting best practices
# Understanding Providers
Source: https://www.bolna.ai/docs/getting-started/providers
Learn about Bolna providers - the AI services that power your Voice AI agents. Connect your own Transcribers, LLMs, Synthesizers, and Telephony providers.
## What are Providers?
Providers are the AI services that power your Voice AI agents. Every voice agent in Bolna uses providers working together to handle conversations in real-time.
***
## Benefits of Connecting Your Own Providers
Use your own API keys and pay providers directly. No markup on provider usage.
Use specific models, voices, or features not available on Bolna's default providers.
Get enterprise SLAs, dedicated support, and compliance certifications from providers.
Already have provider accounts? Connect them to Bolna and use your existing credits.
When you connect your own provider, Bolna doesn't charge for that provider's usage. You pay the provider directly.
***
## How Providers Work Together
```mermaid theme={"system"}
flowchart LR
A[Caller speaks] --> B[Transcriber]
B --> C[LLM]
C --> D[Synthesizer]
D --> E[Agent responds]
```
1. **Transcriber (STT)** — Converts speech to text
2. **LLM** — Understands intent and generates a response
3. **Synthesizer (TTS)** — Converts text to natural speech
***
## Supported Providers
### LLMs (Large Language Models)
The brain of your voice agent. Understands caller intent and generates responses.
>} href="/providers/llm-model/azure-openai">
Enterprise OpenAI deployment
>} href="/providers/llm-model/openai">
GPT-4o, GPT-4o-mini, GPT-3.5
>} href="/providers/llm-model/openrouter">
Access multiple models
>} href="/providers/llm-model/openrouter">
Search-powered responses
***
### Transcribers (Speech-to-Text)
Convert spoken words into text. Accuracy and speed are critical for natural conversations.
>} href="/providers/transcriber/deepgram">
Fast, accurate, great for calls
>} href="/providers/transcriber/openai">
GPT Realtime Whisper
>} href="/providers/transcriber/sarvam">
Indian language transcription
***
### Synthesizers (Text-to-Speech)
Convert text into natural-sounding speech. Voice quality matters for customer experience.
>} href="/providers/voice/cartesia">
Ultra-low latency
>} href="/providers/voice/elevenlabs">
Ultra-realistic voices
>} href="/providers/voice/rime">
High-quality synthesis
>} href="/providers/voice/sarvam">
Indian language voices
***
### Telephony Providers
Handle phone calls - both inbound and outbound.
>} href="/exotel">
India-focused
>} href="/plivo">
Cost-effective
>} href="/twilio">
Global coverage
>} href="/vobiz">
Enterprise telephony
***
### Tools & Integrations
Connect external services to enhance your voice agent.
>} href="/integrations">
WhatsApp messaging
>} href="/tool-calling/book-calendar-slots">
Calendar booking
***
## Quick Start
For testing and development, Bolna's built-in providers work out of the box. No configuration needed.
Ready to connect your own providers? See [Connect Providers](/docs/providers) for step-by-step instructions.
***
## Recommended Setups
| Use Case | Recommended Providers |
| -------------------- | --------------------------------- |
| **Quick testing** | Use Bolna's built-in providers |
| **Production** | Connect your own accounts |
| **Indian languages** | Sarvam for LLM |
| **Lowest latency** | Deepgram + GPT-4o-mini + Cartesia |
| **Highest quality** | Deepgram + GPT-4o + ElevenLabs |
***
## Next steps
Add your provider credentials
View all available integrations
Create custom voices
Configure your agent
# Debugging Graph Agents
Source: https://www.bolna.ai/docs/graph-agent/debugging
Read the routing logs, understand what the routing LLM saw, and fix the most common misbehaviour patterns.
The fastest way to diagnose a misbehaving graph agent is to read the routing logs. On every customer turn the framework logs the routing decision, the confidence, and the reason. This page walks through the log format and the patterns you'll see most often.
***
## What you'll see in the logs
Every customer turn produces one routing log line. Two formats, depending on whether the routing LLM ran or a deterministic rule fired first.
**LLM-routed turn:**
```
Routing decision (LLM): transition_to_offer_pitch | confidence: 0.95 |
reasoning: Customer confirmed identity by saying 'yeah'. (latency: 210.4ms)
```
**Deterministic turn (expression or unconditional edge):**
```
Routing decision (deterministic): -> after_hours |
deterministic:expression:Outside working hours (latency: 0.6ms)
```
| Field | What it tells you |
| --------------------------------- | ------------------------------------------------------------------------------------------------------ |
| `LLM` vs `deterministic` | Whether the routing LLM made the call, or an expression / unconditional rule fired first. |
| `transition_to_` or `-> ` | The target node the routing picked. |
| `confidence` (LLM only) | How certain the LLM was. Close to `1.0` means a clear match. Below `0.6` suggests ambiguous edges. |
| `reasoning` | Why this transition was chosen. The single most useful field for debugging wrong transitions. |
| `latency` | How long routing took. Deterministic edges are sub-millisecond; LLM routing is typically 150 to 300ms. |
When the routing LLM picks `stay_on_current_node`, the agent **still produces a response** on the current node. It does not stay silent.
***
## Common scenarios
### Agent keeps re-asking instead of moving forward
The routing LLM is returning `stay_on_current_node`. Read the `reasoning` value in the routing log: it almost always explains what it thought was missing.
Common causes:
* The edge condition is too strict, or uses vocabulary the LLM wouldn't associate with what the customer said.
* The customer's input genuinely doesn't match any condition. Add a broader fallback edge.
* The edge has `parameters` and the customer hasn't provided one of the required values yet.
### Agent routes to the wrong node
Two edge conditions are overlapping. The routing LLM is matching the wrong one. Check the `reasoning` value in the routing log to see which condition it picked and why, then rewrite the conditions to be more specific and mutually exclusive.
### Confidence is consistently low
Edge conditions are ambiguous or too similar to each other. Rewrite them, or add expression edges for the deterministic cases (working hours, retry counts, language) so the LLM has fewer overlapping options.
### Agent skips a node unexpectedly
An expression edge fired before the LLM got a chance. Check whether any expression edges on the previous node have overly broad conditions. For example `_node_turns gte 1` would always fire on the second turn regardless of what the customer said.
### Time-based expression never fires
`recipient_data.timezone` was not set on the call. Without it, `current_hour`, `current_weekday`, etc. are never populated and every time-based comparison silently returns `False`. Always set `timezone` when creating a call that uses time-based routing.
### Agent forgets earlier context on long calls
The response LLM only sees the most recent 50 messages of conversation history. For most calls this is fine, but on very long flows the agent can lose earlier turns. Persist important state into `context_data` (extracted via edge `parameters` or pushed via event properties) instead of relying on the LLM seeing it in the transcript.
### Static node plays the wrong text or wrong voice
The cache was built from an earlier version of the config. Re-save the agent so the cache regenerates from the current `static_message` and TTS voice settings.
### Event fires but the agent stays silent
Most likely causes, in rough order:
1. The call had already ended when the event arrived. Check that you got `202 Accepted`, not `404`.
2. The event name doesn't match any edge on the **current** node. Event edges only fire on the active node. Check the most recent `Routing decision` log line to see where the call actually was when the event landed.
3. The user was speaking when the event resolved. The node still transitioned, but proactive generation was deliberately skipped. The next user turn will route on the new node naturally.
4. There's no event edge for that name anywhere on the node. Add one or rename the event to match an existing edge.
# Edges & Routing
Source: https://www.bolna.ai/docs/graph-agent/edges-and-routing
Edge types, expression operators, built-in variables, and how routing decisions are made on every turn.
Every node has a list of `edges`. After each customer message, the framework picks the next node by checking deterministic edges first (instant, free), then handing off to the routing LLM if nothing deterministic matches.
***
## Edge fields
| Field | Description |
| ---------------------- | -------------------------------------------------------------------------------------------------------------------------------------- |
| `to_node_id` | Target node id. Required. |
| `condition` | Human-readable description of when to transition. Used as the routing LLM's tool description. |
| `condition_type` | One of `"llm"` (default if unset), `"expression"`, `"unconditional"`, `"event"`. |
| `expression` | Required when `condition_type == "expression"`. See [Expression edges](#expression-edges). |
| `event_name` | Required when `condition_type == "event"`. The external event name to listen for. See [Event injection](/docs/graph-agent/event-injection). |
| `function_name` | Override the auto-generated routing tool name (default: `transition_to_`). |
| `function_description` | Override the auto-generated routing tool description. |
| `parameters` | Map of `{name: type}` to extract from the user's input during the transition. See [Inline data extraction](#inline-data-extraction). |
| `priority` | Lower fires first. Defaults: expression / unconditional / event = `0`, llm = `100`. |
***
## Edge types
| `condition_type` | How it works | When to use |
| ------------------ | ------------------------------------------------------------------------------------------ | --------------------------------------------------------------------------------------------------------------------------------- |
| Not set or `"llm"` | Routing LLM evaluates `condition` against the customer's reply. | When the decision requires understanding intent. |
| `"expression"` | Rule-based check on context variables. Fires instantly if matched. | Time of day, retry counts, language detection, any data-driven decision. |
| `"unconditional"` | Always takes this edge. No check. | When there is only one possible next step. |
| `"event"` | Fires only when a matching external event arrives via REST. Ignored during speech routing. | When an external system (payment, form, link click) drives the conversation. See [Event injection](/docs/graph-agent/event-injection). |
Expression and unconditional edges are checked together (in `priority` order, ascending) **before** any LLM call is made.
***
## Expression edges
```json theme={"system"}
{
"to_node_id": "after_hours",
"condition": "Outside working hours",
"condition_type": "expression",
"expression": {
"logic": "or",
"conditions": [
{ "variable": "recipient_data.current_hour", "operator": "lt", "value": 10 },
{ "variable": "recipient_data.current_hour", "operator": "gte", "value": 18 }
]
}
}
```
Use `"logic": "and"` when all conditions must be true. Use `"logic": "or"` when any one is enough.
### Operators
`eq`, `neq`
`gt`, `gte`, `lt`, `lte`
`contains`
`in`, `not_in`
`exists`, `not_exists`
### Priority
Lower priority fires first. Defaults if not set: deterministic edges (expression, unconditional, event) get priority `0`; LLM edges get priority `100`. Within the deterministic bucket, the **first** matching edge wins. For mutually-exclusive rules (e.g. working-hours vs after-hours), set distinct priorities to make ordering explicit.
***
## Built-in variables
These variables are populated automatically and can be referenced in any expression.
| Variable | Type | Notes |
| -------------------------------- | ---------- | ---------------------------------------------------------------------------------------------------------------------------------------------------------------------------- |
| `recipient_data.current_hour` | int (0-23) | Hour in the call's timezone. |
| `recipient_data.current_minute` | int (0-59) | |
| `recipient_data.current_weekday` | string | Lowercase, e.g. `"wednesday"`. |
| `recipient_data.current_day` | int (1-31) | |
| `recipient_data.current_month` | int (1-12) | |
| `recipient_data.current_year` | int | |
| `recipient_data.current_date` | string | Display string for prompts only, not for comparisons. |
| `recipient_data.current_time` | string | Display string for prompts only. |
| `recipient_data.timezone` | string | e.g. `"Asia/Kolkata"`. |
| `recipient_data.user_number` | string | E.164 phone number. |
| `detected_language` | string | Top-level, not under `recipient_data`. e.g. `"hindi"`, `"en"`. |
| `_node_turns` | int | User messages on the **current** node. Resets on every transition. |
| `_total_turns` | int | User messages in the entire call. |
| `_silence_repeats` | int | Times the current node has replayed because the user stayed silent past `repeat_after_silence_seconds`. Resets on transition. See [Static nodes](/docs/graph-agent/static-nodes). |
Time variables (`current_hour`, `current_weekday`, etc.) are populated **only when `recipient_data.timezone` is set on the call**. Without a timezone, time-based expressions silently never match. Always set `timezone` when creating a call that uses time-based routing.
***
## Common patterns
**Working hours (10 AM to 6 PM)**
```json theme={"system"}
{
"to_node_id": "transfer_call",
"condition": "Working hours",
"condition_type": "expression",
"priority": 0,
"expression": {
"logic": "and",
"conditions": [
{ "variable": "recipient_data.current_hour", "operator": "gte", "value": 10 },
{ "variable": "recipient_data.current_hour", "operator": "lt", "value": 18 }
]
}
}
```
**Auto-escalate after too many retries**
```json theme={"system"}
{
"to_node_id": "transfer_call",
"condition": "Too many retries on this node",
"condition_type": "expression",
"expression": {
"conditions": [
{ "variable": "_node_turns", "operator": "gte", "value": 2 }
]
}
}
```
***
## Inline data extraction
Edges can capture typed values from the user's reply during routing. The routing LLM treats them as required parameters; on a successful transition the values are merged into `context_data` and become available everywhere.
```json theme={"system"}
{
"to_node_id": "confirm_order",
"condition": "Customer provided their order id",
"parameters": {
"order_id": "string"
}
}
```
After the transition, `context_data["order_id"]` is set and you can:
* Reference it in node prompts via `{order_id}`.
* Use it in downstream expression edges: `{ "variable": "order_id", "operator": "exists" }`.
* Pass it to API tools as `%(order_id)s`.
Prefer `parameters` over a separate "extract" node. One LLM call routes **and** captures data.
***
## Routing instructions
The `routing_instructions` field is prepended to every routing request. Keep it short and directive:
```
You are the Routing System for this conversation. Analyze the user's input
and the available edges. Select the edge whose condition best matches.
If no edge matches, stay on the current node.
```
You can include `{variable}` placeholders. They are substituted from `context_data` (and the flattened `recipient_data`) at runtime. Missing keys render as `NULL`.
# Real-Time Event Injection
Source: https://www.bolna.ai/docs/graph-agent/event-injection
Drive graph agent transitions and proactive agent speech from external events via REST, without waiting for the user to speak.
Speech is one input to a graph agent. Events are the other. When a customer opens a payment link, completes a form, or finishes a transaction on your website, you want the agent to react immediately rather than wait for the user to say something.
Event injection adds a REST endpoint, `POST /v1/call/{run_id}/events`, that lets your backend push named events into a live call. A matching event edge transitions the conversation and triggers proactive agent speech, all in under a second.
***
## Configuring an event edge
Add edges with `condition_type: "event"` and an `event_name`. They are ignored during normal speech routing, so they coexist freely with LLM and expression edges on the same node.
```json theme={"system"}
{
"id": "awaiting_payment",
"prompt": "User is completing payment via {method}. Reassure them.",
"edges": [
{
"to_node_id": "confirmation",
"condition_type": "event",
"event_name": "payment_completed"
},
{
"to_node_id": "payment_failed",
"condition_type": "event",
"event_name": "payment_failed"
}
]
}
```
A node can mix all three edge types: event edges (fire on external signal), expression edges (fire on context variables), and LLM edges (fire on user speech). Whichever input arrives first drives the transition.
### Edge field reference
| Field | Type | Required | What it does |
| ---------------- | --------- | -------- | ------------------------------------------------------------------------------------- |
| `condition_type` | `"event"` | Yes | Marks this edge as event-triggered. Skipped during speech routing. |
| `event_name` | string | Yes | The event name to match (e.g. `"link_opened"`, `"payment_completed"`). |
| `to_node_id` | string | Yes | Target node for the transition. |
| `priority` | number | No | If multiple event edges match the same name, lower priority fires first. Default `0`. |
***
## Firing an event
```bash theme={"system"}
curl -X POST https://api.bolna.ai/v1/call/{run_id}/events \
-H "Authorization: Bearer YOUR_API_KEY" \
-H "Content-Type: application/json" \
-d '{
"event": "link_opened",
"properties": { "step": "verify" }
}'
```
```
202 Accepted
{ "status": "accepted", "event": "link_opened", "run_id": "..." }
404 Not Found
{ "detail": "No active call found for this run_id" }
```
* `run_id` is returned by `POST /call` for outbound calls or arrives in your webhook for inbound calls.
* Fire-and-forget. The endpoint returns 202 as soon as the event is published.
* `properties` are merged into the agent's `context_data`, so they become available as `{variable}` substitution in node prompts and as `variable` references in expression edges.
***
## What happens when an event arrives
| Scenario | Behaviour |
| --------------------------------------------------------- | ---------------------------------------------------------------------------------------------------------------------------------------------------------------- |
| Event matches an edge on the current node | Properties merged into `context_data`, transition fires, agent speaks proactively. |
| Event doesn't match any edge | Properties still merged into `context_data`. No speech, but the next LLM call sees the new context. |
| Agent is currently speaking | Buffered at a safe point, processed after the current utterance finishes. |
| User is speaking when the event resolves | Node transitions, but proactive generation is **skipped**. The user's in-progress utterance routes on the new node. Prevents the agent from interrupting itself. |
| LLM is generating a response | Buffered until generation completes. |
| Two events arrive rapidly | Processed sequentially in arrival order. |
| Event transitions to a static node | Cached audio plays in \~50ms. Zero LLM cost. |
| Event arrives on a node with no event edges for that name | No transition. Properties still merge into `context_data` silently. |
***
## How proactive speech stays natural
When an event drives a transition, the agent must speak without the user saying anything. Two design choices make this feel natural rather than scripted:
1. Event `properties` are merged into `context_data`, so the new node's `prompt` can reference them via `{variable}` substitution.
2. The conversation history is **not** polluted with fake user messages. The agent simply produces a new assistant turn on the new node.
The result: a transcript that reads as consecutive assistant messages, exactly as a human agent would speak after seeing a screen update.
***
## Latency
| Target node type | Latency | Cost |
| ---------------- | --------------------- | ---------------- |
| LLM node | \~800ms (LLM + TTS) | LLM tokens + TTS |
| Static node | \~50ms (cached audio) | Zero |
If a confirmation message never changes, point your event edge at a [static node](/docs/graph-agent/static-nodes) for the fastest possible response.
***
## Worked example: payment confirmation
The agent waits while the user completes a payment on the bank's website. Your backend fires `payment_completed` when the gateway confirms.
### Graph config (3 nodes)
```json theme={"system"}
[
{
"id": "awaiting_payment",
"prompt": "Payment initiated. Reassure the user while it processes. Amount: {payment_currency} {payment_amount}.",
"repeat_after_silence_seconds": 20,
"edges": [
{
"to_node_id": "confirmation",
"condition_type": "event",
"event_name": "payment_completed"
},
{
"to_node_id": "payment_failed",
"condition_type": "event",
"event_name": "payment_failed"
}
]
},
{
"id": "confirmation",
"node_type": "static",
"static_message": "Payment confirmed! Thank you. Have a great day.",
"edges": []
},
{
"id": "payment_failed",
"prompt": "Payment failed: {error_reason}. Apologise briefly and offer to retry.",
"edges": []
}
]
```
### Backend code
```python theme={"system"}
import requests
def fire_event(run_id, event, properties=None):
requests.post(
f"https://api.bolna.ai/v1/call/{run_id}/events",
headers={"Authorization": f"Bearer {API_KEY}"},
json={"event": event, "properties": properties or {}},
)
# Payment gateway webhook handler
fire_event(run_id, "payment_completed", {"ref": "TXN-98765"})
```
The `confirmation` node is static, so the user hears the confirmation in \~50ms with no LLM call. The `payment_failed` node uses `{error_reason}` from the event's `properties` to give the user a specific message.
Add more event edges (`details_verified`, `payment_initiated`, etc.) to walk the user through a longer flow. The pattern stays the same: one edge per event name, one HTTP call per step.
***
## Notes on timing
* Events never interrupt active speech. They are queued until the agent is at a safe point (no audio playing, no response in flight) and processed then.
* If the user is mid-utterance when the event lands, the node transitions but the agent does not speak proactively. The user's utterance routes on the new node, so the agent's first words still feel responsive.
* The `run_id` is all you need. The same endpoint works regardless of where the call is running.
# Full Example
Source: https://www.bolna.ai/docs/graph-agent/full-example
Complete annotated graph agent config showing every feature: nodes, edges, expression routing, static nodes, event injection, and call transfer.
This is the complete shape of a graph agent. It demonstrates every feature documented in the rest of this section. Replace `PLACEHOLDER` values with real config before deploying.
The flow:
* `welcome`: greets the customer. Transfers during working hours, ends the call after-hours, or jumps straight to `payment_confirmed` if a payment event arrives.
* `collect_order`: collects an order id with silence handling and a per-node knowledge base.
* `payment_confirmed`: static confirmation message played from cache.
* `transfer_call`: routes the call to a human agent via the transfer tool.
* `closing`: static goodbye.
```json theme={"system"}
{
"agent_config": {
"agent_name": "Demo Graph Agent",
"agent_type": "other",
"agent_welcome_message": "Hello, my name is Neha.",
"tasks": [
{
"task_type": "conversation",
"toolchain": {
"execution": "parallel",
"pipelines": [["transcriber", "llm", "synthesizer"]]
},
"task_config": {
"optimize_latency": true,
"call_terminate": 600,
"hangup_after_LLMCall": true
},
"tools_config": {
"input": { "format": "wav", "provider": "plivo" },
"output": { "format": "wav", "provider": "plivo" },
"api_tools": {
"tools": [
{
"key": "transfer_call",
"name": "transfer_call_main",
"parameters": {
"type": "object",
"required": ["call_sid"],
"properties": {
"call_sid": { "type": "string", "description": "unique call id" }
}
},
"description": "Transfer call to human agent.",
"pre_call_message": "Please hold while I transfer your call..."
}
],
"tools_params": {
"transfer_call_main": {
"url": null,
"param": {
"call_sid": "%(call_sid)s",
"call_transfer_number": "+91XXXXXXXXXX"
},
"method": "POST",
"headers": {}
}
}
},
"llm_agent": {
"agent_type": "graph_agent",
"agent_flow_type": "streaming",
"llm_config": {
"model": "gpt-4.1-mini",
"max_tokens": 200,
"temperature": 0.2,
"provider": "openai",
"routing_model": "gpt-4.1-mini",
"routing_max_tokens": 250,
"routing_instructions": "PLACEHOLDER: routing instructions",
"agent_information": "PLACEHOLDER: global agent prompt (persona, language, guardrails)",
"current_node_id": "welcome",
"nodes": [
{
"id": "welcome",
"prompt": "Greet the customer and identify their intent.",
"edges": [
{
"to_node_id": "collect_order",
"condition": "Customer wants order status",
"parameters": { "order_id": "string" }
},
{
"to_node_id": "transfer_call",
"condition": "Customer asks for a human",
"condition_type": "expression",
"expression": {
"logic": "and",
"conditions": [
{ "variable": "recipient_data.current_hour", "operator": "gte", "value": 10 },
{ "variable": "recipient_data.current_hour", "operator": "lt", "value": 18 }
]
}
},
{
"to_node_id": "closing",
"condition": "Outside working hours",
"condition_type": "expression",
"priority": 1,
"expression": {
"logic": "or",
"conditions": [
{ "variable": "recipient_data.current_hour", "operator": "lt", "value": 10 },
{ "variable": "recipient_data.current_hour", "operator": "gte", "value": 18 }
]
}
},
{
"to_node_id": "payment_confirmed",
"condition_type": "event",
"event_name": "payment_completed"
}
]
},
{
"id": "collect_order",
"prompt": "Confirm the order id and look up its status using @fetch_order_status.",
"repeat_after_silence_seconds": 10,
"rag_config": {
"vector_store": {
"provider_config": { "vector_id": "PLACEHOLDER_collection_id" }
},
"similarity_top_k": 8
},
"edges": [
{ "to_node_id": "closing", "condition": "Status delivered to customer" },
{
"to_node_id": "transfer_call",
"condition_type": "expression",
"expression": {
"conditions": [
{ "variable": "_silence_repeats", "operator": "gte", "value": 3 }
]
}
}
]
},
{
"id": "payment_confirmed",
"node_type": "static",
"static_message": "Your payment is confirmed. Thank you!",
"edges": [
{ "to_node_id": "closing", "condition_type": "unconditional" }
]
},
{
"id": "transfer_call",
"prompt": "Transfer the call to a human agent.",
"function_call": "transfer_call_main",
"edges": []
},
{
"id": "closing",
"node_type": "static",
"static_message": "Thank you for calling. Have a wonderful day. Goodbye!",
"edges": []
}
]
}
},
"transcriber": {
"model": "nova-3",
"language": "multi-hi",
"provider": "deepgram",
"stream": true,
"encoding": "linear16",
"sampling_rate": 16000,
"endpointing": 700
},
"synthesizer": {
"provider": "elevenlabs",
"stream": true,
"caching": true,
"buffer_size": 220,
"audio_format": "wav",
"provider_config": {
"model": "eleven_turbo_v2_5",
"voice": "PLACEHOLDER: voice name",
"voice_id": "PLACEHOLDER: voice ID",
"temperature": 0.2,
"similarity_boost": 0.6,
"speed": 0.9
}
}
}
}
]
}
}
```
For automatic post-call extraction (disposition, sentiment, funnel stage), add an `extraction` task alongside the conversation task. See [Using extractions](/docs/using-extractions).
## What this example shows
| Feature | Where |
| --------------------------------------- | ---------------------------------------------------------------------------------------------------- |
| Mixed edge types on one node | `welcome` has LLM, expression, and event edges. |
| Inline data extraction via `parameters` | `welcome -> collect_order` captures `order_id`. |
| Working-hours routing | `welcome -> transfer_call` (expression). |
| After-hours fallback | `welcome -> closing` (expression, priority 1). |
| Event-driven proactive speech | `welcome -> payment_confirmed` on `payment_completed`. |
| Per-node RAG | `collect_order` has `rag_config`. |
| Silence handling and escalation | `collect_order` has `repeat_after_silence_seconds: 10` and an expression edge on `_silence_repeats`. |
| Static node | `payment_confirmed`, `closing`. |
| Call transfer | `transfer_call` with `function_call`. |
# Graph Agents
Source: https://www.bolna.ai/docs/graph-agent/introduction
Build structured, multi-step voice AI conversations using a node-based graph instead of one large prompt.
A graph agent breaks a phone conversation into discrete **nodes**, each with its own purpose, instructions, and transition rules. Instead of one giant prompt that has to handle everything, you define exactly what the agent does at each step and exactly when it moves to the next one.
Conversations follow explicit paths. Every transition is a rule you defined.
When something breaks, you know which node failed and why.
Change one node without touching the rest of the flow.
Deterministic edges and static nodes skip the LLM entirely.
## When to use a graph agent
Pick a graph agent when the call has discrete stages with different objectives (greet, qualify, collect, confirm, close), or when you need deterministic transitions (time of day, retry count, external events). For a single-objective agent that just answers questions, a regular `simple_llm_agent` is enough.
***
## Core concepts
### Nodes
A node is one step in the conversation. Each node has one clear job.
| Field | Type | Description |
| ------------------------------ | ------ | ---------------------------------------------------------------------------------------------------- |
| `id` | string | Unique identifier. Referenced by edges and `current_node_id`. |
| `prompt` | string | Instruction given to the response LLM when the conversation is in this node. |
| `edges` | array | Possible transitions out of this node. |
| `examples` | object | Sample responses per language (`"en"`, `"hi"`). Guides tone and phrasing. |
| `node_type` | string | `"llm"` (default) or `"static"`. See [Static Nodes](/docs/graph-agent/static-nodes). |
| `static_message` | string | Required when `node_type == "static"`. Pre-cached audio plays at runtime. |
| `repeat_after_silence_seconds` | number | Auto-replay the node after N seconds of user silence. Works on LLM and static nodes. |
| `function_call` | string | Forces the response LLM's `tool_choice` to this tool when the node is entered (e.g. transfer nodes). |
| `rag_config` | object | Optional per-node knowledge base. See [Tools & RAG](/docs/graph-agent/tools-and-rag). |
### Edges
Edges define how the conversation moves from one node to the next.
```json theme={"system"}
{
"to_node_id": "order_status",
"condition": "Customer provides a valid order number"
}
```
If no edge matches, the agent stays on the current node and re-asks naturally. There are four edge types: LLM (default), expression, unconditional, and event. Full reference on [Edges & Routing](/docs/graph-agent/edges-and-routing).
### Routing
After every customer message, a routing LLM evaluates the available LLM-typed edges on the current node and picks the best match.
Expression and unconditional edges are evaluated **before** the routing LLM runs. If a deterministic rule matches, the transition fires instantly with zero latency and zero cost. The routing LLM is only invoked when no deterministic rule matches.
***
## Where graph agent config lives
All graph-agent fields live inside `llm_agent`, nested under `tools_config` in your conversation task:
```
agent_config
└── tasks[]
└── tools_config
└── llm_agent ← graph agent config goes here
├── agent_type: "graph_agent"
├── agent_information
├── routing_instructions
├── current_node_id
└── nodes[]
```
### Top-level fields
| Field | Description |
| -------------------------- | ---------------------------------------------------------------------------------------------------------------------------- |
| `agent_type` | Must be `"graph_agent"` to enable the node-based flow. |
| `agent_information` | Global system prompt. Persona, language rules, guardrails. Applied to every node. |
| `routing_instructions` | Prompt given to the routing LLM. Prepended to every routing request. Supports `{variable}` substitution from `context_data`. |
| `current_node_id` | Starting node when a new call begins. |
| `nodes` | Array of all node objects. |
| `model` | Response LLM. Defaults to `gpt-4.1-mini`. |
| `routing_model` | Routing LLM. Defaults to `gpt-4.1-mini`. |
| `routing_max_tokens` | Cap on routing response tokens. Defaults: 250 (non-GPT-5), 150 (GPT-5). |
| `routing_reasoning_effort` | GPT-5 routing models only. `"minimal"` / `"low"` / `"medium"` / `"high"`. |
### `agent_information` is the identity layer
This prompt is applied to every node. Use it for persona, response rules (max sentence count, language switching), pronunciation rules, and hard guardrails.
`agent_information` is sent with every LLM call. Keep it focused. Save specifics for individual node prompts.
***
## Writing effective node prompts
A well-written `prompt` includes the node's purpose, the exact question to ask, validation rules, a fallback, and any voice formatting rules.
**Weak:**
```
Get the order number from the customer.
```
**Strong:**
```
Collect the customer's 10-digit order number.
ASK: 'Can you please share your 10-digit order number?'
VALIDATION:
- Accept only numeric input, exactly 10 digits.
- Expand spoken phrases: 'double four' becomes 'four four'.
- If the customer gives fewer or more digits, ask once more politely.
- After 2 failed attempts, offer to transfer to a live agent.
FORMAT: Confirm the number in groups of 3-3-4 with a short pause between groups.
Spell each digit as a word. Never use numerals in speech.
```
**One node, one job.** A node that collects an order number should only collect the order number. Don't also ask for the customer's name or call reason in the same node.
***
## Next steps
Edge types, expression operators, built-in variables, inline data extraction.
Pre-cached audio messages with auto-replay on user silence.
Drive transitions and proactive speech from external events via REST.
Call transfer, custom API tools, per-node knowledge bases.
Routing logs, common scenarios, and how to fix them.
Complete annotated JSON skeleton showing every feature end-to-end.
# Static Nodes & Silence Repeat
Source: https://www.bolna.ai/docs/graph-agent/static-nodes
Pre-cached audio messages that play in 50ms with zero LLM cost, plus auto-replay on user silence with deterministic escalation.
Many nodes in a flow always say the same thing: greetings, hold messages, confirmations, goodbyes. A static node pre-renders the audio for that message when the agent is saved and plays it back from cache at runtime. No LLM call. No TTS call. No latency.
`repeat_after_silence_seconds` is a related setting that auto-replays a node after N seconds of user silence and exposes a `_silence_repeats` counter so expression edges can escalate after a few silent rounds (offer help, transfer, hang up).
## Latency and cost
| Node type | Latency | Cost per turn |
| ----------- | --------------------------- | --------------------------- |
| LLM node | \~800ms (LLM + TTS + audio) | LLM tokens + TTS characters |
| Static node | \~50ms (cached audio) | Zero |
***
## Configuring a static node
Set `node_type` to `"static"` and provide `static_message`:
```json theme={"system"}
{
"id": "greeting",
"node_type": "static",
"static_message": "Hello! Thank you for calling Acme. How can I help you today?",
"edges": [
{ "to_node_id": "main_menu", "condition": "User responds with a request" }
]
}
```
That's it. The audio is pre-generated using the agent's configured TTS voice when the agent is saved, then served from cache on every call.
### Field reference
| Field | Type | Required | What it does |
| ------------------------------ | --------------------- | -------------------------------- | -------------------------------------------------------------------------------------------------------------------- |
| `node_type` | `"llm"` or `"static"` | No (defaults to `"llm"`) | Controls whether the node calls the LLM or plays cached audio. |
| `static_message` | string | Yes when `node_type == "static"` | The exact text to speak. Audio is pre-generated from this when the agent is saved. |
| `repeat_after_silence_seconds` | number | No | If set, replays the node's response after this many seconds of user silence. Works on **both** static and LLM nodes. |
All three fields are optional with safe defaults. Existing graph agents that don't use any of them behave exactly as before.
***
## Silence repeat
When `repeat_after_silence_seconds` is set and the user goes quiet:
1. The silence timer fires after the configured seconds.
2. `_silence_repeats` increments by 1.
3. Expression edges are evaluated. If one matches `_silence_repeats`, the agent transitions.
4. Otherwise the node replays. A static node plays the same cached audio (zero cost). An LLM node regenerates with `[silence]` in the conversation history and rephrases naturally.
5. `_silence_repeats` resets to `0` on any transition out of the node.
***
## Example: greeting with silence fallback
Play a greeting. If the user is silent, repeat up to 3 times, then hang up.
```json theme={"system"}
{
"id": "greeting",
"node_type": "static",
"static_message": "Hello! Thank you for calling. How can I help you today?",
"repeat_after_silence_seconds": 8,
"edges": [
{ "to_node_id": "main_menu", "condition": "User responds with a request" },
{
"to_node_id": "goodbye",
"condition_type": "expression",
"expression": {
"conditions": [
{ "variable": "_silence_repeats", "operator": "gte", "value": 3 }
]
}
}
]
}
```
What happens:
* Cached audio plays instantly.
* User silent for 8s, audio replays (`_silence_repeats = 1`).
* Still silent, replays (`_silence_repeats = 2`).
* Still silent, replays (`_silence_repeats = 3`), expression matches, transitions to `goodbye`.
***
## Example: LLM node with silence nudge
The same pattern works on LLM nodes. The LLM sees `[silence]` in conversation history and rephrases without any extra prompt engineering on your part.
```json theme={"system"}
{
"id": "collect_email",
"prompt": "Ask the user for their email address politely.",
"repeat_after_silence_seconds": 10,
"edges": [
{
"to_node_id": "confirm",
"condition": "User shared an email",
"parameters": { "email": "string" }
},
{
"to_node_id": "goodbye",
"condition_type": "expression",
"expression": {
"conditions": [
{ "variable": "_silence_repeats", "operator": "gte", "value": 3 }
]
}
}
]
}
```
The LLM might say "Could you share your email?" first, then "Sorry, I didn't catch that, could you tell me your email?" on the next silence, then transition to goodbye after the third.
***
## When the cache is built
Audio for every static node is generated when you save the agent, using the agent's configured TTS voice. At call time the cached audio is streamed directly, no LLM or TTS call.
If you change `static_message` later, re-save the agent so the cache regenerates with the new text.
# Tools & Per-Node RAG
Source: https://www.bolna.ai/docs/graph-agent/tools-and-rag
Wire up call transfer, custom API tools, and per-node knowledge bases inside a graph agent.
Graph agents support two kinds of tools (call transfer and custom HTTP) and an optional per-node retrieval-augmented generation (RAG) hook. Tools are defined globally in `api_tools` and referenced by name in node prompts. RAG is configured per node and only fires when the conversation is on that node.
***
## Call transfer
Define the transfer tool once in `api_tools.tools` and `api_tools.tools_params`:
```json theme={"system"}
{
"key": "transfer_call",
"name": "transfer_call_main",
"description": "Use when the customer requests a human agent.",
"pre_call_message": "Transferring you now, please hold..."
}
```
```json theme={"system"}
{
"tools_params": {
"transfer_call_main": {
"url": null,
"param": {
"call_sid": "%(call_sid)s",
"call_transfer_number": "+91XXXXXXXXXX"
},
"method": "POST"
}
}
}
```
On the transfer node, set `function_call` to force the response LLM to pick this tool when the node is entered:
```json theme={"system"}
{
"id": "transfer",
"prompt": "Transfer the call to a human agent.",
"function_call": "transfer_call_main",
"edges": []
}
```
`function_call` sets the response LLM's `tool_choice` to the named tool. The LLM still emits the call; the framework doesn't auto-invoke it.
***
## Custom API tools
Define a tool the LLM can call mid-conversation, e.g. to look up an order:
```json theme={"system"}
{
"key": "custom_task",
"name": "fetch_order_status",
"description": "Fetch order status using the customer's order ID.",
"parameters": {
"type": "object",
"properties": {
"order_id": { "type": "string", "description": "Customer order ID" }
}
},
"pre_call_message": "Just a moment, let me check that..."
}
```
```json theme={"system"}
{
"tools_params": {
"fetch_order_status": {
"url": "https://your-api.example.com/order/status",
"param": { "order_id": "%(order_id)s" },
"method": "POST",
"headers": { "Authorization": "Bearer YOUR_TOKEN" }
}
}
}
```
Reference the tool from a node prompt with the `@` prefix:
```
Call @fetch_order_status with the [order_id] collected earlier.
```
Only define tools you actually use. Every tool is visible to the LLM as a callable function, and unused tools increase the chance of accidental invocations.
***
## Per-node RAG
Any node can attach its own knowledge base. When the conversation is on that node, the latest user message is used to retrieve relevant chunks from the configured vector store, and they are injected into the system prompt before the response LLM runs.
```json theme={"system"}
{
"id": "policy_questions",
"prompt": "Answer the customer's policy question using the knowledge base.",
"rag_config": {
"vector_store": {
"provider_config": { "vector_id": "policies_v1" }
},
"similarity_top_k": 10,
"temperature": 0.7,
"model": "gpt-4o",
"max_tokens": 150
},
"edges": [
{ "to_node_id": "closing", "condition": "Customer is satisfied" }
]
}
```
If the retrieval call fails, the node still responds, just without retrieved context. The error is logged but never raised to the caller.
Only configure `rag_config` on nodes that actually need it. Every retrieval call adds latency, so a node that doesn't need a knowledge base shouldn't pay for one.
# Fetch Agent Executions using APIs
Source: https://www.bolna.ai/docs/guides/fetch-agent-executions
Sample Python guide demonstrating how to query and paginate through agent executions, with support for filters, logging, and best practices.
## API Endpoint Overview
### Endpoint
[Agent Executions API](/docs/api-reference/executions/get_executions) - Fetches executions for a specified `agent_id`.
### Request Details
* **Path Parameters**
* `agent_id` (UUID, required): The ID of your agent.
* **Query Parameters** (all optional unless noted):
* `page_number` (integer, default 1): Page index, starting at 1. Must be ≥ 1.
* `page_size` (integer, default 20, max 50): Results per request.
* **Filters**:
* `status` (enum): Filter by execution status (`scheduled`, `queued`, `in-progress`, `completed`, `failed`, etc.)
* `call_type` (enum): `inbound` or `outbound`
* `provider` (enum): e.g., `twilio`, `plivo`, `websocket`, `web-call`
* `answered_by_voice_mail` (boolean): Filter calls answered by voicemail
* `batch_id` (string): Narrow results by batch
* `from` (string, date-time): Filter by starting timestamp
* `to` (string, date-time): Filter by ending timestamp
### Authorization
Include your API key as a Bearer token in the header:
```http theme={"system"}
Authorization: Bearer
```
***
## Example Python Code
```python theme={"system"}
import aiohttp
import time
all_executions = []
page_number = 1
agent_id = "" # your agent_id
api_key = "" # your Bolna API key
headers = {
"Authorization": f"Bearer {api_key}",
"Content-Type": "application/json"
}
async with aiohttp.ClientSession(headers=headers) as session:
while True:
ts_start = time.time() * 1000
print(f"Starting fetch for page {page_number} at {ts_start:.0f} ms")
url = f"https://api.bolna.ai/v2/agent/{agent_id}/executions?page_size=50&page_number={page_number}"
async with session.get(url) as resp:
status_code = resp.status
res = await resp.json()
ts_end = time.time() * 1000
print(f"Fetched page {page_number} in {ts_end - ts_start:.2f} ms")
if status_code != 200:
logger.error(f"Error fetching page {page_number}: status {status_code}")
break
page = res.get("data", [])
all_executions.extend(page)
if res.get("has_more", False):
page_number += 1
else:
print("Completed fetching all executions")
break
```
***
## Why This Matters
| Benefit | Description |
| -------------------------- | --------------------------------------------------------------------------- |
| **Complete History** | Retrieve full call/execution logs for audits, analytics, or dashboards. |
| **Filtering & Efficiency** | Use filters to slice data by status, provider, call type, date, batch, etc. |
***
## Quick FAQs
### How do I fetch all executions for a Bolna agent?
Use the endpoint `/v2/agent/{agent_id}/executions` with pagination and keep fetching while `has_more == true`.
### Can I filter executions by provider or call type?
Yes, you can use query parameters like `provider=twilio`, `call_type=inbound`, `status=completed` and more.
### What is the max page size?
`50` results per page is the maximum allowed. Default is `20`.
### How are extracted fields returned?
In your response under `extracted_data`, with your custom JSON fields—based on your Extraction prompt setup.
***
# Writing Prompts in Non-English Languages
Source: https://www.bolna.ai/docs/guides/writing-prompts-in-non-english-languages
Write multilingual prompts in native scripts for Bolna Voice AI. Ensure natural pronunciation & accurate responses in English, Hindi, Tamil, Telugu & more.
Bolna Voice AI agents have multilingual support and can have conversations in serveral languages ([see list of all support languages](/docs/customizations/multilingual-languages-support)). To ensure **natural speech output**, it is important to write your prompts in the **native script** of the target language, rather than phonetically using the English alphabet.
## Multilingual setup
Bolna supports multilingual configurations. You can add multiple languages to a single agent, set one as primary, and write a separate prompt for each.
> Example configurations:
>
> * English (Primary) + Hindi
> * English (Primary) + Hindi + Dutch
> * English (Primary) + French + Spanish
See the [Multilingual Support](/docs/customizations/multilingual-languages-support) guide for full setup details.
## Prompting for non-english language
If you want to switch languages dynamically you can instruct the prompt to follow the customer's language. For example, for Spanish you may write:
> You will keep your sentences short and crisp. You will never reply with more than 2 sentences at a time.
> You will stick to context throughout. You must speak in Spanish but if the customer wishes to communicate in English, you will immediately shift your language to English and then remain in english.
> Generate the text response in the same language as the customer.
***
## Write the prompt in the native script
Using the correct script:
* Enables more accurate pronunciation
* Helps the AI identify the intended language
* Improves contextual understanding and tone
* Prevents misclassification as English
## Tips for Writing in native scripts
* Use Google Input Tools or built-in language keyboards on your phone/laptop.
* For European languages, make sure to include accented characters (like é, ñ, ü, ¿, ç, etc.).
* Double-check spellings and punctuation using tools like [Google Translate](https://translate.google.com/), but avoid relying on it for full sentence correctness.
## Examples of prompts in native scripts
❌ Incorrect
> Bonjour! Comment ca va? Nous allons commencer l'entretien maintenant.
✅ Correct
> Bonjour ! Comment ça va ? Nous allons commencer l’entretien maintenant.
Notice the accents (ç, é, ’). These help the AI pronounce words like a native speaker.
❌ Incorrect
> Hola! Como estas? Vamos a comenzar la entrevista ahora.
✅ Correct
> ¡Hola! ¿Cómo estás? Vamos a comenzar la entrevista ahora.
Accents and inverted punctuation (¿, ¡) matter for tone and pronunciation accuracy.
❌ Incorrect
> Namaste! Aap kaise ho? Ham aapka interview lene wale hain.
✅ Correct
> नमस्ते! आप कैसे हैं? हम आपका इंटरव्यू लेने वाले हैं।
Accents and inverted punctuation (¿, ¡) matter for tone and pronunciation accuracy.
***
## Common Mistake to Avoid
Don’t write in "English-style" phonetic spelling for non-English prompts.
> ❌ Kaise ho?
> ✅ कैसे हो?
> ❌ Como estas?
> ✅ ¿Cómo estás?
## FAQs
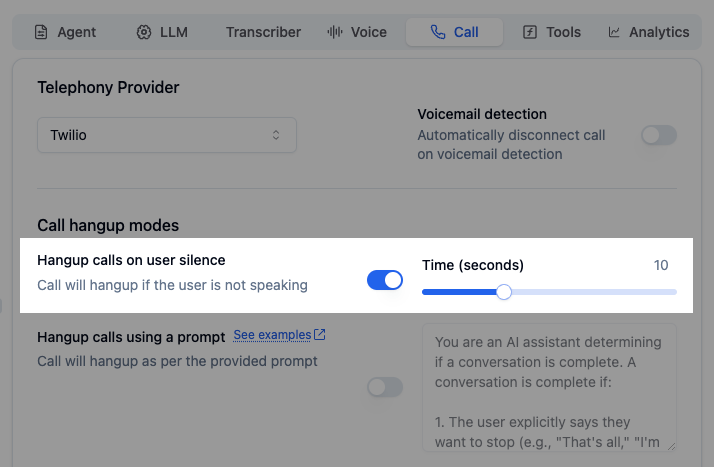
You can add multiple languages to a single agent. Set one as primary and add secondary languages as needed. Each language gets its own prompt tab in the [Agent Tab](/docs/agent-setup/agent-tab).
Bolna agents can dynamically switch between any of the configured languages. Use the **Language Switching Instructions** field in the [Agent Tab](/docs/agent-setup/agent-tab) to define when the agent should switch. If a customer speaks a language not configured on the agent, it will fall back to the primary language.
It depends on your audience and brand tone. Ensure your prompts reflect the appropriate politeness level (e.g., “vous” vs. “tu” in French, or “आप” vs. “तुम” in Hindi) for a consistent and professional experience.
Use Bolna's Preview Voice feature in \[Voice Labs]\[[https://platform.bolna.ai/voices](https://platform.bolna.ai/voices)] to test generated responses before finalizing your prompts. Adjust words and punctuation if needed for more natural pronunciation.
# Hangup and Disconnect Bolna Voice AI calls
Source: https://www.bolna.ai/docs/hangup-calls
Discover methods to disconnect live Bolna Voice AI calls. Implement time-based hangups, custom prompts, and personalized messages for seamless call termination.
## How to Configure Call Hangup
Bolna offers multiple ways to intelligently end voice calls based on user behavior and conversation context.
***
## Hangup Methods
Set a `silence time` threshold (in seconds) for detecting user inactivity. If no audio is detected for the specified duration, the call disconnects automatically, preventing unnecessary call durations.
Add a custom prompt that evaluates whether the conversation is complete. The LLM assesses the conversation context and decides when to end the call.
Since this is prompt-based, it may not be 100% accurate. Tune the prompt based on your use case for best results.
**Example hangup prompt:**
```text hangup prompt example theme={"system"}
You are an AI assistant determining if a conversation is complete. A conversation is complete if:
1. The user explicitly says they want to stop (e.g., "That's all," "I'm done," "Goodbye," "thank you").
2. The user seems satisfied, and their goal appears to be achieved.
3. The user's goal appears achieved based on the conversation history, even without explicit confirmation.
If none of these apply, the conversation is not complete.
```
***
## Personalized Hangup Message
Add a closing message spoken by the agent as the final message before the call ends. This accepts [dynamic context variables](/docs/using-context#custom-variables) using `{}` for a personalized closing statement.
Use variables like `{first_name}` in your hangup message for a personal touch, e.g., *"Thank you , have a great day!"*
***
## Related Features
Set maximum call duration as a safety net
Monitor call statuses in real time
Understand who ended the call and why
# Importing your voices to use with Bolna Voice AI
Source: https://www.bolna.ai/docs/import-voices
Easily import voices from multiple providers like ElevenLabs, Cartesia including custom voices into Bolna for seamless voice agent personalization.
## What is Voice Importing?
Voice importing allows you to bring voices from external providers (like ElevenLabs, Cartesia) into your Bolna workspace. This enables you to use provider-specific voices or custom voices you've created with those providers in your Bolna Voice AI agents.
***
## How to Import Voices
Go to your agent in the Bolna Playground and click the **Audio** tab. Scroll down to the **Text-to-Speech** section and click **Add Voice +**.
Choose your voice provider from the list
Provide the **Voice ID** you want to import
Toggle to import custom voices from your own connected account
Click **"Import"** - your voice will be available within seconds!
Need help finding Voice IDs? Check your voice provider's dashboard or [contact support](mailto:support@bolna.ai).
***
## Next Steps
Create brand-specific voice identities
Configure voice settings in the Playground
Browse voice provider integrations
Set up multilingual agents with imported voices
# Home
Source: https://www.bolna.ai/docs/index
Bolna — the AI Voice API for India. Deploy multilingual conversational Voice AI agents to automate calls, qualify leads, boost sales, support customers, & more.
Bolna Documentation
Create conversational voice agents to qualify leads, boost sales, automate support, streamline hiring, and more.
# Routing Calls Through Indian Servers
Source: https://www.bolna.ai/docs/indian-server-configuration
Configure your voice agent to process calls on Indian servers for data residency compliance and lower latency.
## Overview
If your business requires data residency in India or you want to achieve the lowest possible latency for calls to Indian phone numbers, you can configure your agent to route calls through Bolna's Indian servers.
This guide explains the configuration requirements to ensure your calls are processed entirely on Indian infrastructure.
## Requirements
To route calls through Indian servers, your agent configuration must meet **all** of the following requirements:
### 1. Telephony Provider
Use **Plivo** as your telephony provider.
Twilio is not supported for Indian server routing. If you use Twilio, calls will be processed on US servers.
### 2. Transcriber (Speech-to-Text)
Use one of these transcription providers:
* Deepgram
* Azure
* Sarvam
* ElevenLabs
* Smallest
**If using Deepgram**, additional requirements apply:
| Requirement | Supported Values |
| ------------ | ----------------------------------------------------------------------------------- |
| **Model** | `nova-2`, `nova-3`, and their variants (e.g., `nova-2-phonecall`, `nova-3-general`) |
| **Language** | `hi` (Hindi), `multi-hi` (Multilingual Hindi), `en-IN` (Indian English) |
### 3. Synthesizer (Text-to-Speech)
Use one of these voice synthesis providers:
* ElevenLabs
* Sarvam
* Azure TTS
* Cartesia
Some ElevenLabs voices may not be available in the India region. If you encounter issues, try selecting a different voice.
### 4. LLM (Language Model)
Use one of these LLM providers:
* Azure OpenAI
### 5. Provider API Keys
Use Bolna's default provider integrations. Do not connect your own API keys for the transcriber, synthesizer, or LLM providers.
If you connect your own API keys for any provider (transcriber, synthesizer, or LLM), calls will automatically route through US servers regardless of other configuration settings.
## Quick Checklist
Before deploying your agent for Indian server routing, verify:
| Component | Requirement | Status |
| ----------------- | ------------------------------------------------ | -------- |
| Telephony | Plivo | Required |
| Transcriber | Deepgram, Azure, Sarvam, ElevenLabs, or Smallest | Required |
| Deepgram Language | `hi`, `multi-hi`, or `en-IN` (if using Deepgram) | Required |
| Synthesizer | ElevenLabs, Sarvam, Azure TTS, or Cartesia | Required |
| LLM | Azure OpenAI | Required |
| Custom API Keys | None connected | Required |
## Troubleshooting
If your calls are not routing through Indian servers, check the following:
1. **Telephony Provider**: Ensure you're using Plivo, not Twilio
2. **Deepgram Language**: If using Deepgram, verify the language is set to `hi`, `multi-hi`, or `en-IN`
3. **Custom API Keys**: Check that you haven't connected your own API keys for any provider in the Providers section
4. **Provider Selection**: Verify all providers (transcriber, synthesizer, LLM) are from the supported lists above
## Related Resources
* [Supported Telephony Providers](/docs/supported-telephony-providers)
* [Plivo Setup Guide](/docs/plivo)
* [Understanding Latency Metrics](/docs/call-latencies)
# Bolna Voice AI Integrations
Source: https://www.bolna.ai/docs/integrations
Integrate Bolna Voice AI with tools like Twilio, Plivo, OpenAI, ElevenLabs, Deepgram, and Zapier to enable seamless voice automation and workflows.
## Telephony Integrations
>
}
href="/twilio-connect-provider"
>
Connect your Twilio phone numbers with Bolna
>
}
href="/plivo-connect-provider"
>
Connect your Plivo phone numbers with Bolna
>
}
href="/exotel-connect-provider"
>
Connect your Exotel phone numbers with Bolna
>
}
href="/vobiz-connect-provider"
>
Connect your Vobiz phone numbers with Bolna
## Model Integrations
>
}
href="https://platform.bolna.ai/auth/openai"
>
Connect your OpenAI account with Bolna
>
}
href="https://github.com/deepseek-ai/awesome-deepseek-integration/?tab=readme-ov-file#others"
>
Connect your Deepseek account with Bolna
>
}
href="https://platform.bolna.ai/auth/elevenLabs"
>
Connect your ElevenLabs account with Bolna
>
}
href="https://platform.bolna.ai/auth/cartesia"
>
Connect your Cartesia account with Bolna
>
}
href="https://platform.bolna.ai/auth/deepgram"
>
Connect your Deepgram account with Bolna
>
}
href="https://platform.bolna.ai/auth/azure"
>
Connect your Azure account with Bolna
## External Integrations
>
}
href="https://zapier.com/apps/bolna/integrations"
>
Connect your Zapier account with Bolna
>
}
href="https://www.make.com/en/integrations/bolna"
>
Connect your Make.com account with Bolna
>
}
href="https://platform.bolna.ai/auth/calcom"
>
Connect your Cal.com account with Bolna
>
}
href="https://viasocket.com/integrations/bolna"
>
Connect your viaSocket account with Bolna
# Bolna AI: Create and deploy Voice AI Agents
Source: https://www.bolna.ai/docs/introduction
Build and deploy conversational Voice AI agents with Bolna. Qualify leads, automate support, and book appointments through natural phone conversations.
## See Bolna in Action
***
## Why Businesses Choose Bolna
Never miss a lead again. Your AI agent handles calls 24/7, even at 3 AM.
Sub-600ms responses with natural voices. Callers can't tell the difference.
40+ languages including Hindi, Tamil, Telugu, and Bengali with native accents.
Handle 1 call or 10,000 calls simultaneously. No hiring, no training.
***
## Explore What You Can Build
From lead qualification to customer support, appointment booking to sales outreach, Bolna agents handle it all.
Explore pre-built agents for sales, support, HR, healthcare, and more. Clone any template and customize it for your business.
***
## Get Started
Talk to a live AI agent, no signup required
Build and deploy in under 5 minutes
Clone pre-built agents for common use cases
Get a personalized demo for your business
# Set Up IVR for Inbound Calls in Bolna Voice AI
Source: https://www.bolna.ai/docs/ivr-inbound-calls
Configure IVR menus to route inbound calls to different Bolna Voice AI agents. Support department routing, language selection, and data collection.
## What is IVR?
IVR (Interactive Voice Response) lets callers navigate menus using their phone keypad before connecting to a Voice AI agent.
Send callers to Sales, Support, or Billing agents automatically
Gather account numbers, PINs, or preferences before the conversation
Let callers choose their preferred language before connecting
IVR is currently supported for **Plivo** phone numbers only.
***
## How IVR Works
```mermaid theme={"system"}
flowchart LR
A[Caller Dials] --> B[Welcome Message]
B --> C[IVR Menu Prompt]
C --> D{Caller Presses Digit}
D --> E[Next Menu / Collect Step]
D --> F[Connect to Agent]
E --> D
style A fill:#e0f8e0,stroke:#2e8b57,stroke-width:2px
style B fill:#e0f8e0,stroke:#2e8b57,stroke-width:2px
style C fill:#e0f8e0,stroke:#2e8b57,stroke-width:2px
style D fill:#fff3cd,stroke:#ffc107,stroke-width:2px
style E fill:#e0f8e0,stroke:#2e8b57,stroke-width:2px
style F fill:#d4edda,stroke:#28a745,stroke-width:2px
```
All collected data (department choice, account number, etc.) is passed to the agent as context.
***
## Setting Up IVR via API
Add `ivr_config` to the [Set Inbound Agent API](/docs/api-reference/inbound/agent):
```bash request theme={"system"}
curl -X POST "https://api.bolna.ai/inbound/setup" \
-H "Authorization: Bearer " \
-H "Content-Type: application/json" \
-d '{
"agent_id": "your-default-agent-id",
"phone_number_id": "your-phone-number-id",
"ivr_config": {
"enabled": true,
"voice": "Polly.Aditi",
"welcome_message": "Welcome to Acme Corp.",
"steps": [
{
"step_id": "main_menu",
"type": "menu",
"prompt": "Press 1 for Sales. Press 2 for Support.",
"field_name": "department",
"options": [
{"digit": "1", "label": "Sales", "agent_id": "sales-agent-id"},
{"digit": "2", "label": "Support", "agent_id": "support-agent-id"}
]
}
]
}
}'
```
```json response theme={"system"}
{
"message": "Phone number is already mapped to the given agent. IVR config updated."
}
```
***
## IVR Configuration Reference
### Top-Level Config
| Field | Type | Default | Description |
| ----------------------- | ------- | ---------------------------------- | ------------------------------------------------ |
| `enabled` | boolean | `false` | Enable or disable IVR |
| `voice` | string | `Polly.Joanna` | Text-to-speech voice for IVR prompts |
| `welcome_message` | string | - | Played once when the call connects |
| `timeout` | integer | `5` | Seconds to wait for caller input |
| `max_retries` | integer | `2` | Retry count on invalid input |
| `invalid_input_message` | string | `Invalid input. Please try again.` | Played on wrong key press |
| `no_input_message` | string | `No input received. Goodbye.` | Played on timeout |
| `steps` | array | **required** | IVR flow steps (see below) |
| `default_agent_id` | string | - | Fallback agent when no option-level agent is set |
### Available Voices
| Voice | Language |
| --------------- | ------------------------ |
| `Polly.Aditi` | Hindi + Indian English |
| `Polly.Raveena` | Indian English |
| `Polly.Joanna` | US English (Female) |
| `Polly.Matthew` | US English (Male) |
| `Polly.Amy` | British English (Female) |
***
## Step Types
Presents options for the caller to select using the keypad.
```json theme={"system"}
{
"step_id": "department",
"type": "menu",
"prompt": "Press 1 for Sales. Press 2 for Support.",
"field_name": "department",
"options": [
{"digit": "1", "label": "Sales", "agent_id": "sales-agent-id"},
{"digit": "2", "label": "Support", "agent_id": "support-agent-id"}
]
}
```
**Option Fields:**
| Field | Type | Required | Description |
| --------------- | ------ | -------- | ---------------------------------- |
| `digit` | string | Yes | Key to press (`"1"`, `"2"`, etc.) |
| `label` | string | Yes | Value stored in collected data |
| `agent_id` | string | No | Route to a specific agent |
| `context_label` | string | No | Additional context passed to agent |
Collects multi-digit input like account numbers or PINs.
```json theme={"system"}
{
"step_id": "account",
"type": "collect",
"prompt": "Enter your 6-digit account number.",
"field_name": "account_number",
"num_digits": 6,
"next_step": "pin_step"
}
```
**Collect Fields:**
| Field | Type | Description |
| --------------- | ------- | ---------------------------------------- |
| `num_digits` | integer | Exact number of digits required |
| `min_digits` | integer | Minimum digits (if `num_digits` not set) |
| `max_digits` | integer | Maximum digits (if `num_digits` not set) |
| `finish_on_key` | string | Submit key (default: `#`) |
***
## Step Navigation
Control flow between steps:
| Field | Usage | Description |
| ------------------ | ----------- | ------------------------------------------------------ |
| `next_step` | Linear flow | Go to specified step after this one |
| `conditional_next` | Branching | Route based on digit: `{"1": "step_a", "2": "step_b"}` |
| *(neither)* | End flow | Routes to the assigned agent |
Use `conditional_next` for language selection or department-specific sub-menus. Combine with `next_step` for sequential data collection.
***
## Data Passed to Agent
All collected IVR data is available in `recipient_data`:
```json theme={"system"}
{
"department": "Sales",
"department_context": "sales_inquiry",
"account_number": "123456",
"ivr_completed_at": "2026-01-15T10:30:00Z"
}
```
Reference these in your agent prompt:
```
Customer selected {department}. Account: {account_number}
```
Learn more about using dynamic variables in [Using Context](/docs/using-context).
***
## Examples
Route calls to different agents based on selection:
```json theme={"system"}
{
"ivr_config": {
"enabled": true,
"voice": "Polly.Aditi",
"welcome_message": "Welcome to Acme Corp.",
"steps": [
{
"step_id": "department",
"type": "menu",
"prompt": "Press 1 for Sales. Press 2 for Support. Press 3 for Billing.",
"field_name": "department",
"options": [
{"digit": "1", "label": "Sales", "agent_id": "sales-agent-uuid"},
{"digit": "2", "label": "Support", "agent_id": "support-agent-uuid"},
{"digit": "3", "label": "Billing", "agent_id": "billing-agent-uuid"}
]
}
]
}
}
```
Language selection followed by department menu:
```json theme={"system"}
{
"ivr_config": {
"enabled": true,
"voice": "Polly.Aditi",
"welcome_message": "Welcome. Swagat hai.",
"steps": [
{
"step_id": "language",
"type": "menu",
"prompt": "For English press 1. Hindi ke liye 2 dabayein.",
"field_name": "language",
"options": [
{"digit": "1", "label": "English"},
{"digit": "2", "label": "Hindi"}
],
"conditional_next": {"1": "menu_en", "2": "menu_hi"}
},
{
"step_id": "menu_en",
"type": "menu",
"prompt": "Press 1 for Sales. Press 2 for Support.",
"field_name": "department",
"options": [
{"digit": "1", "label": "Sales", "agent_id": "english-sales-agent"},
{"digit": "2", "label": "Support", "agent_id": "english-support-agent"}
]
},
{
"step_id": "menu_hi",
"type": "menu",
"prompt": "Sales ke liye 1 dabayein. Support ke liye 2 dabayein.",
"field_name": "department",
"options": [
{"digit": "1", "label": "Sales", "agent_id": "hindi-sales-agent"},
{"digit": "2", "label": "Support", "agent_id": "hindi-support-agent"}
]
}
]
}
}
```
Collect account details before connecting to an agent:
```json theme={"system"}
{
"ivr_config": {
"enabled": true,
"voice": "Polly.Aditi",
"welcome_message": "Welcome to your bank.",
"default_agent_id": "bank-agent-uuid",
"steps": [
{
"step_id": "account",
"type": "collect",
"prompt": "Please enter your 10-digit account number.",
"field_name": "account_number",
"num_digits": 10,
"next_step": "pin"
},
{
"step_id": "pin",
"type": "collect",
"prompt": "Enter your 4-digit PIN.",
"field_name": "pin",
"num_digits": 4
}
]
}
}
```
***
## Disable IVR
To disable IVR and route calls directly to your agent:
```bash theme={"system"}
curl -X POST "https://api.bolna.ai/inbound/setup" \
-H "Authorization: Bearer " \
-H "Content-Type: application/json" \
-d '{
"agent_id": "your-agent-id",
"phone_number_id": "your-phone-number-id",
"ivr_config": {"enabled": false}
}'
```
***
## Next Steps
Basic inbound calling configuration
Use your own Plivo phone numbers
Pass dynamic data to your agents
# List of Call Hangup Statuses and Codes in Bolna Voice AI
Source: https://www.bolna.ai/docs/list-phone-call-hangup-status
Explore all hangup statuses, provider codes, and termination reasons in Bolna Voice AI calls. Debug disconnections and improve reliability.
## Introduction
Every Bolna Voice AI call records metadata about how and why it was terminated. This data is essential for debugging, analytics, and improving call completion rates.
Each call termination includes three fields:
| Field | Description |
| --------------- | ------------------------------------------------------------------------- |
| `hangup_by` | Party or system that initiated the hangup (caller, callee, carrier, etc.) |
| `hangup_code` | Numeric code from the telecom provider indicating the specific reason |
| `hangup_reason` | Human-readable description of why the call ended |
***
## Why Hangup Codes Matter
Identify whether disconnections are user-initiated, carrier-caused, or system errors
Track telecom partner performance across providers like Twilio and Plivo
Optimize call handling based on termination patterns and regional issues
Pinpoint geographic routing problems (US, India, Southeast Asia, MENA, etc.)
***
## Hangup Status and Provider Codes
| Hangup By | Description | Provider Codes |
| --------------- | ------------------------------------- | ------------------------------------------------------ |
| **API Request** | Call ended via Bolna API request | `4000`, `4020` |
| **Callee** | Recipient hung up (outbound calls) | `3020`, `4000` |
| **Caller** | Caller ended the call (inbound calls) | `4000` |
| **Carrier** | Terminated by telecom carrier | `2000`, `3000`, `3010`, `3020`, `3040`, `3050`, `3070` |
| **Error** | Ended due to unexpected error | `3080`, `3090`, `3110`, `5010`, `5020`, `7011`, `8011` |
| **Plivo** | Plivo provider disconnected the call | `1010`, `4010`, `5020`, `6000`, `6010`, `6020` |
| **Unknown** | Termination reason unknown | `0` |
| *(empty)* | No hangup reason recorded | *(empty)* |
Code `4000` appears across multiple categories (API, Caller, Callee). The correct interpretation depends on **call direction** (inbound vs outbound) and context.
***
## Hangup Reasons
Bolna provides specific hangup reasons based on your agent configuration:
| Reason | Description |
| --------------------- | ----------------------------------------------------- |
| `inactivity_timeout` | Call ended because the silence threshold was exceeded |
| `llm_prompted_hangup` | Call ended based on custom prompt evaluation |
Configure inactivity timeout and hangup prompts in your [Agent Setup](/docs/agent-setup/agent-tab) to control these behaviors.
Reasons provided by the telephony provider (Twilio, Plivo, etc.):
| Reason | Description |
| -------------------------------------------------------- | ------------------------------------------------------- |
| `Call recipient was busy` | Called party was busy |
| `Call unanswered` | Called party did not answer |
| `Call recipient number invalid` | Invalid or unreachable phone number |
| `Call recipient hung up` | Recipient ended the call |
| `Carrier declined` | Call declined by carrier |
| `Call recipient rejected` | Call rejected by the called party |
| `failed` | Call could not be initiated |
| `Carrier ended because call limit exceeded` | Call terminated due to duration limits |
| `Bolna Error` | Error from Bolna system |
| `Carrier unable to receive media` | Media connection issues |
| `Network Congestion From Carrier` | Network congestion from carrier |
| `End of inputs from Bolna` | Call ended after complete conversation (without prompt) |
| `Carrier unable to reach bolna` | Carrier connectivity issue to Bolna |
| `Carrier ended call because MPC duration limit exceeded` | Multi-party call duration limit reached |
| `Telephony Internal Error` | Internal telephony system error |
| `Carrier Internal Error` | Internal carrier error |
| `Call completed` | Call completed successfully |
| `Call canceled` | Call was canceled |
| `Call ended` | Call terminated normally |
| `Call timed out` | Call exceeded timeout limit |
| `Unknown` | Unknown reason |
***
## Notes on Code Interpretation
Multiple provider codes may map to a single `hangup_by` status depending on network or device behavior. Always check the `hangup_reason` field for additional context.
Codes like `4000` appear in multiple categories. Interpretation depends on **call direction** (inbound vs outbound) and the `hangup_by` field.
Frequent `3010` or `3050` codes in a specific region may indicate local routing or carrier coverage problems. Contact support if you notice persistent regional patterns.
***
## Related Pages
Track the full lifecycle of your calls
Analyze performance across the voice pipeline
Retrieve full execution details programmatically
# List of Call Statuses in Bolna Voice AI
Source: https://www.bolna.ai/docs/list-phone-call-status
Understand every call status in Bolna Voice AI, from queued to completed. Track successful, unanswered, and failed call states.
## Introduction
Every Bolna Voice AI conversation carries two key fields throughout its lifecycle:
| Field | Purpose |
| --------------- | ---------------------------------------------- |
| `status` | Real-time status of the conversation |
| `error_message` | Explanatory message for errors or failed calls |
***
## Anatomy of a Call
The following diagram shows how a call progresses from initiation to completion:
```mermaid theme={"system"}
flowchart LR
ringing --> no-answer
scheduled --> queued --> initiated --> ringing --> in-progress --> call-disconnected --> completed
ringing --> busy
style scheduled fill:#e0f8e0,stroke:#2e8b57,stroke-width:2px
style queued fill:#e0f8e0,stroke:#2e8b57,stroke-width:2px
style initiated fill:#e0f8e0,stroke:#2e8b57,stroke-width:2px
style ringing fill:#e0f8e0,stroke:#2e8b57,stroke-width:2px
style in-progress fill:#e0f8e0,stroke:#2e8b57,stroke-width:2px
style call-disconnected fill:#e0f8e0,stroke:#2e8b57,stroke-width:2px
style completed fill:#e0f8e0,stroke:#2e8b57,stroke-width:2px
```
`completed` is the **final** status of every conversation, indicating all post-call processing (recordings, data extraction) is finished.
***
## Call Status Reference
These statuses appear in chronological order during a normal call flow:
| Status | Description |
| ------------------- | ------------------------------------------------------------------------------------------------------------------------------------ |
| `scheduled` | Waiting for its `scheduled_at` time to elapse before being queued |
| `queued` | Call received by Bolna and queued for processing |
| `rescheduled` | Call triggered outside allowed hours and automatically rescheduled (requires [call guardrails](/docs/agent-setup/call-tab) configuration) |
| `initiated` | Call initiated from Bolna's servers |
| `ringing` | Call is ringing at the destination |
| `in-progress` | Call answered and conversation is active |
| `call-disconnected` | Call has been disconnected |
| `completed` | All post-call processing finished (recordings, data extraction; may take \~2-3 minutes after disconnect) |
| Status | Description |
| ------------- | ----------------------------------------------- |
| `balance-low` | Insufficient Bolna balance to initiate the call |
| `busy` | Callee was busy |
| `no-answer` | Phone rang but callee did not answer |
| Status | Description |
| ---------- | ------------------------------------------------------------- |
| `canceled` | Call was canceled |
| `failed` | Call failed to connect |
| `stopped` | Call stopped by user or due to no telephony provider response |
| `error` | An error occurred while placing the call |
The payloads for all status events follow the same structure as the [Get Execution API](/docs/api-reference/executions/get_execution) response.
***
## Example Payload
```json {7, 8} theme={"system"}
{
"id": 7432382142914,
"agent_id": "3c90c3cc-0d44-4b50-8888-8dd25736052a",
"batch_id": "d12abbbe-d16d-4c51-b18c-c7d5c3807962",
"conversation_duration": 123,
"total_cost": 123,
"status": "completed",
"error_message": null,
"answered_by_voice_mail": true,
"transcript": "",
"created_at": "2024-01-23T01:14:37Z",
"updated_at": "2024-01-29T18:31:22Z",
"usage_breakdown": {
"synthesizer_characters": 123,
"synthesizer_model": "polly",
"transcriber_duration": 123,
"transcriber_model": "deepgram",
"llm_tokens": 123,
"llm_model": {
"gpt-3.5-turbo-16k": {
"output": 28,
"input": 1826
},
"gpt-3.5-standard-8k": {
"output": 20,
"input": 1234
}
}
},
"telephony_data": {
"duration": 42,
"to_number": "+10123456789",
"from_number": "+1987654007",
"recording_url": "https://bolna-call-recordings.s3.us-east-1.amazonaws.com/...",
"hosted_telephony": true,
"provider_call_id": "CA42fb13614bfcfeccd94cf33befe14s2f",
"call_type": "outbound",
"provider": "twilio",
"ring_duration": 17,
"post_dial_delay": 1,
"to_number_carrier": "Reliance Jio Infocomm Ltd (RJIL)"
},
"transfer_call_data": {
"provider_call_id": "CA42fb13614bfcfeccd94cf33befe14s2f",
"status": "completed",
"duration": 42,
"cost": 123,
"to_number": "+10123456789",
"from_number": "+1987654007",
"recording_url": "https://bolna-call-recordings.s3.us-east-1.amazonaws.com/...",
"hangup_by": "Caller",
"hangup_reason": "Normal Hangup"
},
"batch_run_details": {
"status": "completed",
"created_at": "2024-01-23T01:14:37Z",
"updated_at": "2024-01-29T18:31:22Z",
"retried": 0
},
"extracted_data": {
"user_interested": true,
"callback_user": false,
"address": "42 world lane",
"salary_expected": "42 bitcoins"
},
"context_details": {},
"extraction_webhook_status": true
}
```
***
## Related Pages
Understand who ended the call and why
Analyze performance across the voice pipeline
Retrieve full execution details programmatically
# Make Outbound Calls Using Bolna Voice AI Agents
Source: https://www.bolna.ai/docs/making-outgoing-calls
Make outbound Voice AI calls with Bolna using default or dedicated phone numbers. Integrate telephony providers and automate calls via dashboard and APIs.
## How to make outbound calls with Bolna?
Bolna Voice AI enables you to make outbound calls in three ways: using Bolna's default phone numbers, purchasing dedicated numbers from Bolna, or connecting your own telephony provider. Choose the option that best fits your use case and brand requirements.
## Can I use Bolna's default numbers for outgoing calls?
By default, you can make outbound calls using Bolna's centralized phone numbers.
| Callee country | Phone number prefix |
| ------------------- | ---------------------------------------------------------- |
| 🇺🇸 United States | Callee will recieve the phone call from `+1` prefix phone |
| 🇬🇧 United Kingdom | Callee will recieve the phone call from `+1` prefix phone |
| 🇦🇺 Australia | Callee will recieve the phone call from `+1` prefix phone |
| 🇮🇳 India | Callee will recieve the phone call from `+91` prefix phone |
| 🌍 Others | Callee will recieve the phone call from `+1` prefix phone |
## How to use your own dedicated phone number?
### Method 1. Purchase a phone number from the [Bolna Dashboard](https://platform.bolna.ai/phone-numbers).
Please refer to a [step by step tutorial for purchasing phone numbers on Bolna](/docs/buying-phone-numbers).
### Method 2. Connect your Telephony account and use your own phone numbers.
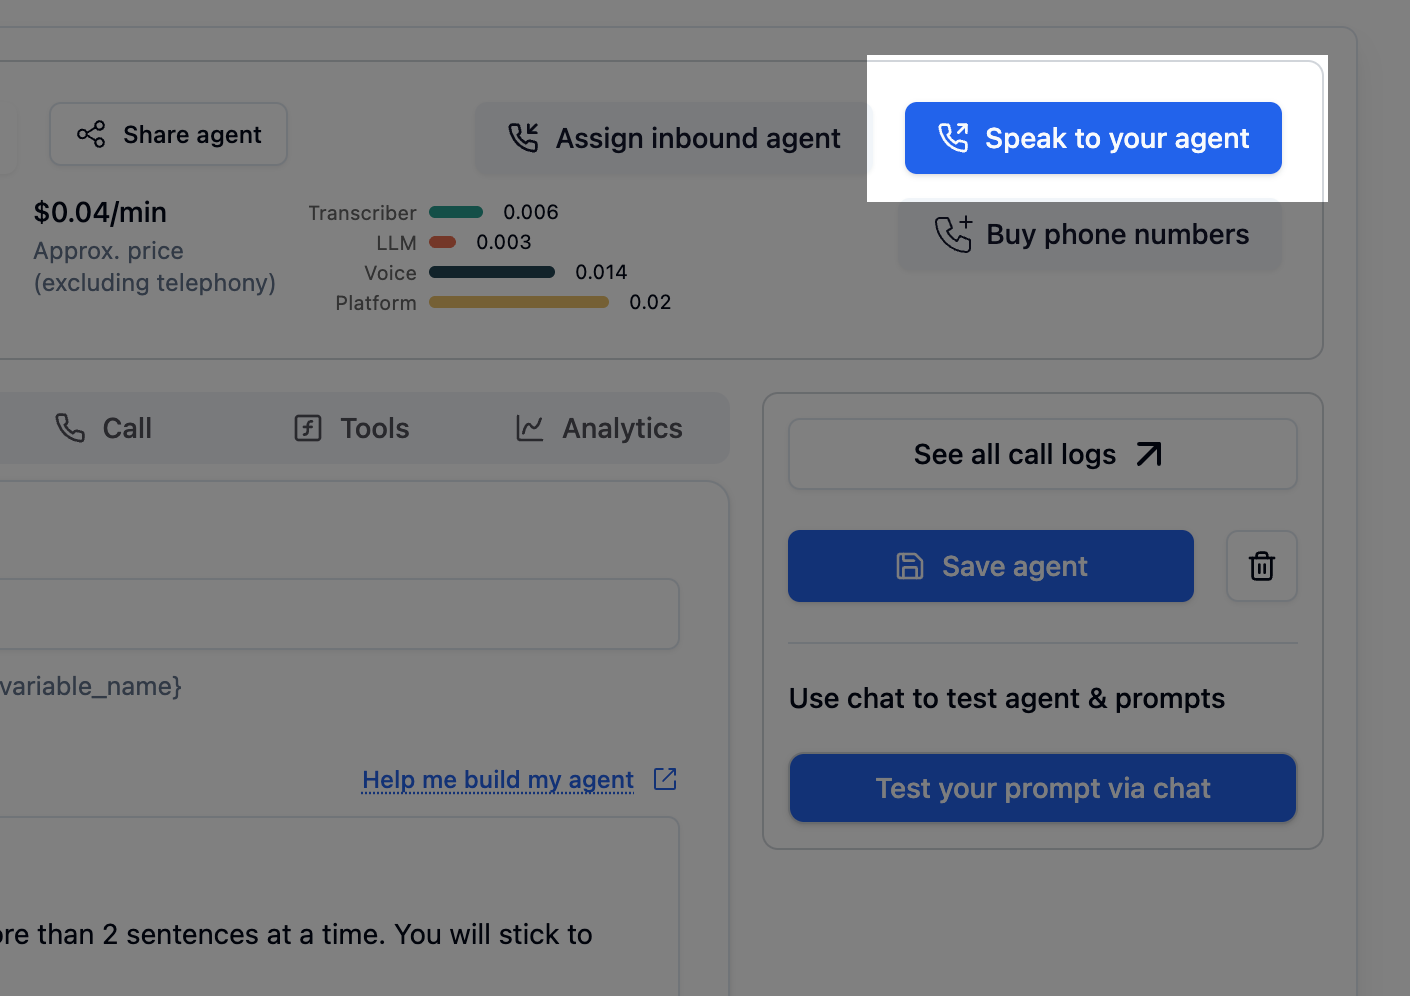
>
}
href="/twilio-connect-provider"
>
Use your own Twilio phone numbers with Bolna
>
}
href="/plivo-connect-provider"
>
Use your own Plivo phone numbers with Bolna
>
}
href="/vobiz-connect-provider"
>
Use your own Vobiz phone numbers with Bolna
>
}
href="/exotel-connect-provider"
>
Use your own Exotel phone numbers with Bolna
***
## How to make outbound calls from the dashboard?
## How to make outbound calls using APIs?
Use [`/call` API](api-reference/calls/make) to place the call to the agent
```curl default-centralized-phone-numbers theme={"system"}
# No need to add `from_phone_number`
curl --request POST \
--url https://api.bolna.ai/call \
--header 'Authorization: ' \
--header 'Content-Type: application/json' \
--data '{
"agent_id": "123e4567-e89b-12d3-a456-426655440000",
"recipient_phone_number": "+10123456789"
}'
```
```curl dedicated-phone-numbers theme={"system"}
# Add your purchased phone number or your own connected phone number in `from_phone_number` field
curl --request POST \
--url https://api.bolna.ai/call \
--header 'Authorization: ' \
--header 'Content-Type: application/json' \
--data '{
"agent_id": "123e4567-e89b-12d3-a456-426655440000",
"recipient_phone_number": "+10123456789",
"from_phone_number": "+1987654321"
}'
```
## How to make outbound calls using Zapier & Make.com?
>
}
href="https://zapier.com/apps/bolna/integrations"
>
Connect Zapier to start making outbound calls using Bolna Voice AI agents
>
}
href="https://www.make.com/en/integrations/bolna"
>
Connect Make.com to start making outbound calls using Bolna Voice AI agents
## Next steps
Ready to start making outbound calls? [Set up your first agent](/docs/agent-setup/agent-tab) or explore related features:
* [Batch calling](/docs/batch-calling) for high-volume campaigns
* [Supported telephony providers](/docs/supported-telephony-providers) for integration options
* [Context variables](/docs/using-context) to personalize each call
* [Call pricing](/docs/pricing/call-pricing) to understand costs
For receiving calls instead, see how to [handle inbound calls](/docs/receiving-incoming-calls).
# How to Get 140 & 160-Series Phone Numbers in India
Source: https://www.bolna.ai/docs/obtaining-regulated-phone-numbers
Complete guide to obtaining regulated 140-series and 160-series phone numbers in India for Voice AI calling. Covers DLT registration, required documents, KYC, and the step-by-step provisioning process.
## Why Do You Need Regulated Numbers?
To make commercial or telemarketing calls in India, businesses must use regulated phone numbers issued under TRAI guidelines. These numbers require registration on the **DLT (Distributed Ledger Technology)** platform before they can be used.
| Number Series | Use Case | Telephony Provider |
| -------------- | ---------------------------------------------------------- | ------------------ |
| **140-series** | Telemarketing and promotional calls | Vobiz |
| **160-series** | Transactional and service calls (banking, insurance, etc.) | Plivo |
DLT registration is mandatory to procure 140 or 160-series numbers from Indian telephony providers.
***
## 140-Series Numbers (Telemarketing)
140-series numbers are used for **promotional and telemarketing calls**. Bolna uses **Vobiz** as the telephony provider for Indian calling, and Vobiz recommends registering on the **TATA Teleservices DLT portal**.
### Registration Process
Visit the [TATA Teleservices DLT portal](https://telemarketer.tatateleservices.com/#/) and select **Register as Principal Entity**.
Upload the following documents during registration:
| Document | Details |
| --------------------------------- | ---------------------------------------------------------------------- |
| **Certificate of Incorporation** | Issued by Ministry of Corporate Affairs (MCA) / Registrar of Companies |
| **GST Certificate** | Copy of your GST registration |
| **Company PAN Card** | PAN card in the company's name |
| **Director List & MOA** | Memorandum of Association with the list of directors |
| **Letter of Authorization (LOA)** | Signed by the director whose name is mentioned in the MOA |
The LOA must be signed by a director whose name appears in the Memorandum of Association (MOA). Download the sample LOA template from the DLT portal, fill in the required details, and get it signed before uploading.
Submit the LOA with your official **mobile number** and **email ID**. OTPs for verification will be sent to these details during the registration process. Contact [compliance@bolna.ai](mailto:compliance@bolna.ai) to solicit a sample LOA.
The mobile number and email ID in the LOA become your permanent registered contact for all DLT communications. These cannot be easily changed after submission — choose carefully.
Once your Digital KYC is verified, a payment link for **₹5,900** will be generated on the portal. Complete the payment to finalize your Principal Entity registration.
Keep the mobile number and email from your LOA accessible throughout the process — all OTPs are sent there.
***
## 160-Series Numbers (Transactional & Service Calls)
160-series numbers are used for **transactional and service communication** such as banking alerts, insurance reminders, and regulatory notifications. These require additional provisioning through **Plivo** after DLT registration.
### Documents Required
Required as proof of regulatory compliance during Header registration on DLT
COI and GST Certificate for Plivo KYC verification
Principal Entity ID and Telemarketer ID, generated after DLT registration
Your compliance name to be shared with Plivo during provisioning
### Provisioning Process
Complete your DLT registration as a Principal Entity (same process as the 140-series registration above). This generates your **PE ID** and **TM ID**.
Share your **Certificate of Incorporation (COI)** and **GST Certificate** with Bolna for Plivo KYC verification.
This step can be skipped if your Plivo KYC on Bolna is already completed.
Provide your **PE-ID**, **TM-ID**, and **compliance application name** to Bolna for verification with Plivo.
Plivo will verify the submitted details and allocate the 160-series number to your Plivo KYC previously done on your Bolna account.
The allocated numbers will **not be active** at this stage. Further steps are required before you can start making calls.
Register your Header on the DLT portal. Submit the **RBI / SEBI Certificate** as proof of regulatory compliance during this step.
After Header registration, obtain your **URN (Unique Reference Number)**. Share the URN and the **approval screenshot** with Bolna. Bolna will ensure Plivo coordinates with TATA Teleservices for header approval.
Once the header is approved, proceed with **Template registration** on the DLT portal.
Once the template is approved, your 160-series numbers will be **active** and ready for calling.
***
## Next Steps
Once your DLT registration is approved and numbers are provisioned, you can:
Purchase regulated numbers for your outbound agents
Set up your outbound calling agent
Run calling campaigns at scale
Stay compliant with TRAI regulations
# Account based concurrency tiers
Source: https://www.bolna.ai/docs/outbound-calling-concurrency
Learn how Bolna Voice AI account tiers affect outbound call concurrency. Explore limits, scaling tiers, and enterprise options for high-volume operations.
## What are concurrency limits in Bolna?
Concurrency limits determine how many **simultaneous outbound calls** your account can make at once. Higher call volumes automatically increase your concurrency tier, ensuring smooth operations for growing businesses.
Up to **2 concurrent calls**, restricted to verified phone numbers only.
Starts at **10 concurrent calls**, scaling automatically with monthly usage.
**Unlimited concurrency** for high-volume operations. Calls over your limit are automatically queued.
**No concurrency limits** - inbound calls are never restricted or queued.
You can read more about our enterprise offering here [Bolna enterprise](/docs/enterprise/plan).
## How to check my account's concurrency limits?
Go to your **Workplace settings** in the Bolna dashboard.
See your **Account limits** to check your current concurrency tier and available slots.
## Next steps
Ready to scale your calling operations? Explore related features:
Set up batch calling for high-volume campaigns
Learn about making outbound calls efficiently
Explore unlimited concurrency with our Enterprise plan
Monitor call details and execution results
For custom concurrency needs, [contact our team](mailto:support@bolna.ai) to discuss your requirements.
# Voice AI Platform Architecture & Concepts
Source: https://www.bolna.ai/docs/platform-concepts
Understand how Bolna Voice AI works including voice pipeline, agent configuration, real-time capabilities, and multilingual conversational AI agents.
## What is Bolna?
Bolna is a platform for building **conversational Voice AI agents** that can handle phone calls naturally, just like a human. Whether you're automating customer support, qualifying leads, or scheduling appointments, Bolna provides the infrastructure to create, deploy, and scale voice agents.
Configure agents with prompts, voice, and tools
Connect to phone numbers for inbound/outbound calls
Handle thousands of concurrent conversations
***
## How Voice AI Works
Every conversation flows through a **three-step pipeline** that happens in real-time:
**Speech-to-Text (ASR)** converts the caller's voice into text that your AI can understand.
Bolna supports [Deepgram](/docs/providers/transcriber/deepgram), [Azure](/docs/providers/transcriber/azure), [ElevenLabs](/docs/providers/transcriber/elevenlabs), and more.
**Large Language Model (LLM)** processes the text, understands context, and generates an intelligent response.
Connect [OpenAI](/docs/providers/llm-model/openai), [Anthropic](/docs/providers/llm-model/anthropic), [Azure OpenAI](/docs/providers/llm-model/azure-openai), or your own LLM.
**Text-to-Speech (TTS)** converts the response into natural-sounding speech played back to the caller.
Choose voices from [ElevenLabs](/docs/providers/voice/elevenlabs), [Cartesia](/docs/providers/voice/cartesia), [Azure](/docs/providers/voice/azure), and more.
Bolna orchestrates this entire pipeline in **under 600ms**, enabling natural, real-time conversations with minimal latency.
***
## Key Terms Explained
New to Voice AI? Here's what the technical terms mean in plain English:
**Think of it as**: The brain of your AI agent.
An LLM is an AI system (like ChatGPT) that understands language and generates human-like responses. When someone speaks to your agent, the LLM reads the transcribed text, understands what the person wants, and writes a response, just like a customer service rep would.
**Examples**: OpenAI GPT-4, Anthropic Claude, Google Gemini
**Think of it as**: The ears of your AI agent.
ASR (Automatic Speech Recognition) listens to what someone says on a call and converts their spoken words into written text. This text is then sent to the LLM so it can understand and respond.
**Examples**: Deepgram, Azure Speech, Google STT
**Think of it as**: The voice of your AI agent.
TTS (Text-to-Speech) takes the written response from the LLM and speaks it out loud in a natural-sounding voice. You can choose different voices, accents, and speaking styles to match your brand.
**Examples**: ElevenLabs, Cartesia, Azure TTS
**Think of it as**: The phone company that connects your calls.
A telephony provider handles the actual phone infrastructure for buying phone numbers, connecting calls, and ensuring audio quality. Bolna integrates with providers so your AI agent can make and receive real phone calls.
**Examples**: Twilio, Plivo, Exotel, Vobiz
**Think of it as**: Your virtual employee.
An agent is a complete Voice AI system configured with a personality, instructions, voice, and capabilities. It's like hiring a virtual employee; you tell it what to say, how to act, and what tasks to perform.
**Think of it as**: The training manual for your agent.
A prompt is a set of instructions you write to tell the agent how to behave. It includes the agent's personality, what information to collect, how to handle different situations, and what NOT to say.
**Think of it as**: Response time, how fast the agent replies.
Latency is the delay between when someone finishes speaking and when the agent starts responding. Lower latency (under 1 second) feels more natural, like a real conversation. Bolna optimizes for sub-600ms latency.
**Think of it as**: Reference documents your agent can read.
A knowledge base is a collection of documents (PDFs, websites, FAQs) that your agent can search during conversations. RAG (Retrieval-Augmented Generation) is the technology that lets the agent find relevant information and use it in responses.
***
## What Can Bolna Agents Do?
### Handle Phone Calls
Answer customer calls 24/7 with AI-powered responses
Proactively reach customers for sales, reminders, and follow-ups
Launch campaigns with thousands of concurrent calls
Route to human agents when AI assistance isn't enough
***
### Execute Actions During Calls
Agents can perform **real-time actions** by calling external APIs and tools:
| Tool | What It Does |
| ------------------------ | --------------------------------------------- |
| **Check Calendar Slots** | Query available appointment slots via Cal.com |
| **Book Appointments** | Schedule meetings directly during the call |
| **Transfer Calls** | Route to human agents or other numbers |
| **Custom Functions** | Call any API endpoint based on conversation |
Configure function tools in the [Tools Tab](/docs/agent-setup/tools-tab). Your agent can access CRMs, databases, payment systems, and more, all while on the call.
***
### Extract Insights After Calls
Every conversation generates valuable data:
Full conversation text with speaker labels
Audio recordings for review and training
AI-generated call summaries
Configure **post-call analytics** in the [Analytics Tab](/docs/agent-setup/analytics-tab) to automatically extract:
* Customer intent and sentiment
* Key data points (name, email, order ID)
* Custom fields you define
***
## Agent Configuration
Every Bolna agent is customized through **8 configuration tabs**:
**Prompts & Personality**
Define your agent's welcome message, instructions, and conversation behavior.
**Intelligence & Knowledge**
Choose your language model and connect knowledge bases for context-aware responses.
**Voice & Transcription**
Select voice provider, language, and transcription settings.
**Latency & Behavior**
Fine-tune response timing, interruption handling, and user detection.
**Telephony & Features**
Configure voicemail detection, DTMF input, and call timeouts.
**API Integrations**
Connect Cal.com, CRMs, and custom function tools.
**Webhooks & Extraction**
Set up post-call summaries, data extraction, and webhooks.
**Caller Matching**
Match callers to your database and prevent spam.
***
## Use Cases
Handle FAQs, troubleshoot issues, and escalate complex cases
Qualify inbound leads and schedule meetings with sales reps
Book, reschedule, and confirm appointments automatically
Screen candidates and schedule interviews at scale
***
## Get Started
Build an agent in under 5 minutes
Explore all configuration options
Set up voice, LLM, and telephony providers
Start from pre-built templates
# Enhance Call Capabilities with Bolna's Plivo Integration
Source: https://www.bolna.ai/docs/plivo
Integrate Plivo with Bolna to manage outbound & inbound calls for India. Access setup guides for seamless Voice AI agent communication using your Plivo numbers.
## What is Plivo integration in Bolna?
Plivo is a cost-effective telephony provider supported by Bolna Voice AI. By integrating Plivo with Bolna, you can make outbound calls, receive inbound calls, and use your own Plivo account for complete control over your phone numbers and calling infrastructure.
Learn more about [supported telephony providers](/docs/supported-telephony-providers) or [purchase phone numbers](/docs/buying-phone-numbers) directly through Bolna.
## How to get started with Plivo
Bolna agents make phone calls using Plivo numbers
Bolna agents receive phone calls on Plivo numbers and answers them
Use your own Plivo account with Bolna
## Why use Plivo with Bolna?
Plivo offers several advantages:
* **Cost-effective**: Competitive international calling rates
* **Reliable infrastructure**: Good uptime and call quality
* **Global coverage**: Support for calls in many countries
* **Easy integration**: Seamless setup with Bolna platform
For high-volume calling needs, consider using [batch calling](/docs/batch-calling) to scale efficiently. Compare Plivo with [Twilio](/docs/twilio) to choose the best provider for your needs.
# Link Your Plivo Account to Bolna for Voice AI
Source: https://www.bolna.ai/docs/plivo-connect-provider
Securely connect your Plivo account with Bolna. Enable your Voice AI agents to utilize Plivo phone numbers for managing inbound and outbound calls.
## Use your own Plivo account to make outbound calls
You can connect your own Plivo account and start using it on Bolna. All calls initiated from Bolna will be from your own Plivo account and use your own Plivo phone numbers.
1. Navigate to `Providers` tab from the left menu bar & Click **Plivo connect button**.
2. Fill in the required details.
3. Save details by clicking on the **connect button**.
4. You'll see that your Plivo account was successfully connected. All your calls will now go via your own Plivo account and phone numbers.
# Initiate Outbound Calls via Plivo with Bolna Voice AI
Source: https://www.bolna.ai/docs/plivo-outbound-calls
Configure Bolna Voice AI agents to make outbound calls through Plivo. Learn to set up calls using the dashboard and APIs for effective outreach.
## Making outbound calls from dashboard
1. Login to the dashboard at [https://platform.bolna.ai](https://platform.bolna.ai) using your account credentials
2. Choose `Plivo` as the Call provider for your agent and save it
3. Start placing phone calls by providing the recipient phone numbers.
Bolna will place the calls to the provided phone numbers.
You can place calls using your own custom Plivo phone numbers only if you've connected your Plivo account.
You can read more on how to connect your Plivo account [here](/docs/providers).
## Making outbound calls Using APIs
1. Generate and save your [Bolna API Key](/docs/api-reference/introduction#steps-to-generate-your-api-key)
2. Set your agent `input` and `output` tools as `plivo` while using [`/create` Agent API](/docs/api-reference/agent/create)
```create-agent.json theme={"system"}
...
...
"tools_config": {
"output": {
"format": "wav",
"provider": "plivo"
},
"input": {
"format": "wav",
"provider": "plivo"
},
"synthesizer": {...},
"llm_agent": {...},
"transcriber": {...},
"api_tools": {...}
}
...
...
```
3. Use [`/call` API](api-reference/calls/make) to place the call to the agent
```call.json theme={"system"}
curl --request POST \
--url https://api.bolna.ai/call \
--header 'Authorization: ' \
--header 'Content-Type: application/json' \
--data '{
"agent_id": "123e4567-e89b-12d3-a456-426655440000",
"recipient_phone_number": "+10123456789"
}'
```
# Receive Bolna Voice AI call updates
Source: https://www.bolna.ai/docs/polling-call-status-webhooks
Receive real-time call status updates from Bolna Voice AI using webhooks. Automate workflows, update CRM, and sync data with your systems.
## What are Webhooks?
Webhooks allow you to receive real-time call data from Bolna as call status updates happen. When a call status changes, Bolna sends an HTTP POST request to your server with the execution data.
***
## Setting Up Webhooks
Open your agent and navigate to the **[Analytics Tab](/docs/agent-setup/analytics-tab)**.
In the **"Push all execution data to webhook"** section, enter your webhook endpoint URL.
Click **Save agent** to activate the webhook.
**Your webhook endpoint must be publicly accessible** and able to receive HTTP POST requests. Bolna will POST data to this URL as call status updates.
***
## IP Whitelist
Webhooks are sent from the following IP address. **Whitelist this IP** on your server to ensure you receive all webhook events.
```
13.203.39.153
```
***
## Webhook Payload
The webhook payload is the **same structure as the Raw Call Data** you see in [Call History](/docs/call-history). It matches the [Get Execution API](/docs/api-reference/executions/get_execution) response format.
As call status updates (scheduled → queued → in-progress → completed), Bolna sends POST requests to your webhook with the current execution data.
Test your webhook integration using [webhook.site](https://webhook.site) before implementing a production server.
***
## Use Cases
Automatically update customer records after each call
Build live dashboards with call metrics and analytics
Trigger actions based on call outcomes
Log all call data to your preferred storage system
***
## Call Statuses
Learn about all valid call status types in Bolna Voice AI
***
## Next Steps
Configure post-call extraction and summarization
View raw call data and recordings
Understand the execution data structure
Automate outbound calling campaigns
# Bolna Voice AI usage pricing
Source: https://www.bolna.ai/docs/pricing/call-pricing
Discover detailed insights into Bolna Voice AI's pricing structure. Learn about cost breakdowns and flexible plans tailored to your business needs.
## How much does Bolna Voice AI cost?
Bolna Voice AI uses a transparent, usage-based pricing model. You only pay for what you use, with costs broken down into three components: Voice AI processing (STT + LLM + TTS), telephony charges, and a Bolna platform fee.
See all available plans, volume tiers, and per-minute rates on our pricing page.
***
## What does call pricing depend on?
Every call's total cost is the sum of five components across three parts.
**Part A - Voice AI (STT + LLM + TTS)**
Your choice of Speech-to-Text (STT) model and provider.
Billed by **call duration** (rounded to seconds).
Your choice of Large Language Model (LLM) and provider.
Billed by **tokens generated**.
Your choice of TTS model and provider.
Billed by **characters synthesized**.
**Part B & C - Telephony and Platform**
Your telephony provider and the country/region of the phone numbers.
Billed by **call duration** (rounded to minutes).
A flat per-minute fee charged by Bolna on top of your provider costs.
Billed by **call duration**.
***
## How can I reduce my Voice AI costs?
You can significantly reduce costs by connecting your own provider accounts. When you bring your own keys (BYOK), Bolna does not charge for those components. You only pay your providers directly, plus Bolna's platform fee.
Head to the [Providers page](https://platform.bolna.ai/providers) to link your own STT, LLM, and TTS accounts.
Lighter LLM models (e.g. `gpt-4o-mini`) and efficient TTS voices can meaningfully lower per-call costs.
For predictable workloads, a volume-based plan offers better per-minute rates than pay-as-you-go.
See available tiers at [bolna.ai/pricing](https://bolna.ai/pricing).
[Learn more about supported providers](/docs/providers) and how to connect your accounts.
***
## Where can I see my call costs?
After each conversation, go to the [Agent Executions page](https://platform.bolna.ai/agent-executions) to see how many credits the conversation consumed.
***
## Next steps
Explore pay-as-you-go, pilots, and enterprise plans
Bring your own keys to reduce per-call costs
Track credits consumed per call
Custom pricing for high-volume deployments
For customized volume-based pricing, reach out to us at [enterprise@bolna.ai](mailto:enterprise@bolna.ai).
# Prompting Guide and Best Practices for Bolna Voice AI
Source: https://www.bolna.ai/docs/prompting-guide
Write effective prompts for Bolna Voice AI agents. Use variables, prompt modules, and best practices to build high-performing conversational agents.
This guide covers how to write effective prompts, use variables and prompt modules, and optimize your agent for performance.
***
## Variables
Variables let you inject dynamic data into your prompts. There are two types:
Defined by you. Passed via the API at call time or from CSV rows during [batch calling](/docs/batch-calling). Examples: `{customer_name}`, `{order_id}`, `{city}`.
Predefined by Bolna. Available automatically in every call. Examples: `agent_id`, `call_sid`.
### Using Variables in the Prompt Editor
Type `{` in the prompt editor to open the variable dropdown. It shows both **User Variables** and **System Variables**.
With `{`, you can:
* **Select** an existing user or system variable
* **Define a new variable** by typing a name that does not exist yet (e.g., `{appointment_date}`)
### Testing Variables
Any variable you define with `{variable_name}` in your prompt **automatically appears** as an editable input field in the testing section below the prompt. Fill in test values to preview how the prompt behaves before going live.
User variables are passed via the API at call time or from CSV rows during [batch calling](/docs/batch-calling). System variables like `agent_id` and `call_sid` are filled automatically by Bolna.
***
## Using @ to Insert Modules, Functions, and Variables
Type `@` in the prompt editor to open a dropdown that lets you select and insert:
* **Prompt Modules** - pre-built prompt blocks for common tasks
* **Custom Functions** - functions defined in the [Tools Tab](/docs/agent-setup/tools-tab)
* **Variables** - existing variables already used in your prompt
With `@`, you can only **select** existing items. You cannot create new variables, functions, or modules. To create a new variable, use `{variable_name}` instead.
## Prompt Modules
Prompt modules are pre-built prompt blocks that handle common tasks like email collection, persuasion, objection handling, and more. Insert a module and customize it instead of writing from scratch.
### Browse Modules
Click the **Browse Modules** button in the top-right of the Agent Prompt section to open the full modules library. Browse by category, read what each module does, and insert it into your prompt with one click.
Each module shows:
* **What Prompt Does** - a short description of the module's purpose
* **Prompt** - the full prompt text that will be inserted
* **Insert into editor** - click to add it to your current prompt
### Available Module Categories
| Category | What it contains |
| -------------- | ------------------------------------------------------------------------------------------------------------------------------------------------------------------------------------------------------------------------------------------------ |
| **Collection** | Email Collection, Number Collection, Name Collection |
| **Optional** | Persuasion, Variables Reference, Pricing and Plans, Objection Handling, Knowledge Base, Hang Up Prompt, Handover and Escalation, FAQ Block, Extraction Schema, Eligibility Criteria, Compliance Healthcare, Compliance Finance, Closing Branches |
| **Flow** | Outbound Survey, Outbound Lead, Inbound Verification |
| **Sector** | Industry-specific modules |
| **Universal** | General-purpose modules that work across use cases |
Modules are a great starting point. Insert one, then customize the prompt text to fit your specific use case and tone.
***
## Writing Effective Prompts
Begin with a clear, concise prompt. Add details incrementally as you test and refine.
Start with: "You will not speak more than 2 sentences at a time." This keeps responses fast and natural.
| Section | Purpose | Example |
| ---------------- | --------------- | ------------------------------------------- |
| **Personality** | Tone and feel | "warm, perceptive, and results-driven" |
| **Context** | Role background | "You are calling on behalf of Acme Corp..." |
| **Instructions** | Tasks and flow | "Ask for their order number first..." |
| **Guardrails** | Restrictions | "Never discuss competitor products..." |
Prompt engineering takes iteration. If your agent does not follow instructions as expected, refine the prompt step by step rather than rewriting everything at once.
***
## Choosing the Right Agent Type
Natural conversations from a plain-English prompt. Creative and flexible, but requires fine-tuning and costs more.
Full control over exact sentences. Cheaper with no hallucination risk, but conversations are limited to the defined tree.
| | Free Flowing | IVR |
| ---------------------- | -------------- | ------------------------- |
| **Setup** | Write a prompt | Build a conversation tree |
| **Flexibility** | High | Low |
| **Hallucination risk** | Possible | None |
| **Cost** | Higher | Lower |
Start with an [agent template](/docs/agents-library) and customize it. Templates are built to run on default settings.
***
## Optimizing for Performance
For low-latency, high-quality conversations:
| Component | Recommended |
| --------------- | ---------------------------- |
| **LLM** | Azure / gpt-4.1-mini cluster |
| **Voice** | ElevenLabs |
| **Transcriber** | Deepgram |
| **Telephony** | Plivo |
Make sure the voice you choose supports the language you have configured.
Use the [Playground](/docs/agent-setup/agent-tab) to test your agent thoroughly before making live calls. Telephone calling burns credits quickly.
***
## Next Steps
Configure prompts, languages, and advanced settings
Start from a pre-built template
Pass dynamic data into calls with context variables
Writing prompts in native scripts
# Supported Providers for Bolna Voice AI
Source: https://www.bolna.ai/docs/providers
Explore the list of providers supported by Bolna Voice AI, including integrations for telephony, transcription, and text-to-speech services to lower your costs
We don't charge for any usage for providers that you have connected to Bolna.
We connect all your `Provider` accounts securely via using [infisical](https://infisical.com/).
### Steps to add your own Provider credentials:
Login to the dashboard at [https://platform.bolna.ai](https://platform.bolna.ai)
Navigate to `Developers` tab from the left menu bar
Head over to the `Provider Keys` tab
Click the button `Add Provider Key` to your Provider key-value pair
Save your Provider
We currently have the following providers which you can connect to Bolna.
All these keys **must** be added for the respective provider.
| Property | Description |
| --------------------- | ------------------- |
| `TWILIO_ACCOUNT_SID` | Twilio account SID |
| `TWILIO_AUTH_TOKEN` | Twilio token |
| `TWILIO_PHONE_NUMBER` | Twilio phone number |
For creating a free Twilio Account you can checkout their blog [How to Work with your Free Twilio Trial Account](https://www.twilio.com/docs/messaging/guides/how-to-use-your-free-trial-account)
| Property | Description |
| -------------------- | ------------------ |
| `PLIVO_AUTH_ID` | Plivo auth ID |
| `PLIVO_AUTH_TOKEN` | Plivo auth token |
| `PLIVO_PHONE_NUMBER` | Plivo phone number |
| Property | Description |
| -------------------- | ------------------ |
| `VOBIZ_AUTH_ID` | Vobiz Auth ID |
| `VOBIZ_AUTH_TOKEN` | Vobiz Auth Token |
| `VOBIZ_PHONE_NUMBER` | Vobiz phone number |
| Property | Description |
| ------------------------ | ------------------------------ |
| `EXOTEL_API_KEY` | Exotel API Key |
| `EXOTEL_API_TOKEN` | Exotel API token |
| `EXOTEL_ACCOUNT_SID` | Exotel Account SID |
| `EXOTEL_DOMAIN` | Exotel Domain |
| `EXOTEL_PHONE_NUMBER` | Exotel phone number |
| `EXOTEL_OUTBOUND_APP_ID` | Exotel Outbound Application ID |
| `EXOTEL_INBOUND_APP_ID` | Exotel Inbound Application ID |
| Property | Description |
| -------- | ------------------- |
| `OPENAI` | Your OpenAI API key |
| Property | Description |
| ------------ | ----------------------- |
| `OPENROUTER` | Your OpenRouter API key |
| Property | Description |
| -------------------------- | ---------------------------- |
| `AZURE_OPENAI_API_KEY` | Your Azure API key |
| `AZURE_OPENAI_MODEL` | Your Azure OpenAI model |
| `AZURE_OPENAI_API_BASE` | Your Azure URL |
| `AZURE_OPENAI_API_VERSION` | Your Azure Model API version |
| Property | Description |
| -------- | -------------------------- |
| `GOOGLE` | Your Google Gemini API key |
For custom llm simply keep provider in the `llm_agent` key as `custom` and add a openai compatible `base_url`
#### Example LLM Agent key for the
```
"llm_agent": {
"max_tokens": 100.0,
"presence_penalty": 0.0,
"base_url": "https://custom.llm.model/v1",
"extraction_details": null,
"top_p": 0.9,
"agent_flow_type": "streaming",
"request_json": false,
"routes": null,
"min_p": 0.1,
"frequency_penalty": 0.0,
"stop": null,
"provider": "custom",
"top_k": 0.0,
"temperature": 0.2,
"model": "custom-llm-model",
"family": "llama"
}
```
| Property | Description |
| ------------ | ----------------------- |
| `ELEVENLABS` | Your Elevenlabs API key |
| Property | Description |
| ---------- | --------------------- |
| `CARTESIA` | Your Cartesia API key |
| Property | Description |
| -------- | ------------------- |
| `SARVAM` | Your Sarvam API key |
| Property | Description |
| ---------- | --------------------- |
| `SMALLEST` | Your Smallest API key |
| Property | Description |
| ---------- | ----------------- |
| `DEEPGRAM` | Your Deepgram key |
# Use Anthropic with Bolna Voice AI
Source: https://www.bolna.ai/docs/providers/llm-model/anthropic
Build powerful voice AI agents using Claude Sonnet 4. Create enterprise-grade conversational AI with Anthropic's advanced models.
## Anthropic API Integration for Voice AI Applications
[Anthropic](https://www.anthropic.com/) provides advanced Large Language Models (LLMs) with superior reasoning capabilities, safety features, and large context windows for building intelligent voice AI agents. This comprehensive guide covers Anthropic API integration with Bolna, including authentication, model selection, and implementation best practices for conversational AI applications.
## Why Choose Anthropic Models for Voice AI Agents?
Anthropic's Claude models offer exceptional performance for voice AI applications through cutting-edge AI capabilities and safety features:
### 1. Advanced Reasoning and Intelligence
* **Claude Sonnet 4**: Latest model with enhanced reasoning capabilities and improved accuracy
* **Claude Opus 4**: Premium model offering maximum intelligence for complex problem-solving
* **Multi-step reasoning**: Handles sophisticated logical chains in voice conversations
* **Context understanding**: Maintains nuanced understanding across extended interactions
* **Analytical thinking**: Provides detailed explanations and step-by-step problem solving
### 2. Large Context Windows and Memory
* **Extended context**: Up to 200K tokens for comprehensive conversation memory
* **Document processing**: Handles large documents and extensive conversation histories
* **Context retention**: Maintains conversation state across long interactions
* **Multi-turn conversations**: Excels at complex, extended voice dialogues
### 3. Safety and Alignment Features
* **Constitutional AI**: Trained to be helpful, harmless, and honest
* **Safety guardrails**: Built-in content filtering and responsible AI features
* **Reliable responses**: Consistent, trustworthy outputs for enterprise applications
* **Ethical reasoning**: Considers ethical implications in decision-making
### 4. Enterprise-Grade Performance
* **High reliability**: Consistent performance for production voice AI systems
* **Scalable infrastructure**: Handles high-volume concurrent voice interactions
* **API compatibility**: OpenAI-compatible API through LiteLLM integration
* **Function calling**: Seamless integration with external APIs and databases
## Model Selection Guide
### Claude Sonnet 4 (Latest Enhanced Model)
* **Best for**: Applications requiring the latest reasoning capabilities with improved accuracy
* **Use cases**: Complex customer service, advanced problem-solving, detailed consultations
* **Performance**: Enhanced reasoning with optimized response times
* **Context**: Large context window for comprehensive conversation memory
## Supported Anthropic Models on Bolna AI
| Model | Context Window | Best Use Case | Key Features |
| ---------------------------- | -------------- | ---------------------------------------------- | ------------------------------------- |
| **claude-sonnet-4-20250514** | 200K tokens | Latest enhanced reasoning, production voice AI | Advanced reasoning, improved accuracy |
## Next Steps
Ready to integrate Anthropic with your voice AI agent? Start by [configuring your LLM settings in the Playground](/docs/agent-setup/llm-tab) or explore our [API documentation](/docs/api-reference/introduction) for programmatic integration.
For related integrations:
* Compare with [OpenAI models](/docs/providers/llm-model/openai) for different capabilities
* Explore [Azure OpenAI](/docs/providers/llm-model/azure-openai) for enterprise deployments
* Configure [custom LLM endpoints](/docs/customizations/using-custom-llm) if needed
* Set up [guardrails](/docs/guardrails) to complement Anthropic's safety features
Need help? [Contact our team](mailto:support@bolna.ai) for personalized setup assistance.
# Use Azure OpenAI with Bolna Voice AI
Source: https://www.bolna.ai/docs/providers/llm-model/azure-openai
Azure OpenAI dedicated clusters for GPT-4.1, GPT-4o, GPT-4, and GPT-3.5-turbo models and deploy powerful conversational Voice AI applications.
## Azure OpenAI API Integration for Voice AI Applications
[Azure OpenAI Service](https://azure.microsoft.com/en-us/products/ai-services/openai-service) provides enterprise-grade access to OpenAI's powerful Large Language Models (LLMs) through Microsoft's secure, compliant, and scalable cloud infrastructure. This comprehensive guide covers Azure OpenAI API integration with Bolna, including authentication, model selection, and implementation best practices for enterprise conversational AI applications.
## Why Choose Azure OpenAI Models for Voice AI Agents?
Azure OpenAI offers the same cutting-edge OpenAI models with additional enterprise benefits for voice AI applications:
### 1. Enterprise-Grade Security and Compliance
* **Data residency control**: Keep your voice AI data within specific geographic regions
* **Private networking**: VNet integration and private endpoints for secure connections
* **Compliance certifications**: SOC 2, ISO 27001, HIPAA, and other enterprise standards
* **Customer-managed keys**: Full control over encryption keys for sensitive voice data
### 2. Advanced Natural Language Understanding (NLU)
* **Same OpenAI models**: Access to GPT-4o, GPT-4, and GPT-3.5-turbo with identical capabilities
* **Multi-turn conversation handling**: Maintains context across extended voice interactions
* **Intent recognition**: Accurately identifies user intentions from spoken language
* **Multilingual support**: Processes voice inputs in 50+ languages
* **Semantic understanding**: Comprehends nuanced meaning and context in conversations
### 3. Enterprise Infrastructure and Reliability
* **99.9% uptime SLA**: Ensures consistent availability for production voice AI systems
* **Global scale**: Leverage Microsoft's worldwide data center network
* **Integrated monitoring**: Azure Monitor and Application Insights for comprehensive observability
* **Cost management**: Built-in Azure cost controls and budgeting tools
### 4. Advanced AI Capabilities with Azure Integration
* **Function calling**: Integrates with Azure services and external APIs seamlessly
* **Azure AI services integration**: Combine with Azure Speech, Translator, and other AI services
* **Structured output**: Returns JSON responses for seamless integration
* **Custom fine-tuning**: Train models on your specific voice AI use cases
* **Content filtering**: Built-in responsible AI content filtering and safety measures
### Model Selection Guide
Choose the optimal Azure OpenAI model based on your voice AI requirements:
#### GPT-4o (Recommended for Production)
* **Best for**: High-quality conversational AI with complex reasoning
* **Use cases**: Customer service, sales calls, technical support
* **Performance**: Fastest response times with superior accuracy
* **Azure benefits**: Enhanced security, compliance, and monitoring
#### GPT-4o-mini (Cost-Effective Option)
* **Best for**: High-volume applications requiring cost optimization
* **Use cases**: Lead qualification, appointment scheduling, basic inquiries
* **Performance**: Balanced speed and quality
* **Cost**: 60% lower cost than GPT-4o with Azure pricing tiers
#### GPT-4 (Maximum Reasoning)
* **Best for**: Applications requiring maximum reasoning capability
* **Use cases**: Complex problem-solving, detailed analysis
* **Performance**: Highest quality with comprehensive reasoning
* **Azure benefits**: Enterprise-grade deployment and management
#### GPT-3.5-turbo (Budget Option)
* **Best for**: Simple conversational tasks and prototyping
* **Use cases**: Basic chatbots, simple Q\&A systems
* **Performance**: Fast responses with good quality
* **Cost**: Most economical option with Azure cost controls
## Implementation Best Practices
### Optimizing for Voice AI Performance
1. **Prompt Engineering for Voice**
* Design prompts specifically for spoken interactions
* Include context about voice communication style
* Optimize for concise, natural-sounding responses
2. **Azure-Specific Optimizations**
* Implement Azure AD authentication for enhanced security
* Use Azure Key Vault for secure credential management
* Configure Azure Monitor for performance tracking
3. **Error Handling and Resilience**
* Implement fallback responses for API failures
* Handle rate limiting gracefully with Azure quotas
* Use Azure Service Bus for reliable message queuing
4. **Performance Monitoring**
* Track response times and quality metrics with Azure Monitor
* Monitor API usage and costs through Azure Cost Management
* Implement comprehensive logging with Azure Application Insights
## Supported Azure OpenAI Models on Bolna AI
| Model | Context Window | Best Use Case | Azure Benefits |
| ----------------- | -------------- | ------------------------------------------ | ---------------------------------- |
| **gpt-4o** | 128K tokens | Production voice AI, complex conversations | Enterprise security, compliance |
| **gpt-4o-mini** | 128K tokens | Cost-effective voice applications | Azure cost controls, monitoring |
| **gpt-4** | 8K tokens | Maximum reasoning capability | Private deployment, data residency |
| **gpt-3.5-turbo** | 4K tokens | Simple conversations, prototyping | Budget-friendly with Azure pricing |
## Next Steps
Ready to integrate Azure OpenAI with your voice AI agent? Start by [configuring your LLM settings in the Playground](/docs/agent-setup/llm-tab) or explore our [API documentation](/docs/api-reference/introduction) for programmatic integration.
For related integrations:
* Compare with [OpenAI](/docs/providers/llm-model/openai) for standard deployments
* Explore [Anthropic Claude models](/docs/providers/llm-model/anthropic) for enhanced reasoning
* Learn about [data residency options](/docs/enterprise/data-residency) for compliance
* Configure [enterprise features](/docs/enterprise/plan) for production deployments
* You can also connect your own Azure account and use it with [Bolna AI](https://platform.bolna.ai/auth/azure)
Need help? [Contact our team](mailto:support@bolna.ai) for personalized setup assistance with Azure's enterprise-grade infrastructure.
# Use DeepSeek with Bolna Voice AI
Source: https://www.bolna.ai/docs/providers/llm-model/deepseek
Complete Bolna AI Voice Agents with DeepSeek. Build cost-effective voice AI agents for conversational Voice AI applications with DeepSeek-Chat models.
## DeepSeek API Integration for Voice AI Applications
[DeepSeek](https://www.deepseek.com/) provides advanced Large Language Models (LLMs) with competitive pricing and powerful reasoning capabilities for building intelligent voice AI agents. This comprehensive guide covers DeepSeek API integration with Bolna, including authentication, model selection, and implementation best practices for cost-effective conversational AI applications.
## Why Choose DeepSeek Models for Voice AI Agents?
DeepSeek offers compelling advantages for voice AI applications through innovative models and competitive pricing:
### 1. Advanced Reasoning Capabilities
* **DeepSeek-Reasoner (R1)**: State-of-the-art reasoning model with enhanced problem-solving abilities
* **Multi-step reasoning**: Handles complex logical chains in voice conversations
* **Context understanding**: Maintains sophisticated reasoning across extended interactions
* **Analytical thinking**: Provides detailed explanations and step-by-step problem solving
### 2. Cost-Effective Performance
* **Competitive pricing**: Significantly lower costs compared to premium alternatives
* **Cache optimization**: Reduced costs with cache hit/miss pricing tiers
* **Discount pricing**: Special pricing during off-peak hours (UTC 16:30-00:30)
* **Flexible pricing tiers**: Standard and discount pricing options for different use cases
### 3. OpenAI-Compatible API
* **Seamless integration**: Drop-in replacement for OpenAI API calls
* **Familiar interface**: Same API format and parameters as OpenAI
* **Easy migration**: Simple transition from other OpenAI-compatible providers
* **Standard features**: JSON output, function calling, and streaming responses
### 4. Advanced AI Features
* **Function calling**: Integrates with external APIs and databases
* **JSON output**: Structured responses for seamless integration
* **Chat prefix completion**: Enhanced conversation flow capabilities
* **FIM completion**: Fill-in-the-middle completion for code and text
* **Streaming responses**: Real-time response generation for natural conversations
## Implementation Best Practices
### Optimizing for Voice AI Performance
1. **Model Selection Strategy**
* Use DeepSeek-Chat for general conversational tasks
* Deploy DeepSeek-Reasoner for complex problem-solving scenarios
* Consider hybrid approaches for different conversation types
2. **Cost Optimization**
* Leverage cache hit pricing for repeated queries
* Schedule high-volume operations during discount hours
* Implement intelligent caching strategies
* Monitor token usage and optimize prompt length
3. **Performance Tuning**
* Configure appropriate temperature settings for voice interactions
* Implement streaming for real-time conversation flow
* Use function calling for external service integration
* Optimize context window usage for conversation memory
4. **Error Handling**
* Implement fallback responses for API failures
* Handle rate limiting gracefully
* Provide clear error messages for users
* Monitor API status and performance metrics
## Supported DeepSeek Models on Bolna AI
| Model | Context Window | Best Use Case | Pricing Advantage |
| ----------------- | -------------- | --------------------------------------- | -------------------------------------- |
| **deepseek-chat** | 64K tokens | General conversations, customer service | Highly cost-effective for volume usage |
## Next Steps
Ready to integrate DeepSeek with your voice AI agent? [Contact our team](mailto:support@bolna.ai) for personalized setup assistance or explore our [API documentation](/docs/api-reference/introduction) for advanced configuration options. Take advantage of DeepSeek's cost-effective pricing and advanced reasoning capabilities to build powerful, affordable voice AI solutions.
# Use Google Gemini with Bolna Voice AI
Source: https://www.bolna.ai/docs/providers/llm-model/gemini
Build powerful voice AI agents using Gemini 2.5 Flash, Gemini 3 Flash, and more. Create multilingual conversational AI with Google's latest Gemini models.
## Google Gemini API Integration for Voice AI Applications
[Google Gemini](https://deepmind.google/technologies/gemini/) models provide cutting-edge natural language processing capabilities for building intelligent voice AI agents. This comprehensive guide covers Gemini API integration with Bolna, including model selection and implementation best practices for conversational AI applications.
## Why Choose Google Gemini Models for Voice AI Agents?
Google Gemini models offer superior performance for voice AI applications through:
### 1. Advanced Natural Language Understanding (NLU)
* **Multi-turn conversation handling**: Maintains context across extended voice interactions
* **Intent recognition**: Accurately identifies user intentions from spoken language
* **Multilingual support**: Processes voice inputs in English, Hindi, Gujarati, French, Italian, and Spanish
* **Semantic understanding**: Comprehends nuanced meaning and context in conversations
### 2. Real-time Response Generation
* **Low latency processing**: Optimized for real-time voice applications
* **Streaming responses**: Enables natural conversation flow
* **Context-aware replies**: Generates relevant responses based on conversation history
* **Adaptive tone matching**: Adjusts communication style to match user preferences
### 3. Enterprise-Grade Reliability
* **Google Cloud infrastructure**: Built on Google's highly available and scalable platform
* **Scalable infrastructure**: Handles high-volume concurrent voice interactions
* **Security compliance**: Enterprise-grade security and data privacy standards
* **Rate limiting management**: Built-in controls for cost optimization
### 4. Advanced AI Capabilities
* **Massive context window**: Up to 1,048,576 tokens (1M) — process entire documents in a single request
* **Multimodal understanding**: Processes text, images, audio, and video inputs
* **Thinking levels**: Configurable reasoning depth (Minimal, Low, Medium, High) on supported models
* **Broad language support**: Native multilingual capabilities across English, Hindi, Gujarati, French, Italian, and Spanish
### Model Selection Guide
Choose the optimal Gemini model based on your voice AI requirements:
#### Gemini 2.5 Flash (Recommended for Production)
* **Best for**: High-quality conversational AI with fast response times
* **Use cases**: Customer service, sales calls, multilingual voice agents
* **Performance**: Best speed and quality balance in the Gemini 2.5 family
* **Cost**: Cost-effective for production-scale deployments
#### Gemini 2.5 Flash Lite (Cost-Effective Option)
* **Best for**: High-volume applications requiring cost optimization
* **Use cases**: Lead qualification, appointment scheduling, basic inquiries
* **Performance**: Lower latency than Gemini 2.0 Flash and 2.0 Flash Lite
* **Cost**: \$0.10 per 1M input tokens — most economical option in the Gemini 2.5 family
#### Gemini 3 Flash (Preview)
* **Best for**: Next-generation voice AI with improved reasoning
* **Use cases**: Long-context conversations, agentic workflows, multimodal tasks
* **Performance**: 168 tokens/sec — released December 2025
* **Cost**: \$0.50 per 1M input tokens
#### Gemini 3.1 Flash Lite (Preview)
* **Best for**: High-throughput workloads demanding speed and cost efficiency
* **Use cases**: Real-time translation, content moderation, data extraction at scale
* **Performance**: 363 tokens/sec, 2.5× faster time-to-first-token — released March 2026
* **Cost**: \$0.25 per 1M input tokens
## Implementation Best Practices
### Optimizing for Voice AI Performance
1. **Prompt Engineering for Voice**
* Design prompts specifically for spoken interactions
* Include context about voice communication style
* Optimize for concise, natural-sounding responses
2. **Context Management**
* Implement conversation memory for multi-turn interactions
* Maintain user preferences across sessions
* Handle interruptions and conversation flow naturally
3. **Error Handling**
* Implement fallback responses for API failures
* Handle rate limiting gracefully
* Provide clear error messages for users
4. **Performance Monitoring**
* Track response times and quality metrics
* Monitor API usage and costs
* Implement logging for debugging and optimization
## Supported Google Gemini Models on Bolna AI
| Model | Context Window | Best Use Case | Relative Cost |
| --------------------------------- | -------------- | ----------------------------------------- | ------------- |
| **gemini-2.5-flash** | 1M tokens | Production voice AI, multilingual agents | Medium |
| **gemini-2.5-flash-lite** | 1M tokens | Cost-effective, high-volume applications | Low |
| **gemini-3-flash-preview** | 1M tokens | Next-gen voice AI, improved reasoning | Medium |
| **gemini-3.1-flash-lite-preview** | 1M tokens | Fastest throughput, high-volume workloads | Low |
## Next Steps
Ready to integrate Google Gemini with your voice AI agent? Start by [configuring your LLM settings in the Playground](/docs/agent-setup/llm-tab) or explore our [API documentation](/docs/api-reference/introduction) for programmatic integration.
For related integrations:
* Configure [transcriber providers](/docs/providers/transcriber/deepgram) for voice input
* Select [voice synthesizers](/docs/providers/voice/elevenlabs) for natural-sounding output
Need help? [Contact our team](mailto:support@bolna.ai) for personalized setup assistance.
# Use OpenAI with Bolna Voice AI
Source: https://www.bolna.ai/docs/providers/llm-model/openai
Build powerful voice AI agents using GPT-4.1, GPT-4o, and GPT-3.5-turbo. Create enterprise-grade conversational AI and LLM-powered voice assistants.
## OpenAI API Integration for Voice AI Applications
[OpenAI's](https://openai.com/) Large Language Models (LLMs) provide state-of-the-art natural language processing capabilities for building intelligent voice AI agents. This comprehensive guide covers OpenAI API integration with Bolna, including authentication, model selection, and implementation best practices for conversational AI applications.
## Why Choose OpenAI Models for Voice AI Agents?
OpenAI's GPT models offer superior performance for voice AI applications through:
### 1. Advanced Natural Language Understanding (NLU)
* **Multi-turn conversation handling**: Maintains context across extended voice interactions
* **Intent recognition**: Accurately identifies user intentions from spoken language
* **Multilingual support**: Processes voice inputs in 50+ languages
* **Semantic understanding**: Comprehends nuanced meaning and context in conversations
### 2. Real-time Response Generation
* **Low latency processing**: Optimized for real-time voice applications
* **Streaming responses**: Enables natural conversation flow
* **Context-aware replies**: Generates relevant responses based on conversation history
* **Adaptive tone matching**: Adjusts communication style to match user preferences
### 3. Enterprise-Grade Reliability
* **99.9% uptime SLA**: Ensures consistent availability for production voice AI systems
* **Scalable infrastructure**: Handles high-volume concurrent voice interactions
* **Security compliance**: SOC 2 Type II certified with enterprise security standards
* **Rate limiting management**: Built-in controls for cost optimization
### 4. Advanced AI Capabilities
* **Function calling**: Integrates with external APIs and databases
* **Code interpretation**: Processes and generates code snippets during conversations
* **Structured output**: Returns JSON responses for seamless integration
* **Custom instructions**: Tailors behavior for specific use cases and industries
### Model Selection Guide
Choose the optimal OpenAI model based on your voice AI requirements:
#### GPT-4.1 (Latest Enhanced Model)
* **Best for**: Applications requiring enhanced reasoning with improved accuracy
* **Use cases**: Complex analysis, advanced problem-solving, detailed conversations
* **Performance**: Superior reasoning capabilities with optimized response times
* **Cost**: Premium pricing for advanced AI capabilities
#### GPT-4o (Recommended for Production)
* **Best for**: High-quality conversational AI with complex reasoning
* **Use cases**: Customer service, sales calls, technical support
* **Performance**: Fastest response times with superior accuracy
* **Cost**: Premium pricing for enterprise applications
#### GPT-4o-mini (Cost-Effective Option)
* **Best for**: High-volume applications requiring cost optimization
* **Use cases**: Lead qualification, appointment scheduling, basic inquiries
* **Performance**: Balanced speed and quality
* **Cost**: 60% lower cost than GPT-4o
#### GPT-4 (Legacy Model)
* **Best for**: Applications requiring maximum reasoning capability
* **Use cases**: Complex problem-solving, detailed analysis
* **Performance**: Highest quality with slower response times
* **Cost**: Higher latency may impact voice experience
#### GPT-3.5-turbo (Budget Option)
* **Best for**: Simple conversational tasks and prototyping
* **Use cases**: Basic chatbots, simple Q\&A systems
* **Performance**: Fast responses with good quality
* **Cost**: Most economical option
## Implementation Best Practices
### Optimizing for Voice AI Performance
1. **Prompt Engineering for Voice**
* Design prompts specifically for spoken interactions
* Include context about voice communication style
* Optimize for concise, natural-sounding responses
2. **Context Management**
* Implement conversation memory for multi-turn interactions
* Maintain user preferences across sessions
* Handle interruptions and conversation flow naturally
3. **Error Handling**
* Implement fallback responses for API failures
* Handle rate limiting gracefully
* Provide clear error messages for users
4. **Performance Monitoring**
* Track response times and quality metrics
* Monitor API usage and costs
* Implement logging for debugging and optimization
## Supported OpenAI Models on Bolna AI
| Model | Context Window | Best Use Case | Relative Cost |
| ----------------- | -------------- | ------------------------------------------ | ------------- |
| **gpt-4.1** | 32K tokens | Enhanced reasoning with improved accuracy | Medium |
| **gpt-4o** | 128K tokens | Production voice AI, complex conversations | High |
| **gpt-4o-mini** | 128K tokens | Cost-effective voice applications | Medium |
| **gpt-4** | 8K tokens | Maximum reasoning capability | High |
| **gpt-3.5-turbo** | 4K tokens | Simple conversations, prototyping | Low |
## Next Steps
Ready to integrate OpenAI with your voice AI agent? Start by [configuring your LLM settings in the Playground](/docs/agent-setup/llm-tab) or explore our [API documentation](/docs/api-reference/introduction) for programmatic integration.
For related integrations:
* Compare with [Azure OpenAI](/docs/providers/llm-model/azure-openai) for enterprise deployments
* Explore [Anthropic Claude models](/docs/providers/llm-model/anthropic) for advanced reasoning
* Configure [transcriber providers](/docs/providers/transcriber/deepgram) for voice input
* Select [voice synthesizers](/docs/providers/voice/elevenlabs) for natural-sounding output
* You can also connect your own OpenAI account and use it with [Bolna AI](https://platform.bolna.ai/auth/openai)
Need help? [Contact our team](mailto:support@bolna.ai) for personalized setup assistance.
# Use OpenRouter with Bolna Voice AI
Source: https://www.bolna.ai/docs/providers/llm-model/openrouter
Learn how to integrate OpenRouter with Bolna Voice AI to access multiple LLM providers like GPT‑4, Claude, Mistral - all via a unified API gateway.
## OpenRouter API Integration for Voice AI Applications
[OpenRouter](https://openrouter.ai) offers a single, unified API gateway to top‑tier Large Language Models (LLMs) from multiple providers such as OpenAI, Anthropic, Mistral, and more. With Bolna Voice AI, you can leverage OpenRouter to seamlessly integrate and switch between models, implement intelligent fallback strategies, and optimize for both performance and cost—all without managing multiple provider integrations.
This guide covers OpenRouter API integration with Bolna, including authentication, model selection, and implementation best practices for advanced voice AI applications.
***
## Why Choose OpenRouter for Voice AI Agents?
OpenRouter unlocks the flexibility to use a variety of cutting‑edge LLMs with additional benefits for conversational AI:
### 1. Unified Access to Multiple LLM Providers
* **One API key**: Access OpenAI, Anthropic, Mistral, and more without juggling multiple credentials
* **Centralized authentication**: Simplifies security and API key management
* **Model variety**: Choose the best model for your specific use case from a wide catalog
### 2. Intelligent Routing and Fallback
* **Custom routing rules**: Select primary, secondary, and backup models for resilience
* **Automatic fallback**: Reduce downtime by switching to alternative models during outages
* **Cost‑aware routing**: Optimize expenses by routing specific requests to lower‑cost models
### 3. Performance and Cost Optimization
* **High‑volume efficiency**: Assign lightweight queries to faster, cheaper models
* **Premium access when needed**: Reserve high‑cost, high‑accuracy models for critical tasks
* **Budget control**: Monitor and manage spend centrally via the OpenRouter dashboard
### 4. Seamless Bolna Integration
* **Voice‑optimized**: Works natively with Bolna’s prompt handling and real‑time streaming
* **Tool support**: Compatible with Bolna function calling, structured output, and action tools
* **Scalable architecture**: Handles production‑level voice AI deployments with ease
***
## Model Selection Guide
Choose the optimal OpenRouter model for your voice AI needs:
#### GPT‑4, GPT-4o & GPT-4.1 family (via OpenRouter)
* **Best for**: Premium, high‑accuracy conversational AI
* **Use cases**: Complex reasoning, customer support, technical assistance
* **Performance**: High‑quality responses with extended context
* **Benefit**: Access without direct OpenAI account management
***
## Implementation Best Practices
### Optimizing for Voice AI Performance
1. **Prompt Engineering for Voice**
* Tailor prompts for spoken interaction styles
* Keep instructions concise yet context‑rich
* Encourage natural‑sounding, conversational output
2. **Routing and Fallback Strategies**
* Define primary and backup models for reliability
* Route by query type—complex queries to GPT‑4, simpler ones to Mistral or Claude
* Test failover scenarios before production deployment
3. **Cost and Latency Management**
* Monitor spend via the OpenRouter dashboard
* Assign high‑volume workloads to cost‑efficient models
* Enable streaming for reduced perceived latency in voice calls
4. **Error Handling and Resilience**
* Implement retries with fallback logic
* Log provider availability to refine routing rules
* Handle rate limits gracefully
***
## Supported OpenRouter Models on Bolna AI
| Model | Context Window | Best Use Case | Key Benefit |
| --------------------------- | -------------- | ---------------------------------------- | -------------------------------- |
| **openrouter/gpt‑4** | \~32K tokens | Premium, high‑accuracy conversations | Access GPT‑4 via unified API |
| **openrouter/gpt‑4o** | \~128K tokens | Real‑time, high‑quality conversations | Faster than GPT‑4 Turbo |
| **openrouter/gpt‑4o-mini** | \~128K tokens | High‑volume, cost‑efficient interactions | Lower cost with balanced quality |
| **openrouter/gpt‑4.1** | \~128K tokens | Complex reasoning, advanced Q\&A | Improved speed and reasoning |
| **openrouter/gpt‑4.1-mini** | \~128K tokens | Mid‑complexity, budget‑friendly tasks | Lower cost with good reasoning |
| **openrouter/gpt‑4.1-nano** | \~128K tokens | Quick, lightweight responses | Fastest, cheapest in 4.1 family |
***
## Next Steps
Ready to integrate OpenRouter with your Bolna voice AI agent?
1. [Sign up for OpenRouter](https://openrouter.ai) and generate your API key
2. Configure Bolna to use `openrouter` as the provider.
For related integrations:
* Select [voice synthesizers](/docs/providers/voice/elevenlabs) for natural-sounding output
* You can also connect your own OpenRouter account and use it with [Bolna AI](https://platform.bolna.ai/auth/openrouter)
> For advanced configuration guidance or help selecting the right models, [contact our team](mailto:support@bolna.ai) or explore our [API reference](/docs/api-reference/introduction).
# AssemblyAI Transcriber (Speech to Text)
Source: https://www.bolna.ai/docs/providers/transcriber/assemblyai
Integrate AssemblyAI with your Bolna Voice AI agents for accurate English transcription with Universal model and real-time streaming.
## 1. What is AssemblyAI STT?
[AssemblyAI](https://www.assemblyai.com/) Speech-to-Text (STT) is an advanced automatic speech recognition platform that uses AI to transcribe spoken English into text with high accuracy. AssemblyAI provides real-time streaming transcription with their Universal model.
AssemblyAI is designed for enterprise-grade applications requiring accurate English transcription with features like speaker diarization, turn-based conversation management, and customizable confidence thresholds, making it ideal for voice agents, customer support systems, and conversational AI applications.
## 2. Key Features of AssemblyAI STT
AssemblyAI offers comprehensive features for enterprise speech recognition:
* **Universal Model**: High-accuracy English speech recognition model with enterprise-grade performance.
* **Real-Time Streaming**: WebSocket-based streaming API with immutable transcripts and turn-based transcription for voice agent applications.
* **Speaker Diarization**: Identify and separate different speakers in English audio streams.
* **Turn-Based Transcription**: Provides speaking turns with unique identifiers, word-level metadata, and configurable silence detection.
* **High Accuracy**: English transcription with enterprise-grade accuracy and low word error rates.
* **Format Flexibility**: Supports PCM16 and Mu-law encoding with configurable sample rates for different telephony providers.
* **Enterprise Features**: Batch and real-time processing, custom vocabulary, confidence scoring, and detailed analytics.
## 3. How Bolna Uses AssemblyAI for STT
Bolna AI integrates AssemblyAI's STT technology to enable accurate multilingual transcription for voice agents. Here's how Bolna leverages AssemblyAI:
* **Real-Time Voice Processing**:
Bolna uses AssemblyAI's streaming WebSocket API (v3) to convert spoken language into text in real time. The immutable transcript feature ensures stable text progression without overwrites.
* **English Voice Agent Support**:
Bolna voice agents use AssemblyAI's streaming API for real-time English transcription with high accuracy and low latency.
* **Turn-Based Conversation Management**:
Bolna leverages AssemblyAI's turn-based transcription to structure conversations, with each speaking turn having unique identifiers for better context management and response generation.
* **Telephony Provider Optimization**:
Bolna automatically configures audio encoding (Mu-law for Twilio, Linear16 for others) and sample rates (8kHz for telephony, 16kHz for web) based on the provider.
* **Streaming and Batch Processing**:
Bolna supports both real-time streaming for live conversations and batch processing for recorded calls, using AssemblyAI's HTTP API for non-streaming scenarios.
* **Enterprise-Grade Reliability**:
Bolna uses AssemblyAI's enterprise features including automatic language detection, confidence thresholds, and detailed latency tracking for production voice applications.
## 4. List of AssemblyAI models supported on Bolna AI
| Model |
| --------- |
| universal |
## 5. Supported Languages
For real-time voice agents, AssemblyAI streaming supports:
* **English** - en
## Conclusion
AssemblyAI's STT capabilities empower Bolna AI to deliver highly accurate, real-time English speech-to-text transcription for voice agents. By integrating AssemblyAI's streaming technology, Bolna provides turn-based conversation management, immutable transcripts, and enterprise-grade reliability for production voice AI applications.
# Azure Transcriber (Speech to Text)
Source: https://www.bolna.ai/docs/providers/transcriber/azure
Integrate Azure Speech-to-Text with Bolna Voice AI for real-time, multilingual, high-accuracy transcriptions and enterprise-grade scalability.
## What is Azure Speech-to-Text?
Azure Speech-to-Text, part of Microsoft Azure Cognitive Services, offers cloud-based automatic speech recognition (ASR). It converts spoken language into text using advanced deep learning models—enabling real-time transcription, batch processing, and support for custom model training. It’s designed to handle enterprise-grade workloads with high accuracy and multi-language capabilities.
## Why choose Azure for speech transcription?
Azure offers a variety of features that make it a leading STT solution:
* **Real-Time Streaming & Batch Transcription**: Supports both low-latency streaming for live interactions and batch processing for recorded files.
* **Speaker Diarization & Language Identification**: Detects speaker turns and identifies languages in multi-party, multilingual scenarios.
* **Noise Reduction**: Advanced noise suppression techniques improve transcription accuracy in challenging audio conditions.
* **Secure & Scalable**: Fully managed service with options for resource control, webhook callbacks, and deployment across regions.
## How does Bolna integrate with Azure Speech-to-Text?
Bolna AI integrates Azure’s STT technology to enable real-time, high-accuracy speech transcription for its AI-powered voice agents. Here’s how Bolna leverages Azure:
* **Live Conversation Transcription**:
Bolna uses Azure's real-time streaming to convert user speech into text with minimal delay, enabling dynamic agent interaction.
* **Multi-Language, Multi-Speaker Context**:
With speaker diarization and language detection, Bolna agents accurately follow multilingual or multi-party calls.
* **Speaker Identification and Context Retention**:
Bolna uses Azure’s speaker diarization capabilities to differentiate between the agent and the caller in conversations. This feature helps in maintaining context and structuring responses effectively.
* **Recording & Post-Call Analysis**:
Bolna supports batch transcription of stored calls via REST, using callbacks/webhooks to asynchronously retrieve results for insights, compliance, and analytics.
## Next steps
Ready to configure Azure Speech-to-Text for your voice AI agent? Start by [setting up your transcriber in the Playground](/docs/agent-setup/audio-tab) or explore our [API documentation](/docs/api-reference/introduction) for programmatic integration.
For related integrations:
* Compare with [Deepgram transcriber](/docs/providers/transcriber/deepgram) for alternative transcription
* Explore [Azure OpenAI](/docs/providers/llm-model/azure-openai) for a complete Azure ecosystem
* Learn about [data residency options](/docs/enterprise/data-residency) for compliance
* Configure [multilingual support](/docs/customizations/multilingual-languages-support) for global agents
* You can also connect your own Azure account and use it with [Bolna AI](https://platform.bolna.ai/auth/azure)
Integrating Azure Speech-to-Text with Bolna empowers voice AI agents to deliver seamless, real-time, and highly accurate transcriptions across diverse languages and speaker scenarios.e.
# Deepgram Transcriber (Speech to Text)
Source: https://www.bolna.ai/docs/providers/transcriber/deepgram
Integrate Deepgram with your Bolna Voice AI agents for fast, accurate streaming transcription. Supports both Nova-3 and Nova-2 speech models.
## What is Deepgram STT?
[Deepgram](https://deepgram.com/) Speech-to-Text (STT) is an advanced automatic speech recognition (ASR) platform that leverages deep learning and artificial intelligence to transcribe spoken language into text with high accuracy.
Deepgram is designed for real-time and batch transcription, making it a powerful solution for applications requiring voice-driven automation, such as virtual assistants, customer support systems, and conversational AI agents.
## Why choose Deepgram for voice AI transcription?
Deepgram offers a variety of features that make it a leading STT solution:
* **High Accuracy**: Deepgram uses deep neural networks trained on diverse datasets, achieving state-of-the-art transcription accuracy even in noisy environments.
* **Low Latency**: Designed for real-time processing, Deepgram provides near-instantaneous transcription, making it ideal for live applications like customer support and interactive voice agents.
* **Multi-Language Support**: It supports multiple languages and dialects, catering to a global audience.
* **Speaker Diarization**: Automatically detects and differentiates between multiple speakers in an audio stream.
* **Noise Reduction**: Advanced noise suppression techniques improve transcription accuracy in challenging audio conditions.
* **Keyword Boosting**: Allows prioritization of specific words or phrases to ensure better recognition of important terms.
* **Cost-Effective**: Compared to traditional ASR solutions, Deepgram offers competitive pricing with high performance and scalability.
## How does Bolna integrate with Deepgram?
Bolna AI integrates Deepgram’s STT technology to enable real-time, high-accuracy speech transcription for its AI-powered voice agents. Here’s how Bolna leverages Deepgram:
* **Real-Time Speech Processing**:
Bolna uses Deepgram's streaming STT API to convert spoken language into text in real time. This allows the AI agent to understand and process user input without significant delays, ensuring a smooth and natural conversation flow.
* **Multilingual Voice Agent Support**:
Given Bolna’s multilingual capabilities, Deepgram's support for various languages ensures that voice interactions can be transcribed accurately, regardless of the language or accent used by the caller.
* **Noise-Resistant Transcription for High Accuracy**:
Bolna agents often handle calls in diverse environments where background noise can be an issue. By leveraging Deepgram’s noise reduction features, Bolna ensures that transcriptions remain accurate, even in challenging conditions.
* **Speaker Identification and Context Retention**:
Bolna uses Deepgram’s speaker diarization capabilities to differentiate between the agent and the caller in conversations. This feature helps in maintaining context and structuring responses effectively.
* **Custom Vocabulary and Industry-Specific Terms**:
Since Bolna AI is used in industries such as recruitment, customer support, and e-commerce, it benefits from Deepgram’s keyword boosting and custom model training to improve recognition of specific industry terms, technical jargon, and company names.
* **Call Recording and Post-Processing**:
In addition to real-time transcription, Bolna also uses Deepgram for batch transcription of recorded calls. These transcriptions are later analyzed for insights, compliance checks, and improving the AI model’s response accuracy.
## Which Deepgram models are supported on Bolna AI?
| Model |
| ----------------------- |
| nova-3 |
| nova-3-medical |
| nova-2 |
| nova-2-atc |
| nova-2-meeting |
| nova-2-phonecall |
| nova-2-finance |
| nova-2-conversationalai |
| nova-2-medical |
| nova-2-drivethru |
| nova-2-automotive |
| Flux (English) |
| Flux (Multilingual) |
## Next steps
Ready to configure Deepgram transcription for your voice AI agent? Start by [setting up your transcriber in the Playground](/docs/agent-setup/audio-tab) or explore our [API documentation](/docs/api-reference/introduction) for programmatic integration.
For related integrations:
* Explore [Azure transcriber](/docs/providers/transcriber/azure) for enterprise deployments
* Compare with [AssemblyAI](/docs/providers/transcriber/assemblyai) for alternative transcription
* Learn about [multilingual support](/docs/customizations/multilingual-languages-support) for global agents
* Configure [LLM providers](/docs/providers/llm-model/openai) to process transcribed text
* You can also connect your own Deepgram account and use it with [Bolna AI](https://platform.bolna.ai/auth/deepgram)
Deepgram's STT capabilities empower Bolna AI to deliver highly accurate, real-time speech-to-text transcription, making voice interactions seamless and efficient.ons.
# Deepgram Flux Transcriber (Speech to Text)
Source: https://www.bolna.ai/docs/providers/transcriber/deepgram-flux
Use Deepgram's next-generation Flux models with Bolna Voice AI agents for ultra-low-latency streaming transcription and intelligent turn detection.
## What is Deepgram Flux?
Deepgram Flux is Deepgram's latest generation of speech-to-text models, purpose-built for real-time conversational AI. Unlike Nova models that rely on external Voice Activity Detection (VAD) for turn boundaries, Flux models have turn detection built directly into the model — producing a richer event stream that lets Bolna start responding sooner and handle barge-ins more accurately.
## Why choose Deepgram Flux for voice AI transcription?
* **Speculative LLM responses**: Bolna can start generating an LLM response on `EagerEndOfTurn` before the speaker has fully stopped, cutting perceived response time significantly.
* **Accurate barge-in detection**: The `StartOfTurn` event fires as soon as speech begins, allowing Bolna to interrupt playback with zero VAD delay.
* **Language Identification (Flux Multi)**: `flux-general-multi` identifies the spoken language per turn and returns it alongside the transcript, enabling dynamic multilingual handling without pre-configuring a language.
* **Configurable turn sensitivity**: End-of-turn thresholds and timeouts are exposed as tunable parameters, so you can balance responsiveness against accuracy for your specific use case.
## Which Deepgram Flux models are supported on Bolna AI?
| Model | Description |
| --------------------- | ------------------------------------------------------------- |
| `Flux (English)` | English-only Flux model optimised for accuracy and latency |
| `Flux (Multilingual)` | Multilingual Flux model with built-in Language Identification |
## Configurable parameters
### EndOfTurn Threshold (`eot_threshold`)
Controls how confident the model must be that the speaker has finished their turn before emitting a final transcript.
| Value | Behaviour |
| ----- | ----------------------------------------------------------- |
| `0.5` | Responds sooner, higher chance of cutting off the speaker |
| `0.7` | **Default** — balanced for most voice agent use cases |
| `0.9` | Waits longer, reduces false endings on incomplete sentences |
**Range:** `0.5` – `0.9` (step `0.05`)
***
### EndOfTurn Timeout (`eot_timeout_ms`)
Maximum silence duration (in milliseconds) the model waits after the last detected speech before forcing an EndOfTurn event. Acts as a safety net when the model's confidence score alone is insufficient.
| Value | Behaviour |
| ------------------- | --------------------------------------------------------- |
| `300 ms` – `900 ms` | Aggressive — good for fast back-and-forth interactions |
| `1 s` | **Default** — works well for most voice agent use cases |
| `2 s` – `3 s` | Patient — useful for agents that ask open-ended questions |
**Options:** `300 ms`, `400 ms`, `500 ms`, `600 ms`, `700 ms`, `800 ms`, `900 ms`, `1 s`, `2 s`, `3 s`
***
### Eager EndOfTurn (`eager_eot_threshold`)
When enabled, Flux emits an `EagerEndOfTurn` event before the final `EndOfTurn`. Bolna uses this to start LLM inference speculatively — if the speaker continues (`TurnResumed`), the speculative request is cancelled; if the speaker stops (`EndOfTurn`), the response is already in flight.
Enable this toggle to activate eager turn detection. When enabled, set the **Eager Threshold**:
| Value | Behaviour |
| ----- | ------------------------------------------------------------------------- |
| `0.3` | Triggers very early — maximum latency reduction, higher cancellation rate |
| `0.5` | **Default** — good balance between speed and accuracy |
| `0.9` | Triggers late — nearly as conservative as standard EndOfTurn |
**Range:** `0.3` – `0.9` (step `0.05`)
Enable Eager EndOfTurn with a threshold of `0.4`–`0.5` for the lowest perceived response latency. If you see frequent mid-sentence interruptions, raise the threshold or disable it.
## Next steps
Ready to configure Deepgram Flux for your voice AI agent? Open the **Audio** tab in the [Bolna Playground](/docs/agent-setup/audio-tab), select `Flux (English)` or `Flux (Multilingual)` as your transcriber model, and tune the parameters above.
For related integrations:
* Compare with [Deepgram Nova](/docs/providers/transcriber/deepgram) for a widely-deployed production alternative
* Learn about [multilingual support](/docs/customizations/multilingual-languages-support) for global agents
* Explore [LLM providers](/docs/providers/llm-model/openai) to process transcribed text
# ElevenLabs Transcriber (Speech to Text)
Source: https://www.bolna.ai/docs/providers/transcriber/elevenlabs
Integrate ElevenLabs Scribe with Bolna Voice AI agents for real-time, low-latency speech transcription. Supports word-level timestamps & VAD-based endpointing.
## What is ElevenLabs Scribe STT?
[ElevenLabs](https://elevenlabs.io/) Scribe is a state-of-the-art real-time speech-to-text (STT) model designed for low-latency transcription in voice AI applications. The Scribe v2 Realtime model delivers accurate transcription across 90 languages with approximately 150ms latency, making it ideal for conversational AI agents, customer support systems, and interactive voice applications.
ElevenLabs Scribe combines advanced deep learning with real-time streaming capabilities, providing precise word-level timestamps, automatic language detection, and intelligent voice activity detection (VAD) for natural conversation flow.
## Why choose ElevenLabs Scribe for voice AI transcription?
ElevenLabs Scribe offers several features that make it a powerful choice for real-time speech recognition:
* **Ultra-Low Latency**: With approximately 150ms latency (excluding network overhead), Scribe v2 Realtime enables natural, responsive conversations without noticeable delays.
* **Extensive Language Support**: Supports 90 languages with high accuracy, making it suitable for global voice AI deployments and multilingual applications.
* **Word-Level Timestamps**: Provides precise timestamps for each transcribed word, enabling accurate synchronization and detailed conversation analysis.
* **Automatic Language Detection**: Detects the spoken language automatically during transcription, supporting code-switching scenarios where speakers switch between languages.
* **VAD-Based Endpointing**: Uses intelligent voice activity detection to determine when a speaker has finished talking, ensuring accurate turn-taking in conversations.
* **High Accuracy**: Achieves industry-leading word error rates, outperforming many competitors on standard benchmarks like FLEURS and Common Voice.
* **Streaming WebSocket API**: Real-time streaming via WebSocket enables continuous transcription as audio is received, perfect for live voice agent interactions.
## How does Bolna integrate with ElevenLabs Scribe?
Bolna AI integrates ElevenLabs Scribe STT technology to enable real-time, high-accuracy speech transcription for its AI-powered voice agents. Here's how Bolna leverages ElevenLabs:
* **Real-Time Voice Processing**:
Bolna uses ElevenLabs' streaming WebSocket API to convert spoken language into text in real time. The low-latency design ensures that AI agents can understand and respond to user input without perceptible delays, creating natural conversation experiences.
* **Multilingual Voice Agent Support**:
With support for 90 languages, Bolna voice agents can handle conversations in virtually any language. The automatic language detection feature allows agents to adapt to the speaker's language dynamically.
* **Intelligent Turn Detection**:
Bolna leverages ElevenLabs' VAD-based commit strategy to accurately detect when users have finished speaking. Configurable silence thresholds (0.3 to 3.0 seconds) allow fine-tuning for different conversation styles and use cases.
* **Telephony Provider Optimization**:
Bolna automatically configures audio encoding based on the telephony provider. For Twilio, it uses mulaw at 8kHz; for Exotel and Plivo, it uses linear16 at 8kHz; and for web-based calls, it uses linear16 at 16kHz for optimal quality.
* **Word-Level Latency Tracking**:
Bolna tracks per-word latency using ElevenLabs' timestamp data, providing detailed analytics on transcription performance and helping optimize voice agent responsiveness.
* **Code-Switching Detection**:
When language detection is enabled, Bolna can identify when speakers switch between languages within a conversation, tracking per-word language breakdown for multilingual scenarios.
## Which ElevenLabs models are supported on Bolna AI?
| Model | Description |
| -------------------- | ------------------------------------------------- |
| scribe\_v2\_realtime | Real-time speech recognition with \~150ms latency |
## Next steps
Ready to configure ElevenLabs transcription for your voice AI agent? Start by [setting up your transcriber in the Playground](/docs/agent-setup/audio-tab) or explore our [API documentation](/docs/api-reference/introduction) for programmatic integration.
For related integrations:
* Compare with [Deepgram transcriber](/docs/providers/transcriber/deepgram) for alternative transcription
* Explore [ElevenLabs synthesizer](/docs/providers/voice/elevenlabs) for a complete ElevenLabs ecosystem
* Learn about [multilingual support](/docs/customizations/multilingual-languages-support) for global agents
* Configure [LLM providers](/docs/providers/llm-model/openai) to process transcribed text
ElevenLabs Scribe STT capabilities empower Bolna AI to deliver highly accurate, real-time speech-to-text transcription with ultra-low latency, making voice interactions seamless and responsive.
# Gladia Transcriber (Speech to Text)
Source: https://www.bolna.ai/docs/providers/transcriber/gladia
Integrate Gladia with Bolna Voice AI agents for real-time multilingual transcription. Supports code-switching, custom vocabulary, and sub-300ms latency.
## What is Gladia STT?
[Gladia](https://www.gladia.io/) is a state-of-the-art audio transcription and intelligence platform that provides real-time speech-to-text capabilities with industry-leading accuracy. Powered by their Solaria ASR model, Gladia delivers transcription with less than 300 milliseconds latency, making it ideal for voice AI agents, contact centers, and real-time communication applications.
Gladia combines advanced speech recognition with audio intelligence features like sentiment analysis, named entity recognition, and automatic language detection, providing a comprehensive solution for voice-driven applications.
## Why choose Gladia for voice AI transcription?
Gladia offers several features that make it a powerful choice for real-time speech recognition:
* **Ultra-Low Latency**: With sub-300ms latency, Gladia enables natural, responsive conversations without noticeable delays, essential for voice AI agents and real-time applications.
* **Extensive Language Support**: Supports over 100 languages interchangeably, making it suitable for global deployments and multilingual customer interactions.
* **Code-Switching Support**: Handles seamless language switching within conversations, accurately transcribing when speakers alternate between languages like English and Hindi (Hinglish) or other language combinations.
* **Custom Vocabulary**: Allows boosting recognition of specific words, phrases, brand names, or industry-specific terminology to improve accuracy for specialized use cases.
* **Native Mulaw Support**: Directly supports mulaw audio encoding used by Twilio, eliminating the need for audio conversion and reducing latency in telephony applications.
* **Audio Enhancement**: Built-in audio preprocessing improves transcription accuracy in challenging conditions with background noise or poor audio quality.
* **Configurable Endpointing**: Adjustable silence detection thresholds allow fine-tuning for different conversation styles and turn-taking patterns.
* **Sentiment Analysis**: Real-time sentiment detection helps understand caller emotions and enables dynamic agent responses.
## How does Bolna integrate with Gladia?
Bolna AI integrates Gladia's STT technology to enable real-time, high-accuracy speech transcription for its AI-powered voice agents. Here's how Bolna leverages Gladia:
* **Real-Time Voice Processing**:
Bolna uses Gladia's streaming WebSocket API to convert spoken language into text in real time. The two-step connection process (session creation followed by WebSocket connection) ensures reliable, authenticated streaming with optimal performance.
* **Multilingual Voice Agent Support**:
With support for over 100 languages, Bolna voice agents can handle conversations in virtually any language. When code-switching is enabled, agents can accurately transcribe conversations where speakers switch between languages.
* **Telephony Provider Optimization**:
Bolna automatically configures audio encoding based on the telephony provider. For Twilio, it uses native mulaw at 8kHz (wav/ulaw); for Exotel and Plivo, it uses linear16 at 8kHz; and for web-based calls, it uses linear16 at 16kHz for optimal quality.
* **Audio Enhancement for Telephony**:
Bolna enables Gladia's audio enhancer for telephony providers (Twilio, Exotel, Plivo) to improve transcription accuracy in real-world call conditions with background noise and varying audio quality.
* **Custom Vocabulary Integration**:
Bolna supports passing custom vocabulary keywords to Gladia, allowing voice agents to accurately recognize company names, product names, and industry-specific terminology.
* **Intelligent Turn Detection**:
Bolna leverages Gladia's configurable endpointing to accurately detect when users have finished speaking. The endpointing threshold can be adjusted to balance responsiveness with accuracy for different conversation styles.
* **Code-Switching for Multilingual Markets**:
For markets like India where code-switching is common, Bolna configures Gladia to recognize both the primary language and English, enabling accurate transcription of mixed-language conversations.
## Which Gladia models are supported on Bolna AI?
| Model | Description |
| ------- | ---------------------------------------------------- |
| Solaria | Universal real-time STT model with sub-300ms latency |
Gladia's Solaria model is the default and recommended model for real-time voice agent applications.
## Next steps
Ready to configure Gladia transcription for your voice AI agent? Start by [setting up your transcriber in the Playground](/docs/agent-setup/audio-tab) or explore our [API documentation](/docs/api-reference/introduction) for programmatic integration.
For related integrations:
* Compare with [Deepgram transcriber](/docs/providers/transcriber/deepgram) for alternative transcription
* Explore [Azure transcriber](/docs/providers/transcriber/azure) for enterprise deployments
* Learn about [multilingual support](/docs/customizations/multilingual-languages-support) for global agents
* Configure [LLM providers](/docs/providers/llm-model/openai) to process transcribed text
Gladia's STT capabilities empower Bolna AI to deliver highly accurate, real-time speech-to-text transcription with ultra-low latency and comprehensive multilingual support, making voice interactions seamless across global markets.
# OpenAI Realtime Transcriber (Speech to Text)
Source: https://www.bolna.ai/docs/providers/transcriber/openai
Integrate OpenAI's Realtime transcription API with Bolna Voice AI agents for low-latency, streaming speech recognition using GPT Realtime Whisper.
## What is OpenAI Realtime STT?
[OpenAI's Realtime API](https://platform.openai.com/docs/guides/realtime-transcription) provides a WebSocket-based streaming speech-to-text service. Unlike batch transcription, audio is streamed continuously and transcripts are returned with low latency as the caller speaks, making it well-suited for live voice agent conversations.
## Why choose OpenAI Realtime for voice AI transcription?
* **Ultra-low latency**: Streams audio and returns interim transcript deltas as the caller speaks, with final results delivered on turn boundaries.
* **Built-in server VAD**: `GPT Realtime Whisper` has voice activity detection built in — it automatically detects speech start and end without any manual configuration.
* **Streaming interim transcripts**: Partial transcripts arrive as the caller is still speaking, giving your agent an early signal to start processing.
* **Optional noise reduction**: Near-field noise reduction can be enabled to improve accuracy in office or call-centre environments.
* **Delay tuning**: The `delay` parameter lets you trade off transcription latency against accuracy — useful for noisy environments or accented speech.
## Which OpenAI models are supported?
| Model | Description |
| ---------------------- | --------------------------------------------------------------------------------------------- |
| `GPT Realtime Whisper` | GA streaming transcription model. Natively designed for real-time sessions with built-in VAD. |
## Configurable parameters
These parameters appear in the **Audio** tab of the Bolna Playground when OpenAI is selected as the transcriber provider.
### Transcription Delay (`delay`)
Controls the trade-off between transcription speed and accuracy. A lower delay emits results sooner; a higher delay gives the model more audio context before committing to a transcript.
| Value | Behaviour |
| --------- | -------------------------------------------------------- |
| `minimal` | Fastest — best for simple, clean audio |
| `low` | Low latency with good accuracy |
| `medium` | **Default** — balanced for most use cases |
| `high` | Higher accuracy — useful for accents or background noise |
| `xhigh` | Maximum accuracy — highest latency |
### Noise Reduction
Toggle on to enable near-field noise reduction. Recommended for call-centre or office environments where background noise is common.
## Supported languages
`GPT Realtime Whisper` supports a wide range of languages. Pass the ISO 639-1 code as the `language` parameter when configuring the transcriber.
Common supported languages include: `en`, `es`, `fr`, `de`, `hi`, `pt`, `ja`, `it`, `nl`, `zh`, `ko`, `ar`, `ru`.
## Next steps
Ready to configure OpenAI transcription for your voice AI agent? Open the **Audio** tab in the [Bolna Playground](/docs/agent-setup/audio-tab), select `openai` as the transcriber provider and `GPT Realtime Whisper` as the model, then tune the parameters above.
For related integrations:
* Compare with [Deepgram Flux](/docs/providers/transcriber/deepgram-flux) for an alternative with configurable turn detection
* Compare with [Deepgram Nova](/docs/providers/transcriber/deepgram) for a widely-deployed production alternative
* Learn about [multilingual support](/docs/customizations/multilingual-languages-support) for global agents
# Pixa Transcriber (Speech to Text)
Source: https://www.bolna.ai/docs/providers/transcriber/pixa
Integrate Pixa with Bolna Voice AI agents for accurate Hindi speech transcription. Optimized for Indian language recognition with real-time streaming support.
## What is Pixa STT?
[Pixa](https://heypixa.ai/) (HeyPixa) is a speech-to-text platform specifically optimized for Hindi and Indian language transcription. Pixa provides real-time streaming transcription through a WebSocket API, making it ideal for voice AI agents serving Indian markets where accurate Hindi recognition is essential.
Pixa's models are trained on diverse Hindi datasets, enabling high accuracy for regional accents, conversational speech patterns, and the natural variations found in spoken Hindi across different regions of India.
## Why choose Pixa for voice AI transcription?
Pixa offers several features that make it a strong choice for Hindi speech recognition:
* **Hindi Language Expertise**: Pixa's models are specifically optimized for Hindi transcription, delivering high accuracy for native Hindi speakers and various regional accents.
* **Real-Time Streaming**: WebSocket-based streaming API provides continuous transcription as audio is received, enabling responsive voice agent interactions.
* **Multiple Audio Encodings**: Supports linear16, linear32, mulaw, and alaw audio encodings, ensuring compatibility with various telephony providers and audio sources.
* **Multiple Model Options**: Offers both the native pixa-1 model optimized for Hindi and a whisper-1 model for broader language support.
* **Low Latency Design**: Designed for real-time applications with minimal delay between speech and transcription output.
* **Telephony Integration**: Native support for common telephony audio formats makes integration with Twilio, Exotel, and Plivo straightforward.
## How does Bolna integrate with Pixa?
Bolna AI integrates Pixa's STT technology to enable real-time Hindi speech transcription for its AI-powered voice agents. Here's how Bolna leverages Pixa:
* **Real-Time Hindi Voice Processing**:
Bolna uses Pixa's streaming WebSocket API to convert Hindi speech into text in real time. This enables AI agents to understand and respond to Hindi-speaking users without noticeable delays.
* **Hindi Market Voice Agents**:
For businesses serving Indian customers, Pixa's Hindi-optimized transcription ensures accurate understanding of customer queries, names, addresses, and other Hindi content that general-purpose transcribers might struggle with.
* **Telephony Provider Optimization**:
Bolna automatically configures audio encoding based on the telephony provider. For Twilio, it uses mulaw at 8kHz; for Exotel and Plivo, it uses linear16 at 8kHz; and for web-based calls, it uses linear16 at 16kHz.
* **Intelligent Turn Detection**:
Since Pixa relies on final transcript markers rather than VAD events, Bolna implements intelligent turn detection based on the is\_final flag, with configurable timeout handling for edge cases.
* **Utterance Timeout Handling**:
Bolna monitors for stuck utterances and implements force-finalization when transcripts don't receive final confirmation within the configured timeout, ensuring conversations continue smoothly.
* **Connection Management**:
Bolna handles WebSocket connection lifecycle including authentication, heartbeat messages, and graceful disconnection to ensure reliable transcription throughout calls.
## Which Pixa models are supported on Bolna AI?
| Model | Description |
| --------- | --------------------------------------------------------- |
| pixa-1 | Native Hindi-optimized speech recognition model (default) |
| whisper-1 | Whisper-based model for broader language support |
## Next steps
Ready to configure Pixa transcription for your Hindi voice AI agent? Start by [setting up your transcriber in the Playground](/docs/agent-setup/audio-tab) or explore our [API documentation](/docs/api-reference/introduction) for programmatic integration.
For related integrations:
* Compare with [Sarvam transcriber](/docs/providers/transcriber/sarvam) for comprehensive Indian language support
* Explore [Deepgram transcriber](/docs/providers/transcriber/deepgram) for multilingual alternatives
* Learn about [multilingual support](/docs/customizations/multilingual-languages-support) for global agents
* Configure [LLM providers](/docs/providers/llm-model/openai) to process transcribed text
Pixa's Hindi-optimized STT capabilities empower Bolna AI to deliver accurate, real-time speech-to-text transcription for Indian market voice agents, ensuring seamless Hindi conversations with high recognition accuracy.
# Sarvam Transcriber (Speech to Text)
Source: https://www.bolna.ai/docs/providers/transcriber/sarvam
Integrate Sarvam with your Bolna Voice AI agents for accurate Indian language transcription. Supports 11 Indian languages with Saarika and Saaras speech models.
## 1. What is Sarvam STT?
[Sarvam](https://sarvam.ai/) Speech-to-Text (STT) is an advanced automatic speech recognition (ASR) platform specifically designed for Indian languages. Sarvam specializes in understanding regional accents, code-mixed speech, and multilingual conversations common in the Indian subcontinent.
Sarvam's "Saarika" and "Saaras" models are built for real-time transcription with a focus on Indian language accuracy. Saarika provides transcription in the original language, while Saaras offers direct speech-to-English translation with automatic language detection, making them ideal solutions for voice-driven applications serving Indian markets.
## 2. Key Features of Sarvam STT
Sarvam offers specialized features for Indian language transcription:
* **Indian Language Expertise**: Deep neural networks specifically trained on diverse Indian language datasets, achieving high accuracy for regional accents and code-mixed speech patterns.
* **Real-Time Processing**: Designed for streaming transcription with low latency, enabling natural conversation flow in live applications.
* **Code-Mixed Speech Recognition**: Excels at understanding code-mixed languages, handling seamless switches between English and Indian languages within conversations.
* **Multilingual Support**: Supports 10 Indian languages including Hindi, Bengali, Tamil, Telugu, Gujarati, Kannada, Malayalam, Marathi, Punjabi, Odia, plus English (India).
* **Speaker Diarization**: Identifies and separates different speakers in audio streams for better conversation structure.
* **Voice Activity Detection**: Advanced VAD capabilities with configurable sensitivity levels for better speech boundary detection.
* **Automatic Language Detection**: Can automatically detect the spoken language when configured with "unknown" language code.
* **WebSocket Streaming**: Real-time streaming API for continuous speech recognition with immediate results and timestamp support.
## 3. How Bolna Uses Sarvam for STT
Bolna AI integrates Sarvam's STT technology to enable high-accuracy Indian language transcription for voice agents. Here's how Bolna leverages Sarvam:
* **Real-Time Indian Language Processing**:
Bolna uses Sarvam's streaming STT API to convert Indian language speech into text in real time. This enables AI agents to understand and process user input in regional languages without delays.
* **Regional Language Voice Agent Support**:
With Sarvam's specialized Indian language support, Bolna voice agents can handle conversations in Hindi, Bengali, Tamil, Telugu, and other regional languages with high accuracy.
* **Accent-Aware Transcription**:
Bolna leverages Sarvam's training on diverse Indian accents and speaking patterns to ensure accurate transcription across different regions and demographics.
* **Voice Activity Detection for Better Accuracy**:
Bolna uses Sarvam's VAD capabilities to detect speech boundaries accurately, improving conversation flow and reducing false transcriptions from background noise.
* **Indian Market Optimization**:
Since Bolna serves businesses across India, Sarvam's focus on Indian languages and accents ensures better customer experience for regional market deployments.
* **Code-Switching Support**:
Sarvam handles mixed language conversations common in India, where speakers switch between English and regional languages within the same conversation.
## 4. List of Sarvam models supported on Bolna AI
| Model | Description |
| ------------ | ------------------------------------------------------------------------------------ |
| saarika:v2.5 | Speech-to-text transcription in original language |
| saaras:v2.5 | Speech-to-English translation with automatic language detection |
| saaras:v3 | Speech-to-text transcription in original language (configured for STT transcription) |
## 5. Supported Languages
All Sarvam transcriber models support the following 11 languages:
* **English (India)** - en-IN
* **Hindi** - hi-IN
* **Bengali** - bn-IN
* **Tamil** - ta-IN
* **Telugu** - te-IN
* **Gujarati** - gu-IN
* **Kannada** - kn-IN
* **Malayalam** - ml-IN
* **Marathi** - mr-IN
* **Punjabi** - pa-IN
* **Odia** - od-IN
**Model Differences:**
* **Saarika v2.5**: Transcribes speech to text in the original spoken language
* **Saaras v2.5**: Translates speech directly to English text with automatic language detection
* **Saaras v3**: Configured for direct transcription in the original spoken language
Note: All models excel at code-mixed speech where speakers seamlessly switch between English and any of the supported Indian languages within the same conversation.
## Conclusion
Sarvam's STT capabilities empower Bolna AI to deliver highly accurate, real-time speech-to-text transcription for Indian languages, making voice interactions seamless for regional markets. By integrating Sarvam's specialized ASR technology, Bolna enhances its ability to process diverse Indian accents, handle code-switching scenarios, and understand complex multilingual conversations, thereby improving the overall performance and reliability of its voice AI solutions for the Indian market.
For related integrations:
* You can also connect your own Sarvam account and use it with [Bolna AI](https://platform.bolna.ai/auth/sarvam)
# AWS Polly Text to Speech with Bolna Voice AI agents
Source: https://www.bolna.ai/docs/providers/voice/aws-polly
Learn how to integrate and use AWS Polly TTS with Bolna Voice AI agents including Amazon's neural, generative and standard models.
## What is AWS Polly TTS?
[AWS Polly](https://aws.amazon.com/polly/) is a cloud-based text-to-speech (TTS) service powered by Amazon Web Services (AWS). It uses deep learning technologies to convert text into natural-sounding speech, making it ideal for applications requiring high-quality voice synthesis.
AWS Polly supports a wide range of languages and voices, offering both **standard TTS** and **neural TTS (NTTS)**, which enhances the realism of speech output. Designed for real-time and batch processing, AWS Polly enables applications to deliver engaging voice experiences across various industries, including customer service, e-learning, and automated assistants.
## Why choose AWS Polly for voice synthesis?
AWS Polly offers several advanced features that make it a powerful choice for AI-driven voice applications:
**Natural-Sounding Speech**: Utilizes neural TTS (NTTS) to enhance realism, reducing robotic-sounding speech.
**Multiple Languages and Voices**: Supports a wide range of languages and accents, allowing for global reach.
**Real-Time Speech Synthesis**: Generates speech quickly with low latency, making it suitable for interactive applications.
**Neural and Standard TTS Options**: Offers high-quality neural TTS as well as cost-effective standard TTS for scalable deployment.
## How does Bolna integrate with AWS Polly TTS?
Bolna AI integrates AWS Polly’s TTS capabilities to deliver high-quality, real-time speech synthesis for its voice AI agents. Here’s how Bolna leverages AWS Polly:
**Generating Lifelike Speech for Voice AI Agents**:
Bolna AI uses AWS Polly to convert AI-generated text responses into human-like speech, ensuring a more natural interaction experience for users.
**Low-Latency Voice Synthesis for Real-Time Conversations**:
With AWS Polly’s low-latency capabilities, Bolna AI ensures real-time speech generation, allowing its voice agents to respond without noticeable delays.
**Multilingual and Accent Customization**:
AWS Polly’s extensive language and voice options allow Bolna AI to cater to a global audience by providing speech output in multiple languages and accents.
**Scalable and Cost-Effective Deployment**:
As a cloud-based service, AWS Polly allows Bolna AI to scale its voice synthesis needs based on demand while maintaining cost efficiency.
## What AWS Polly TTS models are supported?
Bolna supports the following AWS Polly TTS models:
| Model |
| ---------- |
| neural |
| generative |
| standard |
## Next steps
Ready to configure AWS Polly voices for your voice AI agent? Start by [setting up your synthesizer in the Playground](/docs/agent-setup/engine-tab) or explore our [API documentation](/docs/api-reference/introduction) for programmatic integration.
For related integrations:
* Compare with [ElevenLabs voices](/docs/providers/voice/elevenlabs) for alternative synthesis
* Explore [Azure TTS](/docs/providers/voice/azure) for Microsoft ecosystem integration
* Review [Deepgram voices](/docs/providers/voice/deepgram) for low-latency options
* Configure [multilingual support](/docs/customizations/multilingual-languages-support) for global reach
AWS Polly's TTS capabilities enhance Bolna AI's ability to deliver realistic, engaging, and highly responsive voice interactions. AI.
# Azure Text to Speech with Bolna Voice AI agents
Source: https://www.bolna.ai/docs/providers/voice/azure
Integrate Microsoft Azure Text-to-Speech with Bolna to create natural, expressive Voice AI agents. Supports neural voices and multilingual output.
## What is Azure TTS?
Azure Text-to-Speech (TTS) is a cloud-based speech synthesis service offered by Microsoft as part of its Azure Cognitive Services. It uses advanced deep learning models to generate realistic and natural-sounding speech from text. Designed for enterprise-grade applications, Azure TTS enables businesses to create interactive voice experiences, enhance accessibility, and automate customer interactions with high-fidelity voice output.
Azure TTS provides **neural voice synthesis**, offering near-human pronunciation, tone, and emotion control. This technology is widely used in virtual assistants, automated call centers, media narration, and real-time conversational AI applications.
## Why choose Azure for voice synthesis?
Azure Text-to-Speech stands out with the following capabilities:
**Neural TTS for Human-Like Speech**: Uses deep neural networks to create speech that closely mimics human intonation and expressiveness.
**Extensive Language & Voice Support**: Supports over 140 languages and multiple voice options, making it a powerful tool for global reach.
**Real-Time & Batch Processing**: Enables both live interaction and bulk conversion of text to speech.
**AI-Driven Emotion Infusion**: Adjusts emotional expression in speech (e.g., happy, neutral, sad) to improve engagement.
**Latency-Optimized Speech Processing**: Ensures minimal lag, making it suitable for real-time conversational AI applications.
## How does Bolna integrate with Azure TTS?
Bolna AI integrates Azure Text-to-Speech to deliver high-quality, human-like speech output for its AI-driven voice agents. Azure TTS enhances Bolna’s ability to conduct seamless, engaging, and contextually aware voice interactions. Here’s how Bolna leverages this technology:
**Lifelike Speech for Interactive AI Conversations**:
Azure’s Neural TTS allows Bolna AI to generate speech that mirrors human conversation patterns, improving user experience and making voice AI interactions more natural.
**Multi-Language and Multimodal Conversational AI**:
Since Bolna serves a global user base, Azure’s extensive language and accent library helps deliver culturally relevant and clear speech output tailored to different regions.
**Adaptive Speech Based on User Interaction**:
Azure TTS enables Bolna AI to modify speech output dynamically based on conversational context. For instance, the AI can adjust intonation when emphasizing key details in recruitment interviews or customer support interactions.
**Emotionally Intelligent Voice AI**:
By leveraging Azure’s emotion-infused speech synthesis, Bolna AI ensures that the voice agent sounds empathetic, enthusiastic, or neutral based on the conversation’s nature. This is especially useful in customer service and human resource automation.
**Enhanced Pronunciation for Industry-Specific Terms**:
Azure’s custom lexicons and SSML-based pronunciation adjustments help Bolna AI deliver precise pronunciation for technical terms, job roles, and company names, ensuring clarity in voice interactions.
**Real-Time Speech Output for Seamless Conversations**:
Azure’s low-latency synthesis ensures that Bolna AI voice agents can provide instant responses, making them highly effective in real-time support scenarios such as call handling, interview assistance, and virtual customer service.
## Next steps
Ready to configure Azure voices for your voice AI agent? Start by [setting up your synthesizer in the Playground](/docs/agent-setup/engine-tab) or explore our [API documentation](/docs/api-reference/introduction) for programmatic integration.
For related integrations:
* Combine with [Azure Speech-to-Text](/docs/providers/transcriber/azure) for complete Azure integration
* Compare with [ElevenLabs voices](/docs/providers/voice/elevenlabs) for alternative synthesis
* Explore [Azure OpenAI](/docs/providers/llm-model/azure-openai) for enterprise LLM deployment
* Configure [multilingual support](/docs/customizations/multilingual-languages-support) for global reach
* You can also connect your own Azure account and use it with [Bolna AI](https://platform.bolna.ai/auth/azure)
Azure TTS plays a crucial role in enhancing Bolna AI's voice-driven experiences, offering superior speech quality, multilingual support, real-time processing, and brand customization.ide.
# Cartesia Text to Speech with Bolna Voice AI agents
Source: https://www.bolna.ai/docs/providers/voice/cartesia
Enable Cartesia voices in Bolna Voice AI agents for expressive, customizable AI voices using their latest voice models for multilingual Indian voices.
## What is Cartesia text-to-speech API?
[Cartesia](https://cartesia.ai/) is a state-of-the-art text-to-speech (TTS) API that generates high-fidelity, natural-sounding speech for AI voice applications. Cartesia uses advanced neural network models to replicate human speech patterns, delivering expressive and realistic audio output that enhances user engagement in conversational AI systems.
Cartesia TTS API is optimized for real-time voice synthesis with ultra-low latency, making it ideal for AI voice assistants, virtual customer support agents, conversational AI chatbots, and automated business communication systems. The platform offers multilingual voice support, customizable voice characteristics, and high-quality prosody that adapts to different use cases including customer service automation, sales outreach, appointment scheduling, and interactive voice response (IVR) systems.
## Why use Cartesia TTS for AI voice agents?
Cartesia text-to-speech API offers powerful capabilities that make it an excellent choice for building conversational AI applications and voice automation systems:
**Ultra-low latency voice synthesis**: Cartesia delivers real-time speech generation with minimal delay, ensuring natural conversation flow in AI voice assistants and customer support bots. This low-latency performance is critical for interactive applications where response time directly impacts user experience.
**Natural-sounding neural voices**: Powered by advanced deep learning models, Cartesia produces human-like speech with natural prosody, intonation, and emotional expression. The neural TTS technology creates voices that sound authentic and engaging, improving user trust and satisfaction in AI interactions.
**Multilingual and accent support**: Cartesia supports multiple languages and regional accents, enabling businesses to deploy AI voice agents for global audiences. This multilingual capability is essential for international customer support, sales automation, and localized voice experiences.
**Customizable voice characteristics**: Businesses can fine-tune voice parameters to match their brand identity and use case requirements. Adjust speaking rate, pitch, and emotional tone to create distinct voice personas for different AI agent roles.
**Scalable API infrastructure**: Cartesia's cloud-based TTS API scales automatically to handle high-volume voice synthesis requests, making it suitable for enterprise-grade conversational AI deployments and large-scale voice automation campaigns.
**Sonic model family**: Cartesia's Sonic models, including the latest sonic-3-preview, deliver state-of-the-art voice quality with improved naturalness and expressiveness for demanding voice AI applications.
## How to integrate Cartesia TTS with Bolna voice AI agents
Bolna provides seamless integration with Cartesia's text-to-speech API, enabling you to build sophisticated AI voice agents with natural-sounding speech synthesis. The integration supports real-time voice generation for various conversational AI use cases.
### Use cases for Cartesia voice synthesis in Bolna
**AI customer support automation**: Deploy Cartesia-powered voice agents that handle customer inquiries with empathetic, professional speech. The natural voice quality helps build trust and improves customer satisfaction in automated support interactions.
**Sales and lead qualification bots**: Create AI sales agents with persuasive, engaging voices that can conduct outbound calls, qualify leads, and schedule appointments. Cartesia's expressive speech synthesis makes automated sales conversations feel more human and authentic.
**Appointment scheduling and reminders**: Build voice AI systems that handle appointment booking, confirmations, and reminders with clear, friendly speech. The low-latency synthesis ensures smooth, real-time conversations.
**Healthcare voice assistants**: Develop HIPAA-compliant voice agents for patient intake, appointment scheduling, and health information delivery. Cartesia's natural voices create comfortable, trustworthy interactions in healthcare settings.
**E-commerce and order management**: Implement AI voice agents that assist with product inquiries, order tracking, and customer service. The multilingual support enables global e-commerce voice automation.
**Survey and feedback collection**: Automate survey calls and feedback collection with conversational AI agents that use natural speech to improve response rates and data quality.
### Cartesia voice configuration in Bolna
Bolna supports flexible configuration of Cartesia TTS parameters including voice selection, speaking rate, and language settings. You can configure Cartesia voices through the Bolna Playground interface or programmatically via the API for custom voice AI agent deployments.s.
## Supported Cartesia TTS models
Bolna supports the following Cartesia text-to-speech models for AI voice synthesis:
| Model | Description |
| ----------------- | -------------------------------------------------------------------- |
| `sonic` | High-quality neural TTS model optimized for natural speech synthesis |
| `sonic-3-preview` | Latest preview model with enhanced voice quality and expressiveness |
The Cartesia Sonic model family provides state-of-the-art voice synthesis with low latency and natural prosody. The sonic-3-preview model offers improved speech quality and is recommended for applications requiring the highest level of voice naturalness.
## Getting started with Cartesia TTS integration
Ready to build AI voice agents with Cartesia text-to-speech? You can configure Cartesia voices through the [Bolna Playground](/docs/agent-setup/engine-tab) for quick testing or use the [Bolna API](/docs/api-reference/introduction) for programmatic integration in production applications.
To connect your own Cartesia API account, visit the [Cartesia integration page](https://platform.bolna.ai/auth/cartesia) in your Bolna dashboard.
### Compare voice synthesis providers
Explore alternative TTS providers to find the best fit for your AI voice agent requirements:
* [ElevenLabs TTS](/docs/providers/voice/elevenlabs) - Premium voice cloning and expressive synthesis
* [Deepgram TTS](/docs/providers/voice/deepgram) - Ultra-low latency voice generation
* [AWS Polly](/docs/providers/voice/aws-polly) - Cost-effective cloud-based speech synthesis
* [Azure TTS](/docs/providers/voice/azure) - Enterprise-grade multilingual voices
### Related documentation
* [Configure multilingual support](/docs/customizations/multilingual-languages-support) for global voice AI deployments
* [Voice AI agent configuration](/docs/agent-setup/engine-tab) in the Bolna Playground
* [API reference](/docs/api-reference/introduction) for programmatic voice agent creation
Cartesia TTS integration enables Bolna to deliver natural, expressive, and low-latency voice synthesis for conversational AI applications across customer support, sales automation, healthcare, and more.
# Deepgram Text to Speech with Bolna Voice AI agents
Source: https://www.bolna.ai/docs/providers/voice/deepgram
Integrate and use your Bolna Voice AI agents with high-quality neural voices from Deepgram for natural, human-like conversational experiences.
## What is Deepgram TTS?
[Deepgram](https://deepgram.com/) Text-to-Speech (TTS) is an AI-driven speech synthesis technology designed to generate highly realistic, human-like voices. Built using deep learning models, Deepgram TTS offers natural-sounding speech output with expressive intonations, making it suitable for applications that require high-quality voice interactions.
Deepgram TTS is optimized for real-time processing and supports multiple languages, accents, and emotions, allowing businesses to deliver personalized and engaging voice experiences. Compared to traditional TTS solutions, Deepgram leverages end-to-end neural speech synthesis, reducing latency and improving the naturalness of generated speech.
## Why choose Deepgram for voice synthesis?
Deepgram TTS provides several advanced features that enhance voice AI applications:
**Human-Like Speech Output**: Produces clear, natural, and expressive speech that closely mimics human intonation and pacing.
**Real-Time Speech Generation**: Optimized for low-latency responses, ensuring a seamless conversational flow.
**Multilingual and Accent Support**: Provides high-quality speech synthesis in multiple languages, allowing for global reach.
**Noise Reduction & Clarity Enhancement**: Ensures crisp and intelligible speech output even in challenging audio environments.
## How does Bolna integrate with Deepgram TTS?
Bolna AI integrates Deepgram’s TTS technology to power its voice AI agents, enabling them to deliver lifelike speech responses during conversations. Here’s how Bolna leverages Deepgram TTS:
**Generating High-Quality Speech for AI Conversations**:
Bolna AI utilizes Deepgram TTS to convert AI-generated text responses into natural-sounding speech. This enables voice agents to interact seamlessly with users, improving engagement and usability.
**Real-Time Voice Synthesis for Smooth Interactions**:
With Deepgram’s low-latency processing, Bolna AI ensures real-time speech synthesis, eliminating delays and making voice interactions feel more natural and responsive.
**Multilingual and Accent Adaptation for Global Users**:
Bolna AI serves customers across different regions, requiring multilingual voice capabilities. Deepgram’s support for multiple languages and accents allows Bolna to offer voice AI solutions tailored to diverse user bases.
**Emotionally Expressive Speech for Personalized Interactions**:
Bolna AI leverages Deepgram’s emotion control feature to adjust the tone and expressiveness of speech output. This ensures that AI responses sound more engaging and contextually appropriate, whether for customer support, recruitment, or e-commerce applications.
**Handling Complex Pronunciations and Technical Terms**:
Deepgram TTS helps Bolna AI correctly pronounce names, technical jargon, and industry-specific terminology, ensuring clarity and accuracy in conversations.
## What Deepgram TTS models are supported?
Bolna supports the following Deepgram TTS models:
| Model |
| ------ |
| aura |
| aura-2 |
## Next steps
Ready to configure Deepgram voices for your voice AI agent? Start by [setting up your synthesizer in the Playground](/docs/agent-setup/engine-tab) or explore our [API documentation](/docs/api-reference/introduction) for programmatic integration.
For related integrations:
* Compare with [ElevenLabs voices](/docs/providers/voice/elevenlabs) for alternative synthesis
* Combine with [Deepgram transcriber](/docs/providers/transcriber/deepgram) for complete Deepgram integration
* Explore [Azure TTS](/docs/providers/voice/azure) for enterprise deployment
* Configure [multilingual support](/docs/customizations/multilingual-languages-support) for global reach
* You can also connect your own Deepgram account and use it with [Bolna AI](https://platform.bolna.ai/auth/deepgram)
Deepgram's advanced TTS technology enhances Bolna AI's ability to deliver realistic, engaging, and context-aware speech output in voice-driven applications.ive.
# ElevenLabs Text to Speech with Bolna Voice AI agents
Source: https://www.bolna.ai/docs/providers/voice/elevenlabs
Enhance your Bolna Voice AI agents using ElevenLabs ultra-realistic voices, featuring multilingual support through the latest Turbo and Flash models.
## What is ElevenLabs TTS?
[ElevenLabs](https://elevenlabs.io/) Text-to-Speech (TTS) is an advanced AI-powered speech synthesis platform designed to generate high-quality, natural-sounding voices. Using deep learning models, ElevenLabs replicates human-like speech with remarkable accuracy, making it an ideal solution for applications requiring realistic voice interactions.
Unlike traditional TTS systems that rely on rule-based or concatenative synthesis, ElevenLabs leverages deep neural networks to analyze and generate speech in a way that mimics human intonation, pacing, and expressiveness. This makes it particularly useful for AI-driven applications such as virtual assistants, audiobooks, dubbing, and interactive voice agents.
## Why choose ElevenLabs for voice synthesis?
ElevenLabs offers several cutting-edge features that set it apart from traditional text-to-speech engines:
* **Human-Like Speech Quality**: Produces natural-sounding voices with expressive intonations, eliminating robotic-sounding speech.
* **Multi-Language Support**: Supports multiple languages and accents, enabling seamless localization for global applications.
* **Voice Cloning**: Allows users to create AI-generated voices that closely match specific speakers with minimal data.
* **Real-Time Synthesis**: Generates speech with minimal latency, making it suitable for real-time applications such as AI voice assistants.
* **Custom Voice Models**: Provides options to train and fine-tune voice models for industry-specific or brand-personalized voices.
## How does Bolna integrate with ElevenLabs?
Bolna AI integrates ElevenLabs' TTS technology to enhance its voice AI agents, providing realistic and natural speech output for seamless user interactions. Here’s how Bolna leverages ElevenLabs TTS:
* **Generating Human-Like Voice Responses**:
Bolna AI uses ElevenLabs to convert AI-generated text responses into high-quality, lifelike speech. This allows users to interact with Bolna’s voice agents in a more natural and engaging manner.
* **Multi-Language and Accent Adaptation**:
Given Bolna’s need to cater to diverse global audiences, ElevenLabs’ multilingual capabilities ensure that voice agents can communicate fluently in multiple languages and accents, enhancing user accessibility and comprehension.
* **Real-Time Voice Processing for Conversations**:
Bolna’s AI-driven voice agents operate in real-time, requiring low-latency speech synthesis. ElevenLabs' real-time TTS API ensures that responses are generated instantly, maintaining a smooth conversational flow.
* **Custom Voice Models for Brand Identity**:
For businesses using Bolna AI, ElevenLabs’ custom voice models allow for the creation of distinct and brand-aligned voice personas. This helps companies establish a unique audio identity that resonates with their audience.
* **Handling Complex Pronunciations and Domain-Specific Vocabulary**:
Bolna AI works in industries such as recruitment, customer support, and e-commerce, where precise pronunciation of names, technical jargon, and domain-specific terms is crucial. ElevenLabs helps Bolna generate accurate speech outputs by recognizing and adjusting for industry-specific vocabulary.
## Which ElevenLabs models are supported on Bolna AI?
| Model |
| -------------------- |
| eleven\_turbo\_v2\_5 |
| eleven\_flash\_v2\_5 |
## Next steps
Ready to configure ElevenLabs voices for your voice AI agent? Start by [setting up your synthesizer in the Playground](/docs/agent-setup/engine-tab) or [import custom voices](/docs/import-voices) for personalized experiences.
For related integrations:
* Explore [voice cloning](/docs/clone-voices) to create custom voice models
* Compare with [Azure voices](/docs/providers/voice/azure) for enterprise deployments
* Try [Cartesia](/docs/providers/voice/cartesia) for ultra-low latency synthesis
* Configure [multilingual support](/docs/customizations/multilingual-languages-support) for global reach
* You can also connect your own ElevenLabs account and use it with [Bolna AI](https://platform.bolna.ai/auth/elevenlabs)
ElevenLabs' advanced TTS technology enables Bolna AI to deliver realistic, engaging, and context-aware speech output for voice-driven applications.e.
# Rime Text to Speech with Bolna Voice AI agents
Source: https://www.bolna.ai/docs/providers/voice/rime
Integrate Rime TTS with Bolna Voice AI agents for ultra-fast, expressive speech synthesis with sub-200ms latency and diverse conversational voice options.
## What is Rime TTS?
[Rime](https://www.rime.ai/) TTS is an advanced AI-powered speech synthesis platform designed to deliver **ultra-fast, highly expressive, and natural-sounding voices** for conversational AI applications. Rime provides speech synthesis technologies that perfectly balance quality, customizability, and speed for building conversational applications.
Rime TTS is specifically optimized for **real-time conversational AI**, offering **sub-200 millisecond speech synthesis speeds** with their flagship models. With a focus on **emotional expressiveness, demographic diversity, and lightning-fast processing**, Rime TTS enables enterprises to create **engaging, responsive, and human-like voice interactions** across various industries and use cases.
## Why choose Rime for voice synthesis?
Rime TTS provides several cutting-edge features that enhance conversational AI applications:
**Ultra-Fast Speech Synthesis**: Delivers sub-200 millisecond synthesis speeds, with Mist v2 achieving \~70ms latency for real-time applications.
**Highly Expressive Speech Output**: Arcana model pushes the boundary of naturalness and emotional depth in synthesized speech with fine-grained prosody control.
**Multilingual and Demographic Diversity**: Supports multiple languages (English, Spanish, with more coming soon) and offers voices across many different demographic categories including age ranges, accents, and cultural backgrounds.
**Wide Range of Voice Options**: Features flagship voices like luna, celeste, orion, ursa, astra, esther, estelle, and andromeda across different speaking styles and demographics.
**Genre-Specific Optimization**: Provides specialized models for General, Conversational, Narration, and IVR use cases.
**Advanced Pronunciation Control**: Offers sophisticated control over speech performance using linguistically-aware markup and contextual nuances.
**Real-Time Processing Capabilities**: Engineered specifically for interactive applications requiring instant voice responses.
## How does Bolna integrate with Rime TTS?
Bolna AI leverages Rime's cutting-edge TTS technology to create ultra-responsive, engaging, and lifelike voice responses for its AI-powered conversational agents. Here's how Bolna AI integrates Rime TTS:
**Ultra-Fast Voice Output for Real-Time Conversations**:
Bolna AI utilizes Rime's industry-leading synthesis speeds to ensure that its AI-driven voice agents deliver instantaneous responses during live interactions. With sub-200ms latency, Bolna eliminates unnatural delays and creates seamless conversational flow that feels natural and responsive.
**Highly Expressive Speech for Enhanced User Engagement**:
Bolna AI takes advantage of Rime's Arcana model to produce emotionally nuanced and expressive speech output. This enables AI agents to adjust their tone and emotional delivery based on conversation context, creating more engaging and human-like interactions.
**Diverse Voice Demographics for Global Accessibility**:
To serve diverse customer bases, Bolna AI utilizes Rime's wide range of voice demographics and accents, ensuring clear communication across different user populations. This demographic diversity helps businesses create more inclusive and accessible voice AI experiences.
**Multilingual Support for International Applications**:
Bolna AI leverages Rime's multilingual capabilities (English, Spanish, with expanding language support) to provide voice AI solutions that can serve global markets with native-sounding speech in multiple languages.
**Genre-Optimized Speech for Specific Use Cases**:
Bolna AI integrates Rime's genre-specific optimizations to deliver contextually appropriate speech output. For example:
* **Customer Support Agents**: Use conversational-optimized voices that sound empathetic and professional during support interactions.
* **Recruitment AI Assistants**: Employ general-purpose voices with neutral yet engaging tones for job-related communications.
* **E-commerce AI Representatives**: Utilize expressive voices that can adapt tone to enhance user engagement and sales conversations.
* **IVR Systems**: Deploy IVR-optimized voices for clear, professional automated phone system interactions.
**Advanced Prosody Control for Brand Customization**:
For businesses looking to create distinctive voice experiences, Bolna AI integrates Rime's advanced prosody and pronunciation controls, enabling fine-tuned speech output that aligns with specific brand personalities and communication styles.
## What Rime TTS models are supported?
Bolna supports the following Rime TTS models:
| Model |
| ------ |
| arcana |
| mistv2 |
## Next steps
Ready to configure ultra-fast Rime voices for your voice AI agent? Start by [setting up your synthesizer in the Playground](/docs/agent-setup/engine-tab) or explore our [API documentation](/docs/api-reference/introduction) for programmatic integration.
For related integrations:
* Compare with [ElevenLabs voices](/docs/providers/voice/elevenlabs) for alternative expressive synthesis
* Explore [Cartesia voices](/docs/providers/voice/cartesia) for another fast TTS option
* Review [Deepgram voices](/docs/providers/voice/deepgram) for low-latency alternatives
* Configure [multilingual support](/docs/customizations/multilingual-languages-support) for global reach
* You can also connect your own Rime account and use it with [Bolna AI](https://platform.bolna.ai/auth/rime)
By integrating Rime TTS, Bolna AI significantly enhances its conversational AI capabilities, delivering ultra-fast, expressive, and demographically diverse voice output.
# Sarvam Text to Speech with Bolna Voice AI agents
Source: https://www.bolna.ai/docs/providers/voice/sarvam
Integrate and use your Bolna Voice AI agents with high-quality neural voices from Sarvam for natural, human-like conversational experiences.
## 1. What is Sarvam TTS?
[Sarvam](https://www.sarvam.ai/) TTS is a high-performance text-to-speech service developed by Sarvam AI, designed specifically for Indian languages. It delivers natural and expressive voice synthesis optimized for conversational use cases such as virtual assistants, IVRs, and customer support bots. Built using advanced generative AI techniques, Sarvam TTS offers real-time streaming capabilities and supports deployment at scale across multilingual environments.
## 2. Key Features of Sarvam TTS
Sarvam TTS provides several advanced features that enhance Bolna Voice AI applications:
**Multilingual Support**: Specially optimized for Indian languages such as Hindi, Telugu, Tamil, Kannada, and more.
**Natural-Sounding Voices**: Trained on diverse datasets to produce lifelike speech with proper intonation and pronunciation.
**Low Latency Streaming**: Designed for real-time use cases, ensuring smooth conversational flow in interactive systems.
**Custom Voice Options**: Ability to fine-tune or adapt voices for enterprise-specific needs.
## 3. How Bolna Uses Sarvam for TTS
Bolna Voice AI integrates Sarvam TTS to power Indian-language voice agents across recruitment, sales, and support workflows. The TTS system is used to generate real-time voice prompts, questions, and responses in native languages, ensuring better engagement and understanding, especially in Tier 2/3 regions.
**Real-Time Speech for Seamless Conversations**:
Sarvam’s low-latency streaming capabilities enable Bolna agents to synthesize speech in real time. This ensures a smooth, uninterrupted flow of conversation, making interactions feel natural and responsive for users.
**Multilingual & Accent-Aware Voice Support**:
Bolna uses Sarvam to serve candidates and customers in Hindi, Telugu, Tamil, and other Indian languages. The multilingual support allows each voice agent to adapt to the preferred language and accent of the user, improving comprehension and engagement—especially in Tier 2/3 regions.
**Handling Complex Pronunciations and Technical Terms**:
From candidate names to role-specific jargon, Sarvam TTS enables accurate pronunciation of complex or technical terms. This ensures that Bolna’s agents sound professional and easy to understand across varied use cases.
## 4. List of Sarvam TTS models supported on Bolna AI
| Model |
| ----------- |
| `bulbul:v3` |
| `bulbul:v2` |
| `bulbul:v1` |
## Conclusion
Sarvam TTS brings localized voice synthesis to the forefront of conversational AI in India. By integrating Sarvam, Bolna ensures its voice agents are not only intelligent but also relatable and linguistically inclusive. This helps improve candidate experience, increase response rates, and expand accessibility across diverse demographics.
For related integrations:
* You can also connect your own Sarvam account and use it with [Bolna AI](https://platform.bolna.ai/auth/sarvam)
# Smallest Text to Speech with Bolna Voice AI agents
Source: https://www.bolna.ai/docs/providers/voice/smallest
Integrate and use Smallest voices with Bolna Voice AI agents for lightweight and efficient text-to-speech solutions.
## 1. What is Smallest TTS?
[Smallest AI](https://smallest.ai/) TTS is an ultra-lightweight, high-efficiency speech synthesis engine designed for low-resource environments and edge computing applications. Unlike traditional cloud-based TTS solutions, Smallest AI focuses on delivering **fast, memory-efficient, and locally deployable speech synthesis** without sacrificing voice quality. It is ideal for AI-driven systems that require **real-time voice synthesis** on resource-constrained devices, such as mobile applications, IoT devices, and offline virtual assistants.
## 2. Key Features of Smallest TTS
Smallest AI TTS offers several unique features that make it an attractive option for AI-driven voice interactions:
**Lightweight and Efficient**: Optimized for low-power devices, embedded systems, and mobile applications, ensuring smooth performance on minimal hardware.
**Low-Latency, Real-Time Speech Generation**: Unlike cloud-based TTS solutions, Smallest AI offers instant voice synthesis with near-zero delay.
**Offline and On-Device Processing**: Supports fully offline speech generation without requiring an internet connection.
**Neural Compression for Compact Model Size**: Uses advanced compression techniques to reduce the model footprint while maintaining high-quality speech output.
**Multilingual Support with Minimal Resource Consumption**: Provides high-quality voice synthesis across multiple languages without requiring large storage or compute resources.
## 3. How Bolna Uses Smallest for TTS
Bolna AI integrates Smallest AI’s ultra-efficient speech synthesis technology to enhance its real-time conversational AI experience, particularly in low-resource and privacy-sensitive environments. Here’s how Bolna leverages Smallest AI TTS:
**Lightning-Fast Voice Responses for Instant AI Interactions**:
With Smallest AI’s low-latency TTS, Bolna ensures that its voice agents respond instantly, making interactions feel seamless, natural, and fluid.
**Efficient Multilingual Speech Processing with Minimal Compute**:
Bolna AI utilizes Smallest AI’s multilingual synthesis to generate speech without the overhead of large AI models, making it scalable for voice automation across multiple regions and languages.
**Customizable Voices for Enterprise Branding**:
Smallest AI supports lightweight, trainable voice models, allowing Bolna AI to provide custom-branded voices for businesses, ensuring a unique and recognizable AI-driven voice identity.
## 4. List of Smallest models supported on Bolna AI
| Model |
| ------------ |
| lightning-v2 |
## Conclusion
Smallest AI TTS enhances Bolna AI’s ability to deliver **ultra-fast voice interactions**. By integrating **Smallest AI’s lightweight and highly efficient speech synthesis**, Bolna ensures seamless **real-time AI conversations with low-latency responses**. This makes Bolna’s AI voice agents highly scalable for industries requiring **compact, high-performance voice AI solutions in customer service, healthcare and enterprise automation**.
# Handle Inbound Calls with Bolna Voice AI Agents
Source: https://www.bolna.ai/docs/receiving-incoming-calls
Set up Bolna Voice AI agents to answer incoming calls. Assign phone numbers, configure settings via the dashboard or API, and enhance customer interactions.
## How to set up inbound calls with Bolna?
To handle incoming calls with your Bolna Voice AI agent, you need to assign a phone number to your agent. When someone calls that number, your agent will automatically answer and have a conversation based on your configured prompts and settings.
You will need to assign a phone number to your Bolna Voice AI agent for automatically answering all incoming calls on that phone number
## What are my options for getting a phone number?
### Method 1. Purchase a phone number from the [Bolna Dashboard](https://platform.bolna.ai/phone-numbers).
Please refer to a [step by step tutorial for purchasing phone numbers on Bolna](/docs/buying-phone-numbers).
### Method 2. Connect your Telephony account and use your own phone numbers.
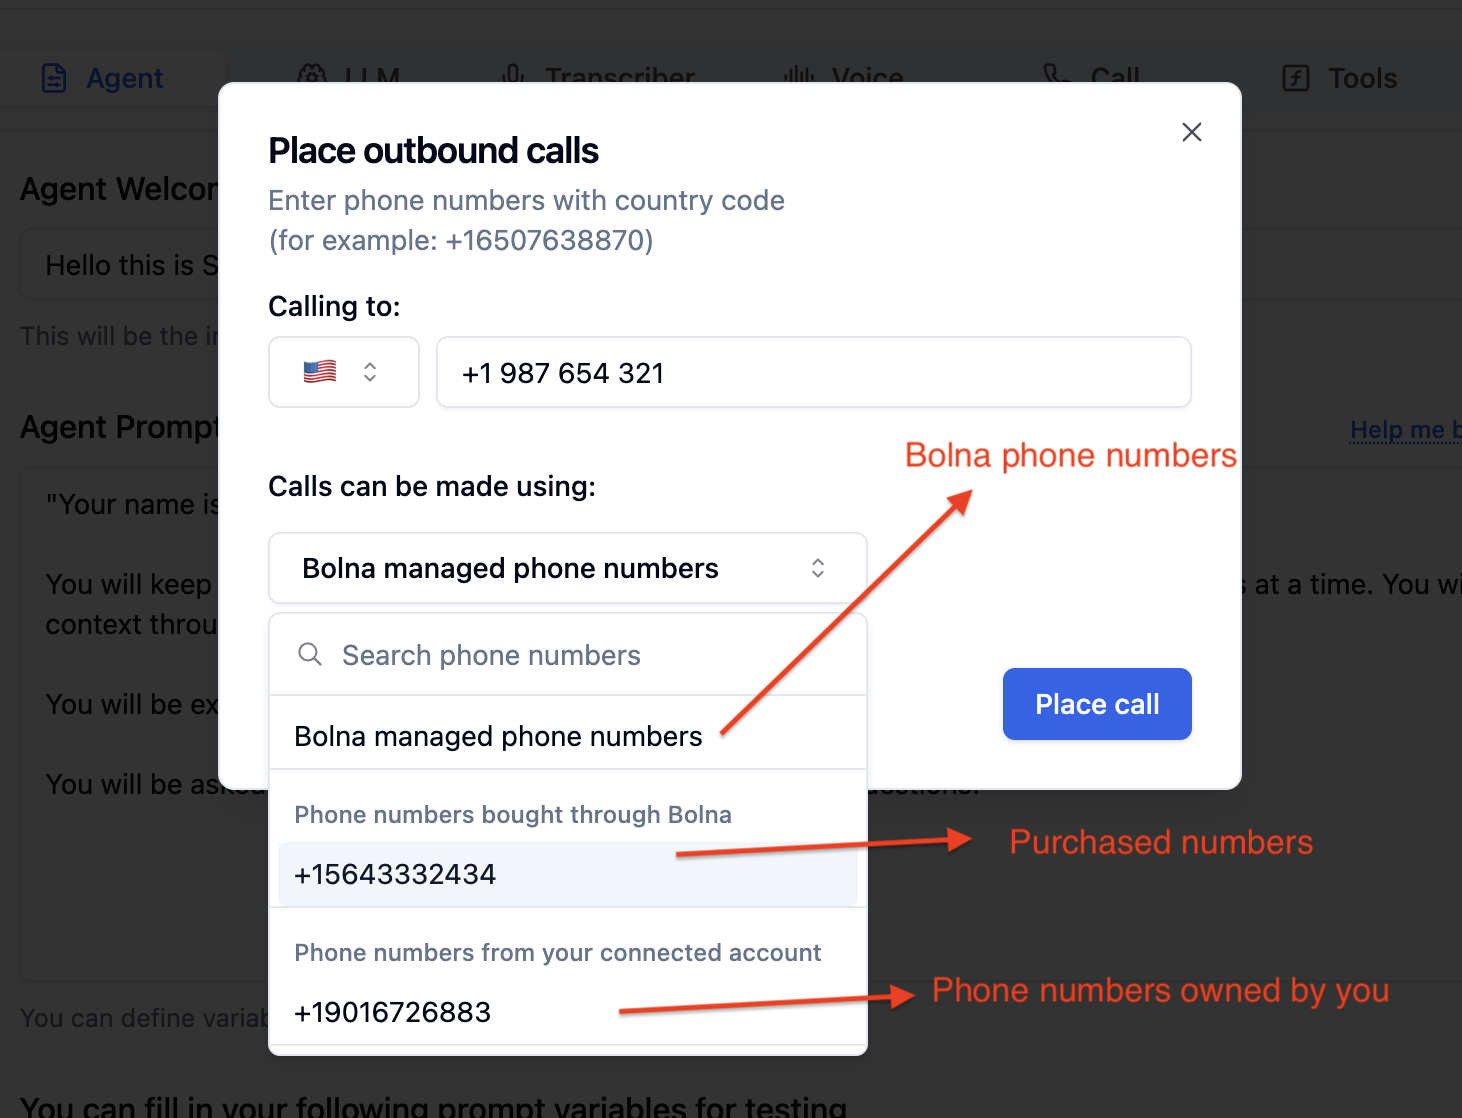
>
}
href="/twilio-connect-provider"
>
Use your own Twilio phone numbers with Bolna
>
}
href="/plivo-connect-provider"
>
Use your own Plivo phone numbers with Bolna
>
}
href="/vobiz-connect-provider"
>
Use your own Vobiz phone numbers with Bolna
>
}
href="/exotel-connect-provider"
>
Use your own Exotel phone numbers with Bolna
***
## How to set up inbound calls from the dashboard?
## How to set up inbound calls using APIs?
#### Step 1. Use [List Phone Numbers API](api-reference/phone-numbers/get_all) to list all avalable phone numbers.
```curl request-phone-numbers theme={"system"}
curl --request GET \
--url https://api.bolna.ai/phone-numbers/all \
--header 'Authorization: Bearer '
```
```json response-phone-numbers theme={"system"}
[
{
"id": "3c90c3cc0d444b5088888dd25736052a",
"humanized_created_at": "5 minutes ago",
"created_at": "2024-01-23T05:14:37Z",
"humanized_updated_at": "5 minutes ago",
"updated_at": "2024-02-29T04:22:89Z",
"renewal_at": "17th Dec, 2024",
"phone_number": "+19876543210",
"agent_id": "3c90c3cc-0d44-4b50-8888-8dd25736052a",
"price": "$5.0",
"telephony_provider": "twilio",
"rented": true
}
]
```
#### Step 2. Use [Set Inbound Agent API](api-reference/inbound/agent) to assign a phone number for Bolna Voice AI agent.
```curl request-set-inbound-agent theme={"system"}
curl --request POST \
--url https://api.bolna.ai/inbound/setup \
--header 'Authorization: Bearer ' \
--header 'Content-Type: application/json' \
--data '{
"agent_id": "3c90c3cc-0d44-4b50-8888-8dd25736052a",
"phone_number_id": "123e4567-e89b-12d3-a456-426614174000"
}'
```
```json response-setup-inbound-agent theme={"system"}
{
"url": "https://api.bolna.ai/inbound_call?agent_id=3c90c3cc-0d44-4b50-8888-8dd25736052a&user_id=28f9c34b-8eb0-4af5-8689-c2f6c4daec22",
"phone_number": "+19876543210",
"id": "3c90c3cc0d444b5088888dd25736052a"
}
```
## Next steps
Ready to start receiving inbound calls? [Configure your agent](/docs/agent-setup/agent-tab) and explore related features:
* [Make outbound calls](/docs/making-outgoing-calls) to complement your inbound setup
* [Supported telephony providers](/docs/supported-telephony-providers) for integration options
* [Call transfer functions](/docs/tool-calling/transfer-calls) to route to human agents
* [Monitor call status](/docs/list-phone-call-status) in real-time
For 24/7 automated support, combine inbound calling with [guardrails](/docs/guardrails) and [custom prompts](/docs/agent-setup/agent-tab).
# Container Images Release
Source: https://www.bolna.ai/docs/self_hosted_changelog/september-2025
Explore the latest features, performance enhancements, and API updates in the September 2025 Bolna Self-Hosted release.
### Container Image Updates
* `ghcr.io/bolna-ai/api_server:release-250911`
* `ghcr.io/bolna-ai/ws_server:release-250911`
* `ghcr.io/bolna-ai/telephone_server:release-250911`
* `ghcr.io/bolna-ai/q_manager:release-250911`
* `ghcr.io/bolna-ai/q_worker:release-250911`
* `ghcr.io/bolna-ai/arq_worker:release-250911`
### Release Changes
* **New API for Subaccount Usage** – Extended a new endpoint to retrieve the usage of all sub-accounts. ([API doc](/docs/api-reference/sub-accounts/all_usage))
* **Enhanced Logging & Call Statuses** – Added more granular logs, additional call statuses, and exception handling to improve visibility and speed up debugging.
* **Twilio and Plivo SDK Removal** – Removed the synchronous telephony SDK packages, eliminating major bottlenecks and significantly improving call initiation performance.
* **Miscellaneous Fixes** – Addressed several minor bugs to improve overall platform stability and performance.
# Setup Exotel with Bolna for Inbound Calling
Source: https://www.bolna.ai/docs/setup-exotel-app-for-inbound-calls
Create, setup and configure Exotel Application with your account for enabling Inbound calls with Bolna Voice AI Platform
## How to Create an Exotel App for Inbound Calls
To enable inbound calling functionality with Bolna's Voice AI agents through Exotel, you'll need to create and configure a dedicated app in your Exotel dashboard. This app serves as the communication bridge between Bolna's AI voice agents and Exotel's telephony infrastructure for making incoming calls.
### Understanding Exotel Apps for Voice AI Integration
An Exotel app is a customizable workflow that defines how your inbound calls are handled, routed, and connected. For Bolna integration, you'll configure a specialized app that connects the Voicebot functionality with Bolna's API endpoints, enabling seamless AI-powered inbound calling capabilities.
### Prerequisites for Creating Your Exotel Inbound App
Before you begin, ensure you have:
* An active Exotel account with API access
* Access to your Exotel dashboard at [my.exotel.com](https://my.exotel.com/)
### Step 1: Access the Exotel App Bazaar
Navigate to your [Exotel dashboard](https://my.exotel.com/) and locate the **App Bazaar** section under the **Manage** menu. The App Bazaar is where you'll create and configure custom apps for your telephony workflows.
### Step 2: Create a New App for Bolna Integration
Click the **Create** button to start building your new app. Give it a descriptive name such as **"Bolna Inbound"** (you can customize this name based on your preference for easy reference in your dashboard).
### Step 3: Add the Voicebot App Component
Drag the **Voicebot** app from the available components and drop it into the **"Drop app here"** box. This is the primary component that will handle the AI voice interaction.
### Step 4: Configure the Voicebot Component
Once dropped, a configuration popup will appear for the Voicebot settings:
* In the URL field, copy and paste the following Bolna API endpoint:
```
https://api.bolna.ai/inbound_call
```
* Enable the **"Record this"** checkbox to record your inbound calls for quality assurance and compliance purposes
### Step 5: Configure App for Transfer calling
Within the Voicebot popup, you'll notice another **"Drop app here"** section at the bottom. This is where you'll configure the call connection logic.
Drag and drop the **Connect** voice app into this designated area. This component manages the actual phone call connection and routing.
When the Connect app popup opens, you'll need to specify how connection parameters are controlled:
1. Look for the section titled **"How do you want to control your Connect params?"**
2. Select the option: **"Configure parameters dynamically by providing a URL"**
3. In the **Primary URL** field, copy and paste the following Bolna API endpoint:
```
https://api.bolna.ai/exotel_connect_transfer
```
This configuration allows Bolna to dynamically control call parameters while transferring a live call.
### Step 6: Save Your Exotel App Configuration
Click the **Save** button to finalize your app configuration. Your Exotel inbound app is now ready to work with Bolna's Voice AI platform.
### Obtaining Your Exotel App ID
After saving your app, Exotel will generate a unique **App ID** for your configuration. This ID is what you'll use when configuring inbound calling campaigns in Bolna. You can find this ID in your Exotel App Bazaar dashboard next to your newly created app.
**Important**: Make sure to test your app configuration with a test call before launching production campaigns to ensure all components are working correctly together.
# Setup Exotel with Bolna for Outbound Calling
Source: https://www.bolna.ai/docs/setup-exotel-app-for-outbound-calls
Create, setup and configure Exotel Application with your account for enabling Outbound calls with Bolna Voice AI Platform
## How to Create an Exotel App for Outbound Calls
To enable outbound calling functionality with Bolna's Voice AI agents through Exotel, you'll need to create and configure a dedicated app in your Exotel dashboard. This app serves as the communication bridge between Bolna's AI voice agents and Exotel's telephony infrastructure for making outbound calls.
### Understanding Exotel Apps for Voice AI Integration
An Exotel app is a customizable workflow that defines how your outbound calls are handled, routed, and connected. For Bolna integration, you'll configure a specialized app that connects the Voicebot functionality with Bolna's API endpoints, enabling seamless AI-powered outbound calling capabilities.
### Prerequisites for Creating Your Exotel Outbound App
Before you begin, ensure you have:
* An active Exotel account with API access
* Access to your Exotel dashboard at [my.exotel.com](https://my.exotel.com/)
### Step 1: Access the Exotel App Bazaar
Navigate to your [Exotel dashboard](https://my.exotel.com/) and locate the **App Bazaar** section under the **Manage** menu. The App Bazaar is where you'll create and configure custom apps for your telephony workflows.
### Step 2: Create a New App for Bolna Integration
Click the **Create** button to start building your new app. Give it a descriptive name such as **"Bolna Outbound"** (you can customize this name based on your preference for easy reference in your dashboard).
### Step 3: Add the Voicebot App Component
Drag the **Voicebot** app from the available components and drop it into the **"Drop app here"** box. This is the primary component that will handle the AI voice interaction.
### Step 4: Configure the Voicebot Component
Once dropped, a configuration popup will appear for the Voicebot settings:
* In the URL field, copy and paste the following Bolna API endpoint:
```
https://api.bolna.ai/exotel_callback
```
* Enable the **"Record this"** checkbox to record your outbound calls for quality assurance and compliance purposes
### Step 5: Configure App for Transfer calling
Within the Voicebot popup, you'll notice another **"Drop app here"** section at the bottom. This is where you'll configure the call connection logic.
Drag and drop the **Connect** voice app into this designated area. This component manages the actual phone call connection and routing.
When the Connect app popup opens, you'll need to specify how connection parameters are controlled:
1. Look for the section titled **"How do you want to control your Connect params?"**
2. Select the option: **"Configure parameters dynamically by providing a URL"**
3. In the **Primary URL** field, copy and paste the following Bolna API endpoint:
```
https://api.bolna.ai/exotel_connect_transfer
```
This configuration allows Bolna to dynamically control call parameters while transferring a live call.
### Step 6: Save Your Exotel App Configuration
Click the **Save** button to finalize your app configuration. Your Exotel outbound app is now ready to work with Bolna's Voice AI platform.
### Obtaining Your Exotel App ID
After saving your app, Exotel will generate a unique **App ID** for your configuration. This ID is what you'll use when configuring outbound calling campaigns in Bolna. You can find this ID in your Exotel App Bazaar dashboard next to your newly created app.
### Next Steps: Using Your Exotel App with Bolna
With your Exotel app configured and your App ID obtained, you can now:
* Configure outbound calling campaigns in Bolna using your Exotel App ID
* Launch AI-powered outbound voice campaigns through your Exotel infrastructure
* Monitor call performance and analytics through both Bolna and Exotel dashboards
**Important**: Make sure to test your app configuration with a test call before launching production campaigns to ensure all components are working correctly together.
# Receive Inbound Calls via Your SIP Trunk
Source: https://www.bolna.ai/docs/sip-trunking/byot-inbound-calls
Route incoming calls from your SIP trunk to Bolna AI agents. Map DID phone numbers to agents so calls are automatically answered.
## How inbound calls work with BYOT
When a call arrives on one of your DID numbers, the following happens:
1. Your SIP provider sends the INVITE to Bolna's SIP server at `sip:sip.bolna.ai:5060` (UDP/TCP) or `sip:sip.bolna.ai:5061;transport=tls` (TLS trunks)
2. Bolna matches the called number against your registered phone numbers
3. The call is routed to the AI agent mapped to that number
4. The agent answers and handles the conversation
## Prerequisites
Before setting up inbound calls, ensure:
1. You have [created a SIP trunk](/docs/sip-trunking/byot-setup) on Bolna
2. You have [added your phone numbers](/docs/sip-trunking/byot-setup#add-phone-numbers-to-your-trunk) to the trunk
3. Your SIP provider is routing those DIDs to `sip:sip.bolna.ai:5060` (or `sip:sip.bolna.ai:5061;transport=tls` for TLS trunks)
4. `inbound_enabled` is set to `true` on your trunk
5. You have a Bolna agent created
## Map a phone number to an agent
Use the [Set Inbound Agent API](/docs/api-reference/inbound/agent) to map a phone number to your Bolna agent.
```bash request theme={"system"}
curl -X POST https://api.bolna.ai/inbound/setup \
-H "Authorization: Bearer " \
-H "Content-Type: application/json" \
-d '{
"agent_id": "agt-xxxxxxxx-xxxx-xxxx-xxxx-xxxxxxxxxxxx",
"phone_number_id": "01HQNUMBER111222333"
}'
```
```json response theme={"system"}
{
"message": "SIP trunk number successfully mapped to agent"
}
```
| Field | Type | Required | Description |
| ----------------- | ------ | -------- | ------------------------------------------------------------------------------------------------------------------- |
| `agent_id` | string | **Yes** | The UUID of the Bolna agent that should handle calls on this number. |
| `phone_number_id` | string | **Yes** | The phone number ID returned when you [added the number to the trunk](/docs/byot-setup#add-phone-numbers-to-your-trunk). |
Once mapped, any call arriving on that DID will be answered by the specified agent. The agent's audio format is automatically updated to `ulaw` to match Asterisk's requirements.
**One number, one agent:** A phone number can only be mapped to one agent at a time. Mapping it to a new agent automatically unmaps it from the previous one.
## Unlink a number from an agent
To stop an agent from answering calls on a number (without removing the number from the trunk), use the unlink endpoint:
```bash theme={"system"}
curl -X POST https://api.bolna.ai/inbound/unlink \
-H "Authorization: Bearer " \
-H "Content-Type: application/json" \
-d '{
"agent_id": "agt-xxxxxxxx-xxxx-xxxx-xxxx-xxxxxxxxxxxx",
"phone_number_id": "01HQNUMBER111222333"
}'
```
After unlinking, inbound calls to that number will no longer be answered by an agent.
## Troubleshooting inbound calls
If inbound calls are not arriving or are being rejected:
1. Confirm your SIP provider has `sip:sip.bolna.ai:5060` (or `sip:sip.bolna.ai:5061;transport=tls` for TLS trunks) set as the origination URI for the DID
2. Confirm the phone number has been [added to the trunk](/docs/sip-trunking/byot-setup#add-phone-numbers-to-your-trunk)
3. Confirm the phone number has been mapped to an agent (above)
4. Confirm `inbound_enabled` is `true` on the trunk
5. Check that the number format in the INVITE's `Request-URI` or `To` header matches what you stored (with or without `+`)
## Next steps
* [Make outbound calls](/docs/sip-trunking/byot-outbound-calls) from your SIP trunk numbers
* [Manage your trunk](/docs/api-reference/sip-trunks/overview) using the SIP Trunk API
* [Monitor call status](/docs/list-phone-call-status) in real-time
# Make Outbound Calls via Your SIP Trunk
Source: https://www.bolna.ai/docs/sip-trunking/byot-outbound-calls
Place outbound calls from your own SIP trunk phone numbers using Bolna AI agents. Configure your agent and start calling through your trunk.
## How outbound calls work with BYOT
Outbound calls from your SIP trunk are placed via the standard Bolna call API. Bolna looks up the `from_number`, resolves the associated trunk and gateway, and places the call via Asterisk's PJSIP channel driver using your trunk's credentials.
## Prerequisites
Before making outbound calls, ensure:
1. You have [created a SIP trunk](/docs/sip-trunking/byot-setup) on Bolna
2. You have [added your phone numbers](/docs/sip-trunking/byot-setup#add-phone-numbers-to-your-trunk) to the trunk
3. `is_active` is `true` on the trunk
4. You have a Bolna agent created
## Step 1. Configure the agent's telephony provider
Set `telephony_provider` to `"sip-trunk"` in your agent's configuration. This tells Bolna to route outbound calls through your SIP trunk and use ulaw audio encoding.
```bash theme={"system"}
curl -X PATCH https://api.bolna.ai/v2/agent/{agent_id} \
-H "Authorization: Bearer " \
-H "Content-Type: application/json" \
-d '{
"agent_config": {
"telephony_provider": "sip-trunk"
}
}'
```
## Step 2. Place an outbound call
Use the standard [call API](/docs/api-reference/calls/make), specifying the `from_number` as a DID registered on your trunk:
```bash request theme={"system"}
curl -X POST https://api.bolna.ai/call \
-H "Authorization: Bearer " \
-H "Content-Type: application/json" \
-d '{
"agent_id": "agt-xxxxxxxx-xxxx-xxxx-xxxx-xxxxxxxxxxxx",
"recipient": {
"phone_number": "+918800001234",
"name": "Rahul Sharma"
},
"from_number": "+919876543210"
}'
```
The `from_number` must be a phone number you have registered on your SIP trunk. Bolna will use the trunk's gateway and credentials to place the call.
## Troubleshooting outbound calls
If outbound calls are failing or not being placed:
1. Confirm `is_active` is `true` on the trunk
2. Confirm the `from_number` used in the call request is registered on the trunk
3. Confirm the gateway address and credentials are correct -- check your provider portal for authentication errors
4. For `ip-based` trunks, ensure `13.200.45.61` is in your provider's IP whitelist
5. Confirm `outbound_leading_plus_enabled` matches what your carrier expects (some carriers reject `+`, others require it)
### No audio / call connects but no voice
A common cause is an SRTP mismatch with your carrier. If the trunk has `media_encryption="sdes"` but the carrier has SRTP disabled (or vice versa), the SIP call sets up but the media path never establishes. Either align both sides on SDES, or set `media_encryption="no"` and use UDP/TCP transport. See [SIP Trunk setup](/docs/sip-trunking/byot-setup#prerequisites) for details.
### Audio quality issues / one-way audio
* Ensure `rtp_symmetric` and `force_rport` are both `true` (the defaults)
* Confirm your SIP provider's RTP IP ranges are reachable from `13.200.45.61`
* Verify `allow` includes `ulaw`
* Avoid enabling `direct_media` unless explicitly advised by Bolna support
## Next steps
* [Set up inbound calls](/docs/sip-trunking/byot-inbound-calls) to receive calls on your SIP trunk numbers
* [Batch calling](/docs/batch-calling) for high-volume outbound campaigns
* [Monitor call status](/docs/list-phone-call-status) and [call hangup statuses](/docs/list-phone-call-hangup-status)
# Set Up Your SIP Trunk on Bolna
Source: https://www.bolna.ai/docs/sip-trunking/byot-setup
Step-by-step guide to configure your SIP provider and create a SIP trunk on Bolna for AI-powered voice calls using your own telephony infrastructure.
## Prerequisites
Before creating a trunk in Bolna, configure the following on your SIP trunk provider's portal.
### 1. Whitelist Bolna's IP Address
Bolna's SIP media server IP is:
```
13.200.45.61
```
You **must** whitelist this IP on your SIP trunk so that Bolna's outbound SIP INVITE and RTP packets are accepted. In most provider portals this is called an **IP whitelist**, **allowed IP**, **trusted IP**, or **ACL**.
If you are using `ip-based` authentication, this is the IP you will add as your identifier -- Bolna will be recognized solely by its source IP.
### 2. Set the Origination URL (for inbound calls)
If you want calls to your DID numbers to ring through to Bolna, point your SIP trunk's **origination URI** to one of the following, depending on the transport you've chosen for the trunk:
| Trunk transport | Origination URI |
| ------------------------- | ------------------------------------- |
| UDP or TCP | `sip:sip.bolna.ai:5060` |
| TLS (encrypted signaling) | `sip:sip.bolna.ai:5061;transport=tls` |
In your provider portal this is usually labeled as:
* **Origination URI** or **Origination URL**
* **Inbound SIP URI**
* **SIP Termination Point**
* **Route to** / **Forward to**
Set this for every DID number (or for the trunk as a whole, depending on your provider) that you intend to route to Bolna.
If your provider only accepts an IP, use `sip:13.200.45.61:5060` for UDP/TCP. TLS inbound requires a hostname so the carrier can validate Bolna's TLS certificate.
### 3. Codec Configuration
Bolna's SIP layer uses **G.711 u-law (ulaw)** audio by default. Ensure your trunk allows ulaw, or at minimum alaw, in its codec preferences. G.729 and other compressed codecs are not recommended.
### 4. Decide on media encryption (optional)
Bolna supports two media modes for BYOT trunks:
* **Plain RTP (default)** -- works on every transport. No setup needed on your side.
* **SDES (encrypted RTP)** -- supported on the **TLS** transport only, since the encryption keys travel inside the SIP signaling channel. To use SDES, your carrier must also have SDES/SRTP enabled on its end.
If you're not sure, leave this on plain RTP -- most production trunks run unencrypted at the media layer, and you can switch later by editing the trunk.
***
## Create your trunk via the dashboard
The dashboard is the easiest way to onboard a trunk. If you'd rather use the API, skip ahead to [Or via API](#or-via-api).
### 1. Open SIP Trunks → New Trunk
In the dashboard, navigate to **SIP Trunks** and click **New Trunk**.
### 2. Fill in the basics
* **Name** -- a label only you see, e.g. `Twilio Production`.
* **Provider** -- the carrier (e.g. `twilio`, `plivo`, `telnyx`, `vonage`, `custom`).
* **Auth type** -- pick **Username / Password** or **IP-based**, then fill in the matching fields.
* **Gateways** -- add at least one gateway. Each row needs a hostname and a port; default port is `5060` for UDP/TCP and `5061` for TLS.
### 3. Open Advanced Settings
Expand **Advanced Settings** to choose your transport, codecs, and media encryption.
#### Transport Protocol
Pick the SIP signaling transport:
* **UDP** -- the default, used by most carriers.
* **TCP** -- avoids UDP fragmentation when SIP INVITEs carry long headers (multiple Diversion / P-Asserted-Identity / Route entries). Pick this if outbound calls intermittently fail to negotiate media.
* **TLS (encrypted signaling)** -- encrypts the SIP signaling channel. Required if you want **SDES (SRTP)** media encryption. Use port `5061` on your gateways.
#### Media Encryption (TLS only)
When you set transport to **TLS**, a **Media Encryption** field appears. Pick **SDES (RTP/SAVP, AES-128)** to encrypt the audio stream end-to-end with your carrier. Leaving it on **No** keeps media as plain RTP even on a TLS-signaled trunk.
SDES requires the carrier to also be configured for SRTP. Check this in your provider's portal before enabling it.
#### Other advanced fields
* **Allowed / Disallowed Codecs** -- defaults `ulaw,alaw` and `all` are correct for most setups.
* **SIP OPTIONS Ping Interval** -- how often Bolna pings the carrier for trunk health. Default `60` seconds; set `0` to disable.
* **RTP Symmetric / Force rport** -- keep enabled for NAT traversal.
* **Enable Inbound Calling** -- turn on if you want Bolna to receive calls on this trunk.
* **Prepend + to Outbound Numbers** -- typically on (E.164 dialing).
* **Trunk Active** -- the master switch; uncheck to pause the trunk.
### 4. Click Create Trunk
The trunk is created with a generated ID. Use that ID when adding phone numbers (next section) and when wiring inbound or outbound calling to your AI agents.
***
## Or via API
Use the [Create SIP Trunk API](/docs/api-reference/sip-trunks/create) to register your trunk programmatically.
### Example -- Twilio Elastic SIP Trunk (userpass)
```bash request theme={"system"}
curl -X POST https://api.bolna.ai/sip-trunks/trunks \
-H "Authorization: Bearer " \
-H "Content-Type: application/json" \
-d '{
"name": "Twilio Production",
"provider": "twilio",
"description": "Main Twilio Elastic SIP trunk",
"auth_type": "userpass",
"auth_username": "",
"auth_password": "",
"gateways": [
{
"gateway_address": "your-trunk.pstn.twilio.com",
"port": 5060,
"priority": 1
}
],
"transport": "transport-udp",
"allow": "ulaw,alaw",
"disallow": "all",
"inbound_enabled": true,
"outbound_leading_plus_enabled": true
}'
```
```json response theme={"system"}
{
"id": "01HQXYZ123ABC456DEF",
"name": "Twilio Production",
"provider": "twilio",
"description": "Main Twilio Elastic SIP trunk",
"auth_type": "userpass",
"auth_username": "",
"gateways": [
{
"id": "01HQXYZ111AAA111BBB",
"gateway_address": "your-trunk.pstn.twilio.com",
"port": 5060,
"priority": 1,
"created_at": "2026-05-09T10:00:00Z"
}
],
"ip_identifiers": [],
"phone_numbers": [],
"allow": "ulaw,alaw",
"disallow": "all",
"transport": "transport-udp",
"direct_media": false,
"rtp_symmetric": true,
"force_rport": true,
"media_encryption": "no",
"media_encryption_optimistic": false,
"qualify_frequency": 60,
"inbound_enabled": true,
"outbound_leading_plus_enabled": true,
"is_active": true,
"created_at": "2026-05-09T10:00:00Z",
"updated_at": "2026-05-09T10:00:00Z"
}
```
### Example -- Plivo Elastic SIP Trunk (ip-based)
```bash request theme={"system"}
curl -X POST https://api.bolna.ai/sip-trunks/trunks \
-H "Authorization: Bearer " \
-H "Content-Type: application/json" \
-d '{
"name": "Plivo Elastic Trunk",
"provider": "plivo",
"auth_type": "ip-based",
"gateways": [
{
"gateway_address": "21467306465797919.zt.plivo.com",
"port": 5060,
"priority": 1
}
],
"ip_identifiers": [
{ "ip_address": "15.207.90.192/31" },
{ "ip_address": "204.89.151.128/27" },
{ "ip_address": "13.52.9.0/25" }
],
"transport": "transport-udp",
"inbound_enabled": true
}'
```
```json response theme={"system"}
{
"id": "01HQXYZ789GHI012JKL",
"name": "Plivo Elastic Trunk",
"provider": "plivo",
"auth_type": "ip-based",
"gateways": [
{
"id": "01HQXYZ222BBB222CCC",
"gateway_address": "21467306465797919.zt.plivo.com",
"port": 5060,
"priority": 1,
"created_at": "2026-05-09T10:00:00Z"
}
],
"ip_identifiers": [
{ "ip_address": "15.207.90.192/31" },
{ "ip_address": "204.89.151.128/27" },
{ "ip_address": "13.52.9.0/25" }
],
"phone_numbers": [],
"transport": "transport-udp",
"media_encryption": "no",
"media_encryption_optimistic": false,
"is_active": true,
"inbound_enabled": true,
"created_at": "2026-05-09T10:00:00Z",
"updated_at": "2026-05-09T10:00:00Z"
}
```
### Example -- Twilio Elastic SIP Trunk, TLS + SDES (encrypted)
```bash request theme={"system"}
curl -X POST https://api.bolna.ai/sip-trunks/trunks \
-H "Authorization: Bearer " \
-H "Content-Type: application/json" \
-d '{
"name": "Twilio Production (encrypted)",
"provider": "twilio",
"auth_type": "userpass",
"auth_username": "",
"auth_password": "",
"gateways": [
{
"gateway_address": "your-trunk.pstn.twilio.com",
"port": 5061,
"priority": 1
}
],
"transport": "transport-tls",
"media_encryption": "sdes",
"media_encryption_optimistic": false,
"allow": "ulaw,alaw",
"disallow": "all",
"inbound_enabled": true
}'
```
```json response theme={"system"}
{
"id": "01HQXYZ555TLS888SDES",
"name": "Twilio Production (encrypted)",
"provider": "twilio",
"auth_type": "userpass",
"gateways": [
{
"id": "01HQXYZ333CCC333DDD",
"gateway_address": "your-trunk.pstn.twilio.com",
"port": 5061,
"priority": 1,
"created_at": "2026-05-09T10:00:00Z"
}
],
"transport": "transport-tls",
"media_encryption": "sdes",
"media_encryption_optimistic": false,
"inbound_enabled": true,
"is_active": true,
"created_at": "2026-05-09T10:00:00Z",
"updated_at": "2026-05-09T10:00:00Z"
}
```
Save the `id` field from the response -- this is your **trunk ID** used in all subsequent API requests.
***
## Add Phone Numbers to Your Trunk
After creating a trunk, add your DID phone numbers using the [Add Phone Number API](/docs/api-reference/sip-trunks/add_number).
```bash request theme={"system"}
curl -X POST https://api.bolna.ai/sip-trunks/trunks/01HQXYZ123ABC456DEF/numbers \
-H "Authorization: Bearer " \
-H "Content-Type: application/json" \
-d '{
"phone_number": "919876543210",
"name": "Mumbai Support Line"
}'
```
```json response theme={"system"}
{
"id": "01HQNUMBER111222333",
"phone_number": "919876543210",
"byot_trunk_id": "01HQXYZ123ABC456DEF",
"telephony_provider": "sip-trunk",
"deleted": false,
"created_at": "2026-05-09T10:05:00Z",
"updated_at": "2026-05-09T10:05:00Z"
}
```
Save the `id` field -- this is the **phone number ID** used when setting up inbound call routing or making outbound calls.
**Phone number format:** Bolna stores the number exactly as provided. When matching inbound calls, the platform performs a flexible lookup that checks both the number with and without a `+` prefix. Use a consistent format across your trunk and inbound DID configuration.
***
## Create Trunk field reference
| Field | Type | Required | Default | Description |
| ------------------------------- | ------- | ----------- | ----------------- | ----------------------------------------------------------------------------------------------------------------------------------- |
| `name` | string | **Yes** | -- | Human-readable label. Must be unique per account. |
| `provider` | string | **Yes** | -- | SIP provider name (e.g. `"twilio"`, `"plivo"`, `"telnyx"`, `"vonage"`, `"custom"`). |
| `description` | string | No | `null` | Optional description for internal reference. |
| `auth_type` | string | **Yes** | -- | `"userpass"` or `"ip-based"`. |
| `auth_username` | string | Conditional | `null` | Required when `auth_type` is `"userpass"`. |
| `auth_password` | string | Conditional | `null` | Required when `auth_type` is `"userpass"`. |
| `gateways` | array | **Yes** | -- | At least one gateway. Each has `gateway_address` (required), `port` (default `5060`, use `5061` for TLS), `priority` (default `1`). |
| `ip_identifiers` | array | Conditional | `[]` | Required when `auth_type` is `"ip-based"`. List of `{ "ip_address": "..." }` objects. |
| `allow` | string | No | `"ulaw,alaw"` | Comma-separated codecs to allow. Always include `ulaw`. |
| `disallow` | string | No | `"all"` | Comma-separated codecs to disallow. |
| `inbound_enabled` | boolean | No | `false` | Set `true` to receive inbound calls. |
| `outbound_leading_plus_enabled` | boolean | No | `true` | Prepend `+` to outbound dialed numbers. |
| `transport` | enum | No | `"transport-udp"` | One of `"transport-udp"`, `"transport-tcp"`, `"transport-tls"`. |
| `media_encryption` | enum | No | `"no"` | One of `"no"`, `"sdes"`. `"sdes"` requires `transport="transport-tls"`. |
| `media_encryption_optimistic` | boolean | No | `false` | When `media_encryption="sdes"`, fall back to clear RTP if the carrier does not offer crypto in its SDP. |
| `direct_media` | boolean | No | `false` | RTP routed directly between caller and callee. Keep `false`. |
| `rtp_symmetric` | boolean | No | `true` | Symmetric RTP. Required for NAT. |
| `force_rport` | boolean | No | `true` | Force responses to source port. Required for NAT. |
| `qualify_frequency` | integer | No | `60` | SIP OPTIONS ping interval in seconds. `0` to disable. |
| `phone_numbers` | array | No | `[]` | Optional phone numbers to add at creation time. |
***
## Troubleshooting
### Inbound calls connect but the caller hears silence (one-way audio)
The most common cause is an SRTP mismatch between Bolna and your carrier. If the trunk has `media_encryption="sdes"` but the carrier has SRTP disabled (or vice versa), the SIP call sets up but the media path never establishes.
* Confirm SRTP is enabled on your provider's side.
* If you need a quick test, set `media_encryption_optimistic=true` -- Bolna will fall back to clear RTP if the carrier does not offer crypto in its SDP.
* If you don't need encrypted media, set `media_encryption="no"` and use UDP or TCP transport.
### `422` from Create / Update with `media_encryption='sdes' requires transport='transport-tls'`
SDES exchanges its keys inside SDP, so it must travel over an encrypted signaling channel. Either:
* Switch `transport` to `"transport-tls"` (and update the gateway port to `5061`), or
* Set `media_encryption` back to `"no"`.
### Outbound INVITE fails or rings forever on a particular carrier
If your carrier sends large SIP headers (long Diversion, P-Asserted-Identity, multiple Route headers), the INVITE may exceed the UDP MTU and get fragmented or dropped silently.
* Switch `transport` to `"transport-tcp"` -- this avoids UDP fragmentation. You don't need TLS for this; TCP alone is enough.
***
## Next steps
* [Set up inbound calls](/docs/sip-trunking/byot-inbound-calls) to route incoming calls to your AI agents
* [Make outbound calls](/docs/sip-trunking/byot-outbound-calls) from your SIP trunk numbers
* [Manage your trunk](/docs/api-reference/sip-trunks/overview) using the full SIP Trunk API
# Bring Your Own SIP Trunk to Bolna Voice AI
Source: https://www.bolna.ai/docs/sip-trunking/introduction
Connect your own SIP trunk to Bolna and use your existing telephony relationships and phone numbers for AI-powered inbound and outbound voice calls.
## What is Bring Your Own Telephony (BYOT)?
Bring Your Own Telephony (BYOT) lets you connect any standards-compliant SIP trunk to the Bolna platform. Instead of using Bolna's built-in telephony providers (Twilio, Plivo, etc.), you can use your existing SIP trunk provider, your own phone numbers, and your own calling rates.
Once connected, Bolna can:
* **Receive inbound calls** on your DID numbers and route them to AI agents
* **Place outbound calls** from your DID numbers using your trunk's minutes and rates
Learn more about [supported telephony providers](/docs/supported-telephony-providers).
**SIP Trunking** is currently in Beta.
Please reach out to us at [enterprise@bolna.ai](mailto:enterprise@bolna.ai) or schedule a call at [https://www.bolna.ai/meet](https://www.bolna.ai/meet) for more information and access.
## How to get started with your SIP Trunk
Configure your SIP provider and create a trunk on Bolna
Place outbound calls through your SIP trunk
Route incoming calls to your Bolna AI agents
Full API reference for managing SIP trunks
## Supported authentication methods
| Method | How it works |
| ---------- | --------------------------------------------------------------------------------------------------------------------------------- |
| `userpass` | Bolna authenticates to your SIP trunk using a username and password (SIP REGISTER or INVITE auth). |
| `ip-based` | Your SIP trunk identifies Bolna by source IP address; no username/password required. You must whitelist Bolna's IP on your trunk. |
## Why bring your own SIP trunk?
* **Use existing relationships**: Keep your current SIP provider and phone numbers
* **Cost control**: Use your own negotiated rates and minutes
* **Provider flexibility**: Works with any standards-compliant SIP trunk (Twilio Elastic SIP, Plivo, Zadarma, Telnyx, Vonage, DIDWW, and more)
* **Number portability**: No need to port numbers to a new provider
**Media encryption (SRTP via SDES) is supported on TLS trunks.** By default, BYOT trunks use plain RTP and that works on every transport. To turn on SDES, set the transport to TLS and `media_encryption` to `sdes` -- see [SIP Trunk setup](/docs/sip-trunking/byot-setup#prerequisites) for details. Your carrier must also be configured for SRTP.
## Next steps
Ready to connect your SIP trunk? Start with the [setup guide](/docs/byot-setup) to configure your provider and create a trunk on Bolna.
# Explore Telephony Integrations with Bolna Voice AI
Source: https://www.bolna.ai/docs/supported-telephony-providers
Review the telephony providers compatible with Bolna agents, including Twilio and Plivo. Integrate seamlessly to initiate inbound and outbound Voice AI calls.
## What telephony providers does Bolna support?
Bolna Voice AI integrates with leading telephony providers to enable both inbound and outbound voice calls for your AI agents.
## Supported use cases
You can create your agents on Bolna and use them to initiate calls for a variety of use-cases:
* 24x7 AI Front desk
* Automated scheduling
* Lead qualifications
* Recruitments
* Customer support
* Sales and outreach
* And many more
## How to set up telephony for your Bolna agents
We have the following telephony integrations available for initiating both **outbound** and **inbound** calls:
| Provider | Supported Countries | Inbound | Outbound | Bring Your Own Account |
| ------------------------------------------------ | --------------------------------------------------------- | ------- | -------- | ---------------------- |
| [Plivo](/docs/plivo) | India | ✅ Yes | ✅ Yes | ✅ Yes |
| [Exotel](/docs/exotel) | India | ✅ Yes | ✅ Yes | ✅ Yes |
| [Vobiz](/docs/vobiz) | India | ✅ Yes | ✅ Yes | ✅ Yes |
| [Twilio](/docs/twilio) | United States, United Kingdom, Singapore, Australia, etc. | ✅ Yes | ✅ Yes | ✅ Yes |
| [Your Own SIP Trunk](/docs/sip-trunking/introduction) | Any (depends on your SIP provider) | ✅ Yes | ✅ Yes | ✅ Yes |
## What's the difference between Twilio, Plivo, Vobiz & Exotel ?
All above telephony providers support inbound and outbound calls with Bolna agents. Choose based on your requirements:
* **Twilio**: if you're making or receiving calls outside India
* **Plivo**: if you're making or receiving calls within India
* **Vobiz**: if you're making or receiving calls within India
* **Exotel**: if you're making or receiving calls within India
* **[Your Own SIP Trunk (BYOT)](/docs/sip-trunking/introduction)**: if you want to use your existing SIP trunk provider, phone numbers, and rates with Bolna
## Next steps
Ready to set up telephony? [Connect your Twilio account](/docs/twilio) or [set up Plivo integration](/docs/plivo). Already have a SIP trunk? [Bring Your Own Telephony](/docs/sip-trunking/introduction) to use your existing provider. Need phone numbers? Learn how to [purchase dedicated phone numbers](/docs/buying-phone-numbers) directly from Bolna or [make your first outbound call](/docs/making-outgoing-calls).
# Book Calendar Slots with Bolna Voice AI and Cal.com
Source: https://www.bolna.ai/docs/tool-calling/book-calendar-slots
Learn how to book calendar appointments during live calls using Bolna Voice AI integrated with Cal.com. Automate appointment scheduling with your voice agent.
## What is Book Calendar Slots?
The **Book Calendar Slots** function allows your Voice AI agent to schedule appointments directly into your Cal.com calendar during live conversations. After a caller selects a time slot, your agent can book it instantly.
***
## Configuration Options
| Setting | Description |
| ------------------------ | ------------------------------------------------------------------------------------------------------------------------- |
| **Description (Prompt)** | When to book - e.g., *"Use this tool to book an appointment with given details and save the appointment in the calendar"* |
| **Pre-tool Message** | What agent says while booking - e.g., *"Just give me a moment, I'll be back with you"* |
| **API Key** | Your [Cal.com API key](https://app.cal.com/settings/developer/api-keys) |
| **Select Events** | Choose event types from your Cal.com account (15 min, 30 min, etc.) |
| **Choose Timezone** | Timezone for accurate slot booking |
**Select Events** and **Choose Timezone** dropdowns appear only after entering a valid Cal.com API key.
***
## How to Set Up
Navigate to [Tools Tab](/docs/agent-setup/tools-tab) in your agent configuration.
Click **"Select functions"** → choose **"Book appointment (using Cal.com)"**.
Paste your Cal.com API key. Event types will load automatically once validated.
Choose which event to book - *15 min meeting*, *30 min meeting*, or your custom events.
Match your Cal.com event timezone for accurate booking.
Add a clear trigger description - e.g., *"Book the appointment after the caller confirms their preferred time slot."*
Click **Save configuration** to apply your settings.
***
## Example Conversation
**Caller**: "I'll take the 2 PM slot on Friday."
**Agent**: "Perfect! Let me book that for you. Just give me a moment..."
*Agent triggers book\_appointment function*
**Agent**: "Done! I've booked your appointment for Friday at 2 PM. You'll receive a calendar invite shortly. Is there anything else I can help with?"
***
## Best Practices
Combine with [Check Calendar Slots](/docs/tool-calling/fetch-calendar-slots) - first fetch availability, then book
Ensure Bolna timezone matches Cal.com event timezone
Have your agent confirm the slot with the caller before booking
Ensure agent collects name and email before triggering the booking
**Pro workflow:** First use **Check Calendar Slots** to show availability, then use **Book Calendar Slots** after the caller confirms their preferred time.
**Test before deploying!** Verify appointments are being created correctly in your Cal.com calendar.
***
## Next Steps
Query available slots before booking
Build your own API integrations
Route calls to human agents
Complete guide to configuring functions
# Custom Function Calls: Complete Guide for Bolna Voice AI
Source: https://www.bolna.ai/docs/tool-calling/custom-function-calls
Build custom function tools with Bolna Voice agents using OpenAI standards. Complete guide with schema examples, code snippets & implementation best practices.
## What are Custom Functions?
Custom functions let your Voice AI agent call your own APIs during live conversations. Check order status, update a CRM, book appointments, or integrate with any system - all while on a call.
Bolna custom functions follow the [OpenAI function calling specification](https://platform.openai.com/docs/guides/function-calling). If you've used OpenAI function calling before, you'll feel right at home.
***
## How Custom Functions Work
The LLM sees your function's `name` and `description` to understand what the function does
Based on conversation context, the LLM decides if this function should be triggered
The LLM collects required parameter values from the conversation with the caller
Bolna makes the HTTP request to your API endpoint with the extracted parameters
The API response is returned to the LLM, which continues the conversation naturally
**The description is everything.** The LLM relies heavily on your description to know when to call the function. A vague description = unreliable triggering.
***
## Creating a Custom Function
You can create a custom function in two ways from the [Tools Tab](/docs/agent-setup/tools-tab):
Click **Write manually** to open the JSON editor and define the function schema from scratch. This gives you full control over every field.
The fields `name`, `description`, `key`, and `method` are mandatory. The `key` must always be set to `"custom_task"`.
If you already have a working API request in `curl`, click **Generate from cURL** to auto-generate a function schema instead of building it manually.
### How to use it
In the Tools Tab, click the **Generate from cURL** button under Add a Custom Tool.
Paste the full cURL request into the text area. Bolna will parse the URL, method, headers, and body.
Bolna generates a function configuration with auto-populated name, description, method, URL, and auth. Review all fields carefully.
Update the function name, improve the description for better LLM triggering, confirm parameters, and click **Submit**.
The import is a starting point, not a final configuration. Always verify authentication, parameter names, required fields, and the API URL before using the function in production.
### After generating, always check
Make it clear and use `snake_case` (e.g., `get_order_status`)
Describe *when* the model should call the function, not just what the API does
Remove anything the caller will never provide; mark only essential fields as required
Confirm secrets, tokens, and custom headers are correct for your environment
Add a short spoken message so callers know the agent is checking something
Combine with [context variables](/docs/using-context) to avoid asking for data you already have
***
## Complete Schema Structure
Every custom function has two parts: **Function Definition** (tells LLM what it does) and **API Configuration** (tells Bolna how to call your API).
```json theme={"system"}
{
"name": "function_name",
"description": "Detailed description of when to call this function",
"pre_call_message": "What agent says while the API is being called",
"parameters": {
"type": "object",
"properties": {
"param_name": {
"type": "string",
"description": "What this parameter represents"
}
},
"required": ["param_name"]
},
"key": "custom_task",
"value": {
"method": "GET",
"param": {
"param_name": "%(param_name)s"
},
"url": "https://your-api.com/endpoint",
"api_token": "Bearer your_token",
"headers": {}
}
}
```
**Mandatory:** The field `"key": "custom_task"` must be present exactly as shown. Do not modify this value.
***
## Schema Reference
Parts 1-2 follow the [OpenAI function calling specification](https://platform.openai.com/docs/guides/function-calling) - they define **what** the function does. Parts 3-5 are Bolna extensions that define **how** to execute the API call automatically.
### 1. Function Definition
These fields tell the LLM about your function:
| Field | Required | Description |
| ------------- | -------- | ----------------------------------------------------------------------- |
| `name` | Yes | Unique function identifier. Use `snake_case` (e.g., `get_order_status`) |
| `description` | Yes | Tells the LLM when to trigger this function. Be specific and detailed. |
| `parameters` | Yes | Defines what information to collect from the caller |
### 2. Parameters Object
The `parameters` object defines what information the LLM should collect from the caller.
```json theme={"system"}
"parameters": {
"type": "object",
"properties": {
"customer_name": {
"type": "string",
"description": "The customer's full name"
},
"order_id": {
"type": "string",
"description": "The order ID, usually starts with ORD-"
},
"quantity": {
"type": "integer",
"description": "Number of items"
}
},
"required": ["customer_name", "order_id"]
}
```
**Supported Data Types:**
| Type | Use Case | Example Values |
| --------- | ------------------------------- | --------------------------- |
| `string` | Text, names, IDs, phone numbers | `"John Doe"`, `"ORD-12345"` |
| `integer` | Whole numbers | `5`, `100`, `-10` |
| `number` | Decimal numbers | `29.99`, `3.14` |
| `boolean` | True/false flags | `true`, `false` |
**Required vs Optional:**
| In `required` array? | Behavior |
| -------------------- | --------------------------------------------------- |
| Yes | LLM will keep asking until this value is provided |
| No | Optional - included if mentioned, skipped otherwise |
### 3. Bolna Extensions
These fields are specific to Bolna:
| Field | Required | Description |
| ------------------ | -------- | -------------------------------------------------------------------------------- |
| `pre_call_message` | No | Message the agent speaks while API is executing (e.g., *"One moment please..."*) |
| `key` | Yes | Must be `"custom_task"` - identifies this as a custom function |
| `value` | Yes | API configuration object (see below) |
### 4. API Configuration (`value` object)
This tells Bolna how to make the HTTP request:
| Field | Required | Description |
| ----------- | -------- | ------------------------------------------------------ |
| `method` | Yes | HTTP method: `GET`, `POST`, `PUT`, `PATCH`, `DELETE` |
| `url` | Yes | Your API endpoint URL |
| `param` | Yes | Maps parameters to API request using format specifiers |
| `api_token` | No | Authorization header value (e.g., `Bearer your_token`) |
| `headers` | No | Additional HTTP headers as key-value pairs |
### 5. Format Specifiers
The `param` object maps your parameters to the API request. Use Python-style format specifiers:
| Data Type | Format Specifier | Example |
| --------- | ---------------- | ---------------------------------- |
| String | `%(param_name)s` | `"customer_id": "%(customer_id)s"` |
| Integer | `%(param_name)i` | `"quantity": "%(quantity)i"` |
| Float | `%(param_name)f` | `"price": "%(price)f"` |
**Parameter names must match exactly.** The name in `properties` must be identical to the name in `param` mapping (case-sensitive).
***
## Examples
The following examples use **illustrative endpoints and credentials** to demonstrate the schema structure. Replace the URLs, tokens, and parameter values with your own API details when implementing.
A customer calls and asks *"Where is my order?"* The agent collects the order ID and fetches the status from your backend.
**What the agent says:** *"Let me check the status of your order."*
**What Bolna sends:**
```bash theme={"system"}
curl --location 'https://api.yourstore.com/orders?order_id=ORD-78234' \
--header 'Authorization: Bearer sk_live_abc123'
```
**Function schema:**
```json theme={"system"}
{
"name": "check_order_status",
"description": "Use this function when the customer asks about their order status, delivery update, shipping progress, or tracking information. The customer must provide their order ID.",
"pre_call_message": "Let me check the status of your order.",
"parameters": {
"type": "object",
"properties": {
"order_id": {
"type": "string",
"description": "The customer's order ID. Usually starts with ORD- followed by numbers, e.g., ORD-78234."
}
},
"required": ["order_id"]
},
"key": "custom_task",
"value": {
"method": "GET",
"param": {
"order_id": "%(order_id)s"
},
"url": "https://api.yourstore.com/orders",
"api_token": "Bearer sk_live_abc123",
"headers": {}
}
}
```
**Example API response the LLM receives:**
```json theme={"system"}
{
"order_id": "ORD-78234",
"status": "shipped",
"estimated_delivery": "March 15, 2026",
"tracking_number": "1Z999AA10123456784"
}
```
The agent would then say something like: *"Your order ORD-78234 has been shipped and is expected to arrive by March 15th. Your tracking number is 1Z999AA10123456784."*
A customer calls and asks *"What's my current balance?"* The agent verifies their identity using their registered phone number and account ID, then fetches the balance.
**What the agent says:** *"Let me pull up your account details."*
**What Bolna sends:**
```bash theme={"system"}
curl --location 'https://api.yourbank.com/accounts/balance?account_id=ACC-991042&phone=%2B919876543210' \
--header 'Authorization: Bearer fin_api_key_001' \
--header 'X-Request-Source: voice-agent'
```
**Function schema:**
```json theme={"system"}
{
"name": "get_account_balance",
"description": "Use this function when the customer asks about their account balance, available credit, remaining amount, or account summary. Requires the customer's account ID and phone number for verification.",
"pre_call_message": "Let me pull up your account details.",
"parameters": {
"type": "object",
"properties": {
"account_id": {
"type": "string",
"description": "The customer's account ID, usually starts with ACC- followed by numbers."
},
"phone": {
"type": "string",
"description": "The customer's registered phone number for identity verification."
}
},
"required": ["account_id", "phone"]
},
"key": "custom_task",
"value": {
"method": "GET",
"param": {
"account_id": "%(account_id)s",
"phone": "%(phone)s"
},
"url": "https://api.yourbank.com/accounts/balance",
"api_token": "Bearer fin_api_key_001",
"headers": {
"X-Request-Source": "voice-agent"
}
}
}
```
**Example API response the LLM receives:**
```json theme={"system"}
{
"account_id": "ACC-991042",
"name": "Rahul Verma",
"current_balance": 24500.75,
"currency": "INR",
"last_transaction": "2026-03-12"
}
```
The agent would then say something like: *"Your current account balance is Rs. 24,500.75. Your last transaction was on March 12th."*
The `phone` parameter can be auto-injected using the `{from_number}` [context variable](/docs/using-context), so the caller does not need to repeat their number.
A caller wants to schedule a consultation. The agent collects their name, preferred date, and time, then creates the booking.
**What the agent says:** *"I'm booking that appointment for you now."*
**What Bolna sends:**
```bash theme={"system"}
curl --location 'https://api.yourclinic.com/v1/appointments' \
--header 'Content-Type: application/json' \
--header 'Authorization: Bearer clinic_token_xyz' \
--data '{
"patient_name": "Priya Sharma",
"preferred_date": "2026-03-20",
"preferred_time": "10:30 AM",
"reason": "General consultation"
}'
```
**Function schema:**
```json theme={"system"}
{
"name": "book_appointment",
"description": "Use this function when the caller wants to book, schedule, or set up an appointment, consultation, or visit. Collect the patient's name, their preferred date and time, and the reason for the visit.",
"pre_call_message": "I'm booking that appointment for you now.",
"parameters": {
"type": "object",
"properties": {
"patient_name": {
"type": "string",
"description": "Full name of the patient"
},
"preferred_date": {
"type": "string",
"description": "Preferred appointment date in YYYY-MM-DD format"
},
"preferred_time": {
"type": "string",
"description": "Preferred time, e.g., '10:30 AM' or '2:00 PM'"
},
"reason": {
"type": "string",
"description": "Brief reason for the appointment, e.g., 'General consultation' or 'Follow-up'"
}
},
"required": ["patient_name", "preferred_date", "preferred_time"]
},
"key": "custom_task",
"value": {
"method": "POST",
"param": {
"patient_name": "%(patient_name)s",
"preferred_date": "%(preferred_date)s",
"preferred_time": "%(preferred_time)s",
"reason": "%(reason)s"
},
"url": "https://api.yourclinic.com/v1/appointments",
"api_token": "Bearer clinic_token_xyz",
"headers": {
"Content-Type": "application/json"
}
}
}
```
The `reason` field is optional (not in the `required` array). If the caller mentions a reason, the LLM includes it. If not, it is skipped without asking.
A customer calls with a complaint or issue. The agent collects the details and creates a support ticket in your helpdesk system.
**What the agent says:** *"I'm creating a support ticket for this issue right away."*
**What Bolna sends:**
```bash theme={"system"}
curl --location 'https://api.yourhelpdesk.com/tickets' \
--header 'Content-Type: application/json' \
--header 'Authorization: Bearer helpdesk_key_789' \
--data '{
"caller_phone": "+919876543210",
"issue_category": "billing",
"description": "Customer was charged twice for their February subscription",
"priority": "high"
}'
```
**Function schema:**
```json theme={"system"}
{
"name": "create_support_ticket",
"description": "Use this function when the customer reports a problem, complaint, issue, or bug. Create a support ticket with the issue category, a summary of the problem, and priority level. The caller's phone number is automatically available.",
"pre_call_message": "I'm creating a support ticket for this issue right away.",
"parameters": {
"type": "object",
"properties": {
"caller_phone": {
"type": "string",
"description": "The customer's phone number"
},
"issue_category": {
"type": "string",
"description": "Category of the issue: billing, technical, account, shipping, or other"
},
"description": {
"type": "string",
"description": "A brief summary of the customer's issue in 1-2 sentences"
},
"priority": {
"type": "string",
"description": "Priority level: low, medium, or high. Set to high if the customer is upset or the issue is time-sensitive."
}
},
"required": ["caller_phone", "issue_category", "description"]
},
"key": "custom_task",
"value": {
"method": "POST",
"param": {
"caller_phone": "%(caller_phone)s",
"issue_category": "%(issue_category)s",
"description": "%(description)s",
"priority": "%(priority)s"
},
"url": "https://api.yourhelpdesk.com/tickets",
"api_token": "Bearer helpdesk_key_789",
"headers": {
"Content-Type": "application/json"
}
}
}
```
The `caller_phone` can be auto-injected using [context variables](/docs/using-context). Add `{from_number}` to your agent prompt, and the LLM will use it automatically instead of asking the caller for their number.
***
## Using Variables and Dynamic Context
[Context variables](/docs/using-context) defined in your agent prompt are automatically substituted into custom functions. The LLM won't ask the caller for these values - they're already available.
### Auto-Injected System Variables
| Variable | Description |
| --------------- | -------------------------------------------------------- |
| `{agent_id}` | The `id` of the agent |
| `{call_sid}` | Unique `id` of the phone call (from Twilio, Plivo, etc.) |
| `{from_number}` | Phone number that **initiated** the call |
| `{to_number}` | Phone number that **received** the call |
### How Variable Substitution Works
```text agent_prompt theme={"system"}
You are agent Sam speaking to {customer_name}.
The agent ID is "{agent_id}".
The call ID is "{call_sid}".
The customer's phone is "{to_number}".
```
```json custom_function theme={"system"}
{
"name": "log_interaction",
"description": "Log customer interaction to CRM",
"parameters": {
"type": "object",
"properties": {
"to_number": {
"type": "string",
"description": "Customer's phone number"
},
"agent_id": {
"type": "string",
"description": "Agent ID"
},
"customer_name": {
"type": "string",
"description": "Customer's name"
},
"customer_address": {
"type": "string",
"description": "Customer's address"
}
},
"required": ["to_number", "agent_id", "customer_name", "customer_address"]
},
"key": "custom_task",
"value": {
"method": "POST",
"param": {
"to_number": "%(to_number)s",
"agent_id": "%(agent_id)s",
"customer_name": "%(customer_name)s",
"customer_address": "%(customer_address)s"
},
"url": "https://my-api-dev.xyz",
"api_token": "Bearer your_token",
"headers": {}
}
}
```
```json runtime_substitution theme={"system"}
{
"to_number": "+19876543210",
"agent_id": "7d86b904-da64-4b8e-8f51-6fef2c630380",
"customer_name": "Bruce",
"customer_address": "221B Baker Street"
}
```
| Parameter | Defined in Prompt? | Result |
| ------------------ | --------------------- | ---------------------------- |
| `to_number` | Yes (system) | Auto-substituted |
| `agent_id` | Yes (system) | Auto-substituted |
| `customer_name` | Yes (passed via call) | Auto-substituted |
| `customer_address` | No | LLM will collect from caller |
***
## Best Practices
Include synonyms and variations: *"Use when customer asks about order status, shipping, delivery, or tracking"*
Set a friendly message like *"Let me check that for you"* so callers know to wait
Only mark parameters as required if the function truly cannot work without them
Verify your API works with tools like curl or Postman before adding to Bolna
Put known data in the agent prompt to avoid asking callers for information you already have
Parameter names in `properties` and `param` must be identical (case-sensitive)
***
## Troubleshooting
**Cause:** Description doesn't match what the caller is saying.
**Fix:** Make your description more comprehensive. Include synonyms and example phrases.
**Cause:** Incorrect URL, authentication, or headers.
**Fix:** Test your API with curl or Postman first. Verify `api_token` format and required headers.
**Cause:** Typo or format specifier mismatch.
**Fix:** Ensure parameter names match exactly between `properties` and `param`. Use `%(name)s` format.
**Cause:** Variable not defined in agent prompt.
**Fix:** Add the variable to your agent prompt using `{variable_name}` syntax.
***
## Next Steps
Learn about dynamic variable injection
Route calls to human agents
Book appointments via Cal.com
Programmatic function configuration
# Check Calendar Slots with Bolna and Cal.com
Source: https://www.bolna.ai/docs/tool-calling/fetch-calendar-slots
Integrate Bolna Voice Agents with Cal.com to fetch real-time available calendar slots during live conversations to check appointment availability automatically.
## What is Check Calendar Slots?
The **Check Calendar Slots** function lets your Voice AI agent query available appointment slots from Cal.com in real-time. When callers ask about availability, your agent instantly fetches open slots and presents options.
***
## Configuration Options
| Setting | Description |
| ------------------------ | ------------------------------------------------------------------------------------------ |
| **Description (Prompt)** | When to check availability - e.g., *"Fetch available slots before booking an appointment"* |
| **Pre-tool Message** | What agent says while fetching - e.g., *"Just a moment, let me check our availability"* |
| **API Key** | Your [Cal.com API key](https://app.cal.com/settings/developer/api-keys) |
| **Select Events** | Choose event types from your Cal.com account (15 min, 30 min, etc.) |
| **Choose Timezone** | Timezone for accurate slot times |
**Select Events** and **Choose Timezone** dropdowns appear only after entering a valid Cal.com API key.
***
## How to Set Up
Navigate to [Tools Tab](/docs/agent-setup/tools-tab) in your agent configuration.
Click **"Select functions"** → choose **"Check slot availability (using Cal.com)"**.
Paste your Cal.com API key. Event types will load automatically once validated.
Choose which event to check - *15 min meeting*, *30 min meeting*, or your custom events.
Match your Cal.com event timezone for accurate time communication.
Add a clear trigger description - e.g., *"Check available slots when caller wants to schedule a meeting."*
***
## Example Conversation
**Caller**: "Hi, I'd like to schedule a meeting with your team."
**Agent**: "Of course! Let me check our available slots for you."
*Agent triggers check\_availability\_of\_slots function*
**Agent**: "I have openings tomorrow at 10 AM, 2 PM, and 4 PM. We also have slots on Friday at 11 AM and 3 PM. Which works best for you?"
***
## Best Practices
Use *"Fetch available slots when caller wants to schedule or asks about times"* instead of just "Check availability"
Ensure Bolna timezone matches Cal.com event timezone to avoid confusion
Set a friendly message like *"Just a moment..."* so callers know to wait
Verify slots are being fetched correctly with test calls
**Timezone matters!** Mismatched timezones cause the agent to communicate incorrect times to callers.
***
## Next Steps
After checking availability, book the appointment
Build your own API integrations
Route calls to human agents
Complete guide to configuring functions
# Function Calling for Voice AI Agents
Source: https://www.bolna.ai/docs/tool-calling/introduction
Use function tools with Bolna Voice AI agents to automate workflows. Integrate calendar booking, call transfers, and custom API endpoints during live conversations.
## What is Function Calling?
Function calling lets your Voice AI agent execute real-time actions during live conversations. Instead of just responding with text, your agent can transfer calls, book appointments, fetch data from APIs, or trigger any custom workflow.
Function calling follows the [OpenAI specification](https://platform.openai.com/docs/guides/function-calling), so you can reuse existing function schemas with Bolna.
***
## Available Function Tools
Bolna provides built-in tools for common use cases. Click **+ Add** next to any tool in the Tools Tab to enable it.
Check open meeting slots from Cal.com in real-time
Create calendar bookings via Cal.com during a call
Route the call to a human agent or another number
Connect any external API endpoint with a custom schema
For custom integrations, you can either **write the function schema manually** or **generate it from a cURL command** you already have. See the [Custom Functions guide](/docs/tool-calling/custom-function-calls) for details.
***
## How It Works
The LLM sees your function's `name` and `description` to understand what the function does
Based on conversation context, the LLM decides if this function should be triggered
The LLM collects required parameter values from the conversation with the caller
Bolna makes the HTTP request to your API endpoint with the extracted parameters
The API response is returned to the LLM, which continues the conversation naturally
**The description is everything.** The LLM relies heavily on your function description to decide when to trigger it. A vague description leads to unreliable results.
***
## Context Variables
The following variables are automatically available in every conversation and can be passed to function parameters:
| Variable | Description |
| ---------------- | -------------------------------------------------------- |
| `{agent_id}` | The `id` of the agent |
| `{call_sid}` | Unique `id` of the phone call (from Twilio, Plivo, etc.) |
| `{from_number}` | Phone number that **initiated** the call |
| `{to_number}` | Phone number that **received** the call |
| Custom variables | Any variable you define in the agent prompt |
Variables defined in your agent prompt are automatically substituted in function parameters. Learn more in [Using Context Variables](/docs/using-context).
***
## Next Steps
Complete guide to building custom API integrations
Set up call routing to human agents
Integrate Cal.com for appointment scheduling
Configure tools from the agent setup interface
# Transfer Live Calls to Human Agents with Bolna Voice AI
Source: https://www.bolna.ai/docs/tool-calling/transfer-calls
Learn how to transfer live phone calls to human agents or custom endpoints using Bolna Voice AI. Enable seamless handoffs based on conversation context.
## What is Call Transfer?
Call transfer enables your Voice AI agent to route live calls to human agents or specific phone numbers based on conversation context. Essential for escalations, specialized support, or when human intervention is needed.
***
## Configuration Options
| Setting | Description |
| ---------------------------- | ------------------------------------------------------------------------------------------------------------------------------------------- |
| **Description (Prompt)** | Tell the LLM when to trigger the transfer. Be specific - e.g., *"Transfer when caller requests to speak with a human agent or sales team."* |
| **Transfer to phone number** | Destination number in international format (e.g., `+19876543210`) |
| **Pre-tool message** | What the agent says while transferring - e.g., *"Sure, I'll transfer the call for you. Please wait a moment."* Supports multiple languages. |
Add multiple languages for pre-tool messages using **+ Add** to support multilingual callers.
***
## How to Set Up Call Transfer
Navigate to the [Tools Tab](/docs/agent-setup/tools-tab) in your agent configuration.
Click **"Select functions"** → choose **"Transfer Call"** from the dropdown.
Enter the destination phone number where calls should be transferred.
Describe when the transfer should trigger - e.g., *"Transfer when caller asks for sales, pricing, or demos."*
Set the message your agent speaks while initiating the transfer.
Click **Save transfer call** to apply your settings.
**Multiple departments?** Add separate transfer functions for Sales, Support, Billing - each with its own phone number and trigger description.
***
## Example Conversation
**Caller**: "I'd like to speak with someone from your sales team."
**Agent**: "Sure, I'll transfer you to our sales team. Please wait a moment..."
*Agent triggers transfer\_call function → Call is routed to configured sales number*
***
## Best Practices
Use detailed descriptions like *"Transfer to sales when caller asks about pricing, demos, or purchasing"* instead of generic "Transfer call"
Verify destination numbers are correct and always reachable before deploying
Always set a friendly message so callers know they're being transferred
Have a fallback plan if the destination is busy or unavailable
**Test before deploying!** Failed transfers frustrate callers. Always verify phone numbers are correct and reachable.
***
## Next Steps
Build custom API integrations for your agent
Query availability via Cal.com integration
Schedule meetings during live calls
Complete function configuration guide
# Truecaller Verification for Phone Numbers
Source: https://www.bolna.ai/docs/truecaller-verification
Verify phone numbers with Truecaller to display your business name with logo when making calls to improve answer rates and build trust with Bolna Voice agents.
## What is Truecaller Verification?
Truecaller verification allows your **business name and logo** to be displayed on recipients' phones when your Voice AI agents make outbound calls. This powerful feature significantly increases call answer rates and builds instant trust with your customers by showing them exactly who is calling before they pick up.
Truecaller verification is available for phone numbers purchased through Bolna. The service costs **\$20 per month** per verified number.
## Why Use Truecaller Verification?
Recipients are significantly more likely to answer calls when they see your verified business name
Display your company logo alongside your business name on every call
Verified caller ID establishes credibility and professionalism with customers
Identified calls are far less likely to be marked as spam or blocked
## Verification Status States
Your phone number can be in one of the following Truecaller verification states:
| Status | Icon | Description |
| --------------------- | ----------------- | ----------------------------------------------------------- |
| **Unverified** | REQUEST | Number has not been submitted for Truecaller verification |
| **Pending** | PENDING | Verification request is being processed by our team |
| **Active** | ACTIVE | Number is verified and displaying your business information |
| **Delisting Pending** | DELISTING PENDING | Delisting request is being processed |
| **Delisted** | REQUEST | Number has been removed from Truecaller verification |
**Important**: When a number is in the **Delisting Pending** state, calls cannot be made from that number. Remove the number from any active agents and avoid using it until the delisting process is complete.
## How to Request Truecaller Verification
Follow these steps to get your phone number verified with Truecaller:
1. Navigate to the [Phone Numbers](https://platform.bolna.ai/phone-numbers) page in your Bolna dashboard.
Find the phone number you want to verify and click REQUEST in the **Verify on Truecaller** column.
2. A verification request form will appear. Enter your **Company Name** — this is the business name that will be displayed to call recipients when your Voice AI agents make calls.
3. Select the **Category** that best describes your business from the dropdown menu. Categories include Education, Finance & Insurance, Health & Wellness, and many more.
4. Choose a **Sub-category** that more specifically describes your business type. This helps Truecaller accurately classify your business for recipients.
5. Select the **Reason for Calling** from the options provided. This tells recipients the purpose of your calls, such as Customer Support, Delivery Confirmation, Front Desk, Recruitment, and more.
6. Upload your **Brand Icon** (company logo) that will be displayed alongside your business name.
**Brand Icon Requirements:**
* **File format**: PNG only
* **Dimensions**: Exactly **200 × 200 pixels**
* Use a clear, recognizable version of your logo. Avoid text-heavy images as they may not be legible at small sizes on mobile devices.
7. Click **Submit request** to send your verification application. Your number's status will change to **Pending**.
## After Submitting Your Request
Once you submit your Truecaller verification request:
Our team reviews your application to ensure it meets Truecaller's guidelines
Verification typically takes **a couple of business days**
You'll receive an email notification once your verification is activated
The status icon will change to when active
You can continue making calls while your verification is pending. The Truecaller display will only appear once the verification is active.
## Viewing Verification Details
For numbers with **Pending**, **Active**, or **Delisting Pending** status, click the status icon to view your verification details including:
* Company name
* Category and sub-category
* Reason for calling
## How to Delist a Number
If you no longer want Truecaller verification for a phone number, you can request delisting:
Navigate to [Phone Numbers](https://platform.bolna.ai/phone-numbers) and click the ACTIVE on the verified number.
In the verification details dialog, click the **Delist verification** button.
Your number's status will change to **Delisting Pending** while the delisting is being processed internally by the team. Note that once opted for delisting pending outbound and inbound calls on this number will be blocked.
**Critical Warning**: During the delisting process, your phone number **cannot be used for calls**. This includes both outbound calls and batch campaigns. Make sure to:
* Remove the number from any active Voice AI agents
* Pause any scheduled batch campaigns using this number
* Wait for the delisting to complete before reassigning the number
## Pricing
Truecaller verification is billed at **\$20 per month** per verified phone number. The charge is:
* Automatically deducted from your Bolna wallet balance
* Billed monthly from the date of verification activation
* Stopped when you delist the number (after the current billing period)
## Frequently Asked Questions
Verification typically takes **1-3 business days**. You'll receive an email notification once your verification is active.
To update your company name, logo, or other details, you'll need to delist the current verification and submit a new request with the updated information.
Common reasons for rejection include:
* **Brand icon not meeting requirements** — must be exactly 200×200 pixels PNG
* **Company name mismatch** — name not matching your registered business
* **Incorrect category** — category selection not appropriate for your business type
If rejected, you can submit a new request with corrected information.
Yes, you can request Truecaller verification for any phone number purchased through Bolna. Each number is verified and billed separately at \$20/month.
If your wallet balance is insufficient for the monthly renewal, your verification may be suspended. Ensure you maintain adequate balance to keep your verifications active.
Delisting typically takes **1-3 business days**. During this time, the number cannot be used for calls.
# Automate Outbound Calls with Bolna AI and Google Sheets
Source: https://www.bolna.ai/docs/tutorials/google-sheets/automate-calls-with-google-sheets
Build a call automation pipeline with Bolna Voice AI and Google Sheets. Trigger calls from a spreadsheet, track status via webhooks, and capture transcripts.
## What You'll Build
A lightweight, serverless pipeline that connects Google Sheets directly to the Bolna Voice AI platform. You will write a few functions in Google Apps Script that:
* **Trigger outbound calls** by reading phone numbers from your spreadsheet
* **Track call progress** in real time as Bolna sends webhook updates
* **Capture call data** like status, duration, transcripts, and errors back into the same sheet
This pattern works for any outbound use case, whether it is product announcements, feedback surveys, appointment reminders, onboarding calls, or lead qualification.
This tutorial uses the [Bolna Make a Call API](/docs/api-reference/calls/make) and [webhooks](/docs/polling-call-status-webhooks) with Google Apps Script. No external automation platforms or servers are required.
***
## Prerequisites
Free trial includes \$5 in credits
Create or pick any agent from the Agent Library
Generate one from the Developers page in your dashboard
Access to Google Sheets and Apps Script
You will also need your **Agent ID**, which is visible next to the agent name on the [Agent Setup](/docs/agent-setup/overview) page.
Trial accounts can only call **verified numbers**. Add yours via **User Profile → Verified Numbers** on the Bolna dashboard before testing.
***
## Step 1: Prepare Your Google Sheet
Create a new spreadsheet and add these column headers in row 1:
| Column | Header | Purpose |
| ------ | ---------------- | --------------------------------------------------------------- |
| A | **Phone Number** | Numbers to call |
| B | **Execution ID** | Returned by the API, used to link webhook updates to each row |
| C | **Status** | `scheduled` → `queued` → `in-progress` → `completed` / `failed` |
| D | **Duration** | Conversation length in seconds |
| E | **Transcript** | Full call transcript |
| F | **Timestamp** | Last status update time |
| G | **Error** | Error details, if any |
Fill column A with the phone numbers you want to call. Leave all other columns empty as the script will populate them automatically.
***
## Step 2: Open the Apps Script Editor
Go to **Extensions → Apps Script** in your Google Sheet. This opens a cloud-based JavaScript editor where all your automation code will live.
All code below goes into the default `Code.gs` file. You can optionally split it across multiple `.gs` files. Apps Script treats them all as a single project.
***
## Step 3: Configure Your Credentials
Add the following constants at the top of `Code.gs`. Replace the placeholder values with your actual details:
```javascript theme={"system"}
// Your spreadsheet ID (the string between /d/ and /edit in the sheet URL)
const SPREADSHEET_ID = 'YOUR_SPREADSHEET_ID';
const SHEET_NAME = 'Sheet1';
// Bolna credentials
const BOLNA_API_KEY = 'YOUR_BOLNA_API_KEY';
const BOLNA_AGENT_ID = 'YOUR_BOLNA_AGENT_ID';
const BOLNA_API_BASE = 'https://api.bolna.ai';
// Column index map (0-based) for clean references
const COL = {
PHONE: 0,
EXEC_ID: 1,
STATUS: 2,
DURATION: 3,
TRANSCRIPT: 4,
TIMESTAMP: 5,
ERROR: 6,
};
```
***
## Step 4: Write the Call Functions
Add these three functions to `Code.gs`:
Cleans and converts raw phone input into international format so calls don't fail on formatting issues.
```javascript theme={"system"}
function normalizePhone(raw) {
let phone = String(raw).replace(/[^\d+]/g, '');
if (phone.startsWith('+')) return phone;
if (phone.length === 10) return '+91' + phone; // adjust country code as needed
return '+' + phone;
}
```
Modify the country code (`+91`) to match your region, or remove the fallback entirely if all your numbers are already in international format.
Sends a POST request to the [Make a Call endpoint](/docs/api-reference/calls/make) and returns the `execution_id` that uniquely identifies this call.
```javascript theme={"system"}
function triggerCall(phone) {
const res = UrlFetchApp.fetch(`${BOLNA_API_BASE}/call`, {
method: 'post',
contentType: 'application/json',
headers: { Authorization: `Bearer ${BOLNA_API_KEY}` },
payload: JSON.stringify({
agent_id: BOLNA_AGENT_ID,
recipient_phone_number: phone,
}),
muteHttpExceptions: true,
});
const body = JSON.parse(res.getContentText());
if (!body.execution_id) throw new Error('No execution_id returned');
return body.execution_id;
}
```
Iterates over every row, skips rows that already have a status, and triggers a call for each new phone number.
```javascript theme={"system"}
function runBolnaCalls() {
const sheet = SpreadsheetApp.openById(SPREADSHEET_ID).getSheetByName(SHEET_NAME);
const rows = sheet.getDataRange().getValues();
for (let i = 1; i < rows.length; i++) {
const phoneRaw = rows[i][COL.PHONE];
const status = rows[i][COL.STATUS];
if (!phoneRaw || status) continue; // skip empty or already-processed rows
try {
const phone = normalizePhone(phoneRaw);
const executionId = triggerCall(phone);
sheet.getRange(i + 1, COL.PHONE + 1).setValue(phone);
sheet.getRange(i + 1, COL.EXEC_ID + 1).setValue(executionId);
sheet.getRange(i + 1, COL.STATUS + 1).setValue('queued');
} catch (err) {
sheet.getRange(i + 1, COL.STATUS + 1).setValue('failed');
sheet.getRange(i + 1, COL.ERROR + 1).setValue(err.message);
}
}
}
```
This is the **only function you run manually**. All other updates happen automatically through webhooks.
***
## Step 5: Handle Webhook Updates
As each call progresses, Bolna sends POST requests to your webhook URL with status updates. The `doPost` function catches these, matches them to the right row using the `execution_id`, and writes the data back to the sheet:
```javascript theme={"system"}
function doPost(e) {
let webhook;
try {
webhook = JSON.parse(e.postData.contents);
} catch {
return ContentService.createTextOutput('Invalid JSON');
}
const executionId = webhook.execution_id || webhook.id;
if (!executionId) return ContentService.createTextOutput('No execution_id');
const sheet = SpreadsheetApp.openById(SPREADSHEET_ID).getSheetByName(SHEET_NAME);
const rows = sheet.getDataRange().getValues();
for (let i = 1; i < rows.length; i++) {
if (String(rows[i][COL.EXEC_ID]) !== String(executionId)) continue;
const row = i + 1;
if (webhook.status)
sheet.getRange(row, COL.STATUS + 1).setValue(webhook.status);
if (webhook.updated_at || webhook.created_at)
sheet.getRange(row, COL.TIMESTAMP + 1).setValue(webhook.updated_at || webhook.created_at);
if (webhook.status === 'completed') {
if (webhook.conversation_duration)
sheet.getRange(row, COL.DURATION + 1).setValue(webhook.conversation_duration + 's');
if (webhook.transcript)
sheet.getRange(row, COL.TRANSCRIPT + 1).setValue(webhook.transcript.slice(0, 5000));
}
if (webhook.status === 'failed')
sheet.getRange(row, COL.ERROR + 1).setValue(webhook.error_message || webhook.status);
break;
}
return ContentService.createTextOutput('OK');
}
```
`doPost` is a **reserved function** in Google Apps Script. It runs automatically whenever your deployed script receives an HTTP POST request, so you never invoke it manually. The webhook payload mirrors the [Get Execution API](/docs/api-reference/executions/get_execution) response.
***
## Step 6: Deploy and Connect the Webhook
In the Apps Script editor, click **Deploy → New Deployment**. Set the type to **Web App**, execute as **Me**, and grant access to **Anyone**.
After deploying, copy the generated URL. This is your webhook endpoint.
In the Bolna dashboard, navigate to your agent's [Analytics tab](/docs/agent-setup/analytics-tab) and paste the URL into the **Webhook URL** field. Bolna will now push call events to this endpoint.
Every time you edit your Apps Script code, you need to create a **new deployment** for changes to take effect. The live URL changes with each deployment.
***
## Step 7: Run the Automation
Populate column A in your sheet with the numbers you want to call. Leave columns B through G empty.
In the Apps Script editor, select `runBolnaCalls` from the function dropdown and click **Run**.
Switch to your Google Sheet. You will see execution IDs and `queued` statuses appear immediately. As calls complete, the sheet updates in real time with status, duration, transcripts, and timestamps.
***
## Optional: Add a Run Button to Your Sheet
Create a new file called `ui.gs` in Apps Script and paste the following. After saving, refresh your Google Sheet. A **Bolna** menu will appear in the menu bar.
```javascript theme={"system"}
function onOpen() {
SpreadsheetApp.getUi()
.createMenu('Bolna')
.addItem('Run Calls', 'runBolnaCalls')
.addToUi();
}
```
***
## How It All Works Together
Here is a quick walkthrough of the entire flow from start to finish:
1. **You fill phone numbers** into Column A of your Google Sheet
2. **`runBolnaCalls()` reads each row**, normalizes the phone number, and sends a POST request to the Bolna [Make a Call API](/docs/api-reference/calls/make)
3. **Bolna returns an `execution_id`** for each call, which the script writes into Column B along with a `queued` status
4. **The Bolna Voice AI Agent** places the call, handles the conversation, and tracks progress internally
5. **On every status change**, Bolna sends a webhook POST to your deployed Apps Script URL
6. **`doPost()` receives the webhook**, finds the matching row by `execution_id`, and fills in the status, duration, transcript, and timestamp
7. **Your Google Sheet stays up to date** automatically as each call completes or fails
The `execution_id` is what ties everything together. It is returned when a call is triggered and included in every webhook update, so the script always knows exactly which row to update.
***
## Next Steps
Run large-scale campaigns with built-in concurrency controls
Pull structured fields like intent, sentiment, or confirmed appointments from calls
Automatically re-attempt unanswered or failed calls
Full reference for webhook payloads and call status polling
# Using Bolna AI with No-code Tools
Source: https://www.bolna.ai/docs/tutorials/introduction
Build your custom workflows and applications using Bolna Voice AI integrations with popular automations tools like Make.com, Zapier and viaSocket
## What are Bolna no-code integrations?
Bolna Voice AI seamlessly integrates with popular automation platforms like Make.com, Zapier, n8n, and viaSocket. These integrations allow you to build powerful workflows that trigger actions before, during, or after voice calls—without writing any code.
## Why use no-code tools with Bolna?
No-code automation platforms enable you to:
* **Automate post-call workflows**: Send emails, SMS, or WhatsApp messages after calls
* **Sync with CRMs**: Automatically update Salesforce, HubSpot, or other systems with call data
* **Schedule follow-ups**: Create calendar events or reminders based on call outcomes
* **Trigger notifications**: Alert your team through Slack, Discord, or other channels
* **Build complex workflows**: Chain multiple actions together based on call results
## How to integrate Bolna with Make.com
1. Create API connection with Bolna AI + Make.com: [Read tutorial](/docs/tutorials/make-com/create-bolna-api-connection).
2. Create Webhook connection with Bolna AI + Make.com: [Read tutorial](/docs/tutorials/make-com/create-bolna-webhook-connection).
3. Email workflows using Bolna AI with Make.com: [Read tutorial](/docs/tutorials/make-com/send-email-after-bolna-call).
4. SMS workflows using Bolna AI with Make.com: [Read tutorial](/docs/tutorials/make-com/send-sms-after-bolna-call).
5. WhatsApp workflows using Bolna AI with Make.com: [Read tutorial](/docs/tutorials/make-com/send-whatsapp-after-bolna-call).
## How to integrate Bolna with n8n.io
1. Create API connection with Bolna AI + n8n: [Read tutorial](/docs/tutorials/n8n/send-email-after-bolna-call).
## How to integrate Bolna with Zapier
1. Create API connection with Bolna AI + Zapier: [Read tutorial](/docs/tutorials/zapier/create-bolna-api-connection).
## How to integrate Bolna with viaSocket
1. Create API connection with Bolna AI + viaSocket: [Read tutorial](/docs/tutorials/viasocket/create-bolna-api-connection).
## How to automate calls with Google Sheets
1. Set up a Google Sheet with call tracking columns and trigger calls via Apps Script: [Read tutorial](/docs/tutorials/google-sheets/automate-calls-with-google-sheets).
## Next steps
Ready to build powerful voice AI workflows? Start with these resources:
* Learn about the [Bolna API](/docs/api-reference/introduction) for authentication and endpoints
* Set up [webhooks in the Tasks Tab](/docs/agent-setup/analytics-tab) for post-call actions
* Review [data extraction](/docs/using-extractions) to capture structured call information
* Explore [custom function calls](/docs/tool-calling/custom-function-calls) for in-call integrations
For support with automation platforms, [contact our team](mailto:support@bolna.ai) or join our community.
# Create Bolna API connection with Make.com
Source: https://www.bolna.ai/docs/tutorials/make-com/create-bolna-api-connection
Learn how to establish an API connection between Bolna Voice AI agents and Make.com, facilitating seamless integration and automation.
## Following are the steps to create a API connection
In this tutorial, we will:
1. Use Bolna's Make.com Module `Make an Outgoing Phone Call` module
2. Create a new API connection
Please refer to [this documentation](/docs/api-reference/introduction#authentication) for creating a new API Key.
After completing the above steps, you can use Action modules to make Bolna APIs call on Make.com.
Please refer to Bolna APIs from [API reference docs](/docs/api-reference/introduction).
# Create Bolna Webhook connection with Make.com
Source: https://www.bolna.ai/docs/tutorials/make-com/create-bolna-webhook-connection
Step-by-step tutorial on integrating Bolna Voice AI agents with Make.com using webhook connections for seamless workflow automations.
## Following are the steps to create a Webhook connection
In this tutorial, we will:
1. Use Bolna's Make.com Trigger `Watch end of Phone call` module
2. Create a new Webhook connection
3. Generate a Webhook URL on Make.com
4. Use the Webhook URL created by Make.com in Bolna's voice AI agent
After completing the above steps, your Bolna Voice AI agent is successfully configured to automatically send phone call information to Make.com.
# Using Bolna AI with Make.com
Source: https://www.bolna.ai/docs/tutorials/make-com/overview
Learn how to connect Bolna AI with Make.com to build custom automation workflows. Trigger voice calls, sync data, and automate tasks easily.
## Bolna AI modules using APIs on Make.com
These are modules that require [Bolna's API connection with Make.com](/docs/tutorials/make-com/create-bolna-api-connection).
Use this to make Outgoing Phone Calls to phone numbers
Use this to performs any authorized API call
## Bolna AI Trigger modules using webhooks on Make.com
These get triggered when Make.com receives events from Bolna servers and requires [Bolna's webhook connection with Make.com](/docs/tutorials/make-com/create-bolna-webhook-connection).
Use this to get entire payload of call data post every every
***
## Bolna + Make.com Tutorials
# Integrating make.com with Bolna AI to send emails
Source: https://www.bolna.ai/docs/tutorials/make-com/send-email-after-bolna-call
Discover how to automate email notifications after a Bolna Voice AI phone call using Make.com for your automations and workflows.
Connect Bolna with any of your favorite apps in just a few clicks using [official bolna's make.com integrations](https://www.make.com/en/integrations/bolna).
## Overview and requirements
1. Bolna account. You may create a free Bolna account by [signing up on Bolna](https://platform.bolna.ai/sign-up)
2. A Bolna Voice AI agent which will be making the calls
3. Official Bolna's Make.com `Bolna Watch end of Phone call` trigger integration
## Steps to send emails after a Bolna AI phone call is completed
Follow the [webhook connection guide](/docs/tutorials/make-com/create-bolna-webhook-connection) to create a webhook connection and generate a webhook URL.
Please note:
1. If you want to use any extraction details, it will be provided as a JSON under `"extracted_data"` as shown below. Please refer to [extracting conversation data](/docs/using-extractions) for more details and using it.
```json using extracted content theme={"system"}
...
...
"extracted_data": {
"address": "Market street, San francisco",
"salary_expected": "100k USD"
},
...
```
2. Any dynamic variables you pass for making the call, can be retrieved from `"context_details" > "recipient_data"` as shown below:
```json using user details theme={"system"}
...
"context_details": {
"recipient_data": {
"name": "Harry",
"email": "harry@hogwarts.com"
},
"recipient_phone_number": "+19876543210"
},
...
```
# Integrating make.com with Bolna AI to send SMS
Source: https://www.bolna.ai/docs/tutorials/make-com/send-sms-after-bolna-call
Discover how to automate SMS notifications after a Bolna Voice AI phone call by integrating with Make.com, improving follow-up communication.
Connect Bolna with any of your favorite apps in just a few clicks using [official bolna's make.com integrations](https://www.make.com/en/integrations/bolna).
## Overview and requirements
1. Bolna account. You may create a free Bolna account by [signing up on Bolna](https://platform.bolna.ai/sign-up)
2. A Bolna Voice AI agent which will be making the calls
3. Official Bolna's Make.com `Bolna Watch end of Phone call` trigger integration
## Steps to send SMS after a Bolna AI phone call is completed
Follow the [webhook connection guide](/docs/tutorials/make-com/create-bolna-webhook-connection) to create a webhook connection and generate a webhook URL.
Please note:
1. If you want to use call summary, it will be provided under `"summary"` as shown below.
```json using call summary theme={"system"}
...
...
"summary": "The conversation was between a user named Harry and an agent named Charles from Alexa. Charles initiated the call to assist Harry with inquiries about Apple Service Center. Harry asked for the location of the closest service center, and Charles informed about Apple Union Square, 300 Post Street San Francisco. After receiving the information, Harry indicated he had no further questions, and Charles offered to help in the future before concluding the call.",
...
```
2. Any dynamic variables you pass for making the call, can be retrieved from `"context_details" > "recipient_data"` as shown below:
```json using user details theme={"system"}
...
"context_details": {
"recipient_data": {
"name": "Harry",
"email": "harry@hogwarts.com"
},
"recipient_phone_number": "+19876543210"
},
...
```
# Integrating make.com with Bolna AI to send WhatsApp
Source: https://www.bolna.ai/docs/tutorials/make-com/send-whatsapp-after-bolna-call
Learn how to send automated WhatsApp messages following a Bolna Voice AI phone call by integrating with Make.com.
Connect Bolna with any of your favorite apps in just a few clicks using [official bolna's make.com integrations](https://www.make.com/en/integrations/bolna).
## Overview and requirements
1. Bolna account. You may create a free Bolna account by [signing up on Bolna](https://platform.bolna.ai/sign-up)
2. A Bolna AI agent which will be making the calls
3. Official Bolna's Make.com `Bolna Watch end of Phone call` trigger integration
## Steps to send WhatsApp after a Bolna AI phone call is completed
Follow the [webhook connection guide](/docs/tutorials/make-com/create-bolna-webhook-connection) to create a webhook connection and generate a webhook URL.
Please note:
1. If you want to use any extraction details, it will be provided as a JSON under `"extracted_data"` as shown below. Please refer to [extracting conversation data](/docs/using-extractions) for more details and using it.
```json using extracted content theme={"system"}
...
...
"extracted_data": {
"salary_expected": "120K USD"
},
...
```
2. Any dynamic variables you pass for making the call, can be retrieved from `"context_details" > "recipient_data"` as shown below:
```json using user details theme={"system"}
...
"context_details": {
"recipient_data": {
"name": "Harry",
"email": "harry@hogwarts.com"
},
"recipient_phone_number": "+19876543210"
},
...
```
# Using Bolna AI with n8n
Source: https://www.bolna.ai/docs/tutorials/n8n/overview
Learn how to integrate Bolna Voice AI with n8n to create custom workflows, enabling seamless automation between Bolna and other applications.
Integrating Bolna Voice AI with [n8n](https://n8n.io/) allows you to trigger powerful, custom workflows from your voice agent's activities. With this integration, a completed Bolna call can initiate actions in hundreds of apps connected through n8n, making your processes more efficient and reducing manual work. It helps streamline post-call workflows and improve productivity by automating repetitive tasks like sending emails or updating a CRM.
## Bolna AI Triggers on n8n
The primary way to integrate Bolna with n8n is by using a webhook. Bolna sends data to an n8n webhook URL when an event occurs, which then triggers your workflow.
To create Outbound calls
Get all agents executions and their details
***
You can get help from the n8n community at [https://community.n8n.io/](https://community.n8n.io/).
# Integrating n8n with Bolna AI to send emails
Source: https://www.bolna.ai/docs/tutorials/n8n/send-email-after-bolna-call
Discover how to automate email notifications after a Bolna Voice AI phone call using n8n for your automations and workflows.
Connect Bolna with any of your favorite apps in just a few clicks using n8n's powerful and flexible workflow automation.
## Overview and requirements
1. A **Bolna account**. You may create a free Bolna account by [signing up on Bolna](https://platform.bolna.ai/sign-up).
2. A **Bolna Voice AI agent** which will be making the calls.
3. An **n8n instance** (cloud or self-hosted) with its **`Webhook`** trigger node.
## Steps to send emails after a Bolna AI phone call is completed
In your n8n canvas, add a **`Webhook`** node to start your workflow. Copy the **Test URL** provided by the node and paste it into the `webhook_url` field in your Bolna agent's configuration. Finally, click **"Listen for Test Event"** in n8n and make a test call with your Bolna agent to send sample data to your workflow.
Add a **`Gmail`** node (or any other email node like `Send Email (SMTP)`) after the Webhook trigger. Connect your email account in the credentials section. Then, map the data received from the Bolna webhook into the email fields using n8n's expression editor.
Please note:
1. If you want to use any extraction details, it will be provided as a JSON under `"extracted_data"`. You can access it in n8n using an expression like `{{ $json.body.extracted_data.address }}`.
```json theme={"system"}
...
...
"extracted_data": {
"address": "Market street, San francisco",
"salary_expected": "100k USD"
},
...
```
2. Any dynamic variables you pass for making the call can be retrieved from `"context_details" > "recipient_data"`. You can access the recipient's email with an expression like `{{ $json.body.context_details.recipient_data.email }}`.
```json theme={"system"}
...
"context_details": {
"recipient_data": {
"name": "Harry",
"email": "harry@hogwarts.com"
},
"recipient_phone_number": "+19876543210"
},
...
```
Click **"Execute Workflow"** on your n8n canvas. The workflow will use the data captured from the last test call. You should see a green success indicator on both the Webhook and the Gmail nodes, confirming that the data was processed and the email was sent successfully.
Check the recipient's inbox to confirm the email has been delivered. Verify that all the dynamic data, such as the recipient's name and the extracted call details, have been correctly populated in the email. Once confirmed, save and **activate your workflow**. Remember to replace the Test URL in Bolna with the **Production URL** from your n8n Webhook node for live calls.
# Receive Inbound Calls via SIP Trunk on Bolna
Source: https://www.bolna.ai/docs/tutorials/sip-trunking/inbound-calls
Route incoming phone calls from your SIP trunk to Bolna AI agents. Map DID phone numbers to specific agents so inbound calls are automatically answered by your Voice AI.
## How Inbound Calls Work
When someone calls your DID phone number, here is the complete flow:
A caller on the PSTN (regular phone network) dials your DID phone number, for example `+919876543210`.
Your SIP trunk provider (Plivo or Twilio) receives the call and forwards a SIP INVITE message to Bolna's SIP server at `sip:13.200.45.61:5060`, based on the origination settings you configured in the previous steps.
Bolna receives the INVITE and looks at the called number in the SIP headers. It matches this number against your registered phone numbers to find the associated trunk and agent.
The call is routed to the AI agent that you have **mapped** to that phone number. The agent answers and begins the conversation, speaking and listening in real-time.
***
## Prerequisites
Before setting up inbound calls, make sure you have completed all these previous steps:
1. Created a SIP trunk on your provider ([Plivo guide](/docs/tutorials/sip-trunking/plivo-trunk-setup) or [Twilio guide](/docs/tutorials/sip-trunking/twilio-trunk-setup))
2. Configured origination settings so your provider knows to route inbound calls to `sip:13.200.45.61:5060`
3. [Registered the trunk on Bolna](/docs/tutorials/sip-trunking/register-trunk-on-bolna) with `inbound_enabled` set to `true`
4. [Added your phone numbers](/docs/tutorials/sip-trunking/register-trunk-on-bolna#step-2-add-phone-numbers) to the trunk on Bolna
5. Created a Bolna AI agent via the [Dashboard](https://platform.bolna.ai/) or the [Agent API](/docs/api-reference/agent/v2/create)
***
## Map a Phone Number to an AI Agent
This is the key step where you tell Bolna which AI agent should answer calls on a specific phone number. Use the [Set Inbound Agent API](/docs/api-reference/inbound/agent):
```bash request theme={"system"}
curl -X POST https://api.bolna.ai/inbound/setup \
-H "Authorization: Bearer " \
-H "Content-Type: application/json" \
-d '{
"agent_id": "agt-xxxxxxxx-xxxx-xxxx-xxxx-xxxxxxxxxxxx",
"phone_number_id": "01HQNUMBER111222333"
}'
```
```json response theme={"system"}
{
"message": "SIP trunk number successfully mapped to agent"
}
```
### Where to find these values
| Field | Type | Where to Find It |
| ----------------- | ------ | ---------------------------------------------------------------------------------------------------------------------------------------------------------------------------------------------------------------------------------------------------------------------------------------- |
| `agent_id` | string | The UUID of your Bolna agent. Found in the [Bolna Dashboard](https://platform.bolna.ai/) by clicking on your agent, or returned by the [Create Agent API](/docs/api-reference/agent/v2/create). |
| `phone_number_id` | string | The ID of the phone number on Bolna. This must be a number you purchased on your SIP provider and then [added to your trunk on Bolna](/docs/tutorials/sip-trunking/register-trunk-on-bolna#step-2-add-phone-numbers). Use the `id` from the Add Number response, not the phone number itself. |
**One number can only be mapped to one agent at a time.** If you map a number to a new agent, it is automatically unmapped from the previous agent. When a number is mapped to an agent via SIP trunk, Bolna automatically sets the audio format to **ulaw** (G.711) to match the trunk's requirements.
***
## Test Your Inbound Setup
After mapping your number, test the complete flow:
From any phone (a mobile phone will do), call the DID number you mapped to the agent. For example, dial `+919876543210`.
You should hear your AI agent's greeting message. Try having a brief conversation to confirm the agent is responding correctly.
After the call, verify it appeared in:
* Your [Bolna Dashboard](https://platform.bolna.ai/) call history
* Your SIP provider's call logs ([Plivo logs](https://console.plivo.com/zentrunk/logs/calls/) or [Twilio logs](https://www.twilio.com/console/sip-trunking/logs))
***
## Unlink a Number from an Agent
To stop an agent from answering calls on a specific number (without removing the number from the trunk entirely), use the unlink endpoint:
```bash theme={"system"}
curl -X POST https://api.bolna.ai/inbound/unlink \
-H "Authorization: Bearer " \
-H "Content-Type: application/json" \
-d '{
"agent_id": "agt-xxxxxxxx-xxxx-xxxx-xxxx-xxxxxxxxxxxx",
"phone_number_id": "01HQNUMBER111222333"
}'
```
After unlinking, inbound calls to that number will no longer be answered by any agent. The number remains on the trunk and can be re-mapped to a different agent (or the same agent) at any time.
***
## Troubleshooting Inbound Calls
If calls ring on the caller's end but never reach Bolna:
* **Check your provider's origination settings.** Confirm the origination URI is set to `sip:13.200.45.61:5060` on your provider.
* **Check the phone number assignment** on your provider's side:
* **Plivo:** Ensure the Application Type is set to `Zentrunk` and the correct inbound trunk is selected for the number.
* **Twilio:** Ensure the number is associated with the correct trunk in the Numbers tab.
* **Review your provider's call logs** for error codes or rejection reasons (e.g., `404 Not Found` or `403 Forbidden`).
If the call connects (no ringing tone stops) but neither party can hear anything:
* **SRTP is likely enabled.** This is the most common cause. Ensure Secure Trunking / SRTP is **disabled** on your SIP provider.
* **Check codec settings.** Verify that `ulaw` is in the `allow` list on your Bolna trunk configuration.
* **Check Symmetric RTP.** Ensure `rtp_symmetric` is set to `true` on your Bolna trunk.
If the call fails immediately with an error:
* **Phone number not registered.** Confirm the number has been [added to the trunk on Bolna](/docs/tutorials/sip-trunking/register-trunk-on-bolna#step-2-add-phone-numbers) using the Add Number API.
* **Number not mapped to an agent.** Confirm you have [mapped the number to an agent](#map-a-phone-number-to-an-ai-agent) using the inbound setup API.
* **Inbound is disabled.** Check your trunk configuration and verify that `inbound_enabled` is set to `true`.
* **Number format mismatch.** The number in the SIP INVITE's `To` header should match what you stored. Bolna performs flexible matching (with/without `+`), but try to keep the format consistent.
If the call connects to Bolna but the agent doesn't speak:
* **Verify the agent is active.** Open the [Bolna Dashboard](https://platform.bolna.ai/), find your agent, and confirm it is in an active state.
* **Check provider connections.** Make sure all required AI providers (transcriber, LLM, and voice synthesizer) are properly configured and connected in the agent's settings.
***
## Next Steps
Place outbound calls from your SIP trunk numbers using AI agents
Full API reference for managing SIP trunks and phone numbers
# SIP Trunking for Voice AI on Bolna
Source: https://www.bolna.ai/docs/tutorials/sip-trunking/introduction
Learn what SIP trunking is, how it works, the benefits it offers, and how Bolna enables you to bring your own SIP trunk for AI-powered voice calls.
## What is a SIP Trunk?
A **SIP trunk** (Session Initiation Protocol trunk) is a virtual phone line that connects your phone system to the public telephone network (PSTN) over the internet. Instead of physical copper wires, voice calls are transmitted as data packets over your existing internet connection.
| Traditional Phone Line | SIP Trunk |
| ------------------------------------ | --------------------------------- |
| Physical copper wires | Virtual connection over internet |
| Fixed capacity (23 channels per PRI) | Scalable on demand |
| Local provider lock-in | Provider-agnostic, works globally |
| High fixed monthly costs | Pay-per-use or wholesale rates |
Just like email replaced physical mail for messages, SIP trunking replaces physical phone lines for calls. The calls sound the same to the person on the other end.
***
## How Does SIP Trunking Work?
Two protocols work together: **SIP** handles the signaling (setting up and tearing down calls), and **RTP** carries the actual voice audio.
### The Call Flow
A **SIP INVITE** is sent to the provider's gateway with the destination number and codec preferences (e.g., G.711 ulaw).
The provider verifies the request via **IP-based auth** or **username/password** (digest auth), then routes the call to the PSTN.
Both sides exchange **SDP** messages to agree on audio codecs, IP addresses, and ports for the voice stream.
Voice audio flows as **RTP packets** between the endpoints, encoded using the agreed codec (typically G.711 ulaw at 64 kbps).
When either party hangs up, a **SIP BYE** message closes the session and stops the audio stream.
### Key Terms
| Term | Meaning |
| --------------- | ------------------------------------------------------------------------ |
| **Origination** | Receiving inbound calls from the PSTN and delivering them to your system |
| **Termination** | Sending outbound calls from your system to the PSTN via the trunk |
| **DID Number** | A phone number assigned to your trunk that external callers can dial |
| **Gateway** | The provider's server address where SIP traffic is sent |
| **Codec** | Audio encoding format (G.711 ulaw is the standard) |
***
## How Bolna Accommodates SIP Trunking
Bolna's **Bring Your Own Telephony (BYOT)** feature lets you connect any standards-compliant SIP trunk. Bolna runs an **Asterisk-based SIP media server** with the **PJSIP** channel driver.
When you register your trunk:
1. **Bolna creates a SIP endpoint** with your gateway address, authentication details, and codec preferences
2. **Inbound calls** arrive at Bolna's server (`sip:13.200.45.61:5060`), get matched to a registered DID, and route to the assigned AI agent
3. **Outbound calls** are sent through your trunk's gateway using your credentials and caller ID
4. **The AI agent** handles the conversation in real-time (speech-to-text, LLM response, text-to-speech)
### Supported Authentication
| Method | How It Works | Best For |
| ---------------------------------- | -------------------------------------------- | ---------------------- |
| **Username/Password** (`userpass`) | SIP digest auth with username and password | Zadarma, Vonage, DIDWW |
| **IP-Based** (`ip-based`) | Bolna identified by source IP `13.200.45.61` | Plivo Zentrunk, Telnyx |
***
## Benefits of Using a SIP Trunk with Bolna
Keep your current SIP provider, contracts, and phone numbers. Connect your trunk to Bolna and your AI agents are ready instantly.
Pay your SIP provider directly for call minutes at your own negotiated rates. Bolna charges separately only for AI processing.
Your DID numbers stay with your current provider. No porting, no downtime. Just point them to Bolna's SIP server.
Switch providers without changing anything on Bolna. Configure multiple trunks from different providers for failover.
Bring US toll-free, Indian DIDs, European local numbers, or any numbers from your provider's inventory.
Your existing compliance setup (DLT registration, STIR/SHAKEN) stays with your provider. Bolna does not interfere.
Scale from 1 concurrent call to thousands without hardware changes. Bolna scales alongside your trunk capacity.
**SRTP (Secure RTP) is not supported.** Media must use standard (unencrypted) RTP. Trunks requiring mandatory SRTP will not work with Bolna.
***
## Get Started
Follow these guides in order to set up SIP trunking with Bolna:
Create inbound and outbound SIP trunks on Plivo Zentrunk
Create an Elastic SIP Trunk on Twilio
Register your trunk and add phone numbers via API
Route incoming calls to Bolna AI agents
Place outbound calls from your trunk numbers
Full API reference for managing trunks and numbers
# Make Outbound Calls via SIP Trunk on Bolna
Source: https://www.bolna.ai/docs/tutorials/sip-trunking/outbound-calls
Place outbound calls from your SIP trunk phone numbers using Bolna AI agents. Configure your agent, set the telephony provider, and start calling through your own trunk.
## How Outbound Calls Work
When you initiate an outbound call through your SIP trunk, here is the complete flow:
You send a request to the [Bolna Call API](/docs/api-reference/calls/make) with your agent ID, the recipient's phone number, and the `from_number` (your SIP trunk phone number to use as the caller ID).
Bolna looks up the `from_number` in its database to find the associated SIP trunk and its gateway configuration (address, credentials, codecs).
Bolna's Asterisk/PJSIP server sends a **SIP INVITE** to your trunk's gateway address (e.g., `bolna-trunk.pstn.twilio.com` or `XXXX.zt.plivo.com`) with the appropriate authentication.
Your SIP trunk provider receives the INVITE, authenticates the request, verifies the caller ID, and then routes the call to the recipient's phone number on the PSTN.
Once the recipient answers the phone, Bolna's Voice AI pipeline takes over. The AI agent speaks, listens, and responds in real-time throughout the entire conversation.
***
## Prerequisites
Before making outbound calls, make sure you have completed all previous steps:
1. Created a SIP trunk on your provider ([Plivo guide](/docs/tutorials/sip-trunking/plivo-trunk-setup) or [Twilio guide](/docs/tutorials/sip-trunking/twilio-trunk-setup))
2. [Registered the trunk on Bolna](/docs/tutorials/sip-trunking/register-trunk-on-bolna) and confirmed `is_active` is `true`
3. [Added your phone numbers](/docs/tutorials/sip-trunking/register-trunk-on-bolna#step-2-add-phone-numbers) to the trunk on Bolna
4. Created a Bolna AI agent via the [Dashboard](https://platform.bolna.ai/) or the [Agent API](/docs/api-reference/agent/v2/create)
***
## Step 1: Configure the Agent's Telephony Provider
Before your agent can place calls through your SIP trunk, you need to tell it to use SIP trunking instead of the default telephony provider. Set `telephony_provider` to `"sip-trunk"` in your agent's configuration:
```bash theme={"system"}
curl -X PATCH https://api.bolna.ai/v2/agent/ \
-H "Authorization: Bearer " \
-H "Content-Type: application/json" \
-d '{
"agent_config": {
"telephony_provider": "sip-trunk"
}
}'
```
Setting `telephony_provider` to `"sip-trunk"` tells Bolna to:
1. Route all outbound calls through your SIP trunk's gateway instead of Twilio's or Plivo's standard API
2. Use **ulaw** audio encoding (G.711 u-law) as required by SIP trunks
3. Authenticate using the credentials stored in your trunk configuration
***
## Step 2: Place an Outbound Call
Use the standard [Call API](/docs/api-reference/calls/make) to place a call. The key difference from a regular Bolna call is the `from_number` field, which must be a phone number registered on your SIP trunk.
```bash request theme={"system"}
curl -X POST https://api.bolna.ai/call \
-H "Authorization: Bearer " \
-H "Content-Type: application/json" \
-d '{
"agent_id": "agt-xxxxxxxx-xxxx-xxxx-xxxx-xxxxxxxxxxxx",
"recipient": {
"phone_number": "+918800001234",
"name": "Rahul Sharma"
},
"from_number": "+919876543210"
}'
```
### Field Reference
| Field | Description |
| ------------------------ | -------------------------------------------------------------------------------------------------------------- |
| `agent_id` | UUID of the Bolna agent that will handle the conversation |
| `recipient.phone_number` | The recipient's phone number in E.164 format (`+` followed by country code and number) |
| `recipient.name` | The recipient's name. This is available to the AI agent during the conversation for personalized interactions. |
| `from_number` | Your SIP trunk phone number to use as the caller ID. **This number must be registered on your SIP trunk.** |
The `from_number` **must** be a phone number that you purchased on your SIP provider (Plivo, Twilio, etc.) and then [added to your trunk on Bolna](/docs/tutorials/sip-trunking/register-trunk-on-bolna#step-2-add-phone-numbers). If the number is not found on any trunk, Bolna will not know which gateway to route the call through and the call will fail.
***
## Step 3: Verify Call Status
After placing a call, you can monitor its status using the [Call Status API](/docs/list-phone-call-status):
```bash theme={"system"}
curl -X GET https://api.bolna.ai/call//status \
-H "Authorization: Bearer "
```
You can also set up [webhooks](/docs/polling-call-status-webhooks) to receive real-time status updates as the call progresses through different stages (ringing, answered, completed, etc.).
***
## Batch Outbound Calling
For high-volume outbound campaigns where you need to call many people automatically, Bolna supports batch calling through your SIP trunk. Use the [Batch API](/docs/api-reference/batches/create) to schedule and manage large call campaigns.
Key points for batch calling with SIP trunks:
* Ensure the agent's `telephony_provider` is set to `"sip-trunk"` as described in Step 1
* Each call in the batch should use a `from_number` that is registered on your trunk
* Monitor concurrency limits, which depend on your SIP trunk provider's capacity and plan
For detailed batch calling instructions, see the [Batch Calling guide](/docs/batch-calling).
***
## Troubleshooting Outbound Calls
If the call never rings on the recipient's phone:
* **Check trunk status.** Verify your trunk's `is_active` is `true`:
```bash theme={"system"}
curl -X GET https://api.bolna.ai/sip-trunks/trunks/ \
-H "Authorization: Bearer "
```
* **Verify `from_number`.** Ensure the `from_number` you used in the call request is registered on the trunk.
* **Check gateway credentials.** For `userpass` auth, verify the username and password in your trunk configuration are correct and match what you set up on your provider.
* **Check IP whitelist.** For `ip-based` auth, ensure `13.200.45.61` is whitelisted on your provider's side.
* **Review provider logs.** Check your provider's call logs for SIP error codes (e.g., `401 Unauthorized`, `403 Forbidden`, `404 Not Found`).
This is almost always caused by an **SRTP mismatch**:
* **Disable SRTP / Secure Trunking** on your SIP provider. Bolna does not support SRTP, and if it is enabled, the media negotiation fails silently.
* **Verify codec settings.** Ensure `ulaw` is in the `allow` list on your Bolna trunk.
* **Check `rtp_symmetric`.** This should be `true` (which is the default).
* **Check `force_rport`.** This should be `true` (which is the default).
If you can hear the agent but the caller cannot, or vice versa:
* **Enable Symmetric RTP.** Set `rtp_symmetric` to `true` on your Bolna trunk (this is the default).
* **Enable force\_rport.** Set `force_rport` to `true` (this is the default).
* **Check NAT traversal.** Confirm your provider's RTP IP ranges are reachable from Bolna's IP `13.200.45.61`.
* **Keep direct\_media disabled.** Ensure `direct_media` is `false` (the default). Enabling it bypasses Bolna's media server, which often causes one-way audio.
Some carriers require the `+` prefix on dialed numbers (E.164 format), while others reject it.
* **Twilio** requires the `+` prefix. Keep `outbound_leading_plus_enabled` as `true` (default).
* **Plivo** generally accepts both formats.
* **Other providers:** Check your provider's documentation for their preferred number format.
You can update this setting per-trunk:
```bash theme={"system"}
curl -X PATCH https://api.bolna.ai/sip-trunks/trunks/ \
-H "Authorization: Bearer " \
-H "Content-Type: application/json" \
-d '{ "outbound_leading_plus_enabled": false }'
```
If the provider rejects the call because of an invalid caller ID:
* **Twilio:** The `from_number` must be either a Twilio DID number on your account or a verified Caller ID number.
* **Plivo:** The `from_number` must be a number in your Plivo account.
* Ensure the number format matches what your provider expects. E.164 (with `+`) is recommended for all providers.
***
## Next Steps
Route incoming calls to your Bolna AI agents
Run high-volume outbound AI call campaigns
Track call status and outcomes in real-time
Full API reference for managing trunks and numbers
# Create a SIP Trunk on Plivo for Bolna
Source: https://www.bolna.ai/docs/tutorials/sip-trunking/plivo-trunk-setup
Step-by-step guide to creating inbound and outbound SIP trunks on Plivo Zentrunk, configured to work with Bolna Voice AI agents.
This guide walks you through creating both an **inbound** and **outbound** SIP trunk on Plivo's Zentrunk platform. By the end, your Plivo account will be fully configured to send and receive calls through Bolna's Voice AI system.
## Prerequisites
Make sure you have the following ready before starting:
A Plivo account is required to create trunks. [Sign up for Plivo](https://console.plivo.com/) if you don't have one. A trial account works for initial testing.
You need at least one voice-enabled phone number from Plivo. [Purchase a number](https://console.plivo.com/active-phone-numbers/) from the Plivo Console. This will be your DID number for making and receiving calls.
An active [Bolna account](https://platform.bolna.ai/) with SIP trunking access enabled. If you don't have access yet, contact [enterprise@bolna.ai](mailto:enterprise@bolna.ai).
Your Bolna API key, which you can find in the [Bolna Dashboard](https://platform.bolna.ai/). You will need this later when registering the trunk on Bolna.
**Bolna's SIP Server IP Address:** Throughout this guide, you will need to use Bolna's SIP media server IP: **`13.200.45.61`**. Keep this handy as you will enter it in multiple configuration steps.
***
## Part 1: Create an Inbound Trunk (Receive Calls)
An **inbound trunk** handles calls coming *in* to your Plivo phone number. When someone dials your number, Plivo will forward the call to Bolna's SIP server, where your AI agent picks up and handles the conversation.
Log in to the [Plivo Console](https://console.plivo.com/) and navigate to **Zentrunk** > **Inbound Trunks** in the left sidebar. You can also go directly to [console.plivo.com/zentrunk/inbound-trunks](https://console.plivo.com/zentrunk/inbound-trunks/).
Click **Create New Inbound Trunk**. Enter a descriptive name that helps you identify this trunk later. For example:
```
Bolna-Inbound
```
This name is just for your reference within the Plivo Console.
This is the most important step. You are telling Plivo *where to send incoming calls*. Click **Add New URI** and fill in the following:
| Field | Value | What it means |
| ------------ | ----------------------- | --------------------------------------------- |
| **URI Name** | `Bolna-Primary` | A label for this destination |
| **SIP URI** | `sip:13.200.45.61:5060` | Bolna's SIP server address |
| **Priority** | `10` (default) | Lower number = higher priority |
| **Weight** | `10` (default) | Used for load balancing between multiple URIs |
**Do NOT add `transport=tcp` or `transport=tls` to the URI.** Bolna's SIP server uses **UDP**, which is the default SIP transport. Adding a TCP or TLS parameter will cause all calls to fail silently.
Review your configuration and click **Create Trunk**. Your inbound trunk is now created. Note down the trunk name for the next step.
Now you need to link your Plivo phone number to this trunk so that incoming calls are forwarded to Bolna:
1. Navigate to **Phone Numbers** > [Your Numbers](https://console.plivo.com/active-phone-numbers/)
2. Click on the phone number you want to use for inbound calls
3. In the **Number Configuration** section, set **Application Type** to **Zentrunk**
4. In the **Trunk** dropdown, select the inbound trunk you just created (e.g., `Bolna-Inbound`)
5. Click **Update Number** to save
You can connect multiple phone numbers to the same inbound trunk. All of them will route incoming calls to Bolna's SIP server, where they can be handled by different AI agents.
Your inbound trunk is now configured. Calls to your Plivo number will be forwarded to Bolna. You will configure which AI agent answers these calls in the [Register Trunk on Bolna](/docs/tutorials/sip-trunking/register-trunk-on-bolna) step.
***
## Part 2: Create an Outbound Trunk (Make Calls)
An **outbound trunk** allows Bolna to place calls *out* to regular phone numbers through your Plivo account. Your AI agents will use this trunk to initiate conversations with recipients.
In the Plivo Console, go to **Zentrunk** > [Outbound Trunks](https://console.plivo.com/zentrunk/outbound-trunks/).
Click **Create New Outbound Trunk** and enter a descriptive name:
```
Bolna-Outbound
```
Plivo uses **username/password authentication** for outbound trunks. Bolna will send these credentials with every outbound call so Plivo can verify the request is legitimate.
In the **Trunk Authentication** section:
1. Click **Add New Credentials List**
2. Enter a **username**, for example: `bolna_trunk`
3. Enter a **strong password** and write it down immediately
**Save your username and password securely.** You will need both when [registering the trunk on Bolna](/docs/tutorials/sip-trunking/register-trunk-on-bolna) in a later step. Plivo will not show the password again after you create it.
In the trunk settings, find **Secure Trunking** and set it to **Disabled**.
**This is critical.** Bolna does **not** support SRTP (Secure RTP). If Secure Trunking is left enabled, the media negotiation between Plivo and Bolna will fail, and you will experience **no audio** on calls (the call appears to connect but neither side can hear anything).
Click **Create Trunk**. After creation, Plivo will display a **Termination SIP Domain** that looks like this:
```
XXXXXXXXXXXXXXXXXXXX.zt.plivo.com
```
**Copy this domain and save it.** This is the gateway address that Bolna will use to route outbound calls through your Plivo account.
The Termination SIP Domain is unique to your outbound trunk. It is the address where Bolna sends SIP INVITE messages when placing outbound calls on your behalf.
Your outbound trunk is now configured on Plivo.
***
## Part 3: Whitelist Bolna's IP Address
For Plivo to accept SIP traffic from Bolna, you need to whitelist Bolna's IP address. Navigate to your outbound trunk's IP Whitelisting or Access Control settings and add:
```
13.200.45.61
```
This ensures that when Bolna sends SIP requests to Plivo, they are recognized and accepted.
***
## Configuration Summary
Here is a quick reference of everything you configured in this guide:
| Setting | Value |
| -------------------------- | ------------------------------------------------------- |
| **Inbound Trunk Name** | `Bolna-Inbound` (or your chosen name) |
| **Inbound Primary URI** | `sip:13.200.45.61:5060` |
| **Outbound Trunk Name** | `Bolna-Outbound` (or your chosen name) |
| **Outbound Credentials** | Username + Password (saved securely) |
| **Termination SIP Domain** | `XXXXXXXXXXXXXXXXXXXX.zt.plivo.com` (copied from Plivo) |
| **Bolna IP to Whitelist** | `13.200.45.61` |
| **Secure Trunking** | Disabled (SRTP not supported) |
| **Transport** | UDP (default, do not change) |
***
## Plivo-Specific Notes
Plivo Zentrunk supports G.711 ulaw (u-law) and G.711 alaw (A-law) codecs by default. These are fully compatible with Bolna, so no additional codec configuration is needed on the Plivo side.
When you register this trunk on Bolna with IP-based authentication, you will need Plivo's IP ranges. These are the IP addresses from which Plivo sends SIP traffic to Bolna:
```
15.207.90.192/31
204.89.151.128/27
13.52.9.0/25
```
You will add these as `ip_identifiers` when [registering the trunk on Bolna](/docs/tutorials/sip-trunking/register-trunk-on-bolna).
If you are using Indian phone numbers (+91), you must complete the DLT (Distributed Ledger Technology) registration process before your numbers will work for outbound calling. See [Plivo's guide on Indian numbers](https://www.plivo.com/docs/numbers/rent-india-numbers) and Bolna's [regulated phone numbers guide](/docs/obtaining-regulated-phone-numbers).
Trial Plivo accounts have limited functionality. You may only be able to call verified numbers (numbers you have manually added to your Plivo account). [Upgrade your Plivo account](https://console.plivo.com/) for full outbound calling capability.
***
## Next Steps
Your Plivo trunks are now configured. Continue with these guides:
Register your Plivo trunk with Bolna and add your phone numbers via API
Map your phone numbers to AI agents so they answer incoming calls
# Register Your SIP Trunk on Bolna and Add Phone Numbers
Source: https://www.bolna.ai/docs/tutorials/sip-trunking/register-trunk-on-bolna
Register your SIP trunk with Bolna using the API, add your DID phone numbers, and verify your trunk is ready for AI-powered calls.
After creating your SIP trunk on your provider ([Plivo](/docs/tutorials/sip-trunking/plivo-trunk-setup) or [Twilio](/docs/tutorials/sip-trunking/twilio-trunk-setup)), the next step is to register that trunk with Bolna. This tells Bolna how to connect to your provider's gateway and which phone numbers belong to this trunk.
You will do two things in this guide:
1. **Create the trunk on Bolna** with your provider's gateway details and authentication credentials
2. **Add your phone numbers (DIDs)** so Bolna knows which numbers to route through this trunk
**SIP Trunking** is currently in **Beta**. Contact [enterprise@bolna.ai](mailto:enterprise@bolna.ai) or [schedule a call](https://www.bolna.ai/meet) for access.
***
## Prerequisites
Before you begin, make sure you have:
1. A SIP trunk already created on your provider ([Plivo guide](/docs/tutorials/sip-trunking/plivo-trunk-setup) or [Twilio guide](/docs/tutorials/sip-trunking/twilio-trunk-setup))
2. Your **provider gateway address** (e.g., `XXXX.zt.plivo.com` for Plivo or `bolna-trunk.pstn.twilio.com` for Twilio)
3. Your **authentication credentials**: username/password for `userpass` auth, or provider IP ranges for `ip-based` auth
4. Your **Bolna API key** from the [Bolna Dashboard](https://platform.bolna.ai/)
5. Your **DID phone numbers** that you purchased from your provider
***
## Step 1: Create the Trunk on Bolna
Use the [Create SIP Trunk API](/docs/api-reference/sip-trunks/create) to register your trunk. The exact payload depends on your provider and authentication method. Choose the example that matches your setup:
With IP-based auth, your provider identifies Bolna by its source IP address. You provide your provider's IP ranges so Bolna can verify that incoming SIP requests are legitimate.
```bash request theme={"system"}
curl -X POST https://api.bolna.ai/sip-trunks/trunks \
-H "Authorization: Bearer " \
-H "Content-Type: application/json" \
-d '{
"name": "Plivo Trunk - Production",
"provider": "plivo",
"description": "Plivo Zentrunk for Bolna Voice AI",
"auth_type": "ip-based",
"gateways": [
{
"gateway_address": "XXXXXXXXXXXXXXXXXXXX.zt.plivo.com",
"port": 5060,
"priority": 1
}
],
"ip_identifiers": [
{ "ip_address": "15.207.90.192/31" },
{ "ip_address": "204.89.151.128/27" },
{ "ip_address": "13.52.9.0/25" }
],
"allow": "ulaw,alaw",
"disallow": "all",
"inbound_enabled": true,
"outbound_leading_plus_enabled": true
}'
```
```json response theme={"system"}
{
"id": "01HQXYZ789GHI012JKL",
"name": "Plivo Trunk - Production",
"provider": "plivo",
"auth_type": "ip-based",
"gateways": [
{
"id": "01HQXYZ222BBB222CCC",
"gateway_address": "XXXXXXXXXXXXXXXXXXXX.zt.plivo.com",
"port": 5060,
"priority": 1
}
],
"ip_identifiers": [
{ "ip_address": "15.207.90.192/31" },
{ "ip_address": "204.89.151.128/27" },
{ "ip_address": "13.52.9.0/25" }
],
"phone_numbers": [],
"is_active": true,
"inbound_enabled": true,
"created_at": "2025-01-15T10:00:00Z"
}
```
Replace `XXXXXXXXXXXXXXXXXXXX.zt.plivo.com` with the **Termination SIP Domain** you copied from your provider's console. The `ip_identifiers` above are Plivo's IP ranges; check your provider's documentation for their specific ranges.
With username/password auth, Bolna sends credentials with every outbound SIP request so your provider can verify the call is authorized.
```bash request theme={"system"}
curl -X POST https://api.bolna.ai/sip-trunks/trunks \
-H "Authorization: Bearer " \
-H "Content-Type: application/json" \
-d '{
"name": "Twilio Trunk - Production",
"provider": "twilio",
"description": "Twilio Elastic SIP Trunk for Bolna Voice AI",
"auth_type": "userpass",
"auth_username": "bolna_trunk",
"auth_password": "",
"gateways": [
{
"gateway_address": "bolna-trunk.pstn.twilio.com",
"port": 5060,
"priority": 1
}
],
"allow": "ulaw,alaw",
"disallow": "all",
"inbound_enabled": true,
"outbound_leading_plus_enabled": true
}'
```
```json response theme={"system"}
{
"id": "01HQXYZ123ABC456DEF",
"name": "Twilio Trunk - Production",
"provider": "twilio",
"auth_type": "userpass",
"auth_username": "bolna_trunk",
"gateways": [
{
"id": "01HQXYZ111AAA111BBB",
"gateway_address": "bolna-trunk.pstn.twilio.com",
"port": 5060,
"priority": 1
}
],
"phone_numbers": [],
"is_active": true,
"inbound_enabled": true,
"created_at": "2025-01-15T10:00:00Z"
}
```
Replace `bolna-trunk.pstn.twilio.com` with the **Termination URI** you configured on your provider. Replace `bolna_trunk` and `` with the credentials you created.
**Save the `id` field from the response.** This is your **Trunk ID** and you will need it for every subsequent API call: adding phone numbers, mapping agents, and making calls.
***
## Step 2: Add Phone Numbers
Register the DID phone numbers you have **already purchased on your SIP provider** (from [Plivo](https://console.plivo.com/active-phone-numbers/) or [Twilio](https://www.twilio.com/console/phone-numbers)). Bolna does not provision numbers, it needs to know which of your provider numbers to route through this trunk for inbound matching and outbound caller ID.
Use the [Add Phone Number API](/docs/api-reference/sip-trunks/add_number) for each number:
```bash request theme={"system"}
curl -X POST https://api.bolna.ai/sip-trunks/trunks//numbers \
-H "Authorization: Bearer " \
-H "Content-Type: application/json" \
-d '{
"phone_number": "919876543210",
"name": "Main Support Line"
}'
```
```json response theme={"system"}
{
"id": "01HQNUMBER111222333",
"phone_number": "919876543210",
"byot_trunk_id": "01HQXYZ123ABC456DEF",
"telephony_provider": "sip-trunk",
"created_at": "2025-01-15T10:05:00Z"
}
```
**Save the `id` from the response.** This is the **Phone Number ID** that you will use when [mapping this number to an AI agent](/docs/tutorials/sip-trunking/inbound-calls) for inbound calls, and when specifying the `from_number` for [outbound calls](/docs/tutorials/sip-trunking/outbound-calls).
### Adding Multiple Numbers
Repeat the API call for each DID number you want to add. Each number receives its own unique `id`:
```bash theme={"system"}
# Example: adding a second number
curl -X POST https://api.bolna.ai/sip-trunks/trunks//numbers \
-H "Authorization: Bearer " \
-H "Content-Type: application/json" \
-d '{
"phone_number": "+14158675309",
"name": "US Sales Line"
}'
```
**Phone number format:** Bolna stores the number exactly as you provide it and performs flexible matching (with and without the `+` prefix) for inbound calls. Use a consistent format across your configuration.
***
## Step 3: Verify Your Trunk
After creating the trunk and adding numbers, verify that everything is configured correctly.
Use the [Get SIP Trunk API](/docs/api-reference/sip-trunks/get) to check your trunk:
```bash theme={"system"}
curl -X GET https://api.bolna.ai/sip-trunks/trunks/ \
-H "Authorization: Bearer "
```
Confirm the following fields in the response:
| Field | Expected Value | What It Means |
| ----------------- | -------------------- | ----------------------------------- |
| `is_active` | `true` | Trunk is active and ready for calls |
| `inbound_enabled` | `true` | Trunk can receive inbound calls |
| `gateways` | Your gateway address | Gateway is correctly configured |
| `phone_numbers` | Your added numbers | All DIDs are registered |
You can also list all phone numbers on the trunk:
```bash theme={"system"}
curl -X GET https://api.bolna.ai/sip-trunks/trunks//numbers \
-H "Authorization: Bearer "
```
***
## Field Reference
Here is a complete reference of all fields you can use when creating a trunk:
| Field | Type | Required | Default | Description |
| ------------------------------- | ------- | ----------- | ------------- | ----------------------------------------------------------------------------------------------------- |
| `name` | string | Yes | | Human-readable label for the trunk. Must be unique. |
| `provider` | string | Yes | | SIP provider: `"twilio"`, `"plivo"`, `"zadarma"`, `"telnyx"`, `"vonage"`, `"custom"` |
| `description` | string | No | `null` | Optional description for your internal reference |
| `auth_type` | string | Yes | | `"userpass"` (username/password) or `"ip-based"` |
| `auth_username` | string | If userpass | `null` | SIP username for authentication |
| `auth_password` | string | If userpass | `null` | SIP password for authentication |
| `gateways` | array | Yes | | At least one gateway with `gateway_address` (required), `port` (default 5060), `priority` (default 1) |
| `ip_identifiers` | array | If ip-based | `[]` | List of `{ "ip_address": "..." }` objects in CIDR notation |
| `allow` | string | No | `"ulaw,alaw"` | Comma-separated codecs to allow. Always include `ulaw`. |
| `disallow` | string | No | `"all"` | Comma-separated codecs to block |
| `inbound_enabled` | boolean | No | `false` | Set to `true` to receive inbound calls |
| `outbound_leading_plus_enabled` | boolean | No | `true` | Prepend `+` to outbound dialed numbers (required by Twilio) |
| `rtp_symmetric` | boolean | No | `true` | Symmetric RTP for NAT traversal. Keep as `true`. |
| `force_rport` | boolean | No | `true` | Force responses to source port. Keep as `true`. |
| `qualify_frequency` | integer | No | `60` | SIP OPTIONS keepalive ping interval in seconds. Set to `0` to disable. |
***
## Next Steps
Your trunk is registered and phone numbers are added. Now configure how calls are handled:
Map your phone numbers to AI agents so they answer incoming calls
Place outbound calls from your trunk numbers using AI agents
# Create a SIP Trunk on Twilio for Bolna
Source: https://www.bolna.ai/docs/tutorials/sip-trunking/twilio-trunk-setup
Step-by-step guide to creating an Elastic SIP Trunk on Twilio for inbound and outbound calling with Bolna Voice AI agents.
This guide walks you through creating and configuring a **Twilio Elastic SIP Trunk** to work with Bolna's Voice AI platform. Twilio's Elastic SIP Trunking provides cloud-based PSTN connectivity. You will configure termination (for outbound calls), origination (for inbound calls), and associate your Twilio phone numbers with the trunk.
## Prerequisites
Make sure you have the following ready before starting:
A Twilio account is required to create trunks. [Sign up for Twilio](https://www.twilio.com/try-twilio) if you don't have one. A free trial can be used for initial testing.
You need at least one Twilio phone number. [Buy a number](https://www.twilio.com/console/phone-numbers) from the Twilio Console. This will be associated with your trunk.
An active [Bolna account](https://platform.bolna.ai/) with SIP trunking access enabled. Contact [enterprise@bolna.ai](mailto:enterprise@bolna.ai) if you don't have access yet.
Your Bolna API key from the [Bolna Dashboard](https://platform.bolna.ai/). You will need this when registering the trunk on Bolna.
**Bolna's SIP Server IP Address:** You will need Bolna's SIP media server IP throughout this guide: **`13.200.45.61`**. Keep this handy.
***
## Step 1: Create a New SIP Trunk
Log in to the [Twilio Console](https://www.twilio.com/console) and navigate to **Elastic SIP Trunking** > **Trunks** in the left sidebar. You can also go directly to [twilio.com/console/sip-trunking/trunks](https://www.twilio.com/console/sip-trunking/trunks).
Click **Create new SIP Trunk** (or the **+** button) and enter a friendly name for your trunk:
```
Bolna Voice AI Trunk
```
Click **Create**. Twilio will assign a unique **Trunk SID** (e.g., `TKxxxxxxxxxxxxxxxxxxxxxxxxxxxxxxxx`). Note this down for reference.
***
## Step 2: Configure Termination (Outbound Calls)
**Termination** settings control how Bolna sends outbound calls through Twilio to the PSTN. You need to set up a Termination URI (the address Bolna will call) and configure authentication so Twilio knows the requests are legitimate.
Go to the **Termination** tab in your trunk's configuration. Enter a unique domain name in the **Termination URI** field:
```
bolna-trunk.pstn.twilio.com
```
Click **Save**. This URI is the gateway address you will provide to Bolna when registering the trunk.
Choose a descriptive name using dashes for readability. The full format is `{your-name}.pstn.twilio.com`. This must be unique across all Twilio accounts.
An IP ACL tells Twilio which IP addresses are allowed to send SIP traffic to your trunk. You need to add Bolna's SIP server IP so Twilio accepts call requests from Bolna.
In the **Authentication** section, find **IP Access Control Lists**:
1. Click **Create IP Access Control List**
2. Enter a friendly name: `Bolna SIP Server`
3. Click **Create**, then click **Add IP Address** and fill in:
| Field | Value | What it means |
| ----------------- | ------------------ | ---------------------------- |
| **Friendly Name** | `Bolna Production` | A label for this IP entry |
| **IP Address** | `13.200.45.61` | Bolna's SIP server IP |
| **CIDR** | `32` | Single IP address (no range) |
4. Save and then **associate this ACL with the trunk** by selecting it from the dropdown on the Termination page
Without Bolna's IP in the ACL, Twilio will reject all outbound SIP INVITE requests from Bolna with a `403 Forbidden` error. Your calls will fail to connect.
In addition to IP-based security, Twilio recommends also using **credential-based authentication**. When configured, Bolna will include a username and password with every outbound call request.
In the **Authentication** section, find **Credential Lists**:
1. Click **Create Credential List**
2. Enter a friendly name: `Bolna Credentials`
3. Add a **username** (e.g., `bolna_trunk`) and a **strong password**
4. Click **Create**, then **associate the Credential List** with the trunk
**Save your username and password securely.** You will need both when [registering the trunk on Bolna](/docs/tutorials/sip-trunking/register-trunk-on-bolna). Twilio will not show the password again after creation.
When both an IP ACL and Credential List are configured, Twilio enforces **both**: the request must come from a whitelisted IP **and** include valid credentials. This is the most secure setup.
***
## Step 3: Configure Origination (Inbound Calls)
**Origination** settings control how Twilio delivers inbound calls (calls from the PSTN) to Bolna's SIP server. This is what enables your AI agent to answer incoming phone calls.
Go to the **Origination** tab in your trunk's configuration. Click **Add new Origination URI** and fill in:
| Setting | Value | What it means |
| ----------------------- | ----------------------- | --------------------------------------------------- |
| **Origination SIP URI** | `sip:13.200.45.61:5060` | Where Twilio sends incoming calls (Bolna's server) |
| **Priority** | `10` | Lower number = higher priority. Use 10 for primary. |
| **Weight** | `10` | Load balancing weight. Use 10 for a single trunk. |
| **Enabled** | Yes | Must be enabled for calls to route |
Click **Add**.
**Failover setup:** You can add multiple Origination URIs with different priorities. If the primary URI fails (e.g., Bolna's server is unreachable), Twilio will try the next URI in priority order.
**Do NOT add `transport=tcp` or `transport=tls` to the URI.** Bolna's SIP server requires **UDP** transport (the default). Adding TCP or TLS will cause inbound calls to fail.
***
## Step 4: General Settings
These settings apply to the entire trunk and affect both inbound and outbound calls.
Go to the **General** tab. Find **Secure Trunking** and set it to **Disabled**. Click **Save**.
**This is critical.** Bolna does not support SRTP (Secure RTP). If Secure Trunking is left enabled, media negotiation between Twilio and Bolna will fail. Calls may appear to connect, but you will experience **no audio** or **one-way audio**.
Set **Symmetric RTP** to **Enabled** and save. This helps prevent one-way audio issues that can occur due to NAT (Network Address Translation) between Twilio's and Bolna's servers.
If you want Twilio to record calls on its side, choose your preference:
* **Do Not Record** (default): No recording on Twilio
* **Record from ringing**: Recording starts when the phone rings
* **Record from answer**: Recording starts when the call is answered
Bolna also offers its own call recording feature. You can use either or both depending on your needs.
***
## Step 5: Associate Phone Numbers
You need to associate at least one Twilio phone number with your trunk. This tells Twilio to route calls to that number through your SIP trunk instead of handling them with TwiML or Studio.
In your trunk's configuration page, click the **Numbers** tab.
If you already have a Twilio phone number:
1. Click **Associate a Number with this Trunk**
2. Select your phone number from the list
3. The number's Voice configuration will automatically be updated to **SIP Trunking**
**One number, one trunk:** A Twilio phone number can only be associated with one trunk at a time. Associating it with a new trunk automatically removes it from the previous one.
To confirm everything is set up correctly:
1. Go to **Phone Numbers** > **Manage** > **Active Numbers** in the Twilio Console
2. Click on your number
3. Under **Voice Configuration**, confirm that **Configure With** is set to **SIP Trunk** and the correct trunk name is shown
***
## Configuration Summary
Here is a complete reference of everything you configured:
| Setting | Value |
| ---------------------- | ---------------------------------------------------- |
| **Trunk Name** | `Bolna Voice AI Trunk` (or your chosen name) |
| **Trunk SID** | `TKxxxxxxxxxxxxxxxxxxxxxxxxxxxxxxxx` (auto-assigned) |
| **Termination URI** | `bolna-trunk.pstn.twilio.com` (your chosen domain) |
| **IP ACL** | Bolna IP `13.200.45.61/32` in `Bolna SIP Server` ACL |
| **Credential List** | Username + Password (saved securely) |
| **Origination URI** | `sip:13.200.45.61:5060` (Priority: 10, Weight: 10) |
| **Secure Trunking** | Disabled (SRTP not supported by Bolna) |
| **Symmetric RTP** | Enabled |
| **Transport** | UDP (default) |
| **Associated Numbers** | Your Twilio phone number(s) |
***
## Twilio-Specific Notes
Twilio **requires** all phone numbers to be in E.164 format (e.g., `+12128675309`). Numbers without the `+` prefix will be rejected with a `400 Bad Request` response. Bolna's `outbound_leading_plus_enabled` setting (default `true`) automatically ensures the `+` is prepended to outbound numbers.
For lower latency on outbound calls, you can use Twilio's region-specific termination URIs instead of the global one. Replace `bolna-trunk` with your chosen domain name:
| Region | URI |
| ------------------------- | --------------------------------------- |
| N. America (Virginia) | `bolna-trunk.pstn.ashburn.twilio.com` |
| N. America (Oregon) | `bolna-trunk.pstn.umatilla.twilio.com` |
| Europe (Ireland) | `bolna-trunk.pstn.dublin.twilio.com` |
| Europe (Frankfurt) | `bolna-trunk.pstn.frankfurt.twilio.com` |
| Asia Pacific (Singapore) | `bolna-trunk.pstn.singapore.twilio.com` |
| Asia Pacific (Tokyo) | `bolna-trunk.pstn.tokyo.twilio.com` |
| South America (Sao Paulo) | `bolna-trunk.pstn.sao-paulo.twilio.com` |
| Asia Pacific (Sydney) | `bolna-trunk.pstn.sydney.twilio.com` |
For outbound calls, Twilio requires the `from_number` (caller ID) to be either a Twilio DID number on your account or a verified Caller ID number. If an invalid caller ID is used, Twilio will reject the outbound call.
Trial Twilio accounts have some restrictions: you can only call **verified phone numbers**, and outbound calls will play a Twilio trial message before your AI agent speaks. [Upgrade your account](https://www.twilio.com/console) to remove these limitations.
Twilio Elastic SIP Trunking supports call durations up to **24 hours** (extended from the default 4 hours). This can be configured per-trunk in the General settings tab.
***
## Next Steps
Your Twilio Elastic SIP Trunk is fully configured. Continue with these guides:
Register your Twilio trunk with Bolna and add your phone numbers via API
Place outbound calls through your Twilio trunk using Bolna AI agents
# Create Bolna API connection with viaSocket
Source: https://www.bolna.ai/docs/tutorials/viasocket/create-bolna-api-connection
Step-by-step guide to integrating Bolna Voice AI with viaSocket by creating an API connection, enabling efficient workflow automation.
A simple step-by-step guide to integrating Bolna Voice AI with [viaSocket](https://viasocket.com/integrations/bolna) by creating an API connection. This integration will allow you to automate workflows efficiently by connecting voice commands from Bolna to various apps in viaSocket.
## Following are the steps to create a API connection
In this tutorial, we will:
1. Create a new Bolna API connection
Please refer to [this documentation](/docs/api-reference/introduction#authentication) for creating a new API Key.
After completing the above steps, you can use [viaSocket](https://viasocket.com/integrations/bolna) modules with Bolna AI.
# Using Bolna AI with viaSocket
Source: https://www.bolna.ai/docs/tutorials/viasocket/overview
Learn how to integrate Bolna Voice AI with viaSocket to create custom workflows, enabling seamless automation between Bolna and other applications.
Integrating Bolna Voice AI with [viaSocket](http://viasocket.com/integrations?utm_source=Bolna.dev\&utm_medium=marketplace\&utm_campaign=Bolna.dev_listing) allows you to automate tasks using voice commands. With this integration, Bolna can trigger actions in thousands of apps connected through viaSocket, making your processes more efficient and reducing manual work. It helps streamline workflows and improve productivity by automating repetitive tasks.
## Bolna AI modules using APIs on viaSocket
These are modules that require [Bolna's API connection with viaSocket](/docs/tutorials/viasocket/create-bolna-api-connection).
To create Outbound calls
Get all agents executions and their details
***
You can reach out to viaSocket support from [https://viasocket.com/support](https://viasocket.com/support).
# Create Bolna API connection with Zapier
Source: https://www.bolna.ai/docs/tutorials/zapier/create-bolna-api-connection
Step-by-step guide to integrating Bolna Voice AI with Zapier by creating an API connection, enabling efficient workflow automation.
## Following are the steps to create a API connection
In this tutorial, we will:
1. Create a new Bolna API connection
Go to [https://zapier.com/app/connections](https://zapier.com/app/connections) to manage apps
Please refer to [this documentation](/docs/api-reference/introduction#authentication) for creating a new API Key.
After completing the above steps, you can use Action modules to make Bolna APIs call on Zapier.
Please refer to Bolna APIs from [API reference docs](/docs/api-reference/introduction).
# Using Bolna AI with Zapier
Source: https://www.bolna.ai/docs/tutorials/zapier/overview
Learn how to integrate Bolna Voice AI with Zapier to create custom workflows, enabling seamless automation between Bolna and other applications.
## Bolna AI modules using APIs on Zapier
These are modules that require [Bolna's API connection with Zapier](/docs/tutorials/zapier/create-bolna-api-connection).
Use this to make Outgoing Phone Calls to phone numbers
***
## Bolna + Zapier Tutorials
Coming soon
# Integrate Twilio with Bolna for Enhanced Calling
Source: https://www.bolna.ai/docs/twilio
Leverage Twilio with Bolna to handle inbound and outbound calls seamlessly. Follow setup guides and connect your Twilio account for tailored experiences.
## What is Twilio integration in Bolna?
Twilio is one of the leading telephony providers supported by Bolna Voice AI. By integrating Twilio with Bolna, you can make outbound calls, receive inbound calls, and use your own Twilio account for complete control over your phone numbers and calling infrastructure.
Learn more about [supported telephony providers](/docs/supported-telephony-providers) or [purchase phone numbers](/docs/buying-phone-numbers) directly through Bolna.
## How to get started with Twilio
Bolna agents make phone calls using Twilio numbers
Bolna agents receive phone calls on Twilio numbers and answers them
Use your own Twilio account with Bolna
## Why use Twilio with Bolna?
Twilio offers several advantages:
* **Global coverage**: Make and receive calls in 100+ countries
* **Reliability**: Industry-leading uptime and call quality
* **Flexibility**: Use your existing Twilio infrastructure
* **Advanced features**: Access to Twilio's full feature set
For high-volume calling needs, consider using [batch calling](/docs/batch-calling) to scale to millions of calls efficiently.
# Securely Link Your Twilio Account to Bolna
Source: https://www.bolna.ai/docs/twilio-connect-provider
Follow detailed steps to connect your Twilio account with Bolna. Enable the use of your Twilio phone numbers for both inbound and outbound Voice AI calls.
## Use your own Twilio account to make outbound calls
We connect your `Twilio` account securely via using [infisical](https://infisical.com/).
You can connect your own Twilio account and start using it on Bolna. All calls initiated from Bolna will be from your own Twilio account and use your own Twilio phone numbers.
1. Navigate to `Providers` tab from the left menu bar & Click **Twilio connect button**.
2. Fill in the required details.
3. Save details by clicking on the **connect button**.
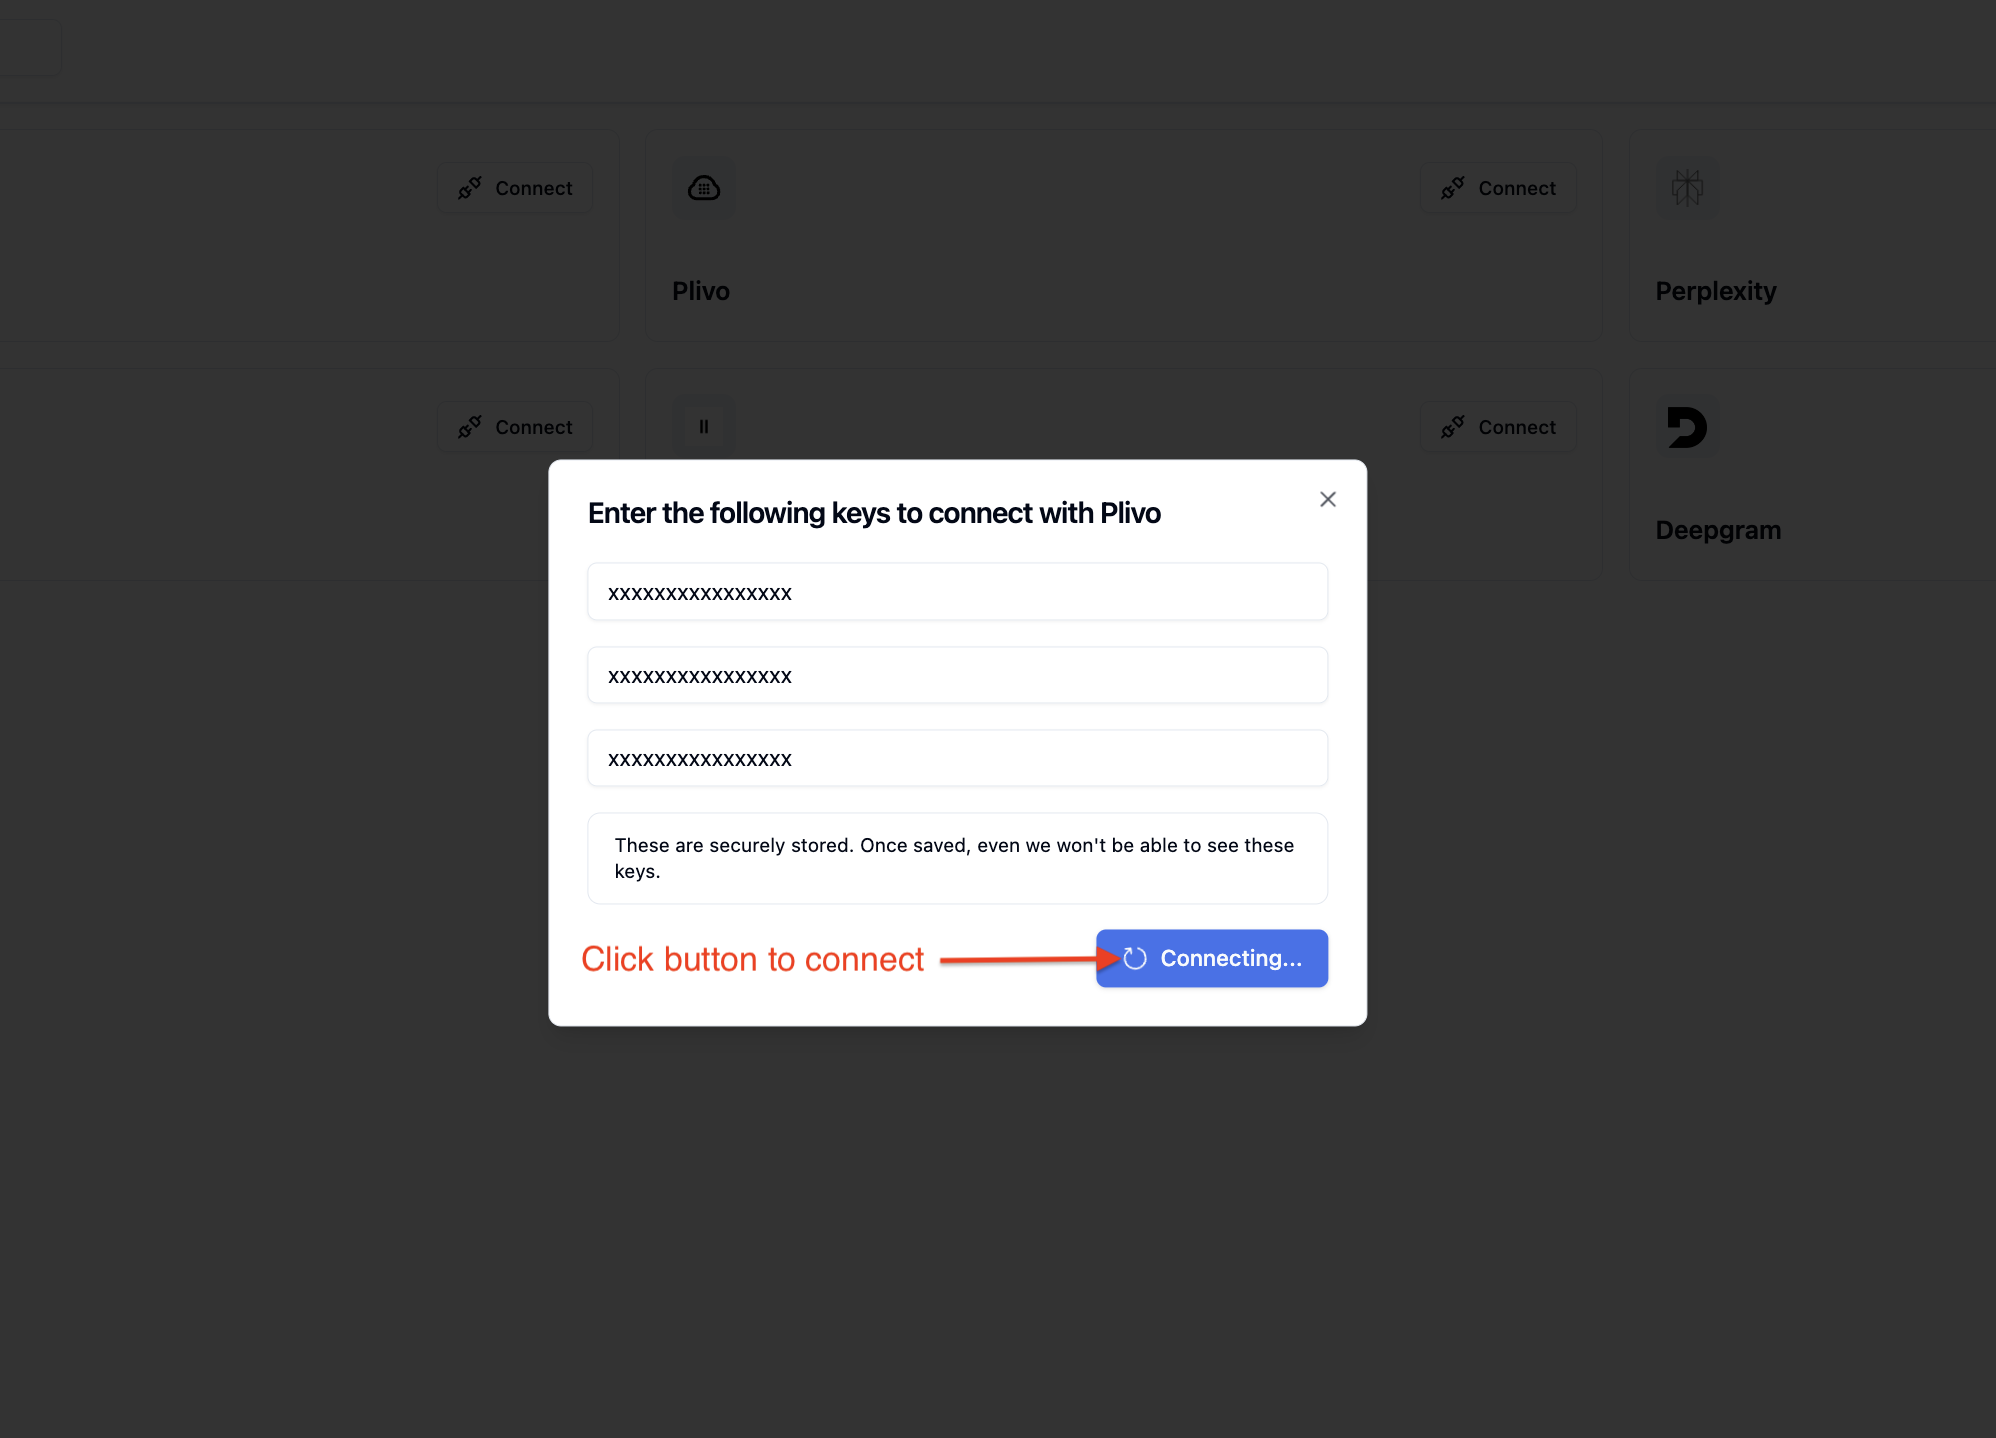
4. You'll see that your Twilio account was successfully connected. All your calls will now go via your own Twilio account and phone numbers.
# Make Outbound Calls via Twilio with Bolna Voice AI
Source: https://www.bolna.ai/docs/twilio-outbound-calls
Set up Bolna Voice AI agents to place outbound calls through Twilio. Learn dashboard configurations and API methods for efficient call management.
## Making outbound calls from dashboard
1. Login to the dashboard at [https://platform.bolna.ai](https://platform.bolna.ai) using your account credentials
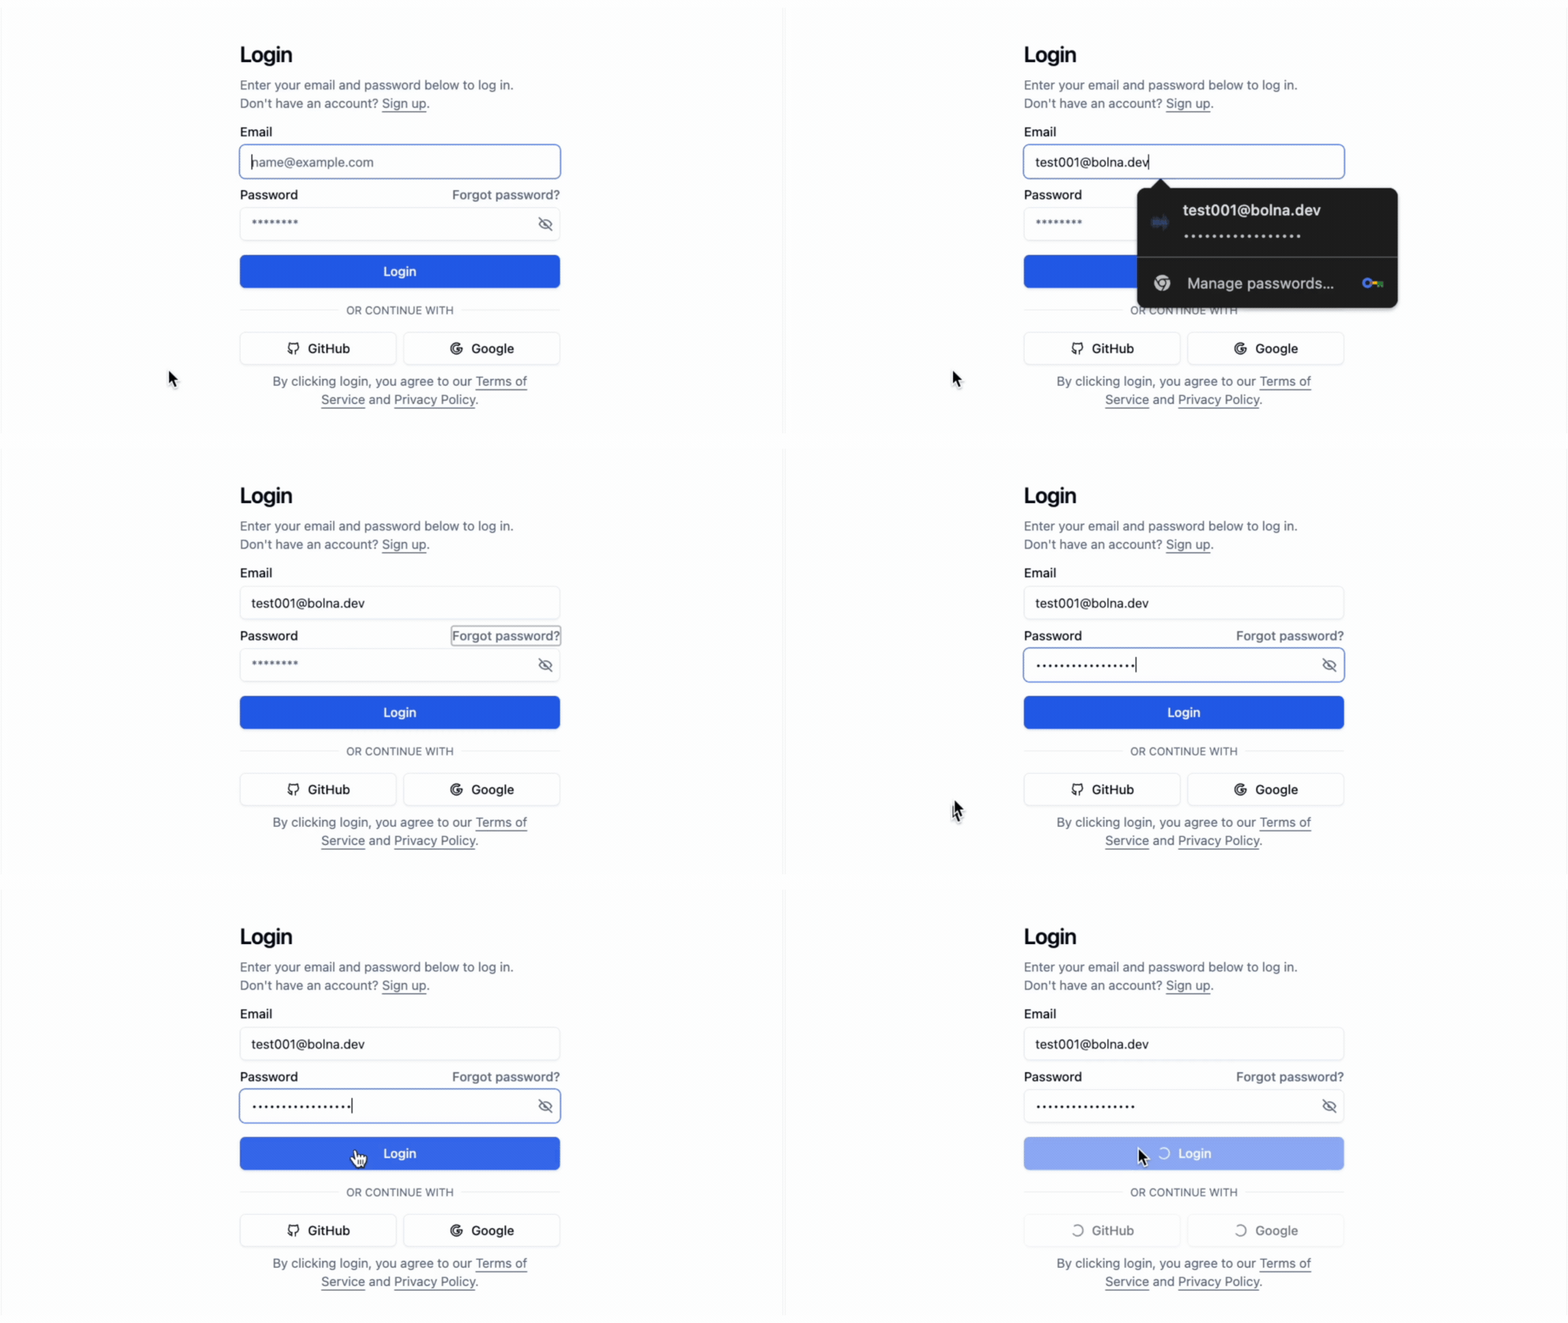
2. Choose `Twilio` as the Call provider for your agent and save it
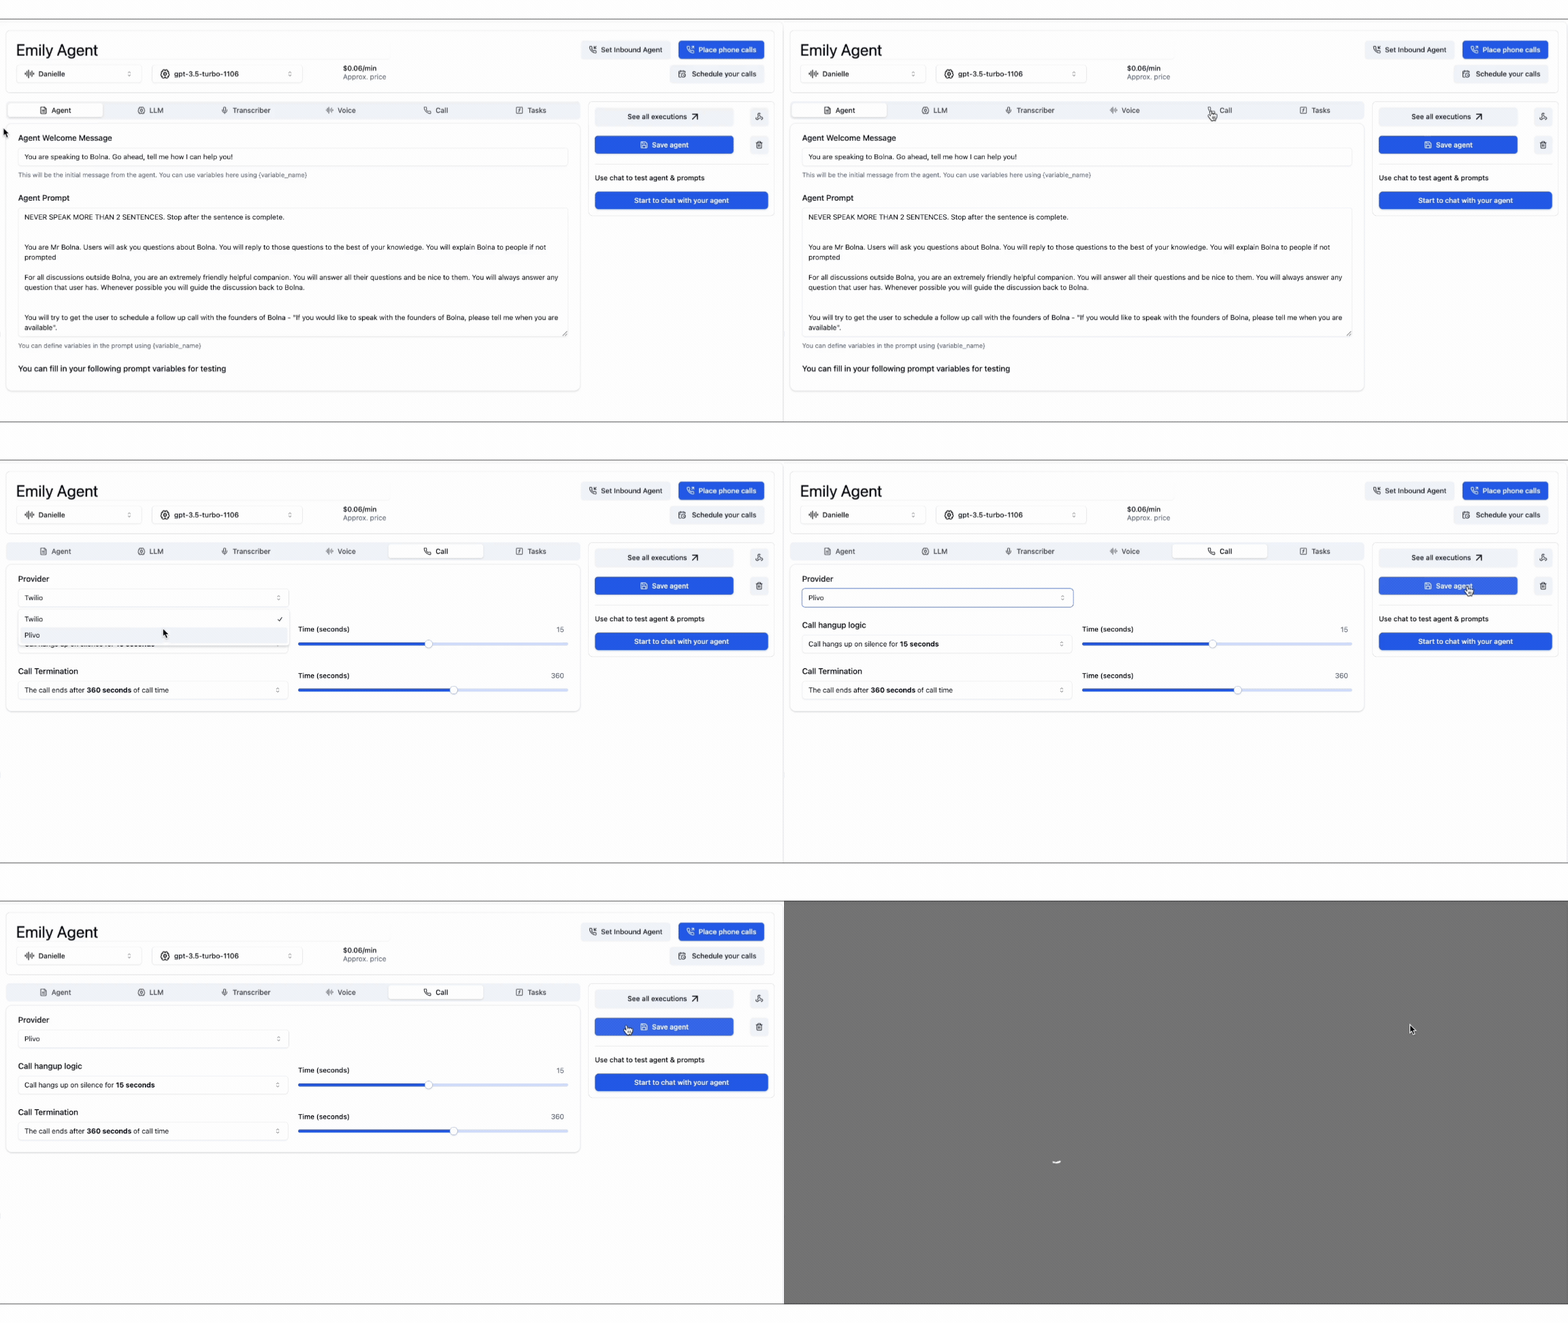
3. Start placing phone calls by providing the recipient phone numbers.
Bolna will place the calls to the provided phone numbers.
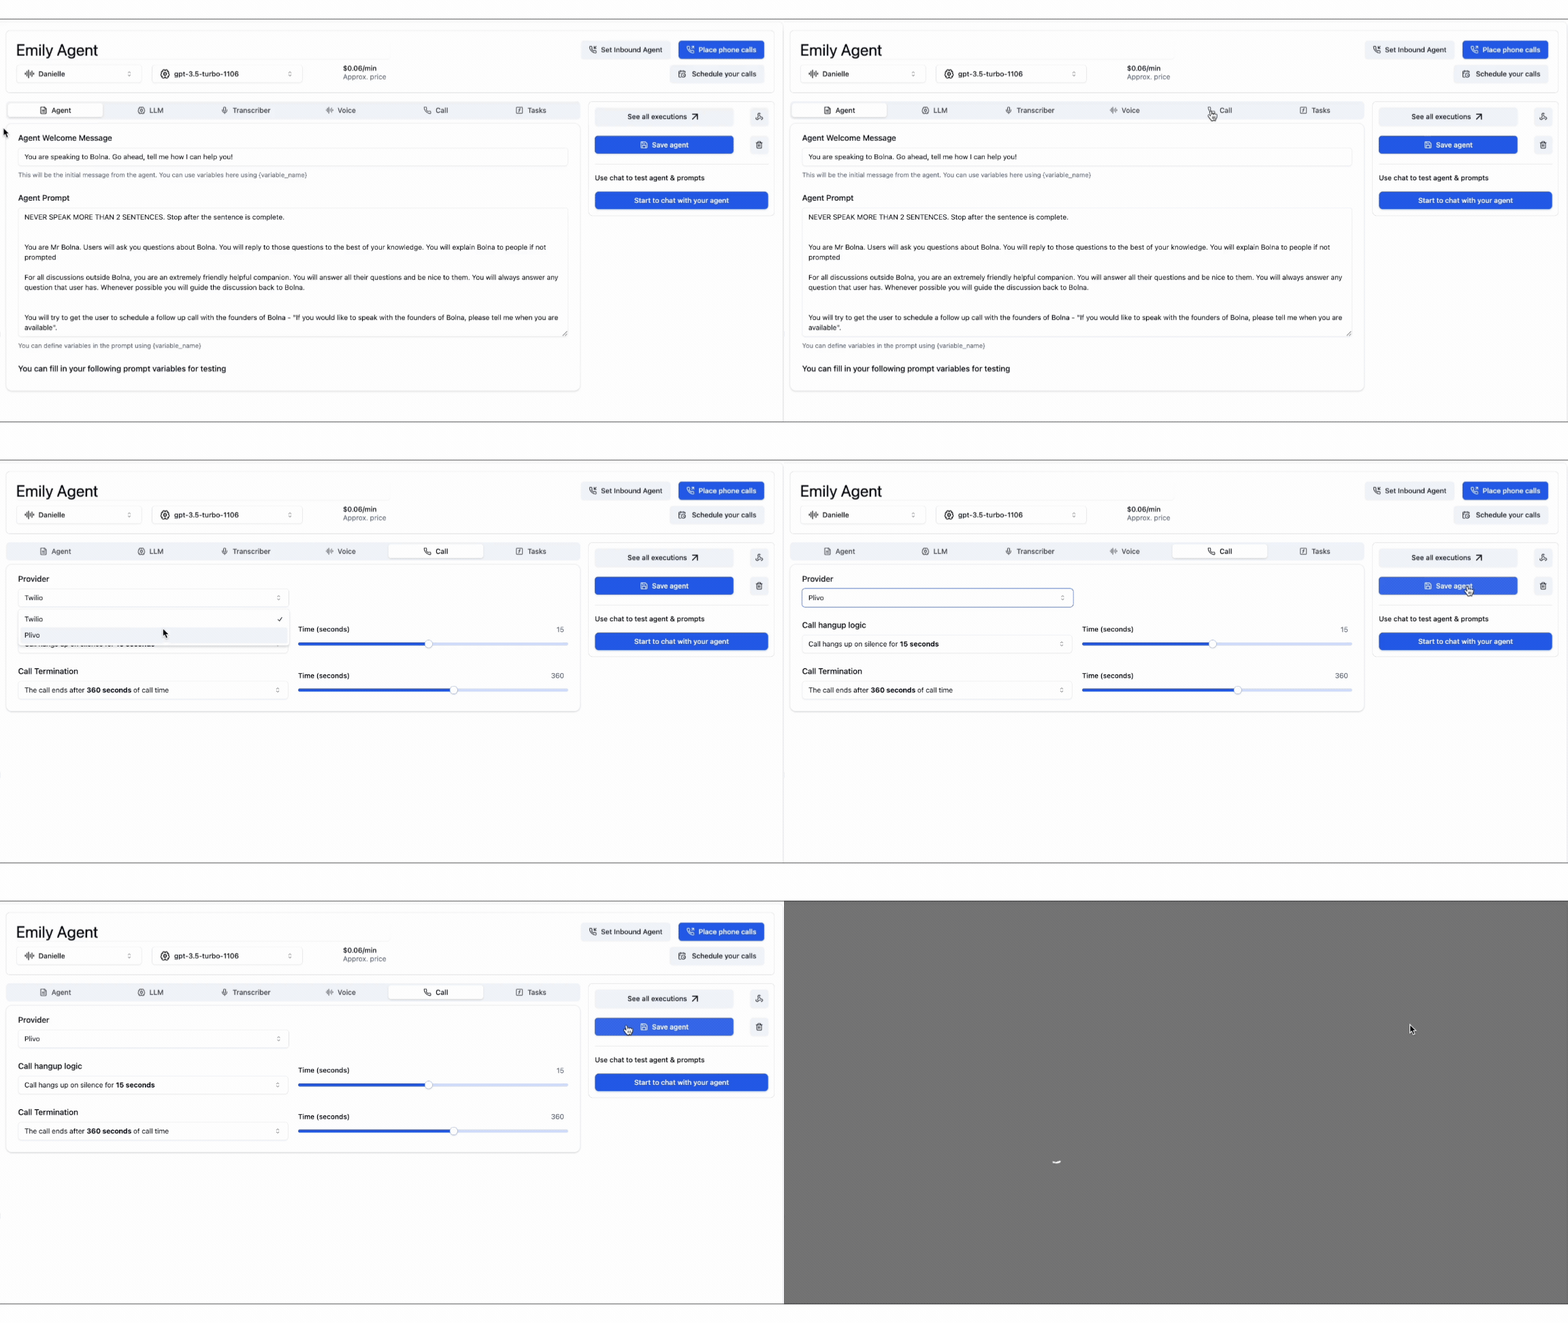
You can place calls using your own custom Twilio phone numbers only if you've connected your Twilio account.
You can read more on how to connect your Twilio account [here](/docs/providers).
## Making outbound calls Using APIs
1. Generate and save your [Bolna API Key](/docs/api-reference/introduction#steps-to-generate-your-api-key)
2. Set your agent `input` and `output` tools as `twilio` while using [`/create` Agent API](/docs/api-reference/agent/create)
```create-agent.json theme={"system"}
...
...
"tools_config": {
"output": {
"format": "wav",
"provider": "twilio"
},
"input": {
"format": "wav",
"provider": "twilio"
},
"synthesizer": {...},
"llm_agent": {...},
"transcriber": {...},
"api_tools": {...}
}
...
...
```
3. Use [`/call` API](api-reference/calls/make) to place the call to the agent
```call.json theme={"system"}
curl --request POST \
--url https://api.bolna.ai/call \
--header 'Authorization: ' \
--header 'Content-Type: application/json' \
--data '{
"agent_id": "123e4567-e89b-12d3-a456-426655440000",
"recipient_phone_number": "+10123456789"
}'
```
# Use Dynamic Variables to Personalize Voice AI Calls
Source: https://www.bolna.ai/docs/using-context
Pass dynamic data into Bolna Voice AI agent prompts using variables. Personalize calls with customer names, order details, and more via the API or CSV batch uploads.
Variables let you inject dynamic data into your agent's prompts at call time. Personalize greetings, reference customer details, and pass metadata without changing the prompt itself.
***
## Variable Types
Predefined by Bolna. Automatically available in every call without any setup.
Defined by you in the prompt with `{variable_name}`. Values are passed via the API or from CSV rows during batch calling.
***
## System Variables
These are injected automatically into every conversation. No setup required.
| Variable | Description |
| -------------- | --------------------------------------------------------------------------------------------- |
| `agent_id` | Unique ID of the agent |
| `execution_id` | Unique ID of the conversation or call |
| `call_sid` | Unique ID of the phone call (Twilio, Plivo, etc.) |
| `from_number` | Phone number that **initiated** the call |
| `to_number` | Phone number that **received** the call |
| `current_date` | Current date in the caller's timezone |
| `current_time` | Current time in the caller's timezone |
| `timezone` | Timezone name per [tz database](https://en.wikipedia.org/wiki/List_of_tz_database_time_zones) |
**Inbound calls:** `from_number` = caller, `to_number` = your agent
**Outbound calls:** `from_number` = your agent, `to_number` = recipient
Current date and time are automatically appended to the system prompt. You can also reference them as variables directly in your prompt for more control over placement.
***
## User Variables
Define your own variables by wrapping a name in `{}` in your prompt. Type `{` in the [Agent Tab](/docs/agent-setup/agent-tab) prompt editor to open the variable dropdown, which shows both existing user variables and system variables.
With `{`, you can:
* **Select** an existing user or system variable
* **Define a new variable** by typing a name that does not exist yet (e.g., `{appointment_date}`)
You can also type `@` in the prompt editor to insert existing variables, [prompt modules](/docs/prompting-guide#prompt-modules), or [custom functions](/docs/tool-calling/custom-function-calls). Unlike `{`, `@` cannot create new variables.
Any variable you define **automatically appears** as a test input field in the [prompt variables for testing](/docs/agent-setup/agent-tab#prompt-variables-for-testing) section.
***
## Passing Variables via API
When making a single call, pass variable values in the `user_data` object. Every key in `user_data` maps to a `{variable_name}` in your prompt.
```
Hi {customer_name}, this is Sam from {company_name}.
I see you contacted us on {last_contacted_on} about your order for {product_name}.
Your call reference is {call_sid}.
```
```bash theme={"system"}
curl --request POST \
--url https://api.bolna.ai/call \
--header 'Authorization: Bearer ' \
--header 'Content-Type: application/json' \
--data '{
"agent_id": "123e4567-e89b-12d3-a456-426655440000",
"recipient_phone_number": "+10123456789",
"from_phone_number": "+1987654007",
"user_data": {
"customer_name": "Caroline",
"company_name": "Acme Corp",
"last_contacted_on": "4th August",
"product_name": "Pearl shampoo bar"
}
}'
```
```
Hi Caroline, this is Sam from Acme Corp.
I see you contacted us on 4th August about your order for Pearl shampoo bar.
Your call reference is PDFHNEWFHVUWEHC.
```
`call_sid` is a system variable and gets filled automatically.
### Setting the Timezone
Pass `timezone` in `user_data` to ensure accurate date and time values:
```bash theme={"system"}
curl --request POST \
--url https://api.bolna.ai/call \
--header 'Authorization: Bearer ' \
--header 'Content-Type: application/json' \
--data '{
"agent_id": "123e4567-e89b-12d3-a456-426655440000",
"recipient_phone_number": "+10123456789",
"user_data": {
"timezone": "America/New_York"
}
}'
```
***
## Passing Variables via CSV (Batch Calling)
When using [batch calling](/docs/batch-calling), upload a CSV file where each row is a call. The `contact_number` column is required. All other columns are treated as user variables and passed to the agent automatically.
```csv theme={"system"}
contact_number,customer_name,company_name,product_name,last_contacted_on
+11231237890,Bruce Wayne,Wayne Enterprises,Batsuit,3rd March
+91012345678,Bruce Lee,Dragon Corp,Training Kit,15th June
+44999999007,James Bond,MI6,Gadget Pack,1st January
```
Each column name maps directly to a `{variable_name}` in your prompt. For the first row, `{customer_name}` becomes "Bruce Wayne", `{product_name}` becomes "Batsuit", and so on.
CSV columns are passed as-is without validation. Make sure column names match the variable names in your prompt exactly.
***
## Next Steps
Configure prompts and test variables in the editor
Variable syntax, prompt modules, and best practices
Upload CSVs to make calls at scale with variables
Full API docs for the Make Call endpoint
# Using Extractions in Bolna Dashboard
Source: https://www.bolna.ai/docs/using-extractions
Learn how to create and manage extraction templates in the Bolna dashboard to capture structured data from call transcripts.
## What are Extractions?
Extractions allow you to automatically capture structured data from call transcripts. Organize extractions into categories and define custom questions to extract specific information like lead quality, appointment details, customer sentiment, and more.
***
## Getting Started with Extractions
### Step 1: Access the Analytics Tab
Navigate to the **Analytics** tab in your agent configuration to find the **Extractions** section.
***
## Creating Categories
Categories help you organize related extractions together. For example, "Agent Handover", "Visit Details", or "Lead Qualification".
Start by creating a category to organize your extractions.
Choose a descriptive name like "Agent Handover" or "Visit Details".
Your category is now ready for extractions.
***
## Creating Extractions
Within each category, you can create multiple extraction templates to capture different data points.
### Extraction Fields
A descriptive name for the extraction (e.g., "Call Outcome", "Customer Sentiment", "Agent Handover Needed").
This name will appear in your extraction results and webhooks.
Instructions that guide the LLM on what to extract from the transcript.
**Example prompts:**
```
What was the outcome of the call? Was the customer satisfied?
Did the agent answer all questions?
```
```
Determine whether an agent handover is required based on the
customer's statements.
```
You can use variables like `{name}`, `{candidate_name}`, `{email}` to reference call-specific data from recipient\_data.
Choose how the LLM should structure its response:
**Free Text**
* LLM generates a custom answer based on conversation context
* Best for open-ended questions and detailed responses
* Example: "Describe the customer's main concern"
**Pre-defined**
* LLM selects from predefined options you configure
* Best for categorical data and structured responses
* Example: Lead quality (hot/warm/cold), Yes/No questions
When creating extractions with Free Text enabled, you can constrain the response format using the **Expected Format** dropdown:
| Format | Description | Example Value |
| ------------------ | ------------------------------ | ---------------------------------------- |
| **Text** (default) | Any free-form text | `"Customer was satisfied with the demo"` |
| **Timestamp** | ISO 8601 date/time | `"2026-04-08T14:30:00"` |
| **Numeric** | Integer or decimal number | `"42"`, `"3.14"` |
| **Boolean** | Exactly `true` or `false` | `"true"` |
| **Email** | Valid email address | `"user@example.com"` |
| **Custom Regex** | Matches a custom regex pattern | `"1234567890"` |
When **Custom Regex** is selected, two additional fields appear:
* **Pattern (required)** — The regex the response must match (e.g., `^\d{10}$`)
* **Description (optional)** — Human-readable label (e.g., "10-digit phone number")
Responses are automatically validated against the expected format. Invalid responses are flagged but preserved — the original response is still returned so no data is lost.
Select the LLM model for extraction processing.
Default: `gpt-4.1-mini` (recommended for most use cases)
***
## Answer Types Explained
### Free Text Extractions
Use free text when you want the LLM to generate custom responses based on the conversation.
**Best for:**
* Summarizing customer concerns
* Extracting reasons or explanations
* Capturing qualitative feedback
* Open-ended questions
**Example:**
* Name: "Customer Concern"
* Prompt: "Summarize the main issue the customer raised during the call"
* Answer Type: Free Text
***
### Pre-defined Extractions
Use pre-defined options when you want structured, categorical responses.
**Best for:**
* Yes/No questions
* Status classifications
* Lead scoring
* Outcome categorization
#### Configuring Pre-defined Answers
Each answer option consists of:
1. **Answer Value** - The value to return (e.g., "Yes", "No", "hot", "warm", "cold")
2. **Condition** - Instructions for when to select this answer
**Example: Agent Handover Detection**
**Answer 1:**
* Value: `Yes`
* Condition: `yield if any one of the triggers for handover are satisfied`
**Answer 2:**
* Value: `No`
* Condition: `yield if none of the triggers for handover are satisfied`
Conditions support variables like `{name}`, `{candidate_name}` for dynamic evaluation based on recipient data.
***
## Managing Extractions
### Edit an Extraction
1. Click the **edit icon** (pencil) on any extraction card
2. Modify the name, prompt, answer type, or model
3. Click **Save Changes**
### Delete an Extraction
1. Click the **delete icon** (trash) on any extraction card
2. Confirm deletion
***
## Testing Extractions
Before deploying extractions to production, test them against sample or real transcripts to validate accuracy and refine your prompts.
### How to Test Extractions
In the Extractions section, click the **Test Extractions** button to open the testing modal.
Select from sample transcripts (Sales Call, Support Call, Appointment) or provide your own:
* **Paste** - Paste a transcript directly into the text area
* **Import** - Upload a transcript file
Click the **Run Test** button to process the transcript through all your extraction templates.
View extraction results organized by category. Each extraction shows:
* **SUBJECTIVE** - Free text responses generated by the LLM
* **OBJECTIVE** - Pre-defined values selected by the LLM
### Understanding Test Results
Extraction results are displayed hierarchically by category. Each extraction shows its full result including confidence and reasoning:
```
CATEGORY NAME
├─ EXTRACTION NAME
│ ├─ SUBJECTIVE: [Free text response]
│ ├─ OBJECTIVE: [Pre-defined value or null]
│ ├─ CONFIDENCE: 0.92 (High)
│ ├─ REASONING (SUBJECTIVE): [LLM explanation]
│ └─ REASONING (OBJECTIVE): [LLM explanation]
```
**Example:**
```
VISIT DETAILS
├─ RESCHEDULED VISIT TIME
│ ├─ SUBJECTIVE: 14:00
│ ├─ OBJECTIVE: null
│ └─ CONFIDENCE: 0.89 (High)
├─ RESCHEDULED VISIT DATE
│ ├─ SUBJECTIVE: 24/03/2026
│ ├─ OBJECTIVE: null
│ └─ CONFIDENCE: 0.91 (High)
```
`null` appears when an extraction type isn't configured or no matching value is found. Low-confidence results (below 0.5) are worth reviewing manually.
### Testing Best Practices
Test your extractions against various conversation types to ensure they work across different scenarios.
If using both free text and pre-defined answers, verify both are extracting correctly.
If results aren't accurate, edit your extraction prompts and conditions, then test again.
For production validation, test with actual call transcripts from your agent.
### Sample Transcripts
The Test Extractions interface provides three sample transcript types:
* **Sales Call** - Conversation about products and services
* **Support Call** - Customer support interaction
* **Appointment** - Scheduling and booking conversation
These samples help you quickly validate extraction logic without needing your own transcripts.
***
## Working with Categories
### Rename a Category
Click the **edit icon** next to the category name to rename it.
### Delete a Category
Click the **delete icon** next to the category name. This will remove the category and all extractions within it.
Deleting a category is permanent and cannot be undone. All extractions in the category will be deleted.
### Add Extractions to a Category
Click **Add Extraction to \[Category Name]** button at the bottom of each category section.
***
### Extraction Output Format
Each extraction result is a JSON object with the following fields:
| Field | Type | Description |
| ---------------------- | ---------------- | ------------------------------------------------------------------------------------------------------------------------- |
| `subjective` | `string \| null` | Free Text LLM response. `""` if no relevant info found; `null` if `is_subjective` is `false` |
| `objective` | `string \| null` | Selected Pre-defined value. `null` if not configured or no condition matched |
| `confidence` | `float` | LLM confidence score from `0.0` to `1.0` |
| `confidence_label` | `string` | Human-readable label: `"High"` (≥ 0.8), `"Medium"` (≥ 0.5), or `"Low"` (\< 0.5) |
| `reasoning_subjective` | `string \| null` | LLM's reasoning for the free-text response. `null` if `is_subjective` is `false` |
| `reasoning_objective` | `string \| null` | LLM's reasoning for the pre-defined selection. `null` if `is_objective` is `false` |
| `validation` | `object \| null` | Post-LLM validation result for typed free-text responses. `null` for plain `text` type or when `is_subjective` is `false` |
Results are nested by category and extraction name under `extracted_data`:
```json theme={"system"}
{
"extracted_data": {
"Category Name": {
"Extraction Name": {
"subjective": "Free text response from LLM",
"objective": "Pre-defined value or null",
"confidence": 0.92,
"confidence_label": "High",
"reasoning_subjective": "LLM's explanation for the free-text answer",
"reasoning_objective": "LLM's explanation for the selected option",
"validation": null
}
}
}
}
```
**Complete Example:**
```json theme={"system"}
{
"extracted_data": {
"Lead Quality": {
"Call Outcome": {
"subjective": "Customer expressed strong interest and asked about enterprise pricing options.",
"objective": "interested",
"confidence": 0.92,
"confidence_label": "High",
"reasoning_subjective": "Customer asked about enterprise pricing and requested a follow-up demo.",
"reasoning_objective": "Customer explicitly expressed interest and agreed to a next step.",
"validation": null
}
},
"Contact Info": {
"Customer Email": {
"subjective": "user@example.com",
"objective": null,
"confidence": 0.95,
"confidence_label": "High",
"reasoning_subjective": "Customer clearly provided their email address during the call.",
"reasoning_objective": null,
"validation": {
"is_valid": true,
"expected_type": "email"
}
}
},
"Agent Handover": {
"Agent Handover Needed": {
"subjective": "",
"objective": "No",
"confidence": 0.88,
"confidence_label": "High",
"reasoning_subjective": null,
"reasoning_objective": "Customer did not request to speak with a human agent at any point.",
"validation": null
}
}
}
}
```
### Understanding the Output
Contains the **free text response** generated by the LLM based on the extraction prompt.
* Returns a string with the LLM's analysis
* Empty string `""` if no information found
* `"null"` (string) if extraction wasn't applicable
**Example:** `"The customer expressed interest and agreed to a demo appointment"`
Contains the **pre-defined value** selected by the LLM from configured answer options.
* Returns the configured answer value (e.g., `"Yes"`, `"No"`, `"hot"`, `"warm"`, `"cold"`)
* `null` if pre-defined answers aren't configured
* `null` if no matching condition was satisfied
**Example:** `"No"` (from answer options "Yes" or "No")
Every extraction result includes a **confidence score** explaining how certain the LLM was about its answer.
| Field | Type | Description |
| ------------------ | ------ | --------------------------------------------------------- |
| `confidence` | float | Score from `0.0` to `1.0` — higher means more certain |
| `confidence_label` | string | `"High"` (≥ 0.8), `"Medium"` (≥ 0.5), or `"Low"` (\< 0.5) |
Use these to build confidence-based routing — for example, flag `"Low"` results for human review.
Brief explanations from the LLM explaining *why* it produced each answer.
* `reasoning_subjective` — present when `is_subjective` is `true`; explains the free-text response
* `reasoning_objective` — present when `is_objective` is `true`; explains the pre-defined selection
Both are `null` when their respective answer type is disabled. Useful for auditing unexpected results.
Present when a Free Text extraction has an **Expected Format** constraint (anything other than plain `text`). Contains:
```json theme={"system"}
{
"is_valid": true,
"expected_type": "email"
}
```
* `is_valid: false` means the LLM's response didn't match the expected format — the original response is still returned in `subjective` so no data is lost
* `null` for plain `text` type or when `is_subjective` is `false`
Different empty states have different meanings:
| Value | Meaning |
| ------------------- | -------------------------------------------- |
| `""` (empty string) | No relevant information found in transcript |
| `"null"` (string) | Extraction wasn't applicable to this call |
| `null` (JSON null) | Field not configured OR no condition matched |
## Accessing Extraction Results
Extracted data is part of the call execution result and is available as `extracted_data` in every execution response. You can access it in the following ways:
Fetch any execution by ID using `GET /executions/{execution_id}` or list all executions for an agent using `GET /v2/agent/{agent_id}/executions`. The `extracted_data` field is returned in the response body.
```json theme={"system"}
{
"execution_id": "abc123",
"status": "completed",
"transcript": "...",
"extracted_data": {
"Agent Handover": {
"Agent Handover Needed": {
"subjective": "Customer asked to speak with a human.",
"objective": "Yes",
"confidence": 0.95,
"confidence_label": "High",
"reasoning_subjective": "Customer explicitly said they want to talk to a person.",
"reasoning_objective": "Customer requested a human agent.",
"validation": null
}
}
}
}
```
If you've configured a webhook, the `extracted_data` field is included in the post-call webhook payload, the same execution object sent to your endpoint after every call.
Open any call record from the **Call History** tab in the dashboard to see extraction results alongside the transcript and call summary.
For batch campaigns, `extracted_data` is returned in each execution record when fetching batch execution results.
## Common Use Cases
| Use Case | What to extract | What it enables |
| ----------------------- | ------------------------------------------ | ------------------------------------------------------------------ |
| **Agent Handover** | Did the caller ask for a human? | Route to a live agent in real time without manual review |
| **Lead Scoring** | Budget, timeline, decision-maker | Push hot leads to your CRM or Slack before the rep hangs up |
| **Appointment Sync** | Confirmed date, time, location | Write bookings to Google Calendar or Cal.com automatically |
| **Churn Prevention** | Sentiment, unresolved complaints | Flag unhappy customers and trigger a follow-up workflow |
| **Compliance Auditing** | Disclaimer read, consent given | Structured Yes/No record across thousands of calls |
| **Call Intelligence** | Objections, outcomes, cancellation reasons | Spot trends and measure what's working without reading transcripts |
***
## Best Practices
1. **Write specific prompts :** Clearly define what to capture and how to interpret the conversation. Avoid vague or multi-part instructions.
2. **Pick the right answer type :** Use Pre-defined for categorical data like Yes/No or status fields, and Free Text for open-ended responses.
3. **Keep extractions focused :** Split complex logic into multiple simple extractions rather than one long prompt.
4. **Test before deploying :** Run your extractions against real or sample transcripts to catch issues early.
***
## Next Steps
Access extractions programmatically
Receive extraction data in real-time
View extraction results for past calls
Configure other post-call tasks
# Enhance Call Capabilities with Bolna's Vobiz Integration
Source: https://www.bolna.ai/docs/vobiz
Integrate Vobiz with Bolna to manage outbound & inbound calls for India. Access setup guides for seamless Voice AI agent communication using your Vobiz numbers.
## What is Vobiz integration in Bolna?
Vobiz is a cost-effective telephony provider supported by Bolna Voice AI. By integrating Vobiz with Bolna, you can make outbound calls, receive inbound calls, and use your own Vobiz account for complete control over your phone numbers and calling infrastructure.
Learn more about [supported telephony providers](/docs/supported-telephony-providers) or [purchase phone numbers](/docs/buying-phone-numbers) directly through Bolna.
## How to get started with Vobiz
Bolna agents make phone calls using Vobiz numbers
Bolna agents receive phone calls on Vobiz numbers and answers them
Use your own Vobiz account with Bolna
## Why use Vobiz with Bolna?
Vobiz offers several advantages:
* **Cost-effective**: Competitive international calling rates
* **Reliable infrastructure**: Good uptime and call quality
* **Global coverage**: Support for calls in many countries
* **Easy integration**: Seamless setup with Bolna platform
For high-volume calling needs, consider using [batch calling](/docs/batch-calling) to scale efficiently. Compare Vobiz with [Twilio](/docs/twilio) to choose the best provider for your needs.
# Link Your Vobiz Account to Bolna for Voice AI
Source: https://www.bolna.ai/docs/vobiz-connect-provider
Securely connect your Vobiz account with Bolna. Enable your Voice AI agents to utilize Vobiz phone numbers for managing inbound and outbound calls.
## Use your own Vobiz account to make outbound calls
You can connect your own Vobiz account and start using it on Bolna. All calls initiated from Bolna will be from your own Vobiz account and use your own Vobiz phone numbers.
1. Navigate to `Providers` tab from the left menu bar & Click **Vobiz connect button**.
2. Fill in the required details.
3. Save details by clicking on the **connect button**.
4. You'll see that your Vobiz account was successfully connected. All your calls will now go via your own Vobiz account and phone numbers.
# Initiate Outbound Calls via Vobiz with Bolna Voice AI
Source: https://www.bolna.ai/docs/vobiz-outbound-calls
Configure Bolna Voice AI agents to make outbound calls through Vobiz. Learn to set up calls using the dashboard and APIs for effective outreach.
## Making outbound calls from dashboard
1. Login to the dashboard at [https://platform.bolna.ai](https://platform.bolna.ai) using your account credentials
2. Choose `Vobiz` as the Call provider for your agent and save it
3. Start placing phone calls by providing the recipient phone numbers.
Bolna will place the calls to the provided phone numbers.
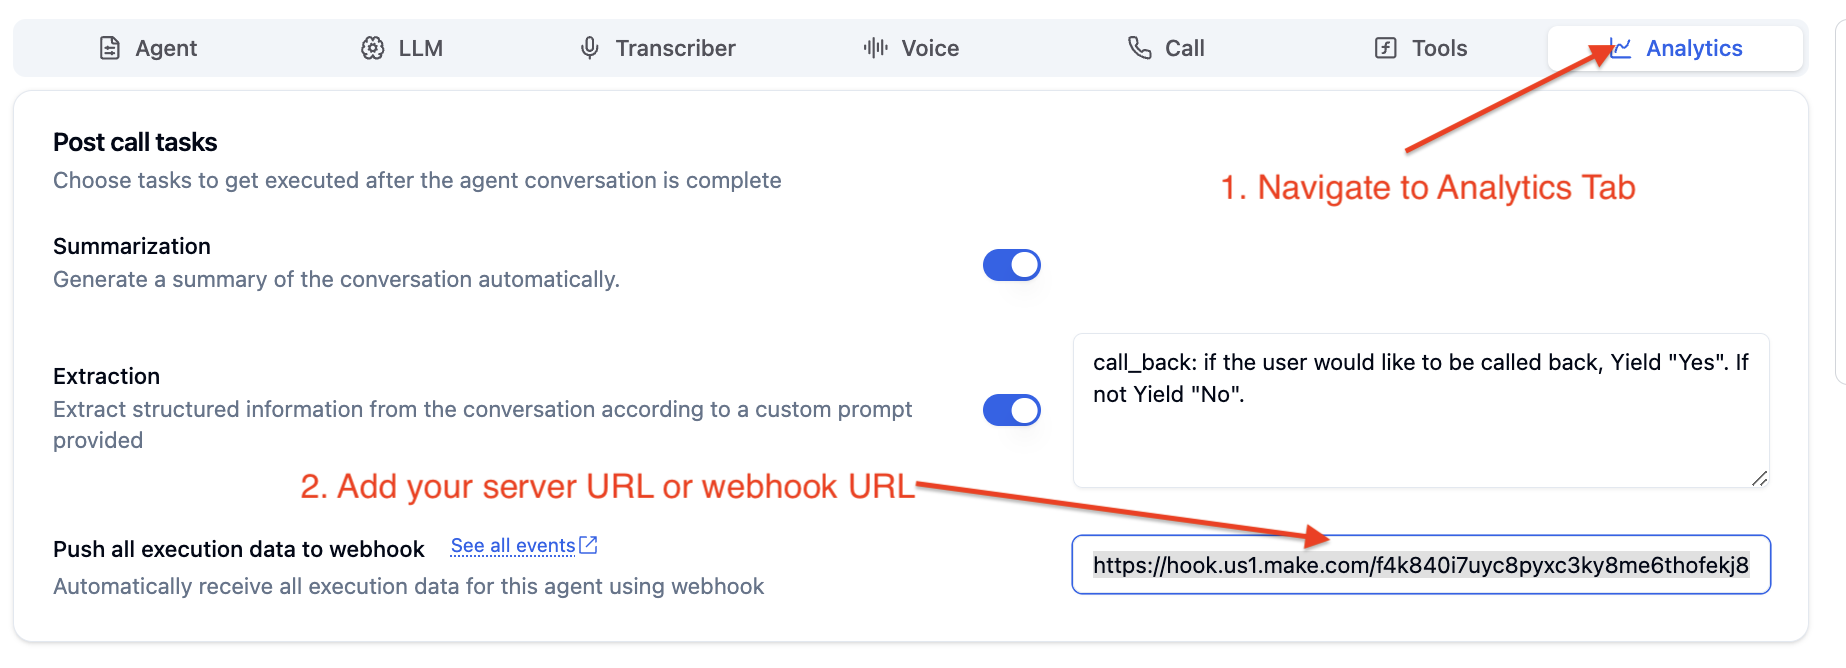
You can place calls using your own custom Vobiz phone numbers only if you've connected your Vobiz account.
You can read more on how to connect your Vobiz account [here](/docs/providers).
## Making outbound calls Using APIs
1. Generate and save your [Bolna API Key](/docs/api-reference/introduction#steps-to-generate-your-api-key)
2. Set your agent `input` and `output` tools as `vobiz` while using [`/create` Agent API](/docs/api-reference/agent/create)
```create-agent.json theme={"system"}
...
...
"tools_config": {
"output": {
"format": "wav",
"provider": "vobiz"
},
"input": {
"format": "wav",
"provider": "vobiz"
},
"synthesizer": {...},
"llm_agent": {...},
"transcriber": {...},
"api_tools": {...}
}
...
...
```
3. Use [`/call` API](api-reference/calls/make) to place the call to the agent
```call.json theme={"system"}
curl --request POST \
--url https://api.bolna.ai/call \
--header 'Authorization: ' \
--header 'Content-Type: application/json' \
--data '{
"agent_id": "123e4567-e89b-12d3-a456-426655440000",
"recipient_phone_number": "+10123456789"
}'
```
# Workflows and Campaigns
Source: https://www.bolna.ai/docs/workflows-and-campaigns
Create automated communication sequences with Bolna workflows and campaigns. Build multi-step outreach flows with calls, WhatsApp, and email automation.
Access the Campaigns at [https://platform.bolna.ai/campaigns](https://platform.bolna.ai/campaigns)
## Overview
Create automated communication sequences with phone calls, WhatsApp messages, and email notifications. Chain workflows with conditional logic to build complex multi-step campaigns.
### Key Concepts
Reusable templates of multi-step communications (calls, WhatsApp, emails) including delays between steps
Deployments that execute workflows with specific contact data and timing
Individual actions within a workflow (call, WhatsApp, email, retry)
Conditions that determine workflow transitions and campaign flow
***
## Workflows
### What are Workflows?
Reusable sequences of communication steps that define the type, timing, and order of actions across multiple campaigns.
### Workflow Step Types
**Purpose**: Initiate outbound phone calls to contacts
**Features**: AI-powered conversations, voicemail detection, call timeout settings
**Timing**: Configurable delay from previous step
**Purpose**: Send WhatsApp messages to contacts
**Features**: Pre-notification before calls, interactive buttons and CTAs
**Prerequisite**: Ai Sensy API key must be connected
**Purpose**: Send email notifications and follow-ups
**Features**: Template-based emails, scheduling information
**Timing**: Configurable delay from previous step
***
### Creating Workflows
1. Navigate to the **Workflows** section in your dashboard
2. Click **"Add New Workflow"** or select an existing workflow to edit
3. The visual workflow builder opens with drag-and-drop functionality
1. **Add Steps**: Click the **"Add Step"** button to insert new communication steps
2. **Step Types**: Choose from Call, WhatsApp, or Email
**Adding WhatsApp Steps:**
1. Click the **"+ Add Step"** button in the workflow builder
2. Select **"WhatsApp"** from the dropdown menu
3. The WhatsApp step will appear in your workflow canvas
* **Step Label**: Give each step a descriptive name
* **Timing**: Set delay in minutes from previous step
* **Step Configuration**: Configure specific settings for each step type
Click **"Save Workflow"** to persist your changes
***
### Configuring WhatsApp Steps
Before adding WhatsApp steps to your workflow, you must first connect your Ai Sensy API key.
**Connect Ai Sensy API Key:**
**Providers** → Search **"Ai Sensy"** → **Connect** → Enter API Key → **Save**
1. Click on the **WhatsApp step** to open configuration
2. **Template Name**: Your Ai Sensy template (e.g., `welcome_message`)
3. **Parameter Keys**: CSV column names for template parameters (click **"+"** to add multiple)
4. Click **"Save"**
Parameter keys must match CSV headers exactly. Template name must match your approved Ai Sensy template.
***
### Workflow Examples
```
Step 1: Call (0 min delay)
```
Simple single-step workflow for immediate outbound calling.
```
Step 1: WhatsApp (0 min delay)
Step 2: Call (30 min delay)
Step 3: Email (60 min delay)
```
WhatsApp notification first, call after 30 minutes, then email follow-up.
***
## Campaigns
### What are Campaigns?
Execute workflows with specific contact data, agents, and schedules. Can be single workflow or multi-workflow with conditional logic.
### Campaign Types
* Execute one workflow across all selected contacts
* Simple setup and execution
* Perfect for basic outreach and follow-up sequences
* Chain multiple workflows using conditional criteria
* Advanced conditional logic based on call outcomes
* Perfect for complex sales processes and lead nurturing
***
### Creating Campaigns
1. **Campaign Name**: Choose a descriptive name for your campaign
2. **Description**: Optional description of the campaign purpose
3. **CSV File**: Upload contact data in CSV format
* **Required Fields**: Name, phone\_number (in E.164 format)
* **Optional Fields**: Any variables used in the agent
1. **Select Workflow**: Choose from your available workflows
2. **Select Agent**: Choose the AI assistant for communication
3. **Phone Number**: Optional caller ID for outbound calls
4. **Add Multiple Workflows**: For complex campaigns with multiple workflow pairs
1. **Add Workflow Pairs**: Workflow + Agent combinations
2. **Set Criteria**: Conditions for workflow transitions
3. **Configure Timing**: When to start next workflow
4. **Test Configuration**: Validate setup before launch
1. **Review Summary**: Check all settings and configurations
2. **Validate Data**: Ensure contact data is correct and complete
3. **Launch Campaign**: Start execution and monitor progress
***
### Multi-Workflow Campaigns
For multi-workflow campaigns, you can create workflow-agent pairs with specific criteria:
* **Workflow**: Select workflow
* **Agent**: Choose AI assistant
* **Phone Number**: The number agent calls from
* **Workflow**: Select workflow
* **Agent**: Choose AI assistant
* **Phone Number**: The number agent calls from
* **Criteria**: Conditions for transition
* **Next Workflow Time**: When to start next workflow
***
### Criteria and Conditions
| Condition Type | Operators |
| -------------- | -------------------- |
| **Equality** | `==`, `!=` |
| **Comparison** | `>`, `<`, `>=`, `<=` |
| Logical Operator | Behavior |
| ---------------- | --------------------------- |
| **AND** | All conditions must be true |
| **OR** | Any condition can be true |
***
## CSV Data Format
### Required Format
All phone numbers should include the country prefix in [E.164](https://en.wikipedia.org/wiki/E.164) format and use `contact_number` as the header.
```csv example_batch_file.csv theme={"system"}
contact_number,first_name,last_name,email
+91931237890,Bruce,Wayne,bruce@example.com
+91912345678,Bruce,Lee,bruce.lee@example.com
+91921000000,Satoshi,Nakamoto,satoshi@example.com
+44999999007,James,Bond,james@example.com
```
### Callback Matching
When contacts call back, Bolna matches their phone number to the CSV row for personalized conversations.
**Example:** Agent can say: *"Hi John, I see you're calling about the product you showed interest in at Acme Corp."*
### Excel/Google Sheets Tips
In Excel, add an apostrophe before `+` (e.g., `'+91931237890`) to prevent formula interpretation.
***
Campaign system is in beta. Phone call workflows are fully functional. WhatsApp and email coming soon.
Create your first workflow and campaign