Write one prompt for every language your Bolna agent speaks: mark the lines that need translating and review each language’s wording in the Translations panel.
Build a multilingual agent from one prompt instead of maintaining a separate prompt for every language. You write the role, rules and call flow once, then mark only the lines the agent speaks out loud. Bolna gives each marked line its own wording per language; everything else is shared.
Beta. The Single Prompt view is being A/B tested, so it may not be on your account yet. To turn it on, email support@bolna.ai.
A multilingual agent is really one conversation spoken in several languages. The Single Prompt view treats it that way.
Change it once, everywhere. Rules, call flow and instructions live in one shared prompt. Edit them once and the change applies to every language, with no tabs to hop between and no edits to repeat.
Your languages never drift apart. With a single source, there’s no risk of updating Hindi and forgetting Tamil. Every language runs the same logic.
No translating by hand. Mark the lines your agent speaks and Bolna translates them into each of your languages. You only step in to review or fine-tune the wording.
In the older canvas, each language has its own full prompt, even though most of that text is identical. Every change has to be repeated in each tab, and over time the tabs fall out of sync.Here’s how the two compare:
An agent’s view is set when it’s created and saved with it. Enabling the view on your account doesn’t change agents you already have; they keep working exactly as before, in the editor and on calls.The table assumes the Single Prompt view is enabled for your account.
Agent
Opens in
New agent created in Agent Studio
Single Prompt view
Imported agent with one language
Single Prompt view
Imported agent already using the Single Prompt view
Single Prompt view, whatever its number of languages
Imported agent with more than one language
Older canvas
Existing agent created before you had the view
Older canvas
Imported multi-language agents stay on the older canvas because their separate per-language prompts don’t map onto one shared prompt. See Import agents.
How to tell which view you’re in: the Single Prompt view shows language chips with a + icon. The older canvas shows language tabs with a + Add Language button.
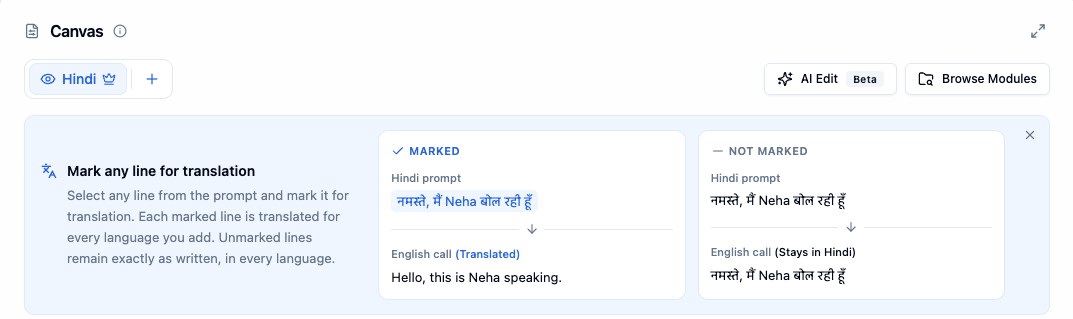
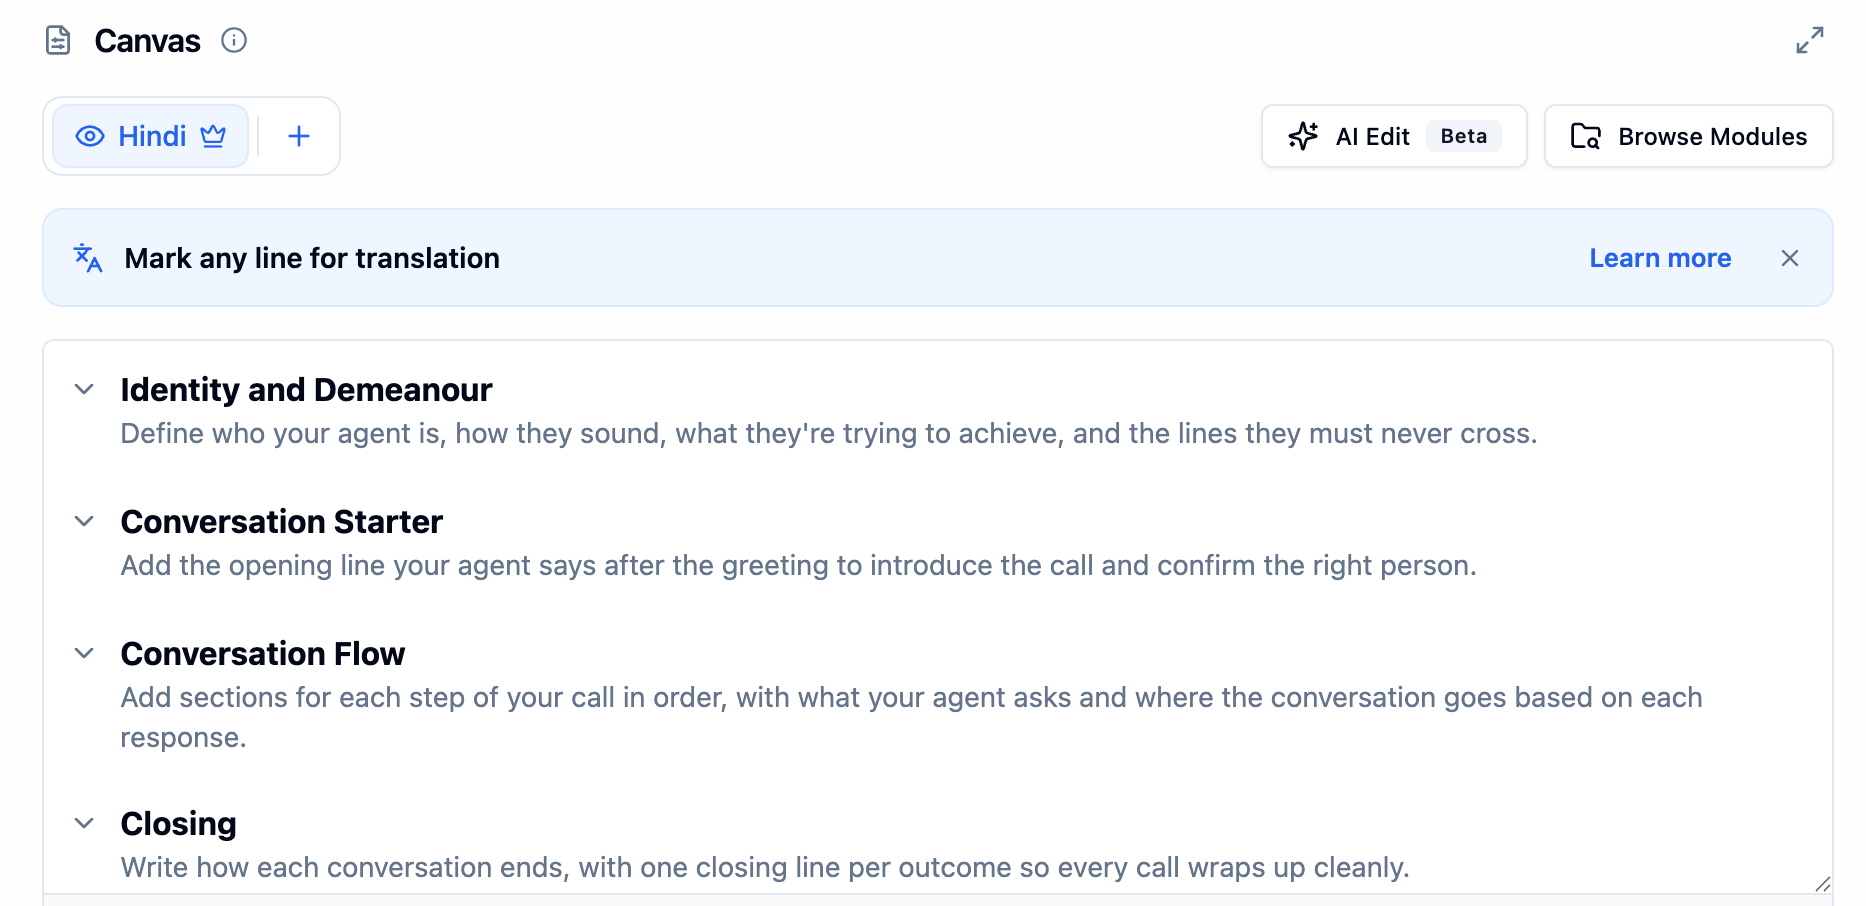
The translation explainer shown at the top of the Canvas
Every line in the prompt is either marked or unmarked.
Marked lines have their own wording in each language. On a call, the agent uses the wording for the caller’s language. Mark what the agent says out loud: the opening line, questions, confirmations and closing lines.
Unmarked lines stay exactly as written, in every language. Instructions, rules and section headings usually stay unmarked.
You write the prompt in your default language, shown with a crown. Every other language takes its wording from it.
If an agent has more than one language and no lines are marked, the Canvas shows a warning. Without marked lines, the agent speaks every line in the default language on all calls.
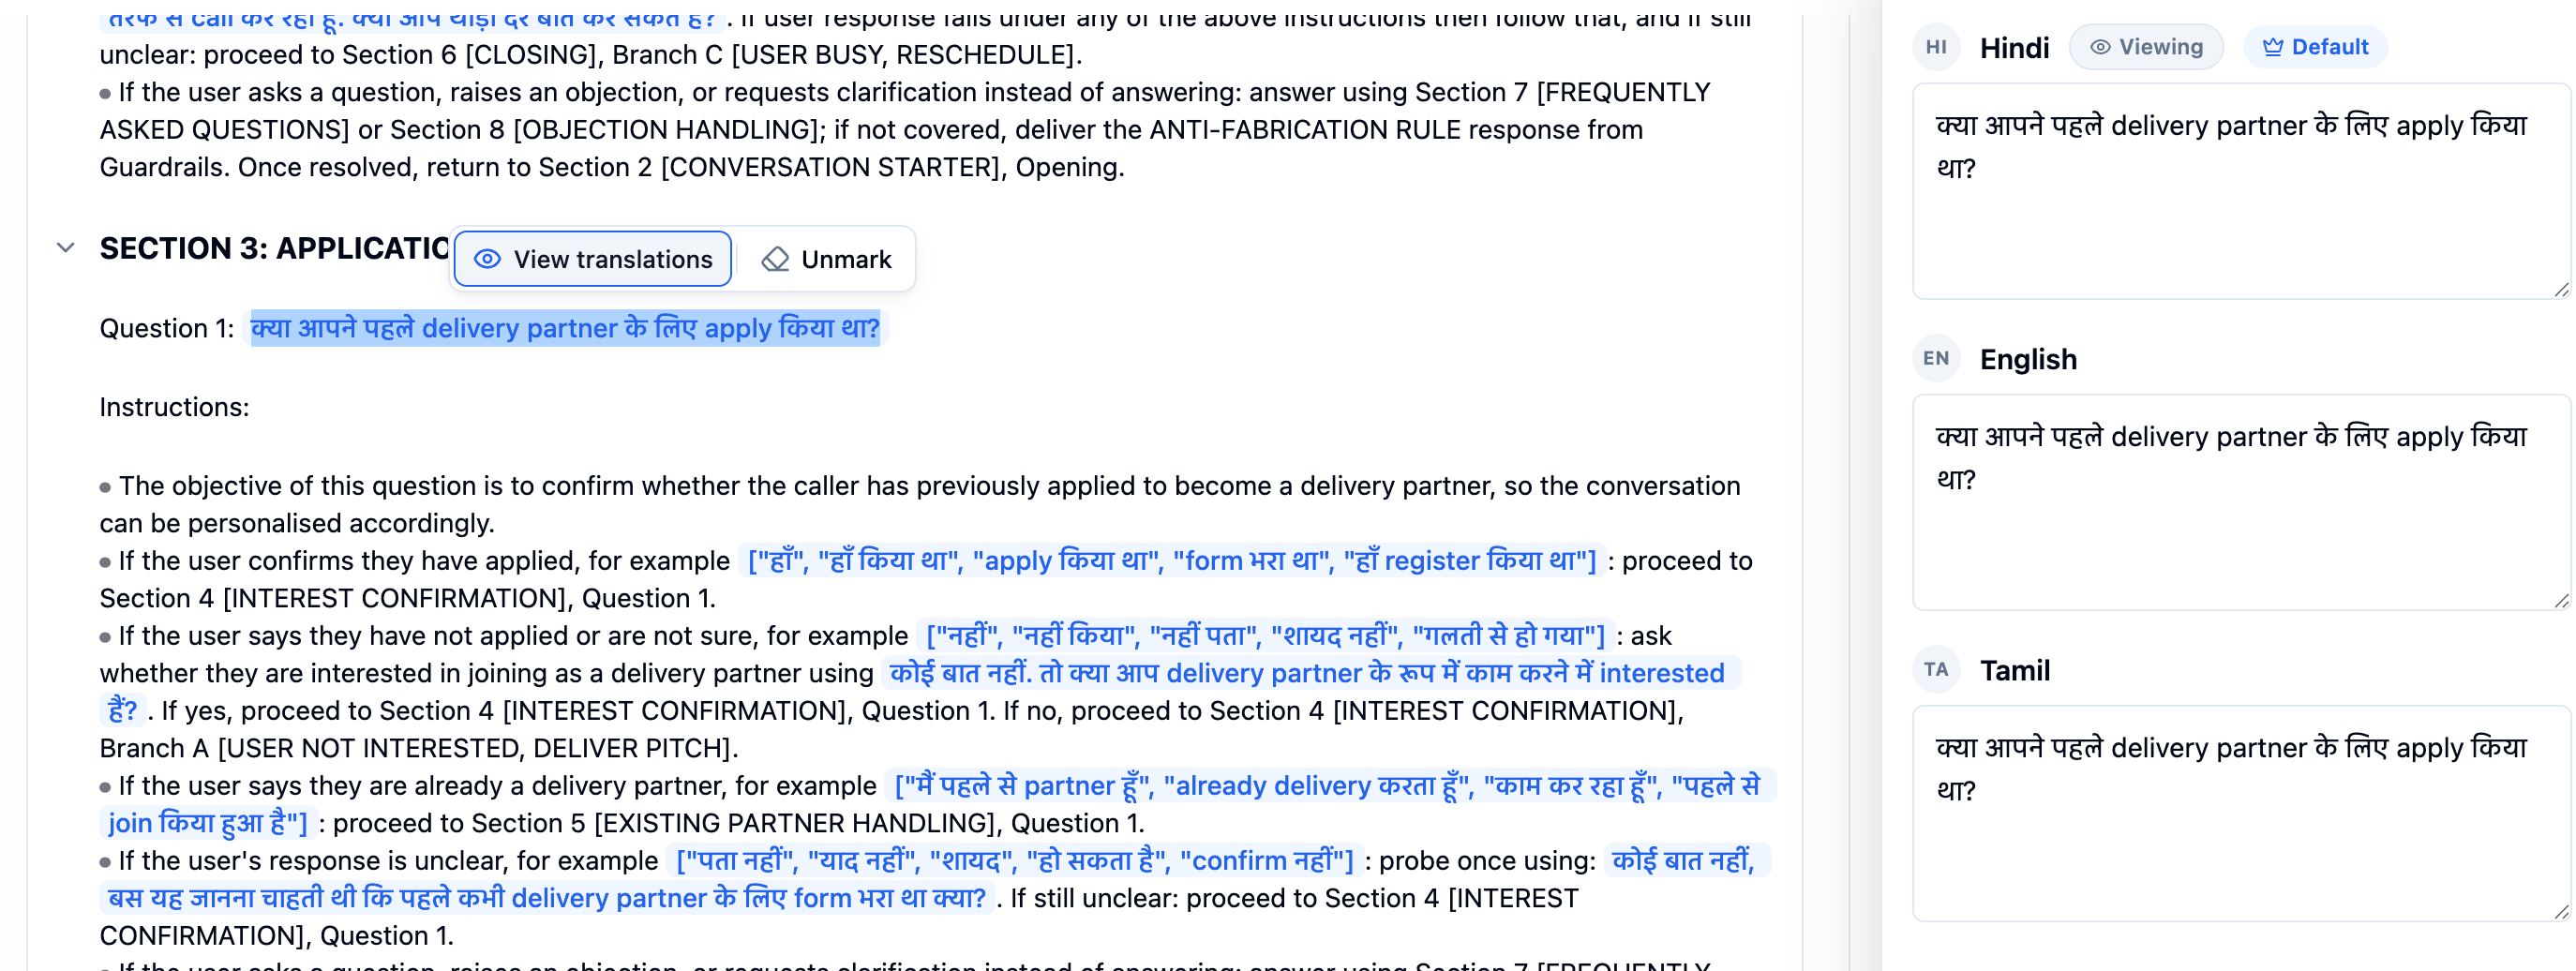
The Translations panel opens on the right of the Canvas. It shows one box per language for the selected line. The language you’re viewing is labelled Viewing, and your default language is labelled Default.
Translations panel for a marked line on a Hindi, English and Tamil agent
1
Edit the wording
Type or correct the wording in any language’s box.
2
Click Save
Save stays disabled until you change something. To drop your changes, click Discard (or Cancel on a line you’ve just marked).
3
Click Save agent
The panel only saves wording into the Canvas; the agent isn’t saved until you do this.
If the agent has only one language, the panel tells you to add another before you can translate the line.
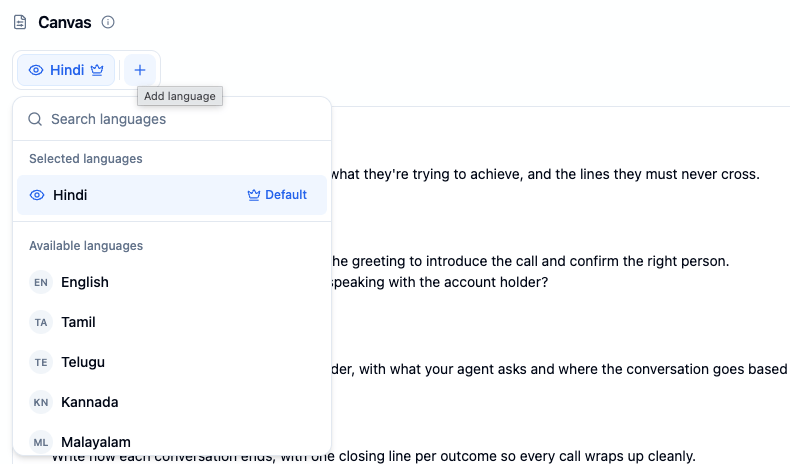
Languages appear as chips at the top of the Canvas. The default language has a crown, and the eye icon shows the one you’re viewing. Click a chip to see the prompt in that language. Voice and transcription for each language are still set in the Languages Tab.
Click the + icon and pick a language from Available languages. What happens next depends on the agent:
Agent state
What happens
Saved, with marked lines
Bolna translates every marked line. A notification reads Adding <Language> and changes to <Language> added when done, usually within a minute. If no wording comes back, the language is still added and you’ll see Translations are not ready; fill in the wording from the Translations panel.
No lines marked
A dialog asks you to choose Mark lines first or Add language anyway.
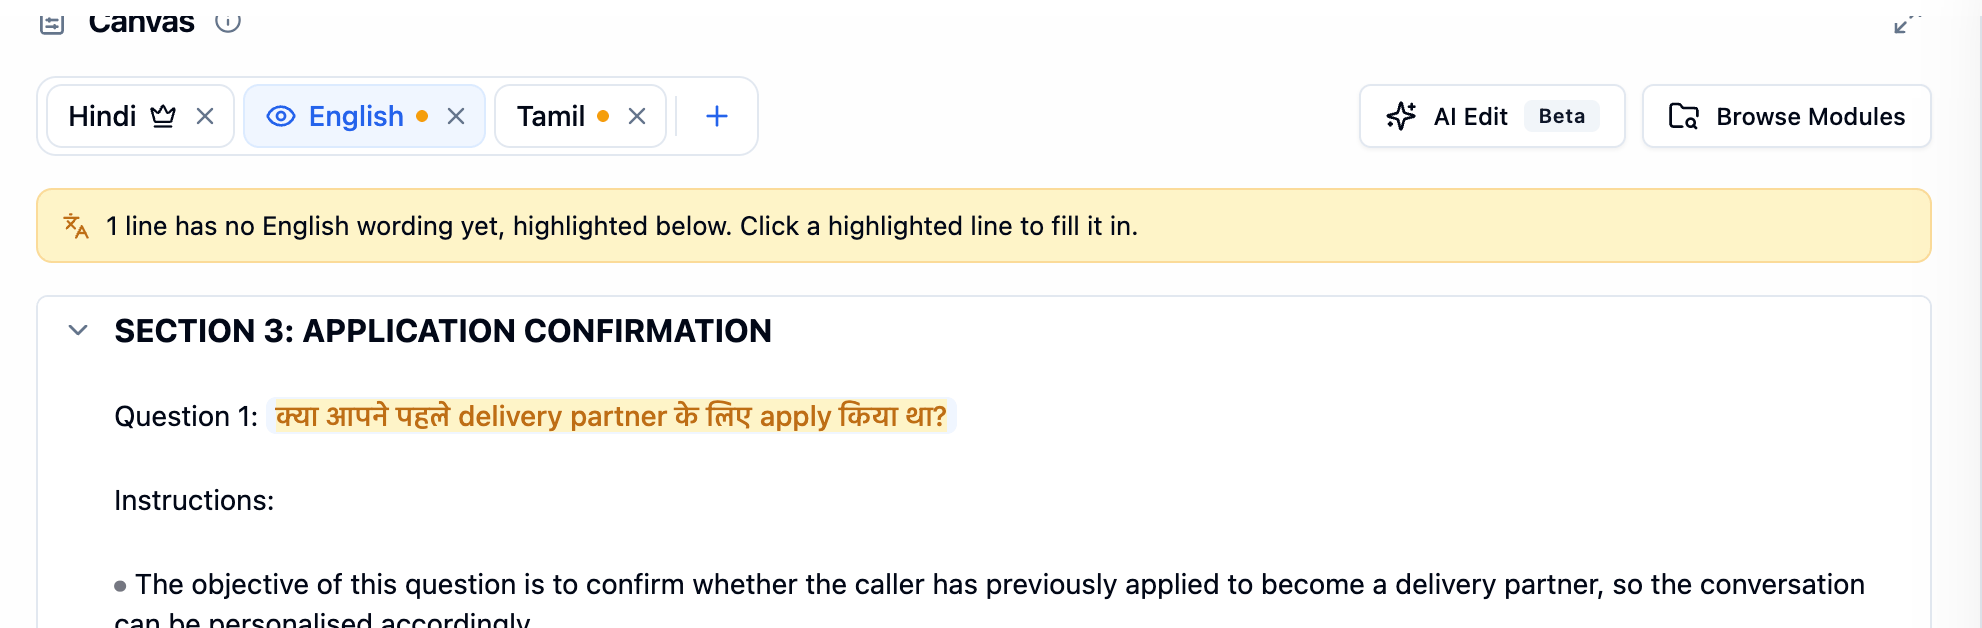
Marked lines that still have no wording in a language are highlighted, that language’s chip shows an amber dot, and a banner tells you how many lines need wording.
Hindi, English and Tamil chips with a line that still needs English wording
In the same picker, hover over the language and click the remove icon. Removing a language deletes its wording for every marked line, along with its voice, speech recognition, handoff and related settings. You can’t remove the default language; make another language the default first.
The prompt is split into collapsible sections. A new agent built from scratch starts with Identity and Demeanour, Conversation Starter, Conversation Flow, Closing, and Frequently Asked Questions. Each has placeholder text to replace with your own.
Canvas of a new agent with the default sections and their placeholder text
Collapse or expand a section with the chevron next to its heading.
Add a section with + Add Section at the bottom of the Canvas, or type # in the prompt.
Delete a section with the delete icon on its heading. This removes the heading and everything under it.
Go full screen with the expand icon at the top right of the Canvas.
Variables ({{), modules (@), Browse Modules and the token count work as described in the Agent Tab.
AI Edit works on the shared prompt, so its changes apply to every language. When it edits a marked line, the suggestion can include that line’s wording in your other languages.While AI Edit is open, you can switch the language you’re viewing, but you can’t add or remove languages or change the default.