
Connecting Your Exotel Account for AI-Powered Calling

Bolna ensures enterprise-grade security by connecting your Exotel account through Infisical, an industry-leading secrets management platform that encrypts and protects your authentication credentials.
Linking your personal or business Exotel account to Bolna gives you complete ownership and control over your telephony infrastructure. Once connected, all voice calls initiated by Bolna’s AI agents will route through your Exotel account, utilizing your provisioned phone numbers and billing directly to your Exotel subscription. This approach ensures transparency in call costs, maintains your existing phone number reputation, and provides full visibility into call analytics through both Bolna and Exotel dashboards.

Step-by-Step Integration Process

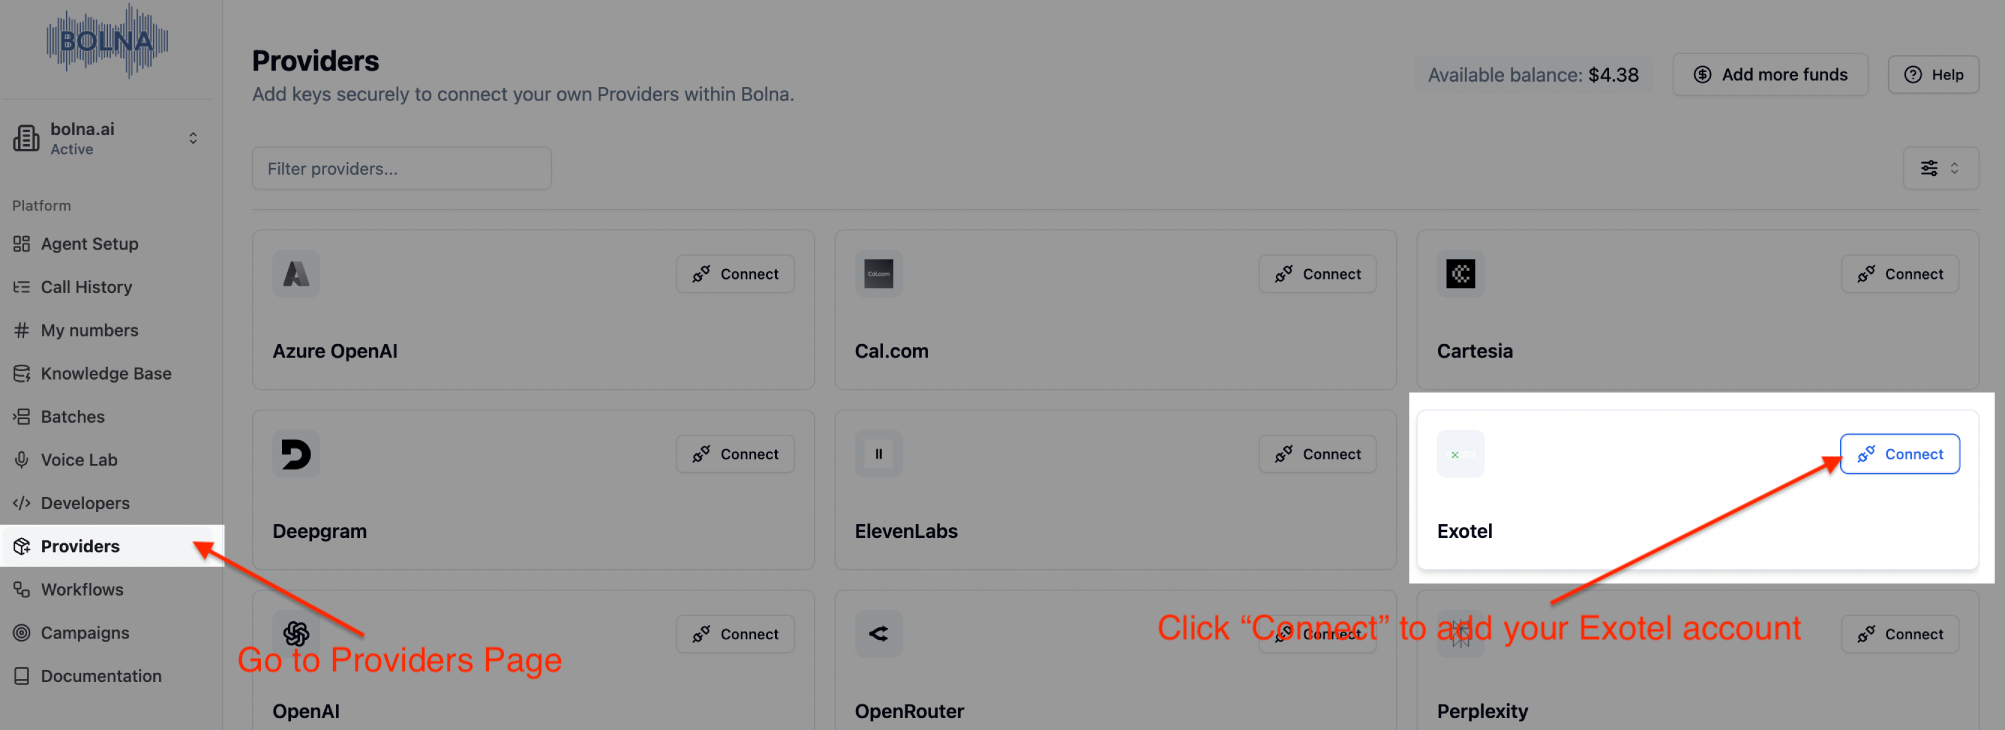
Step 1: Access the Providers Configuration Panel

Begin by logging into your Bolna platform account and locating the Providers section in the left navigation menu. Click the Exotel connect button to initiate the account linking process.
Providers page in Bolna dashboard showing Exotel connection button for integrating Exotel telephony with Voice AI agents

Providers page on Bolna


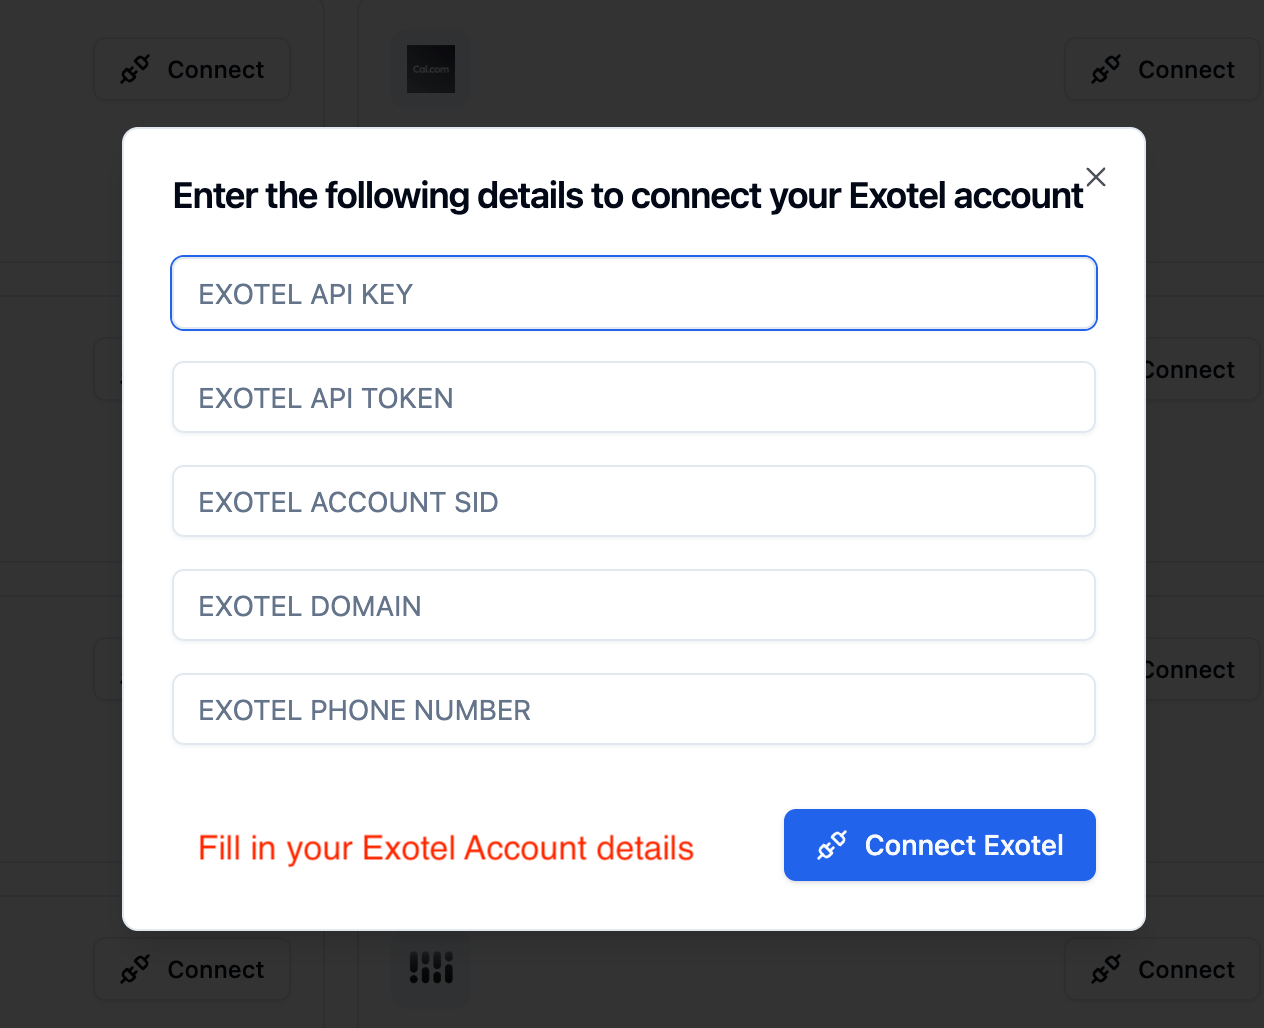
Step 2: Enter Your Exotel Authentication Credentials

You’ll need to provide your Exotel API credentials, which include your API_KEY, API_TOKEN, ACCOUNT_SID, DOMAIN and PHONE_NUMBER. These credentials can be found in your Exotel account dashboard under API settings. These credentials allow Bolna to securely communicate with Exotel’s API on your behalf.
Exotel account connection form in Bolna showing Auth ID and Auth Token input fields for establishing secure connection

Provide Exotel details


Step 3: Finalize the Connection

After entering your credentials click the connect button to establish the secure link between your Exotel account and Bolna’s Voice AI platform. The system will validate your credentials and establish the integration.
Exotel account connection confirmation screen in Bolna showing connect button to finalize telephony provider integration

Connect your account


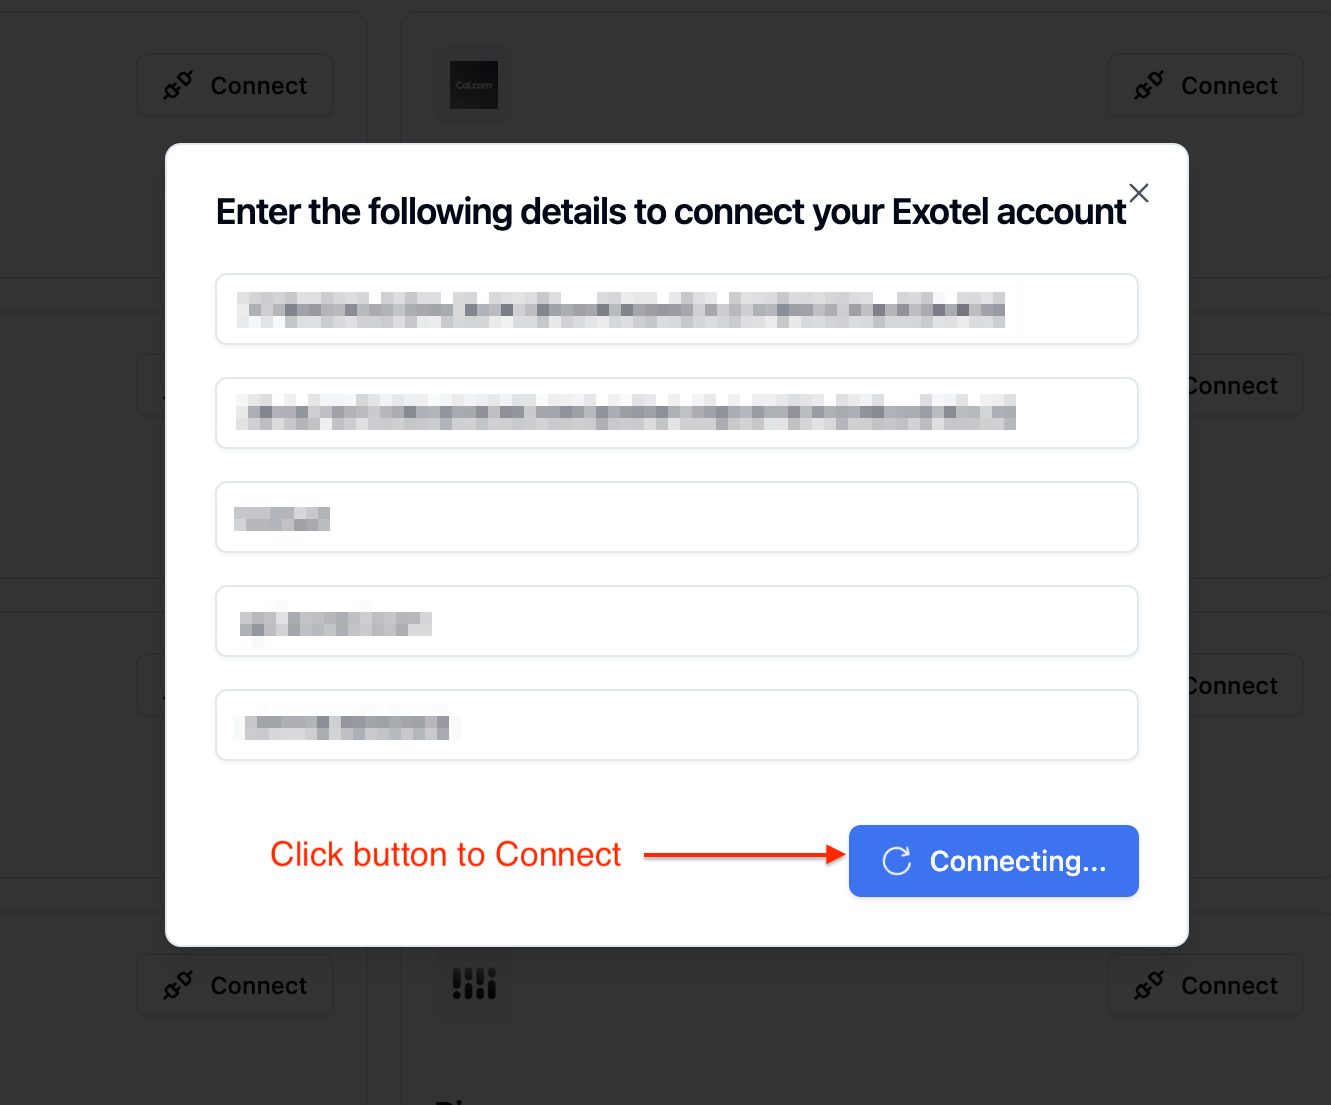
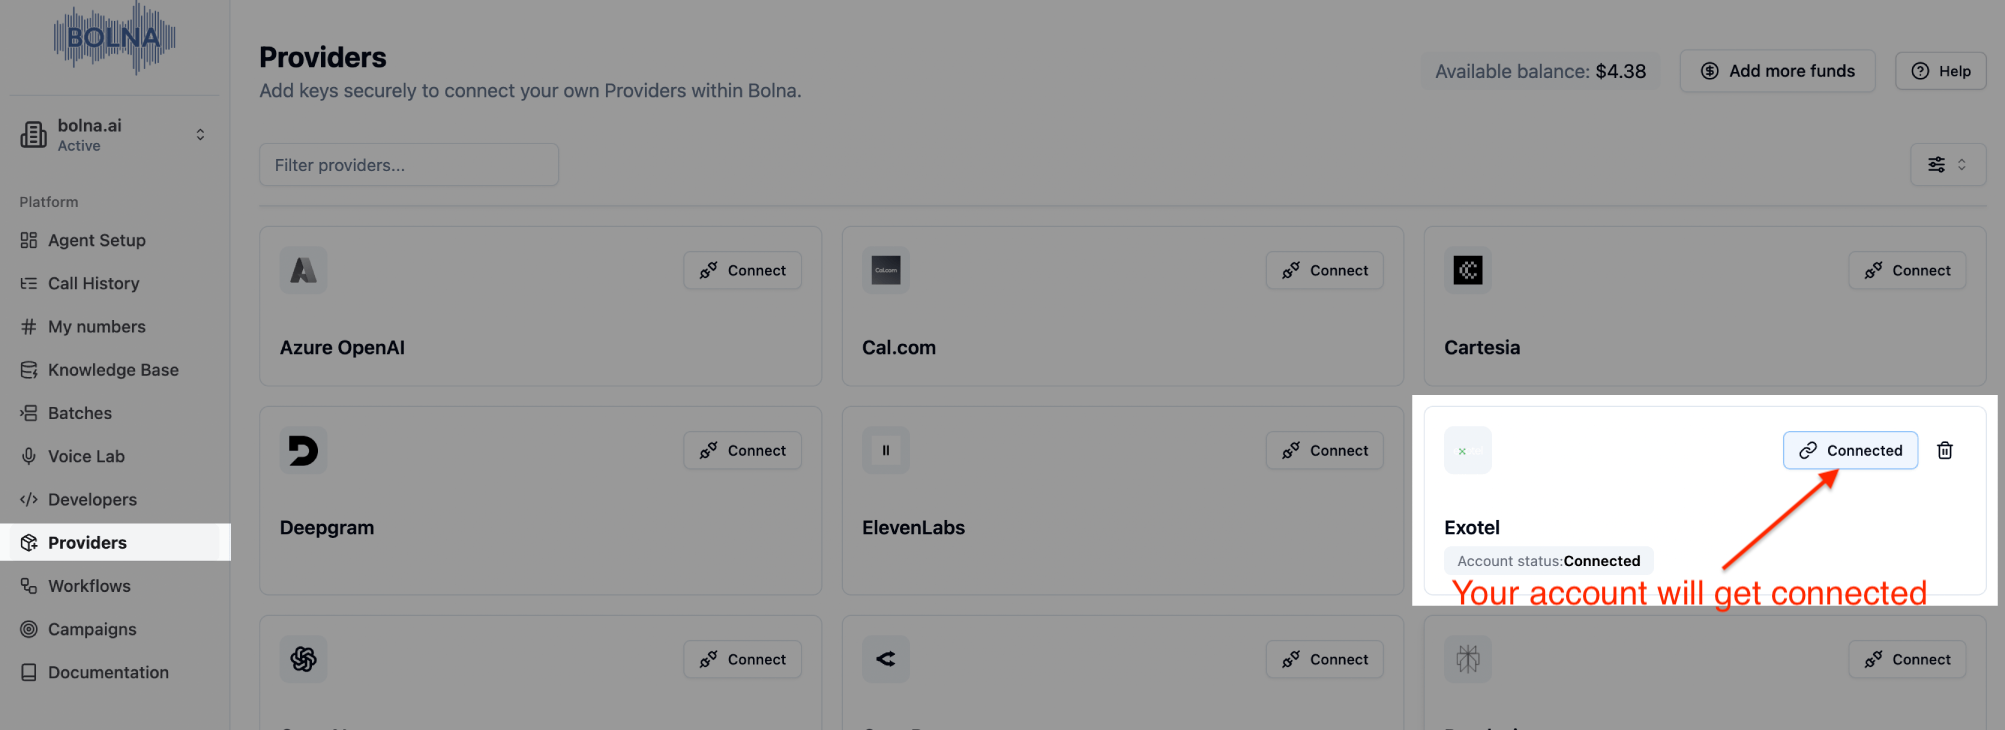
Step 4: Verify Successful Integration

Upon successful connection, you’ll receive a confirmation message indicating that your Exotel account is now active on Bolna. From this point forward, all AI-powered voice calls initiated through Bolna cab be utilized with your Exotel infrastructure, phone numbers, and account balance. You can now configure your AI agents to make outbound calls or handle inbound calls using your Exotel telephony resources.
Successful Exotel account connection status in Bolna platform showing secure integration completion for Voice AI telephony services

Your Exotel account is now securely connected


How to Create an Exotel Applet ID for Outbound Calls

To enable outbound calling functionality with Bolna’s Voice AI agents through Exotel, you’ll need to create and configure a dedicated applet in your Exotel dashboard. This applet serves as the communication bridge between Bolna’s AI voice agents and Exotel’s telephony infrastructure for making outbound calls.

Understanding Exotel Applets for Voice AI Integration

An Exotel applet is a customizable workflow that defines how your outbound calls are handled, routed, and connected. For Bolna integration, you’ll configure a specialized applet that connects the Voicebot functionality with Bolna’s API endpoints, enabling seamless AI-powered outbound calling capabilities.

Prerequisites for Creating Your Exotel Outbound Applet

Before you begin, ensure you have:
  • An active Exotel account with API access
  • Access to your Exotel dashboard at my.exotel.com
  • Your Exotel account already connected to Bolna (see steps above)

Step-by-Step Guide to Configure Exotel Applet for Bolna Outbound Calls

Step 1: Access the Exotel App Bazaar

Navigate to your Exotel dashboard and locate the App Bazaar section under the Manage menu. The App Bazaar is where you’ll create and configure custom applets for your telephony workflows.

Step 2: Create a New Applet for Bolna Integration

Click the Create button to start building your new applet. Give it a descriptive name such as “Bolna Outbound” (you can customize this name based on your preference for easy reference in your dashboard).

Step 3: Configure the Voicebot Component

Drag the Voicebot applet from the available components and drop it into the “Drop applet here” box. This is the primary component that will handle the AI voice interaction. Once dropped, a configuration popup will appear for the Voicebot settings:
  • In the URL field, copy and paste the following Bolna API endpoint:
https://api.bolna.ai/exotel_callback
  • Enable the “Record this” checkbox to record your outbound calls for quality assurance and compliance purposes

Step 4: Add the Connect Voice Applet

Within the Voicebot popup, you’ll notice another “Drop applet here” section at the bottom. This is where you’ll configure the call connection logic. Drag and drop the Connect voice applet into this designated area. This component manages the actual phone call connection and routing.

Step 5: Configure Dynamic Connection Parameters

When the Connect applet popup opens, you’ll need to specify how connection parameters are controlled:
  1. Look for the section titled “How do you want to control your Connect params?”
  2. Select the option: “Configure parameters dynamically by providing a URL”
  3. In the Primary URL field, copy and paste the following Bolna API endpoint:
https://api.bolna.ai/exotel_connect_transfer
This configuration allows Bolna to dynamically control call parameters such as destination numbers, caller IDs, and other telephony settings through API calls.

Step 6: Save Your Exotel Applet Configuration

Click the Save button to finalize your applet configuration. Your Exotel outbound applet is now ready to work with Bolna’s Voice AI platform.

Obtaining Your Exotel Applet ID

After saving your applet, Exotel will generate a unique Applet ID for your configuration. This ID is what you’ll use when configuring outbound calling campaigns in Bolna. You can find this ID in your Exotel App Bazaar dashboard next to your newly created applet.

Next Steps: Using Your Exotel Applet with Bolna

With your Exotel applet configured and your Applet ID obtained, you can now:
  • Configure outbound calling campaigns in Bolna using your Exotel Applet ID
  • Launch AI-powered outbound voice campaigns through your Exotel infrastructure
  • Monitor call performance and analytics through both Bolna and Exotel dashboards
Important: Make sure to test your applet configuration with a test call before launching production campaigns to ensure all components are working correctly together.